- ekkeuustalu
- 0 Comments
- 494 Views
Introduction
In the digital realm, the way you manage your domains can significantly affect your online presence. One of the critical aspects of domain management is the effective use of domain redirects. If you’re utilizing domain.com for your hosting needs, you have access to a user-friendly platform for setting up these redirects. In this tutorial, we will explore what domain redirects are, their benefits, how to configure them via the domain.com dashboard, and discuss certain limitations, including the lack of HTTPS support.
What are Domain Redirects?
Domain redirects, also known as URL forwarding, are techniques used to make a web page available under more than one URL address. When a web browser attempts to open a URL that has been redirected, a page with a different URL is opened. Essentially, it’s like instructing the browser, “Don’t go here; go there instead.”
Examples and Benefits of Using Domain Redirects
- Consolidating Domain Variants: If you own multiple variants of your domain (e.g., .net, .org, .com), you can redirect all of them to a single primary site. This practice ensures brand consistency and prevents competitors from using similar domain names.
- Rebranding or Changing Domain Names: If your business undergoes rebranding and changes its name, you don’t want to lose your existing SEO juice. A redirect will bring visitors to your new domain without affecting your search engine ranking.
- Tracking Marketing Efforts: Redirects can be used for marketing campaigns, allowing you to track how traffic reaches your site by using different URLs for the same page.
- Improving User Experience: Redirects eliminate the confusion caused by broken or outdated links, leading users to updated pages or an alternative resource, thereby enhancing the user experience.
Configuring Domain Redirects using the domain.com Dashboard and Domain-Forward.com
We understand your frustration about being unable to forward your domain with domain.com; that’s why we have built a powerful solution called Domain-Forward.com.
Using our all-in-one solution, anyone can forward a domain over HTTPS without any hassle. And guess what? It only takes a couple of clicks to set everything up.
What makes Domain-Forward.com absolutely special is that it grants users access to built-in HTTPS support and analytics, making it insanely easy for anyone to forward their domain without stress.
Forwarding your domain using Domain-Forward.com is easy. All you need to do is create an account, set up your sources and the destination address, and configure some things at your DNS provider.
In our example, we will be forwarding the domain “my-old-domain.xyz” to “mysite.com”.
Step 1: Register an account
The first thing you want to do is sign up for an account, which only takes a few minutes to complete.
Step 2: Add your domain to Domain-Forward.com
Once you have registered an account, it’s time to add the domain you’d like to redirect. All you need to do is click on the option for “Add Redirect.”

Since we already have a domain with domain.com called ‘my-old-domain.xyz’, we need to integrate it into the Source URL field. To make things hassle-free for your website visitors, we recommend adding both ‘www’ and the non-www version.
And that’s not all. We must also set the Destination URL, where all the magic happens – your forward-to spot.
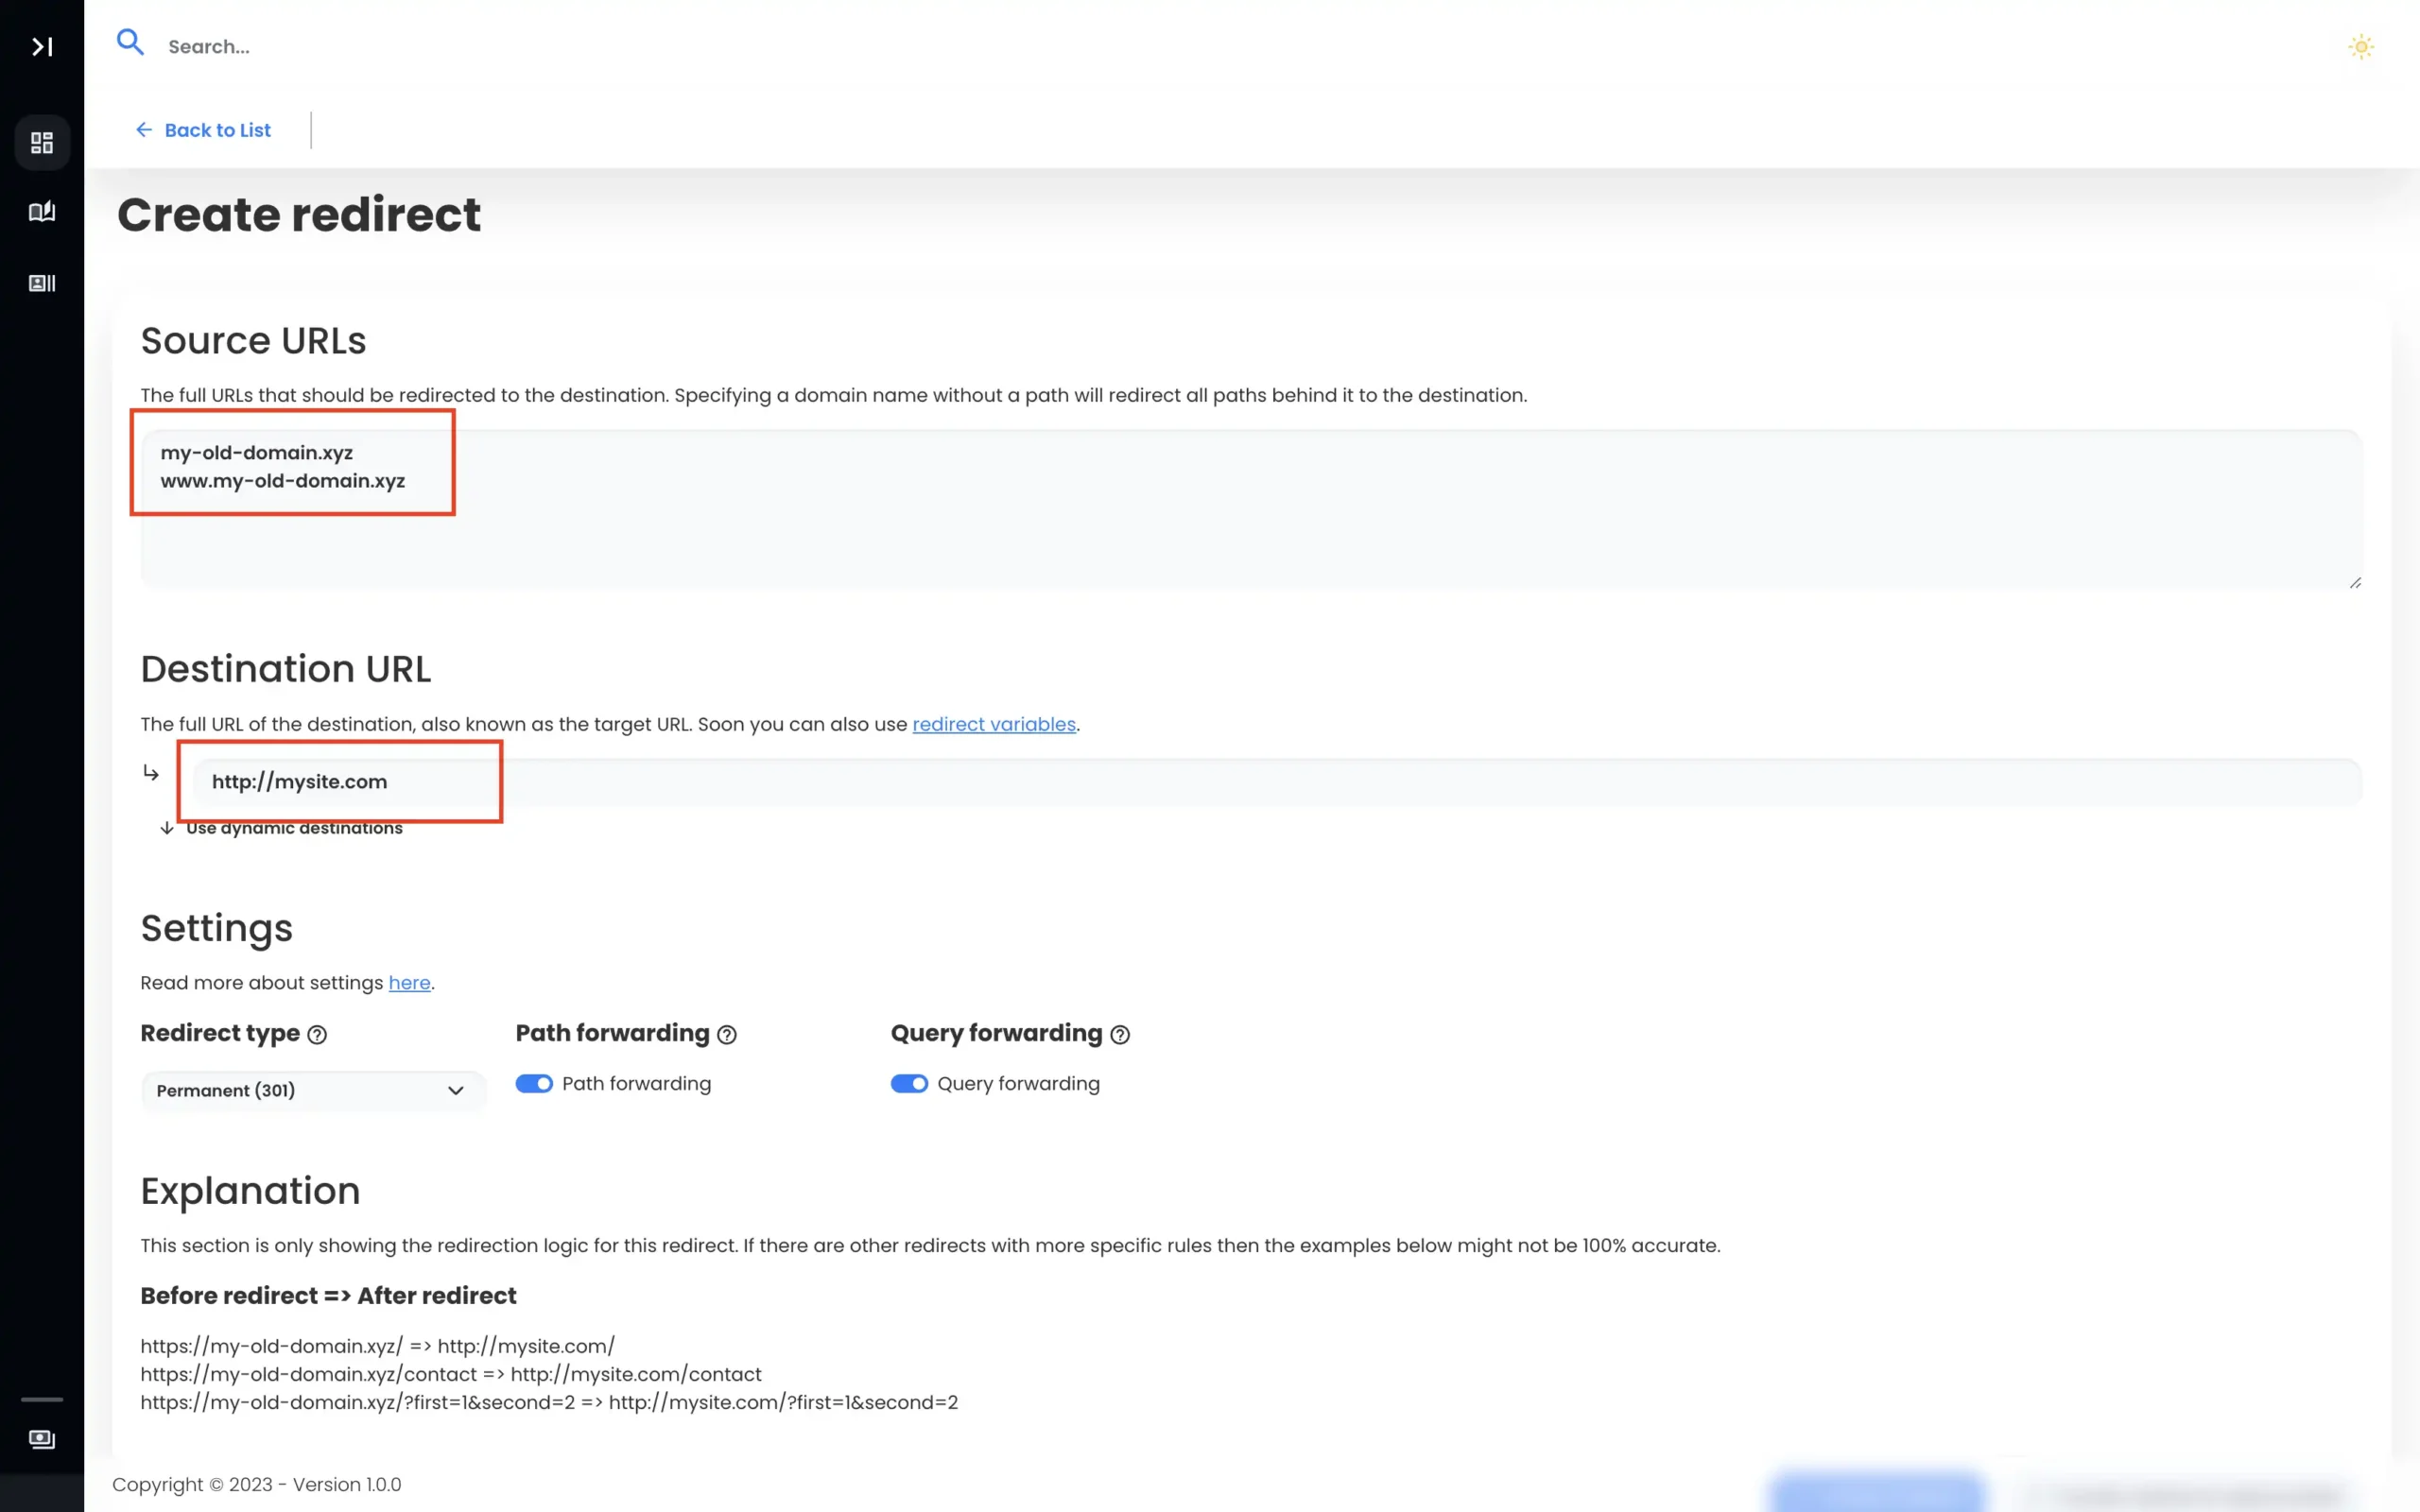
With our Source URLs and Destination URL now set, all we need to do is create our redirect. We recommend you leave the redirect type as 301, but if you are unsure exactly what redirect type you need then here’s our basic guide about URL forwarding.
Note: After completing the domain redirect, you’ll notice the DNS status as checking. We need to fix that.
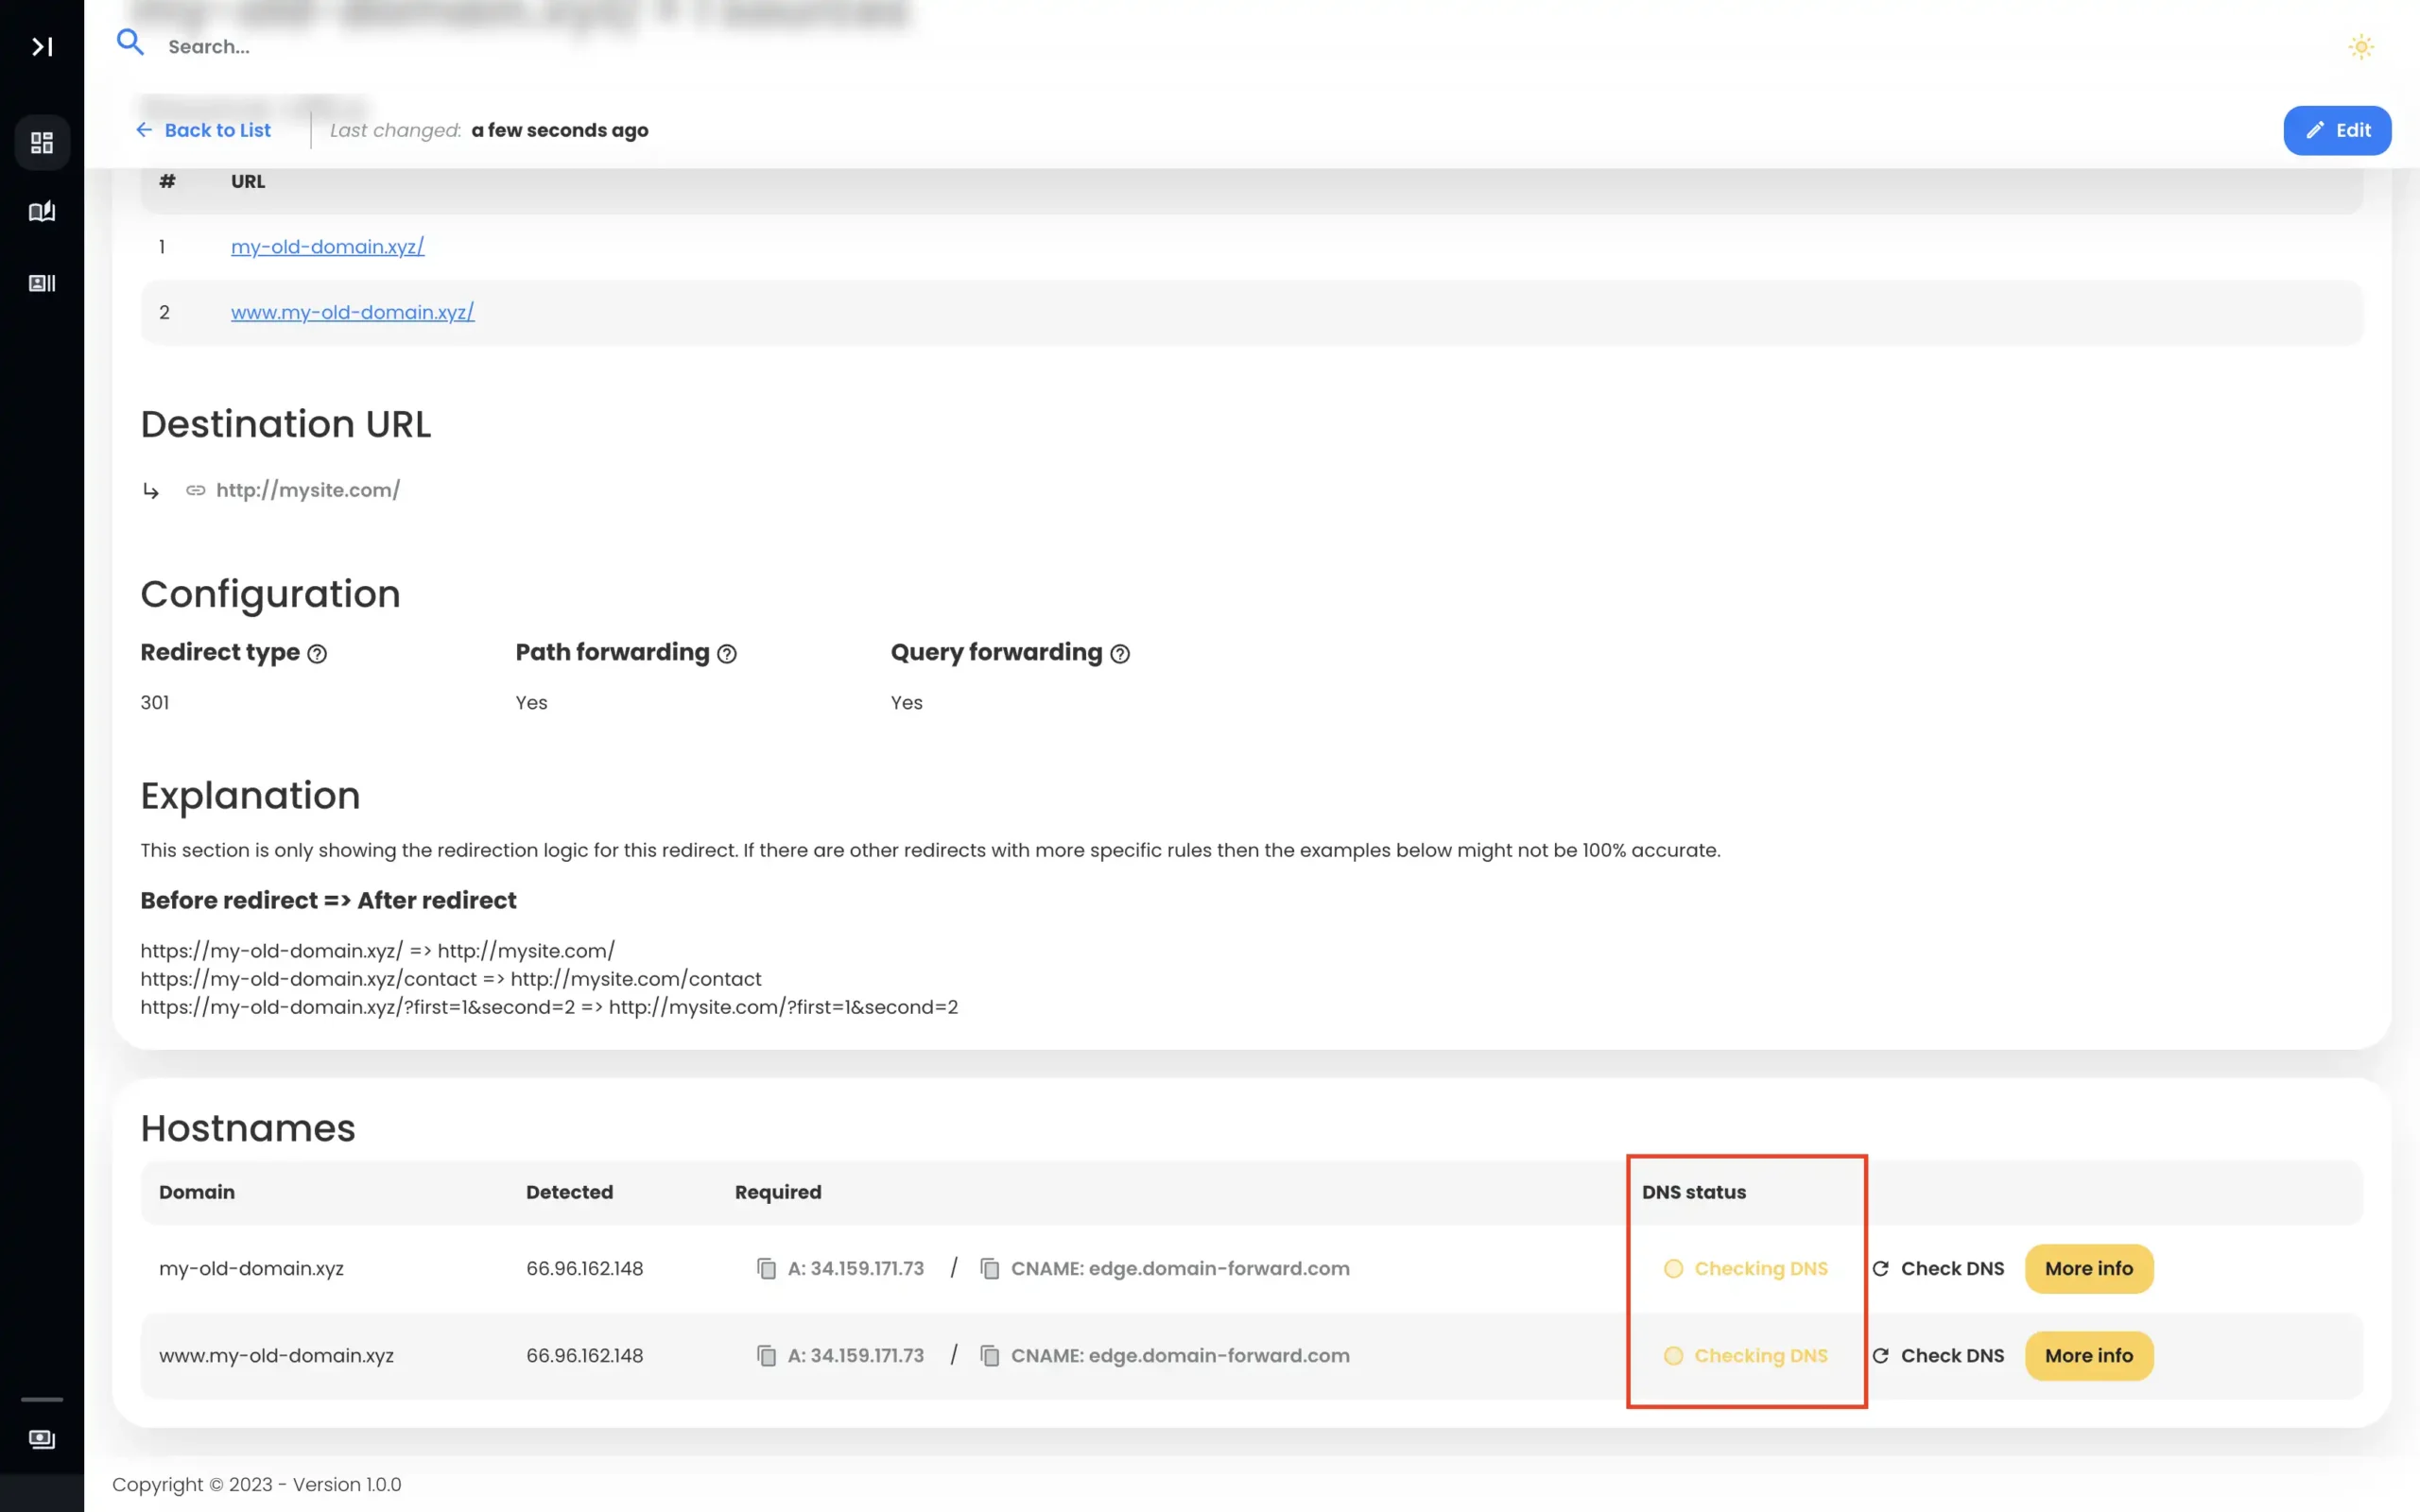
Step 3: Navigate to domain.com
To complete redirecting using Domain-Forward.com, we need to head over to domain.com to tweak DNS changes.
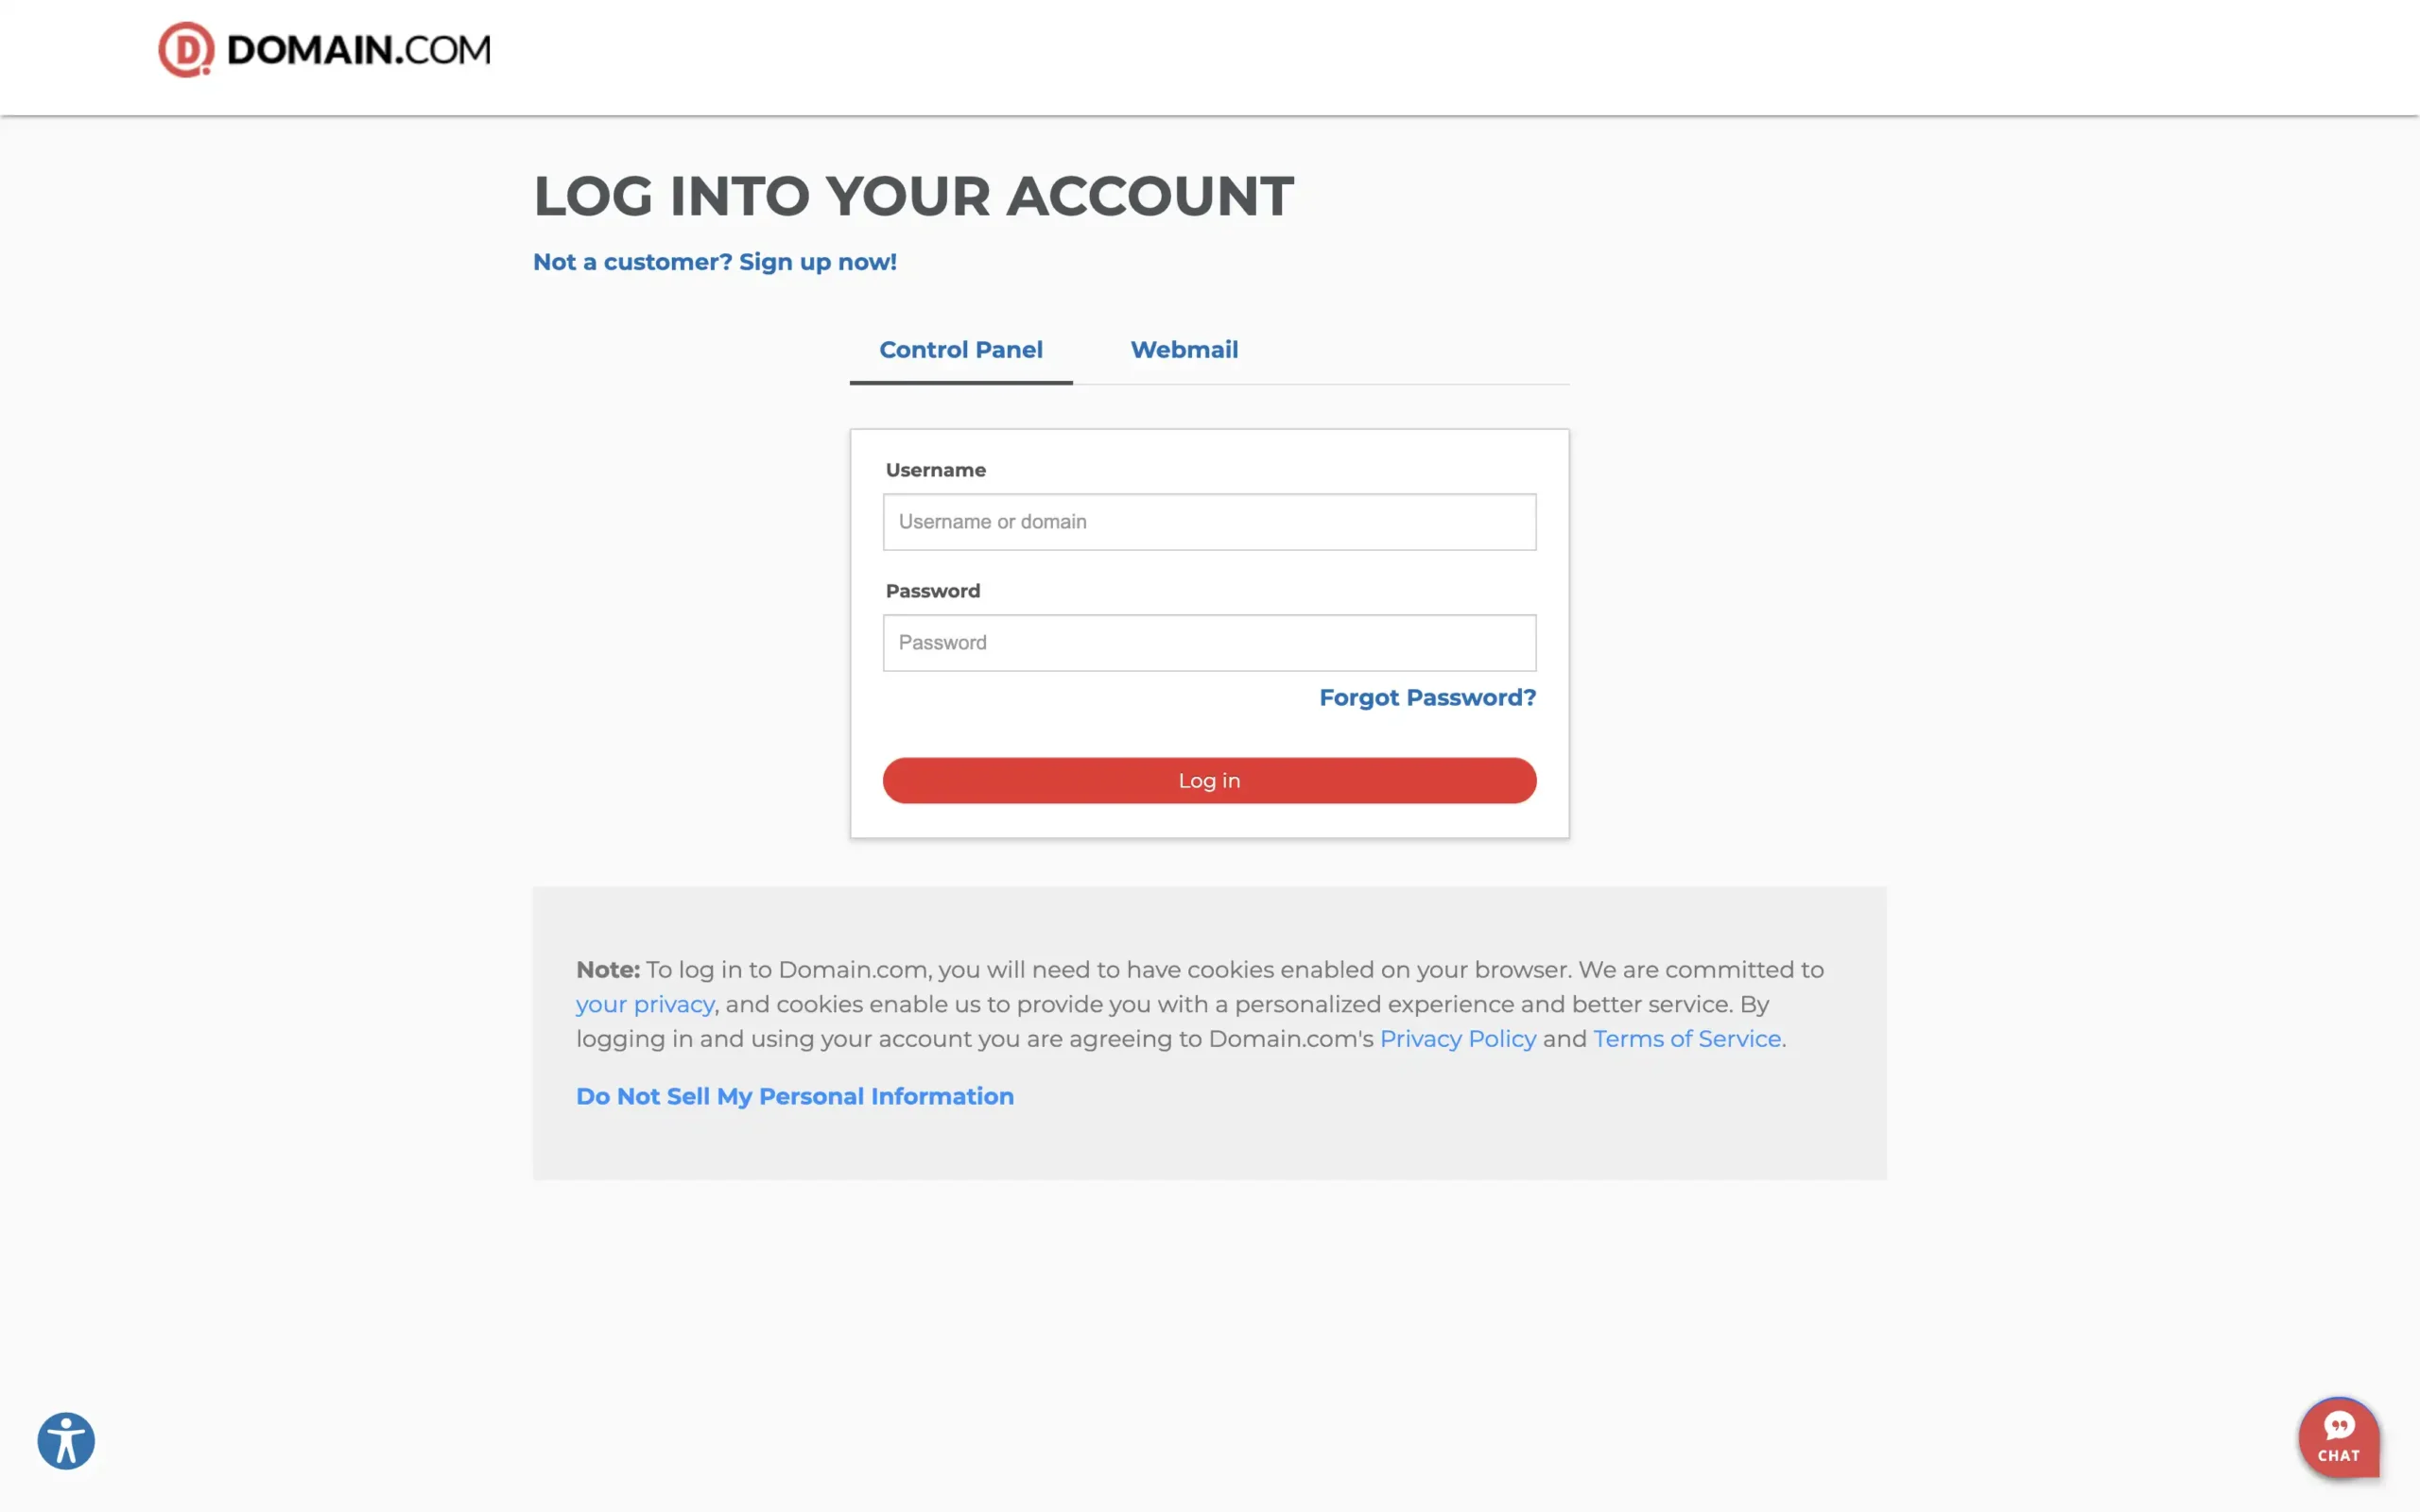
To do that, log into the domain.com platform.
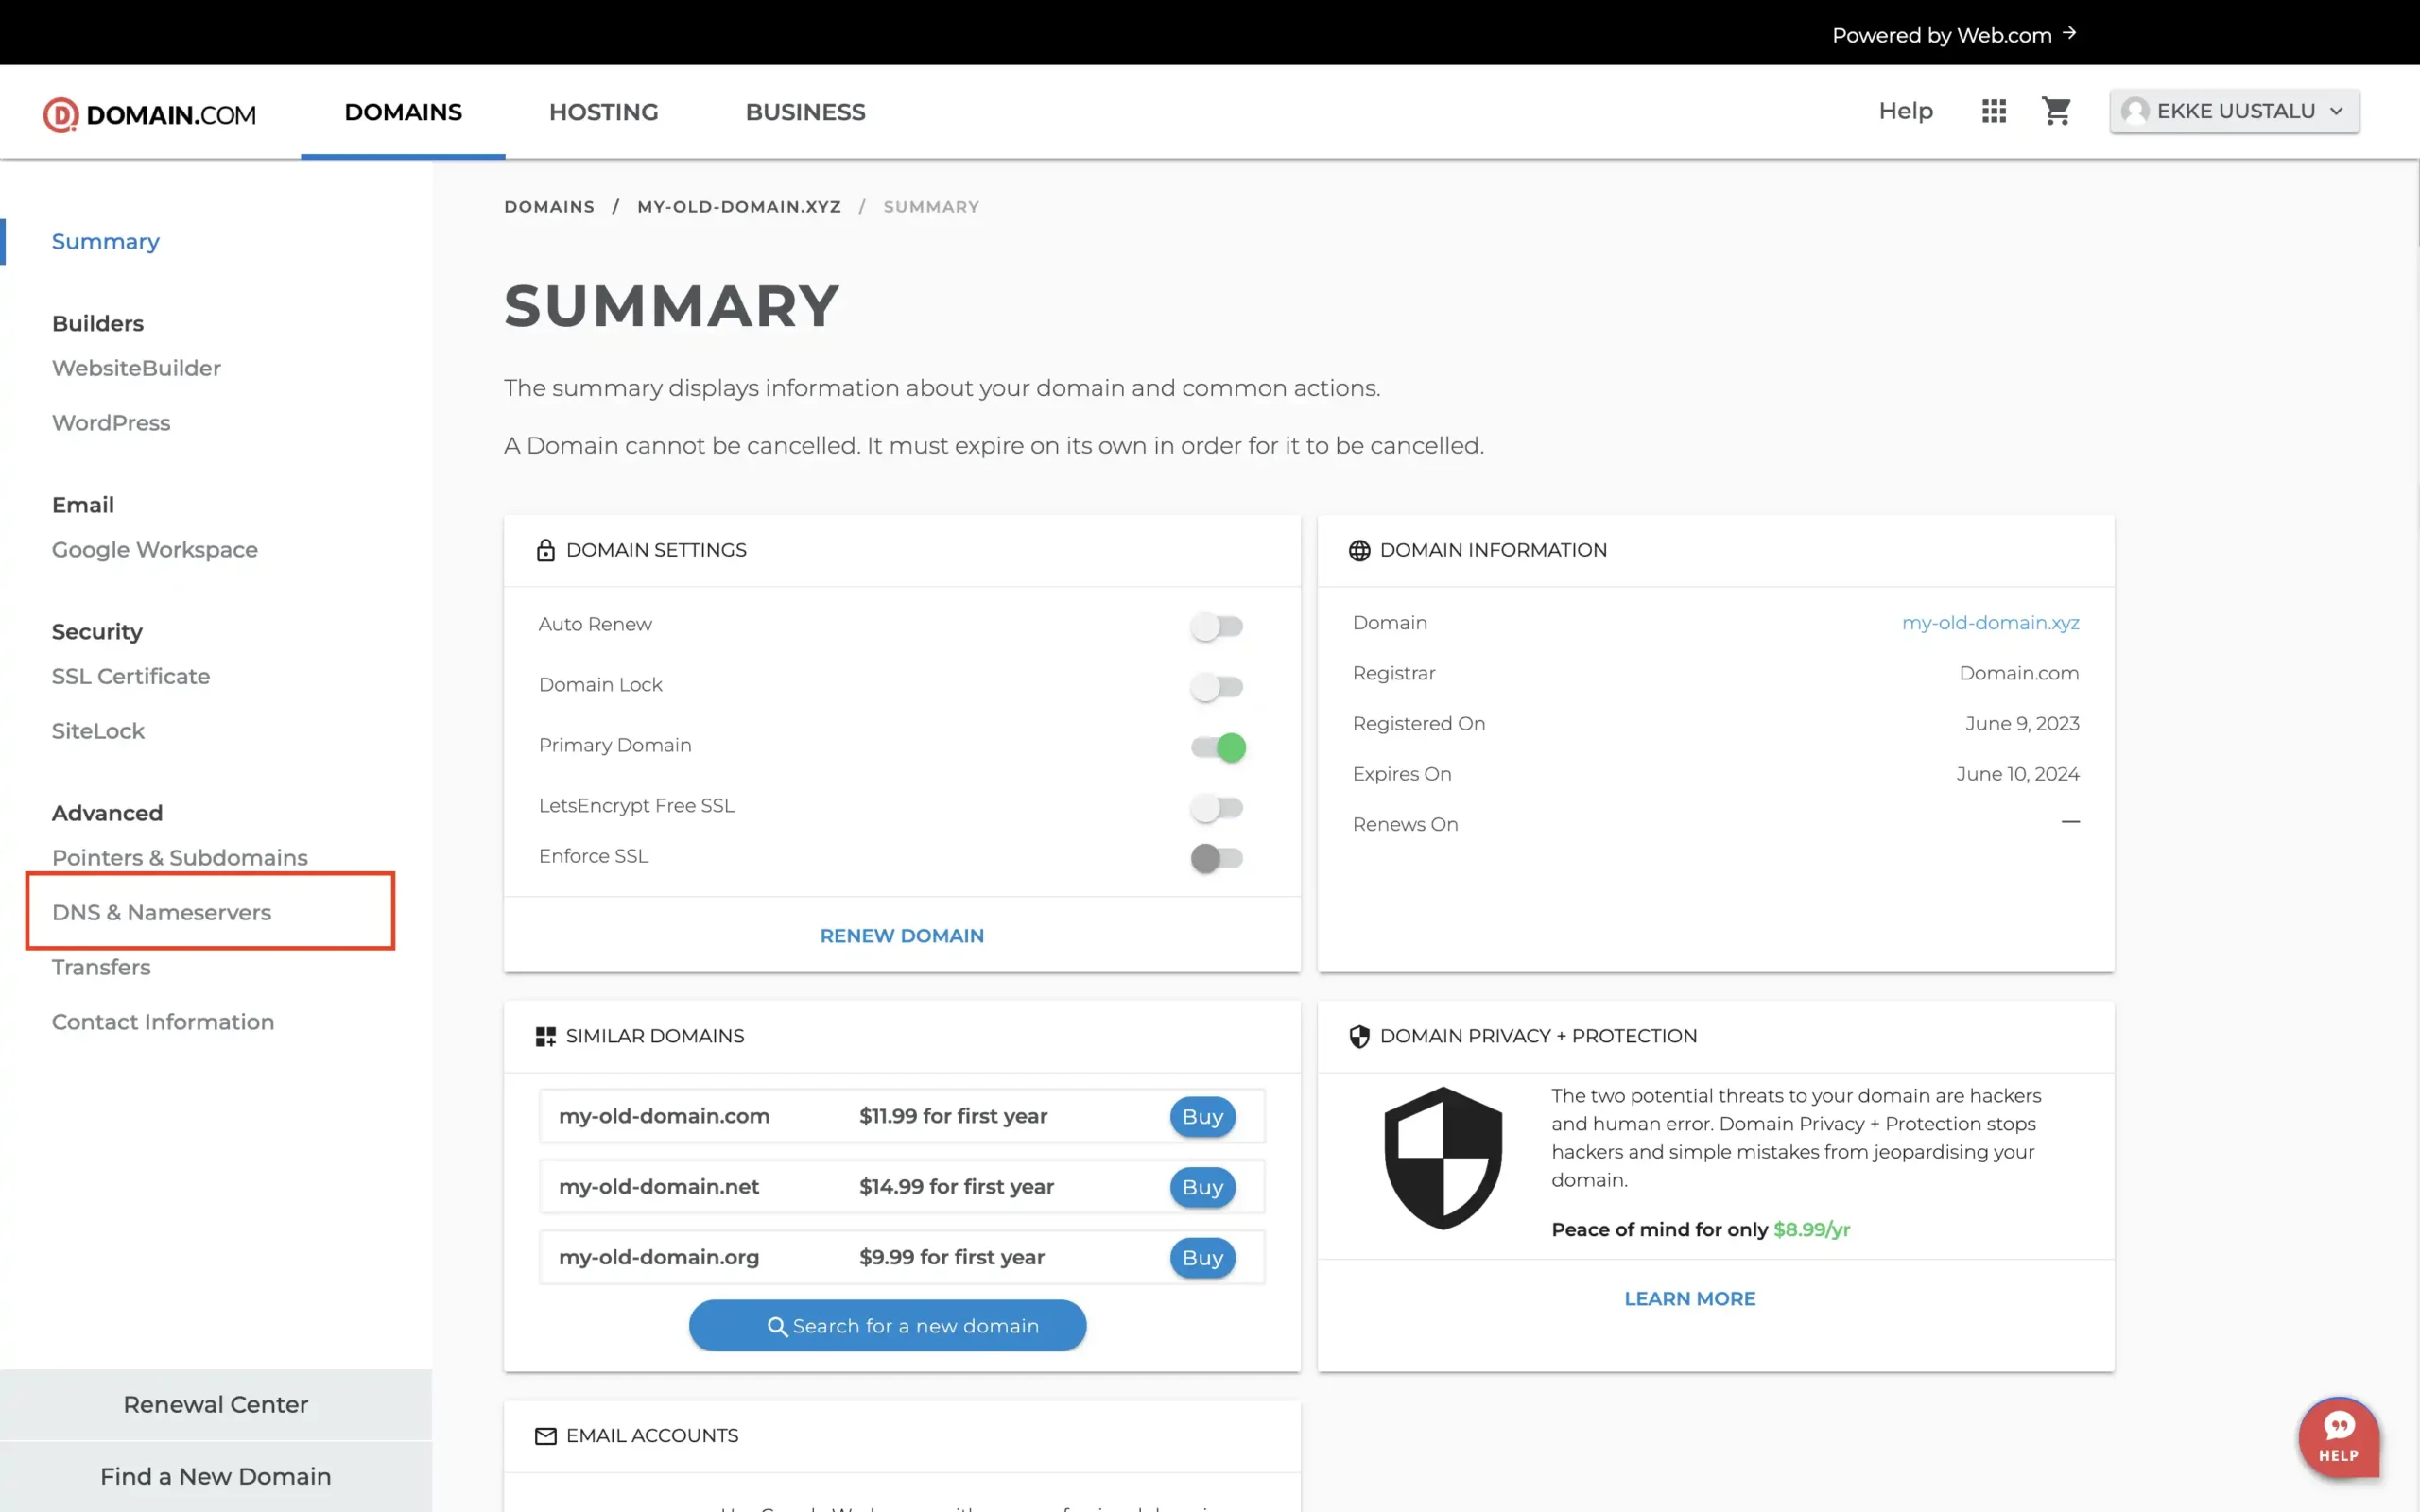
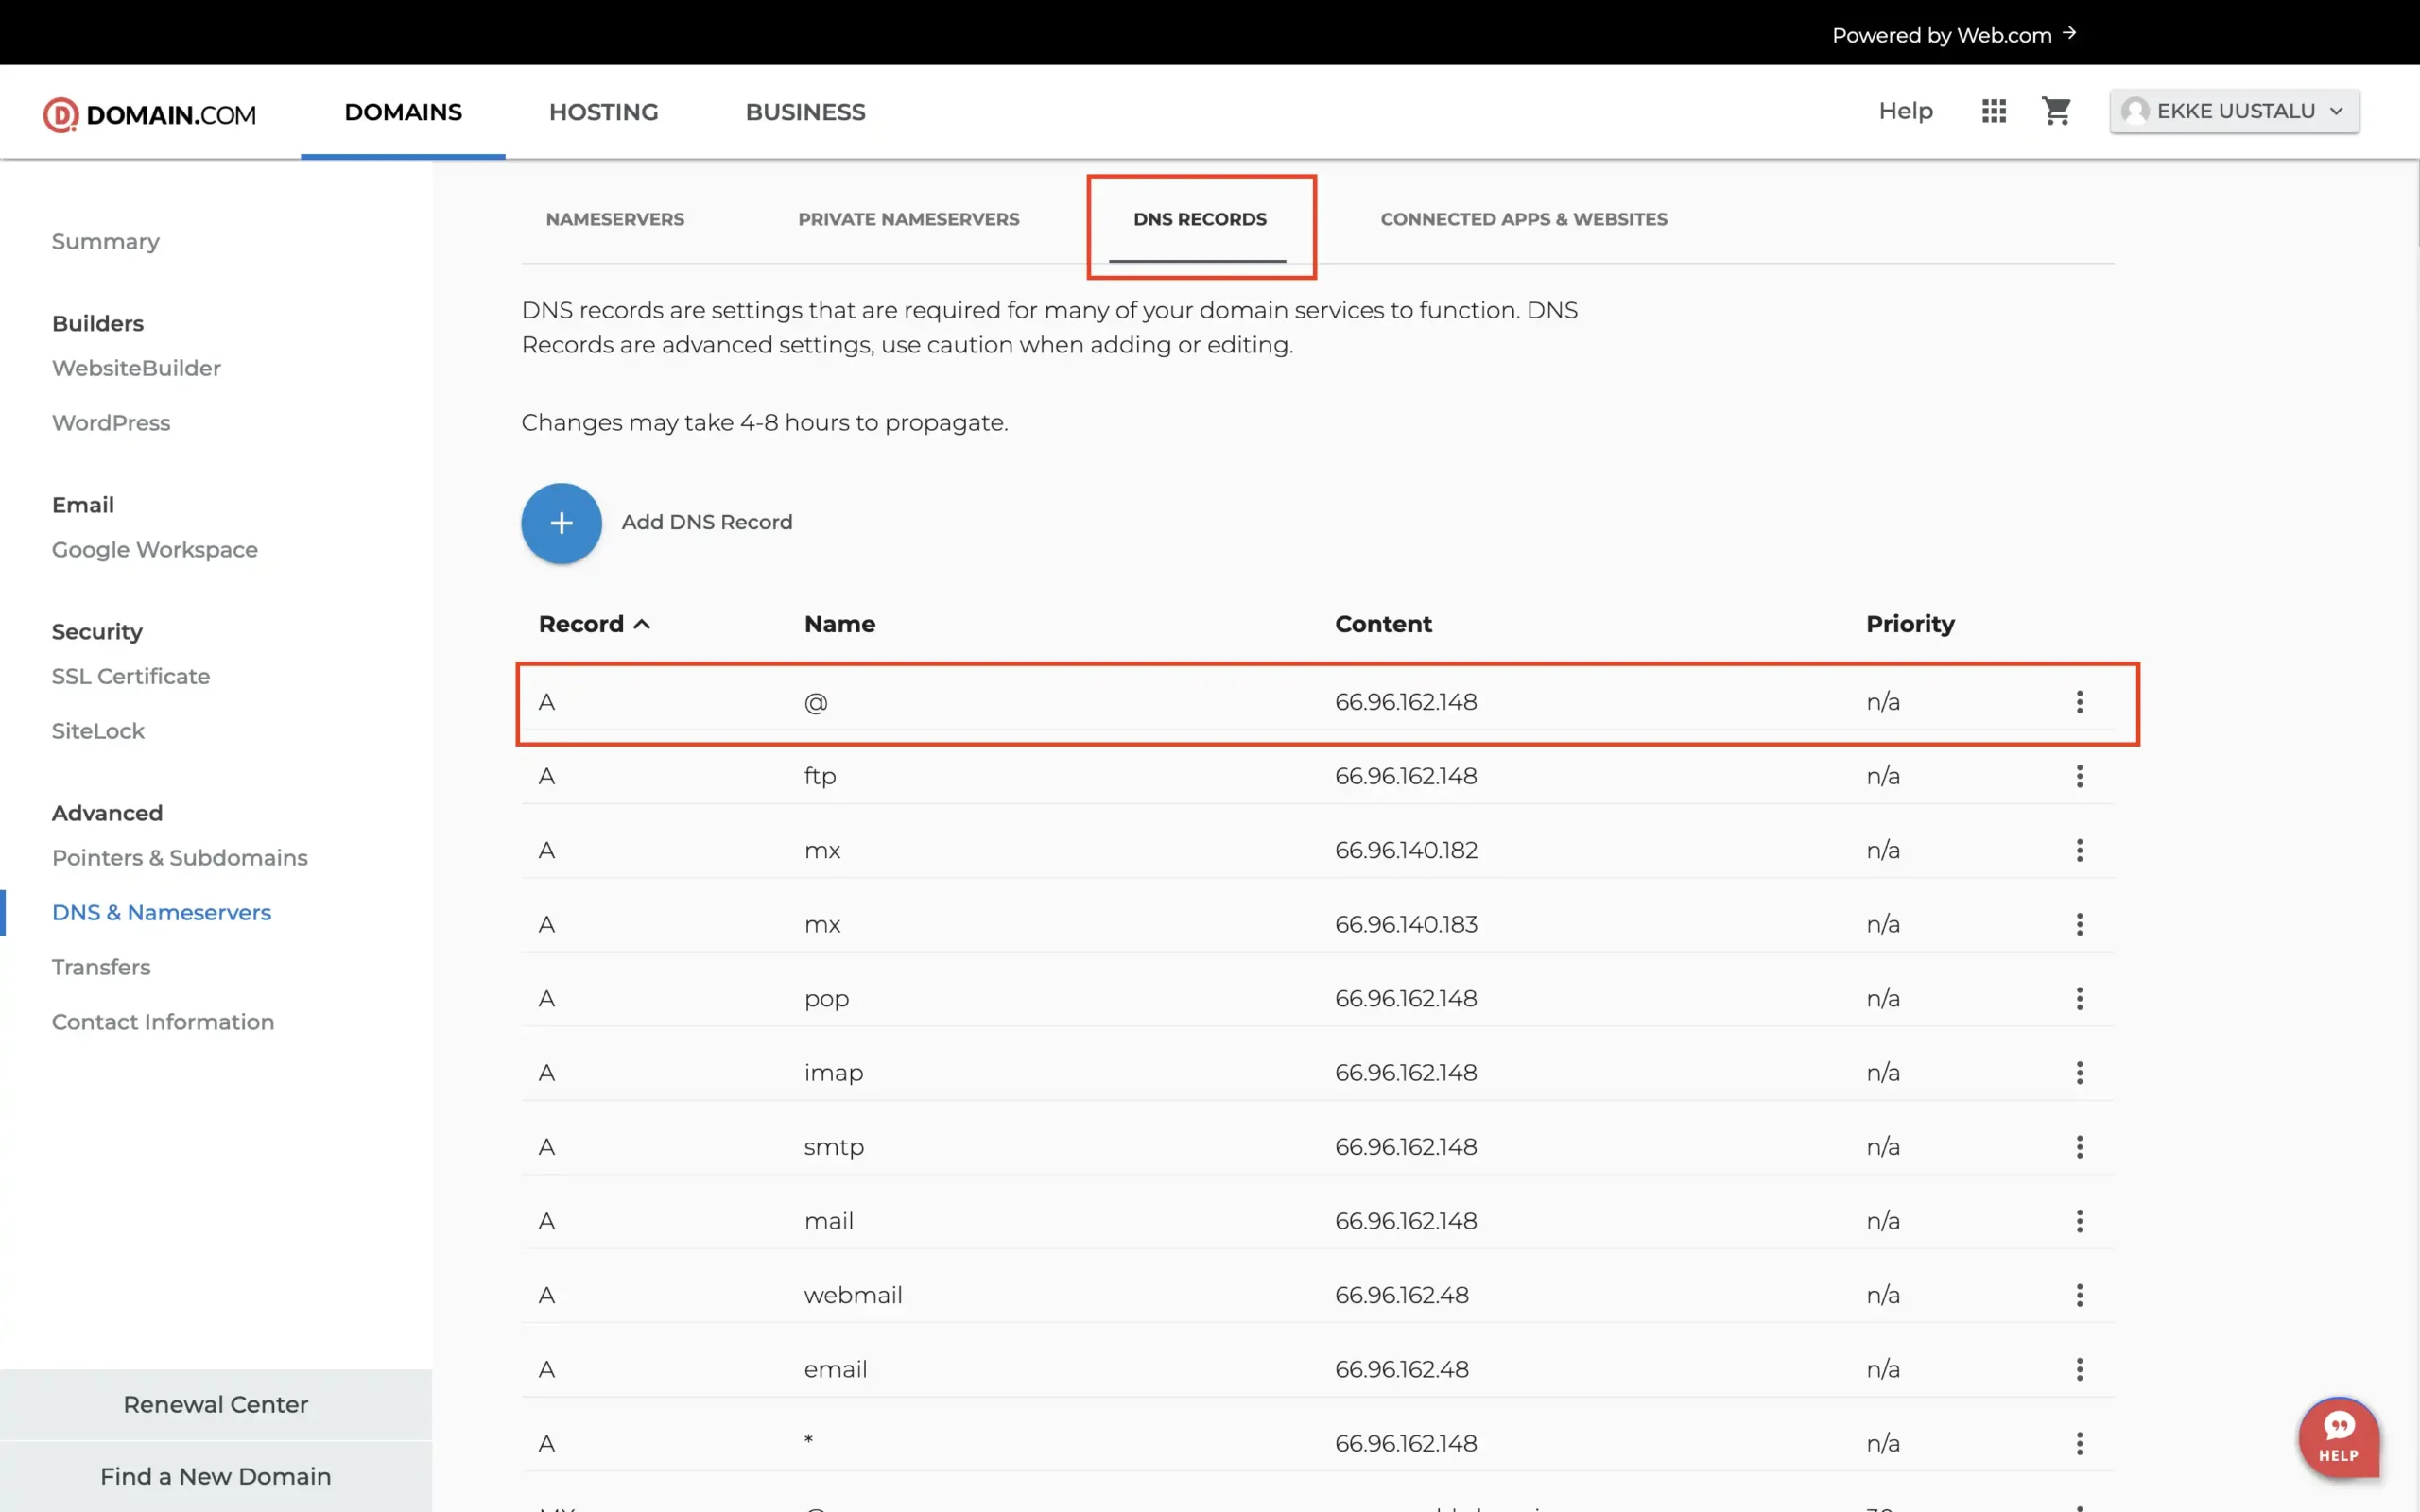
After logging in, we are shown the dashboard where we can adjust all of our settings regarding our domains on domain.com. Then choose the domain you would like to manage. If you only have one domain there, you’ll be redirected to the domain details right away. Next, click on “DNS & Nameservers” on the left sidebar.
If you followed the steps exactly as we showed you, you should have a page that looks something like this:
Step 4: Change the DNS
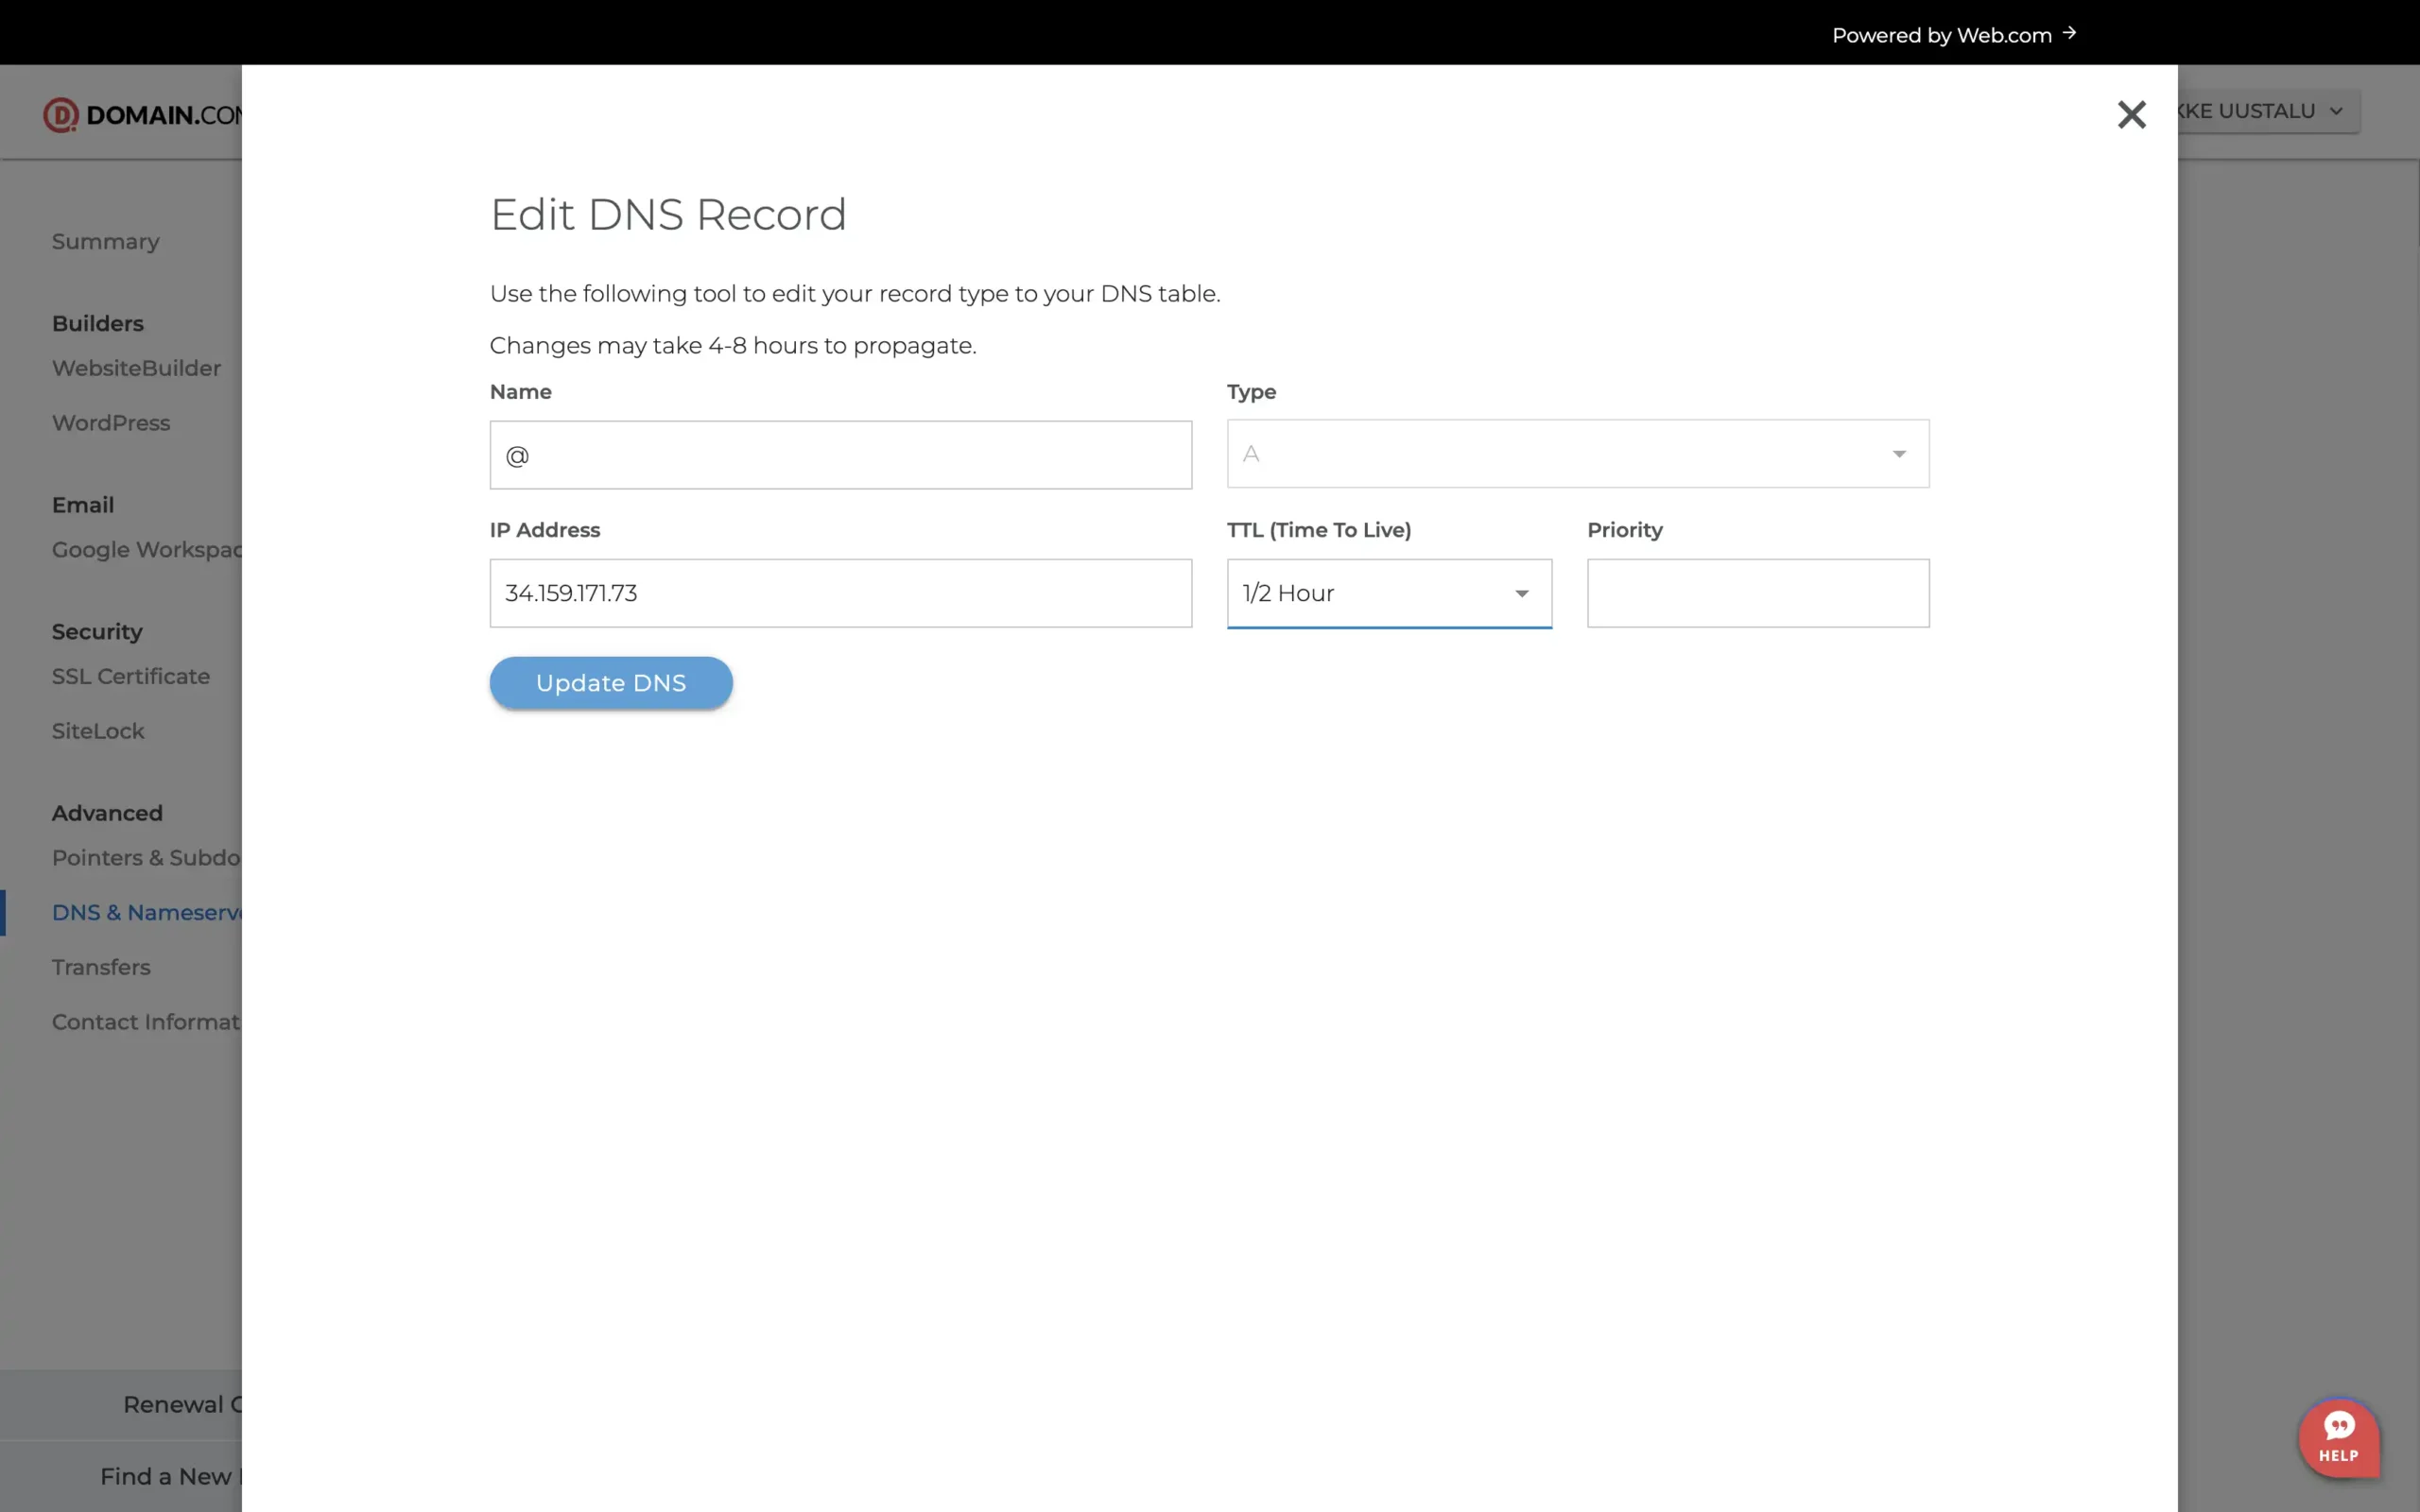
Now, let’s tweak our DNS settings. First, you want to click the three dots at the end of the @ domain A-type record. Here, you want to change the Value to 34.159.171.73. With that done, click Edit. You can change the TTL value to 1/2 Hour if you want the DNS changes to propagate slightly faster in the future.
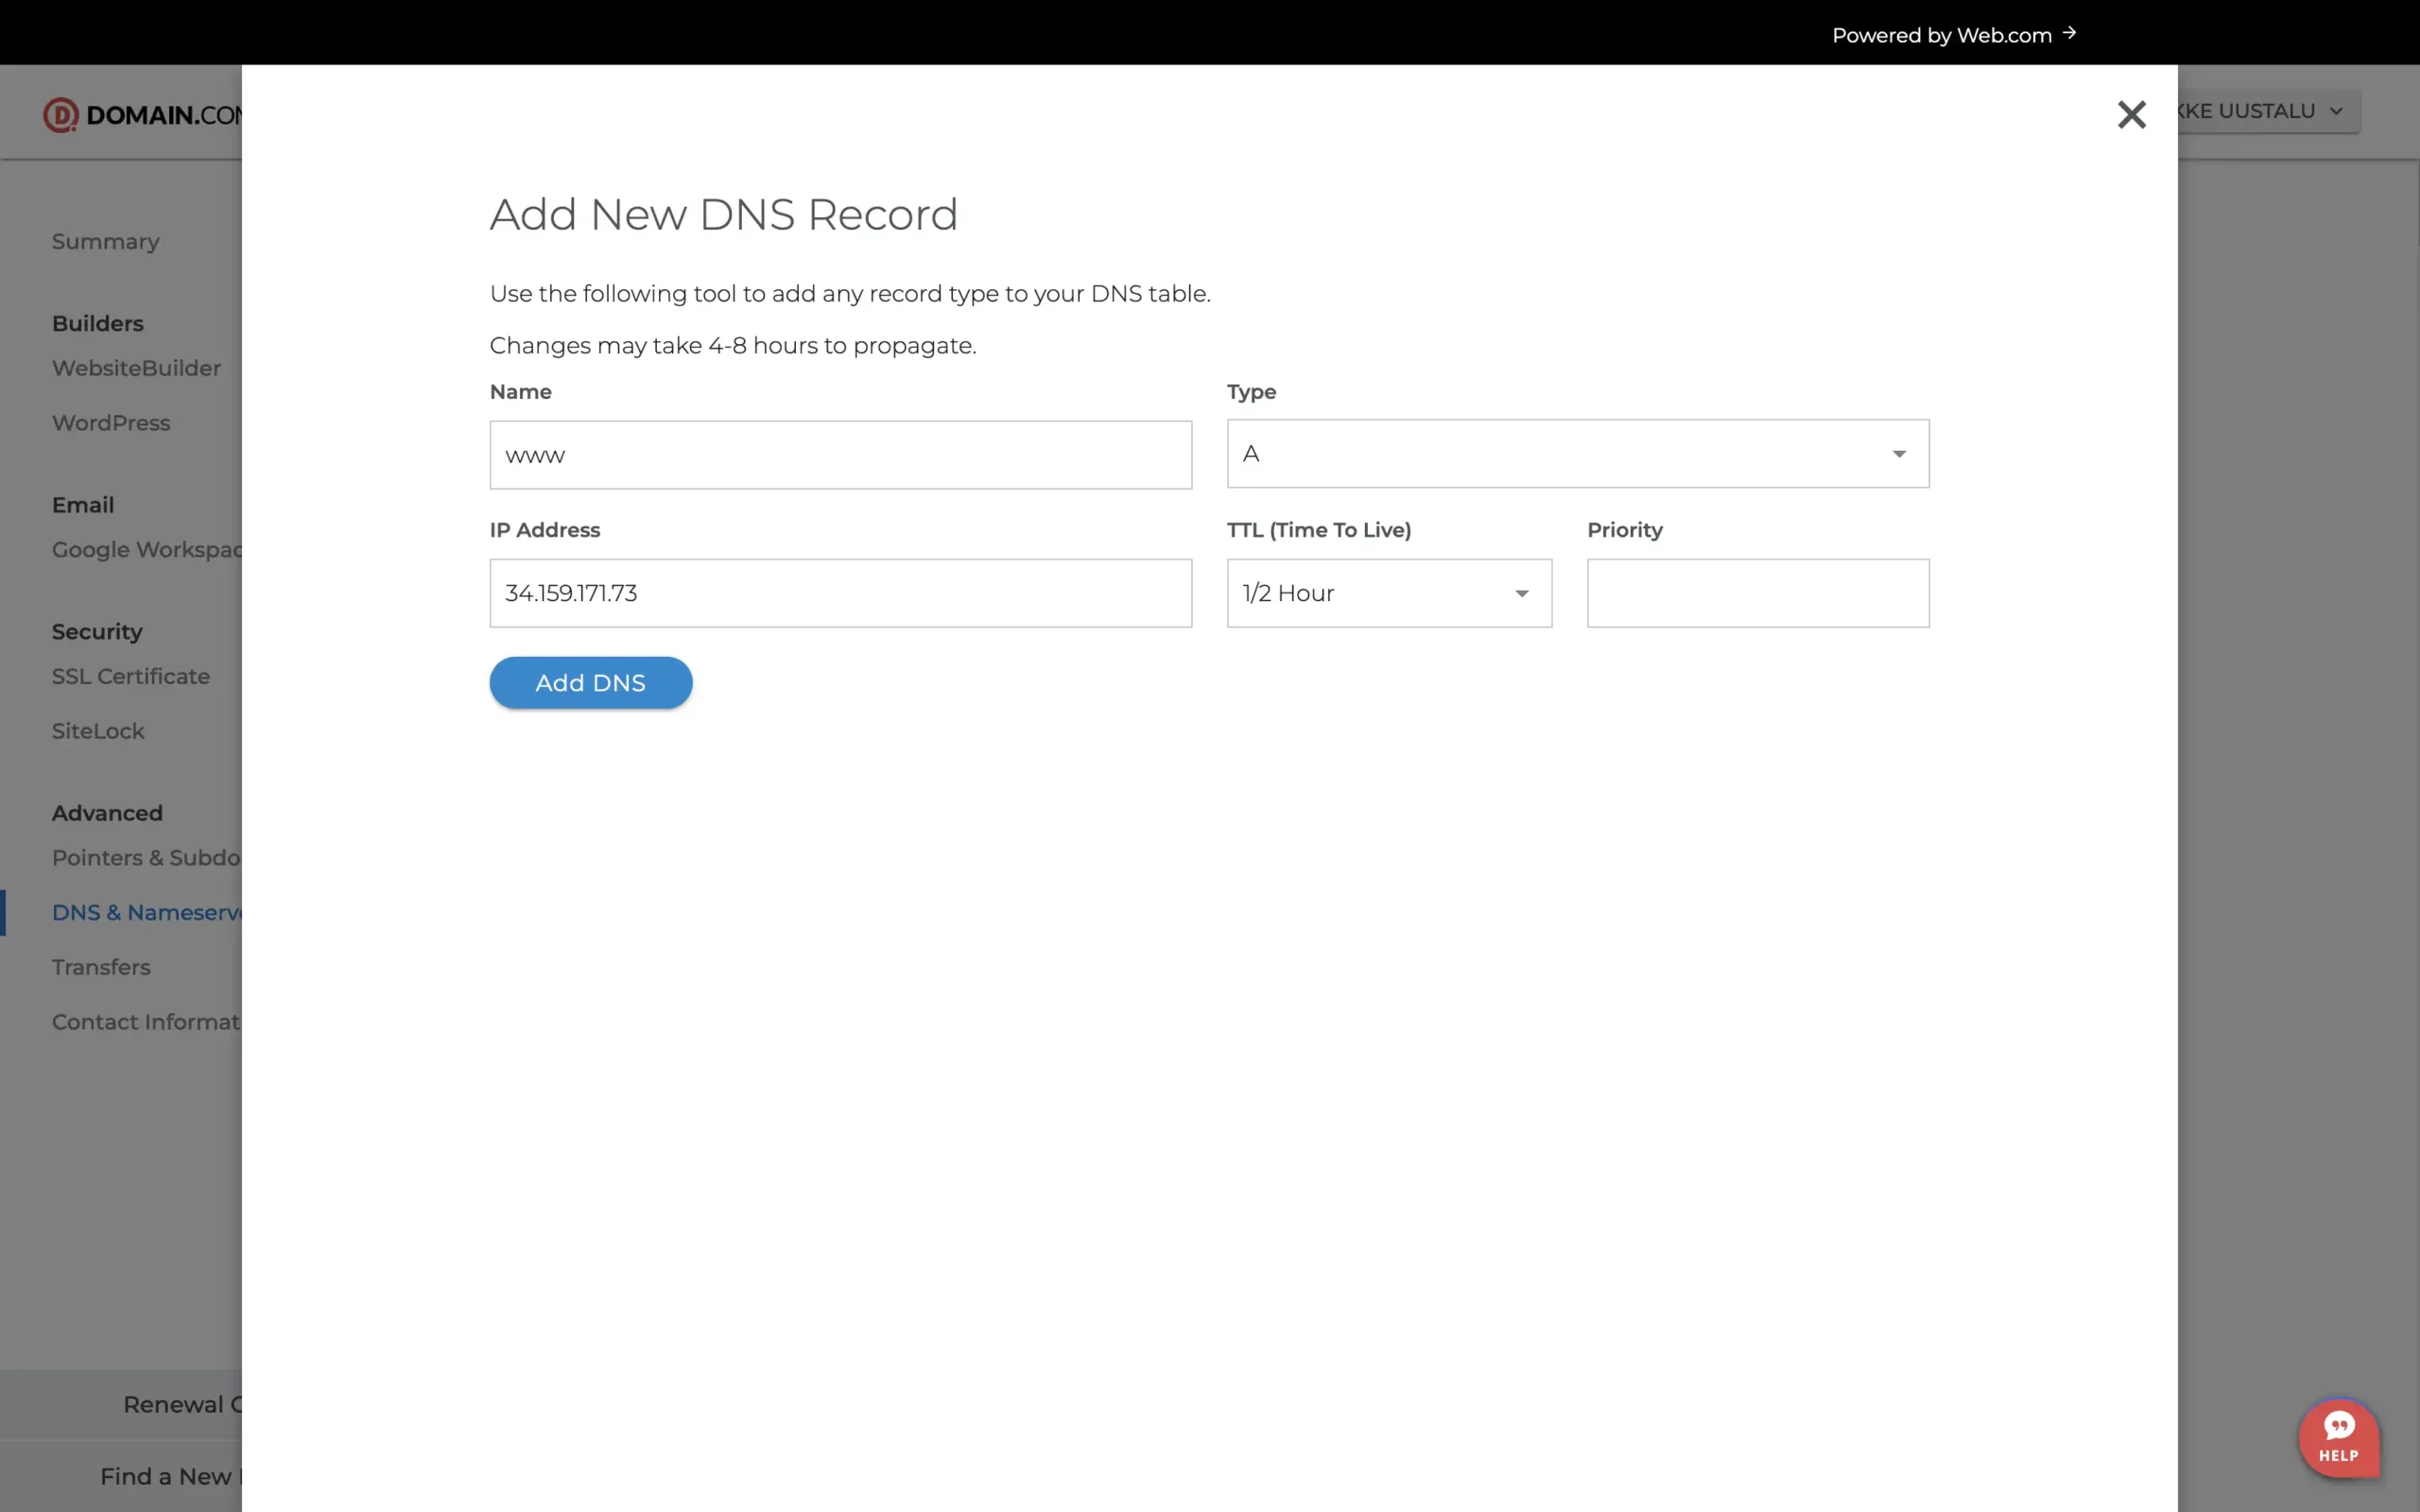
Next, we also want to add an entry for the www subdomain. Add the same IP as for the @ domain and optionally set the TTL to 1/2 Hour.
Now, that’s all we need to do here. Just so you know you did the right thing, it should look something like this:
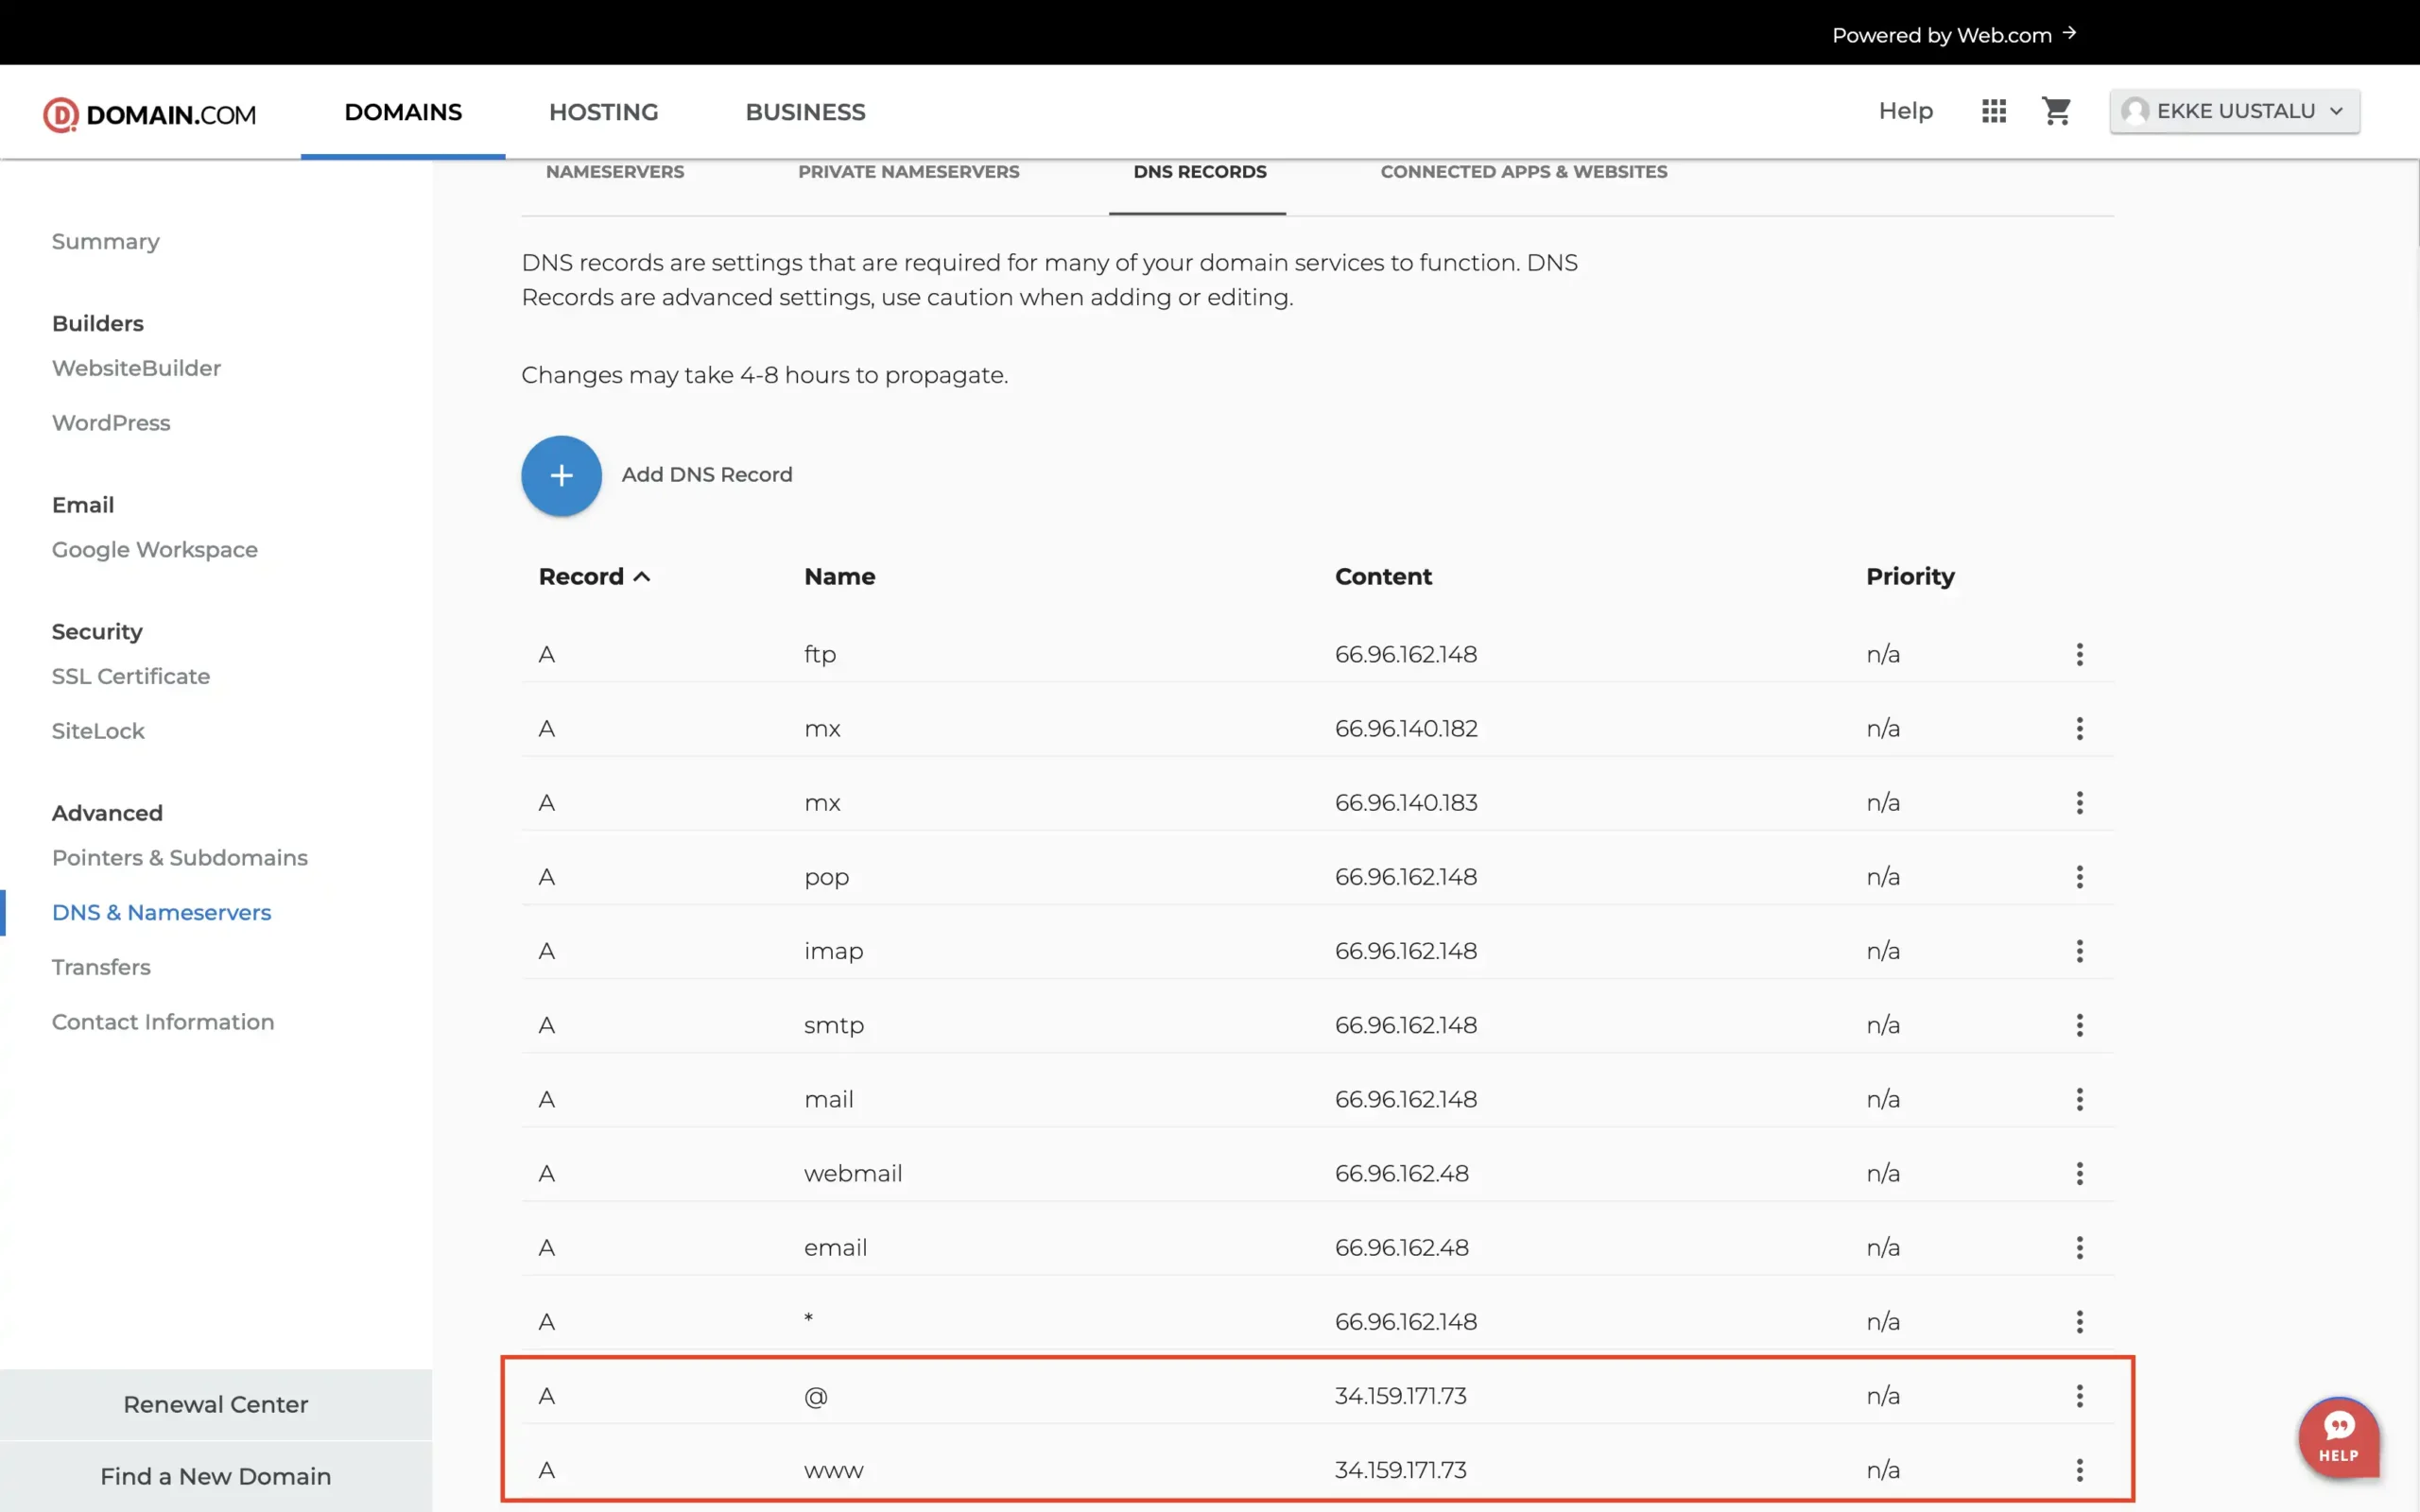
You might have some other records there as well, but you can leave them as is. Only if you run into some redirection issues should you consider debugging why it doesn’t work.
Step 5: Verify DNS changes at Domain-Forward.com
Once your changes have been effected on domain.com, head over to Domain-Forward.com to see if the DNS changes reflect there as well. In our testing, it took around 2 hours, but your mileage may vary.
Here is what ours looks like, showing that our DNS change at domain.com was successful.
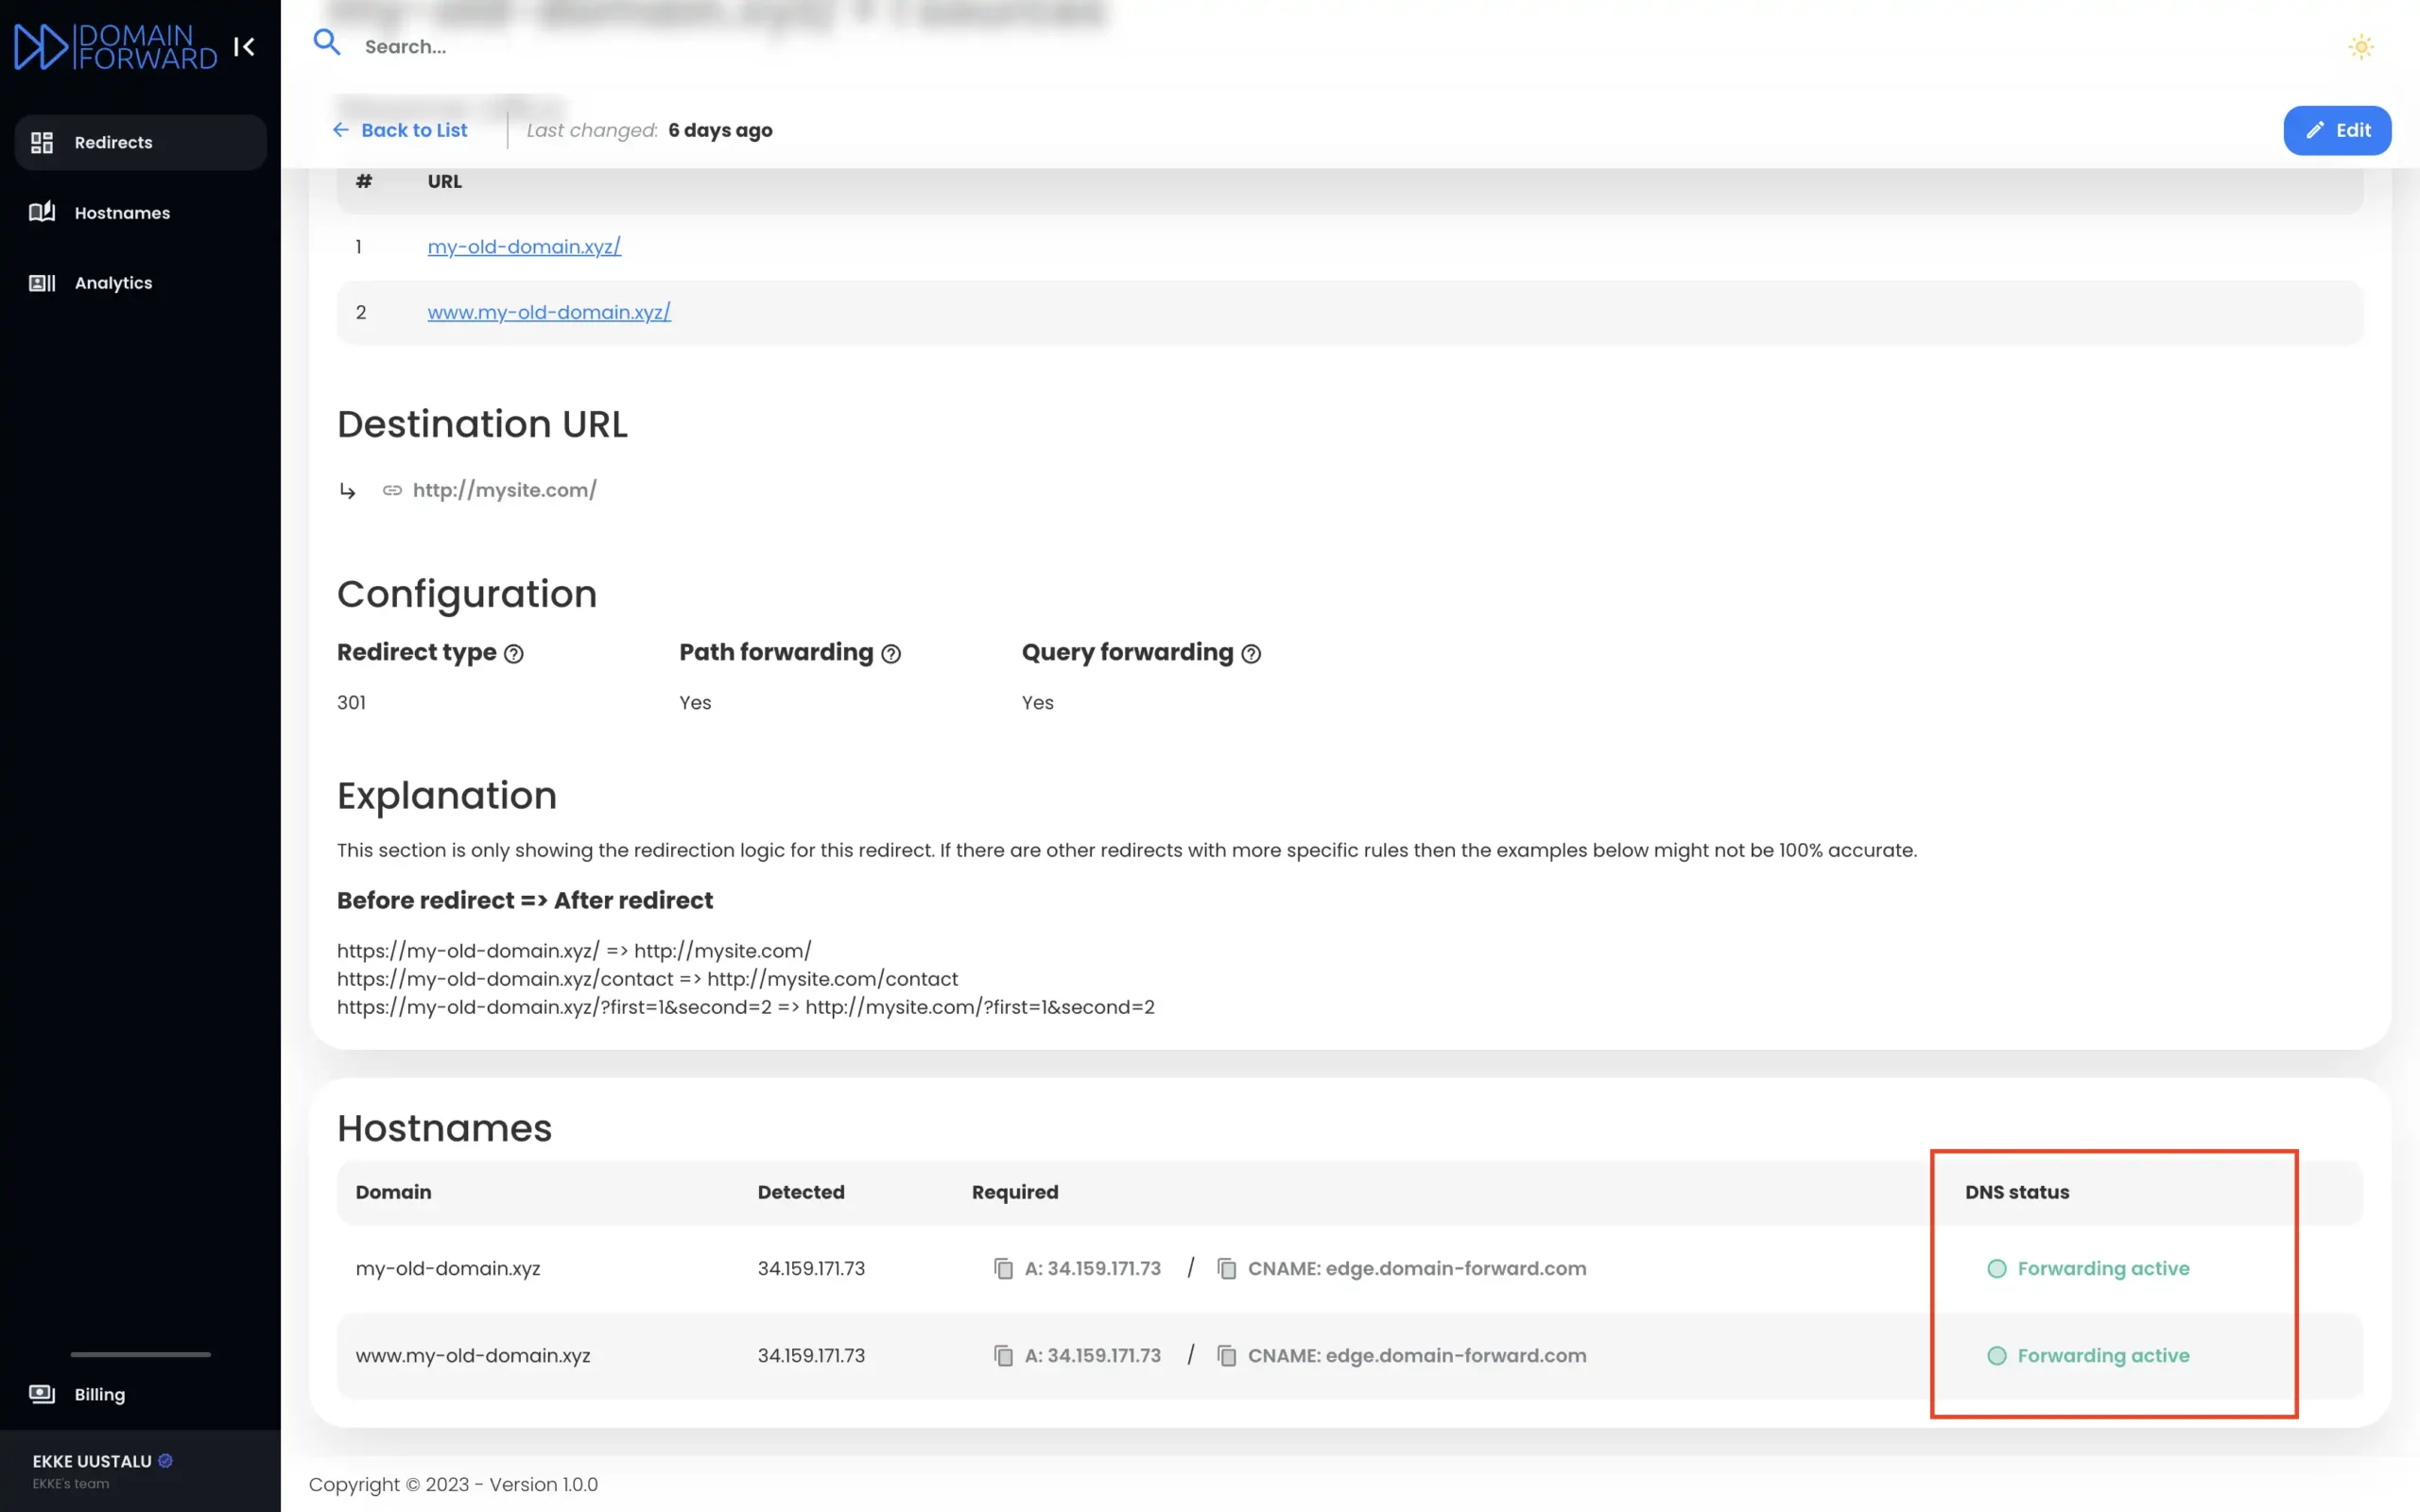
Note: The DNS change isn’t always instant. It can take an hour or even up to 48h for the changes to go live. So have some patience. 🙂
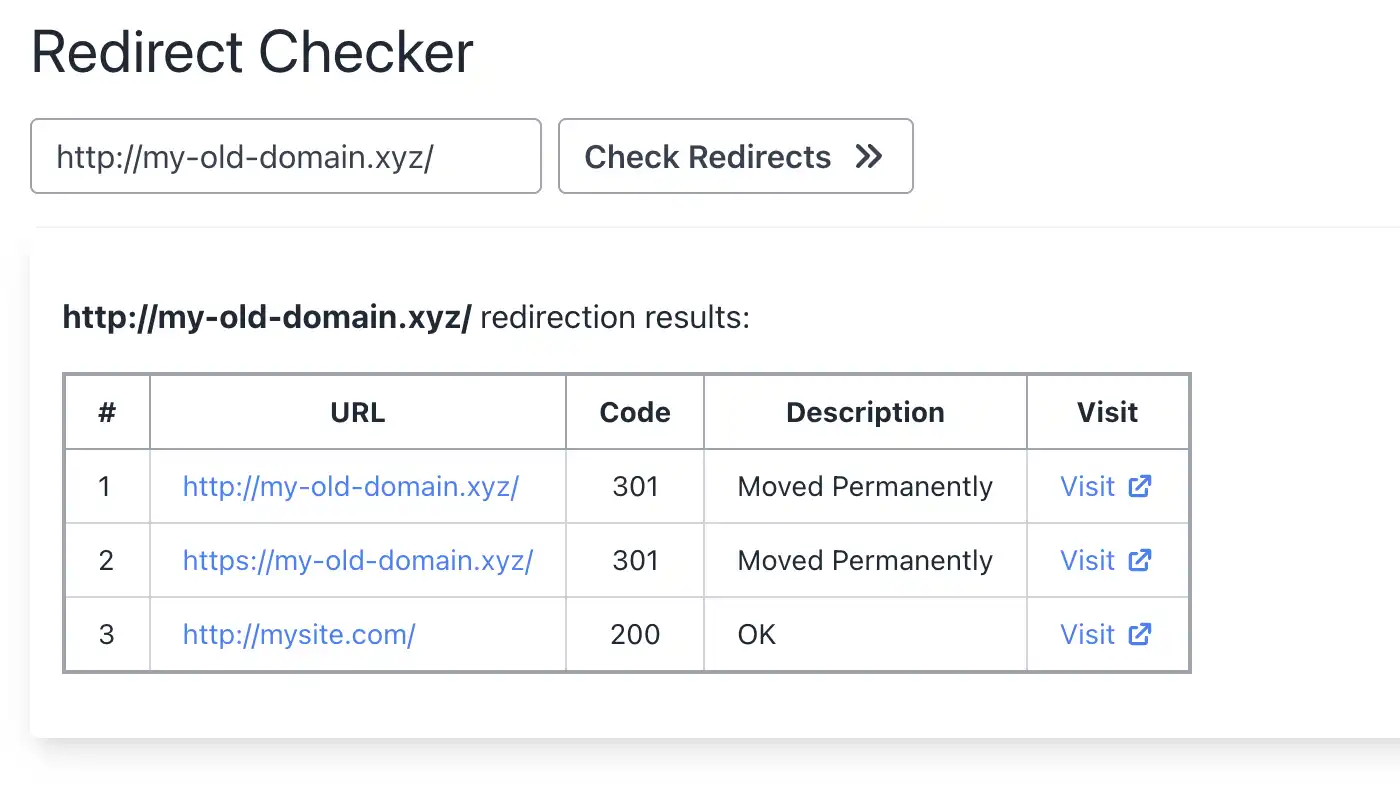
Step 6: Verify Redirect Using Online Tools
Now that we have set up the domain forwarding and the DNS entries, it’s time to check if the redirection is working correctly. Below is an image from an online “redirect testing tool,” confirming our redirection is functioning correctly.
Final thoughts
If you’ve made it this far, you can finally say goodbye to the headaches of redirecting with domain.com because Domain-Forward.com has got you covered.
Here is the exciting part – with Domain-Forward.com, you get free and automatic HTTPS support, giving your website that extra layer of security and trust, unlike domain.com, where you miss out on this fantastic feature.
If you found this post helpful (and we hope you did), show us some love and support by subscribing to our paid plans. By doing so, you’ll help us continue offering top-notch services and take our magic to new heights.

