
TL;DR: Bluehost doesn’t have domain forwarding. If you need to redirect a Bluehost domain (with or without HTTPS), use Domain-Forward.com — free plan, automatic SSL, proper 301 redirects. Update two DNS records and you’re done in 5 minutes.
You have a domain registered at Bluehost and you need it to redirect somewhere else. You log into the Bluehost dashboard, look for a forwarding option… and it doesn’t exist.
Bluehost doesn’t offer built-in domain forwarding. Unlike GoDaddy or Namecheap, there’s no “Forward Domain” button in the Bluehost control panel. If you want to redirect a domain, you need either a hosting plan with server-level redirects (Apache/Nginx) or a third-party forwarding service.
This guide shows you how to get your Bluehost domain redirecting with HTTPS in 5 minutes using a free tool.
Why You Need a Redirect for Your Bluehost Domain
Without a redirect, visitors to your old domain see an error page or a Bluehost parking page. Here’s what’s at stake:
- Lost SEO value: Every backlink pointing to your old domain is wasted if it leads to a dead page instead of redirecting to your new site
- Broken bookmarks: Visitors who bookmarked your old domain can’t find you anymore
- Brand confusion: A parked or error page makes your business look unprofessional
- Domain variant leakage: If you own .net, .org, or other variants, traffic to those domains is completely lost without redirects
How to Redirect Your Bluehost Domain Using Domain-Forward.com
Since Bluehost doesn’t offer forwarding, Domain-Forward.com is the simplest solution:
- Free plan for up to 5 domains
- Automatic HTTPS with SSL certificates
- 301 permanent redirects for proper SEO transfer
- Analytics to see redirect traffic
- No hosting plan required — just DNS changes
Step 1: Register an account
The first thing you want to do is sign up for an account, which only takes a few minutes to complete.
Step 2: Add your domain to Domain-Forward.com
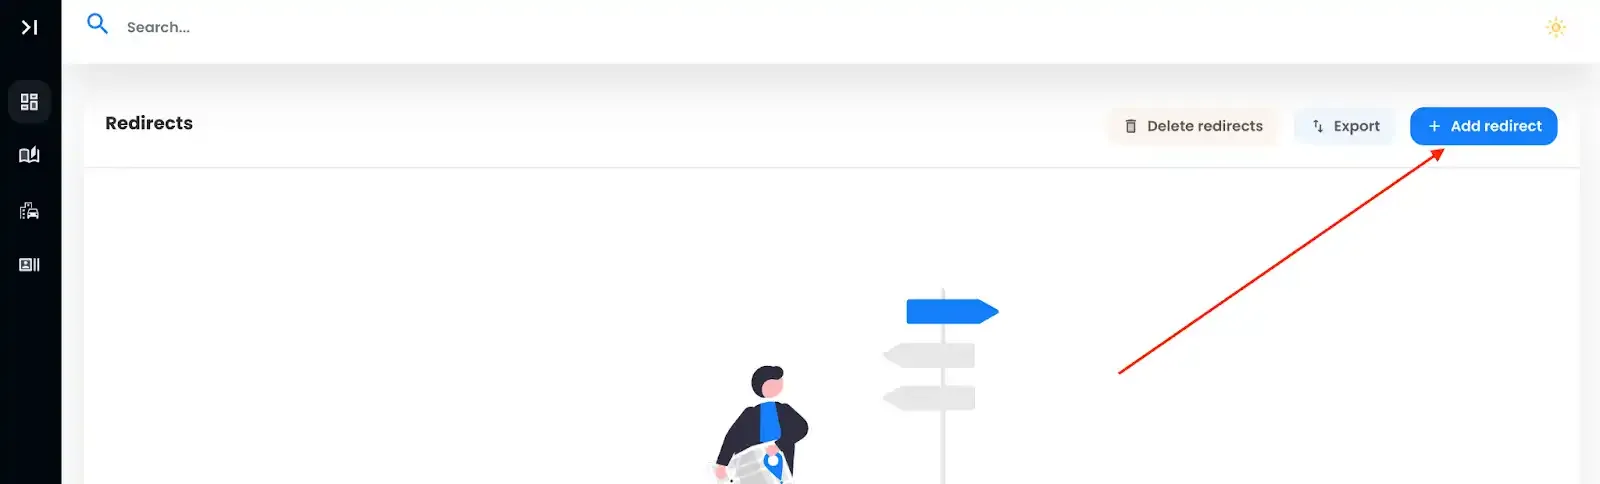
Once you have registered an account, it’s time to add the domain you’d like to redirect. All you need to do is click on the option for “Add Redirect.”
Since we already have a domain with Bluehost called ‘myolddomain.site’, we need to integrate it into the Source URL field. To make things hassle-free for your website visitors, we recommend adding both ‘www’ and the non-www version.
And that’s not all. We must also set the Destination URL, where all the magic happens – your forward-to spot.
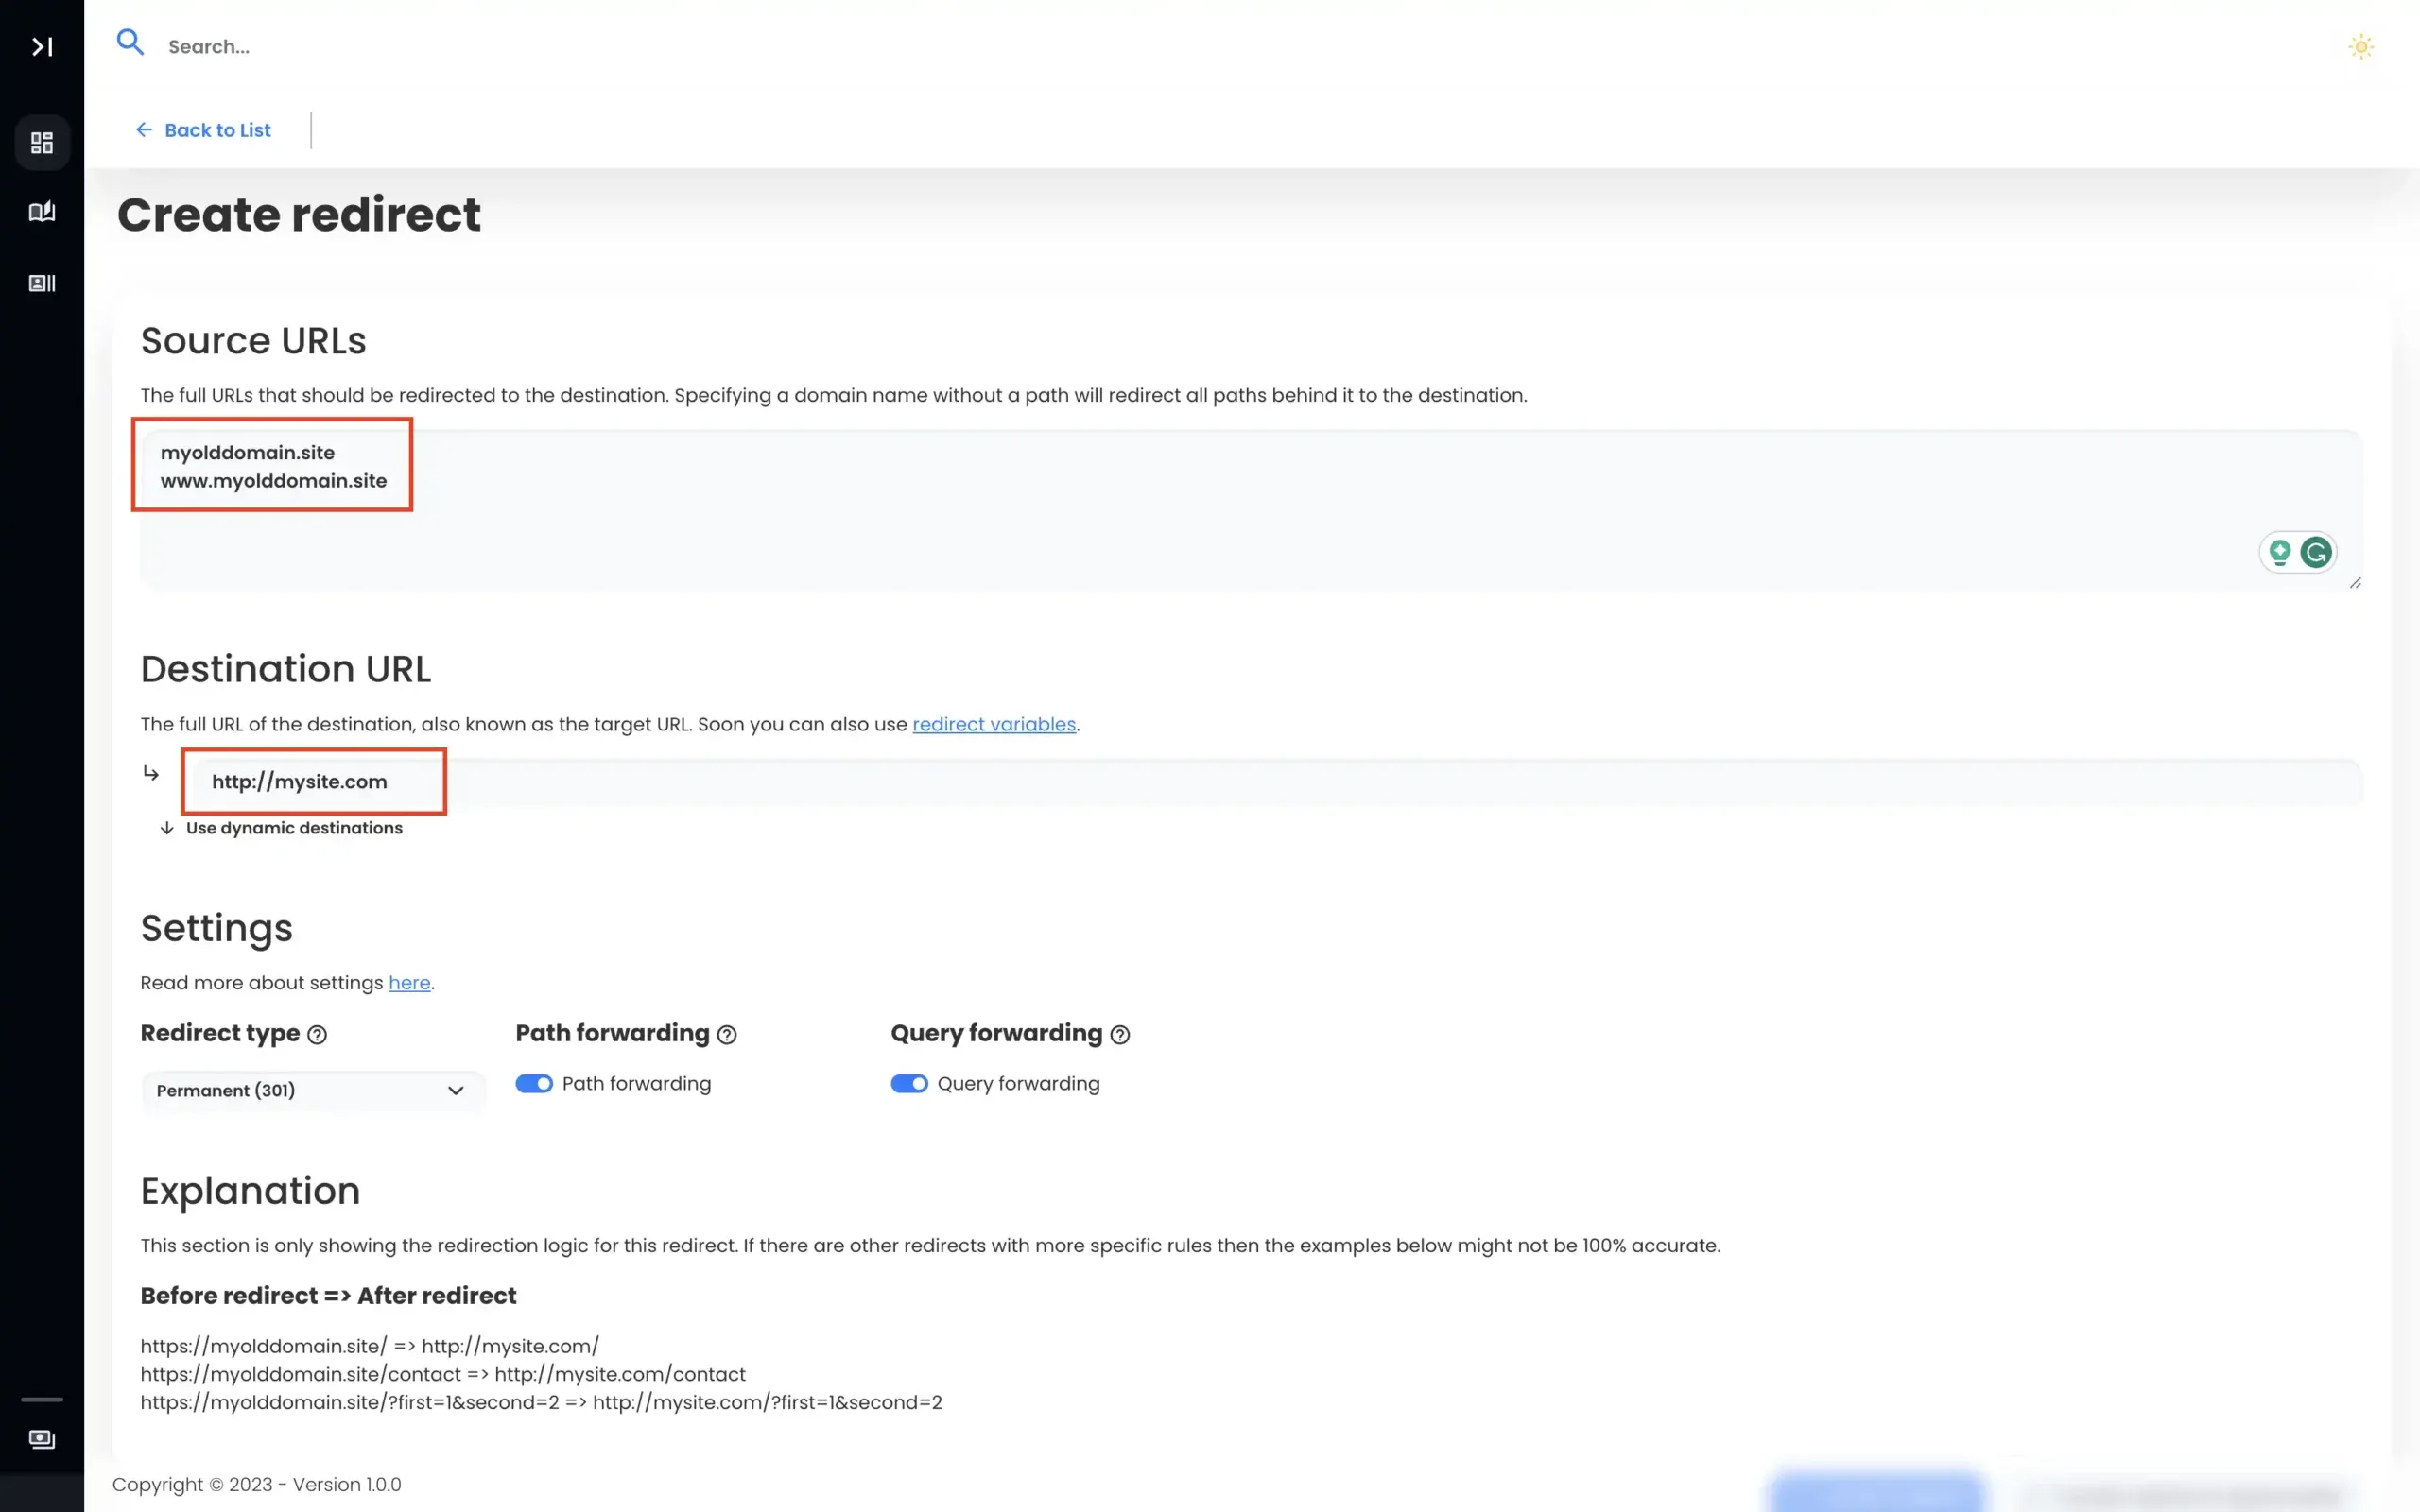
With our Source URLs and Destination URL now set, all we need to do is create our redirect. We recommend you leave the redirect type as 301, but if you are unsure exactly what redirect type you need then here’s our basic guide about URL forwarding.
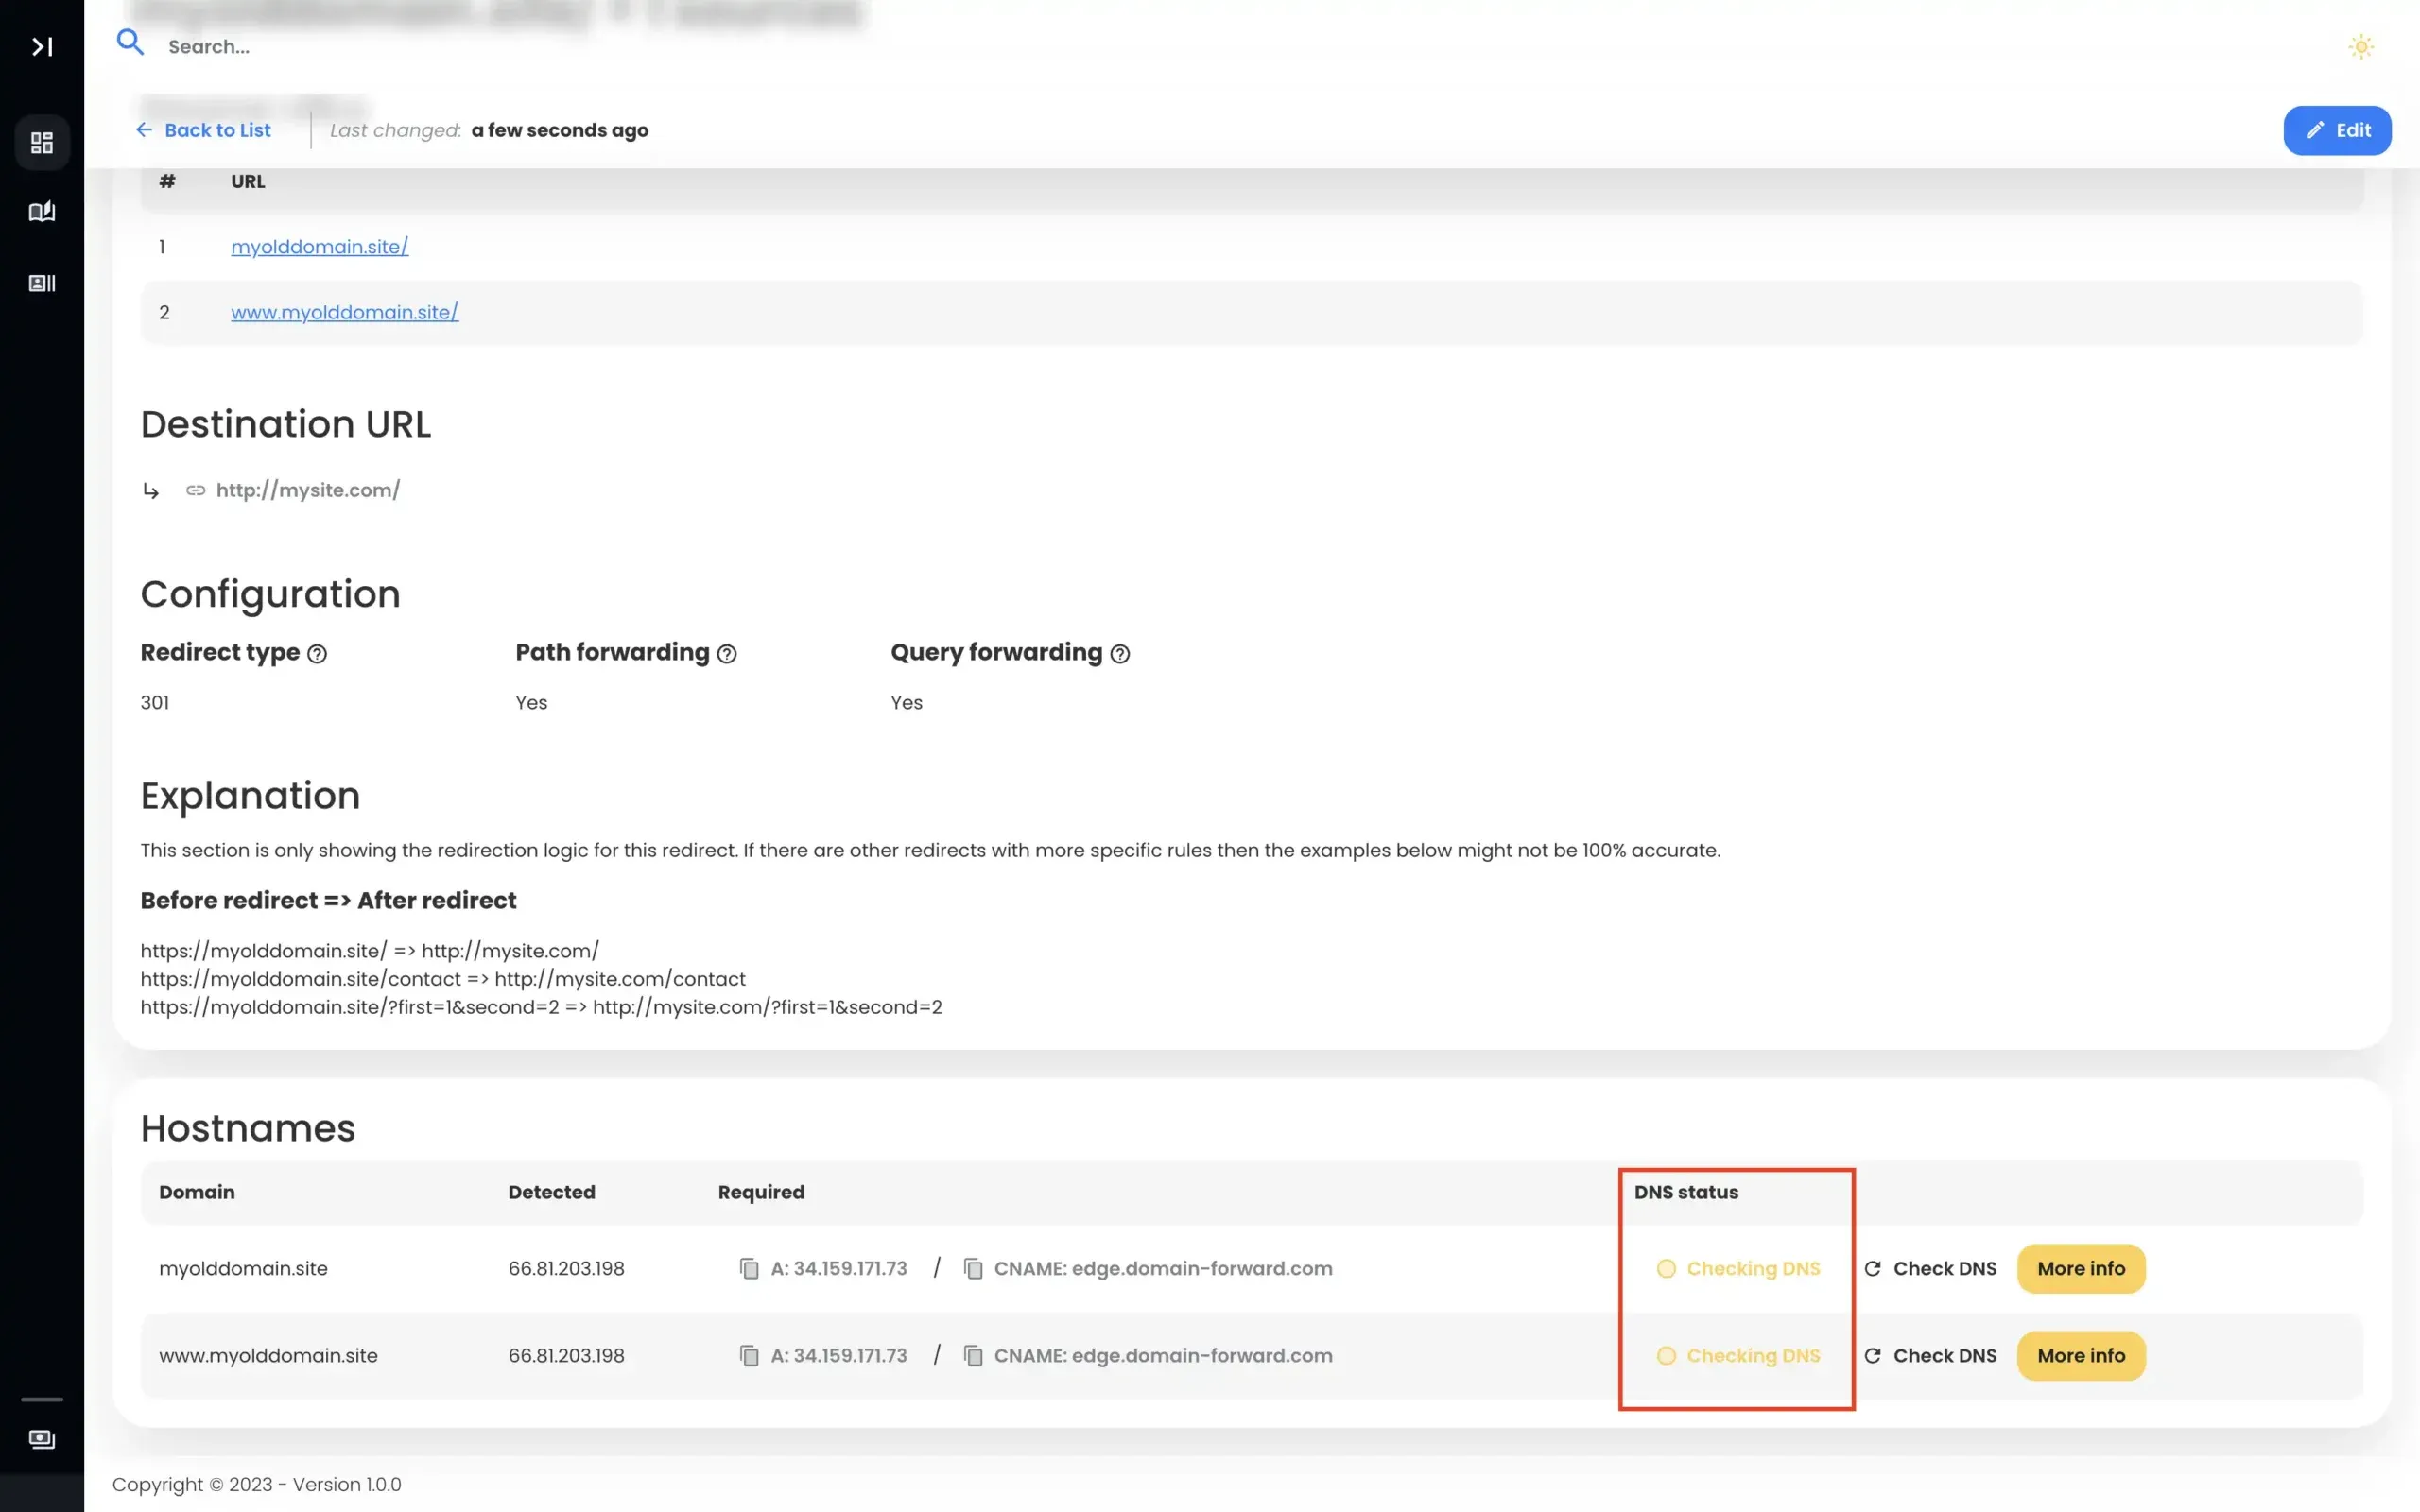
Note: After completing the domain redirect, you’ll notice the DNS status as checking. We need to fix that.
Step 3: Navigate to Bluehost
To complete redirecting using Domain-Forward.com, we need to head over to Bluehost to tweak DNS changes.
To do that, log into the Bluehost platform.
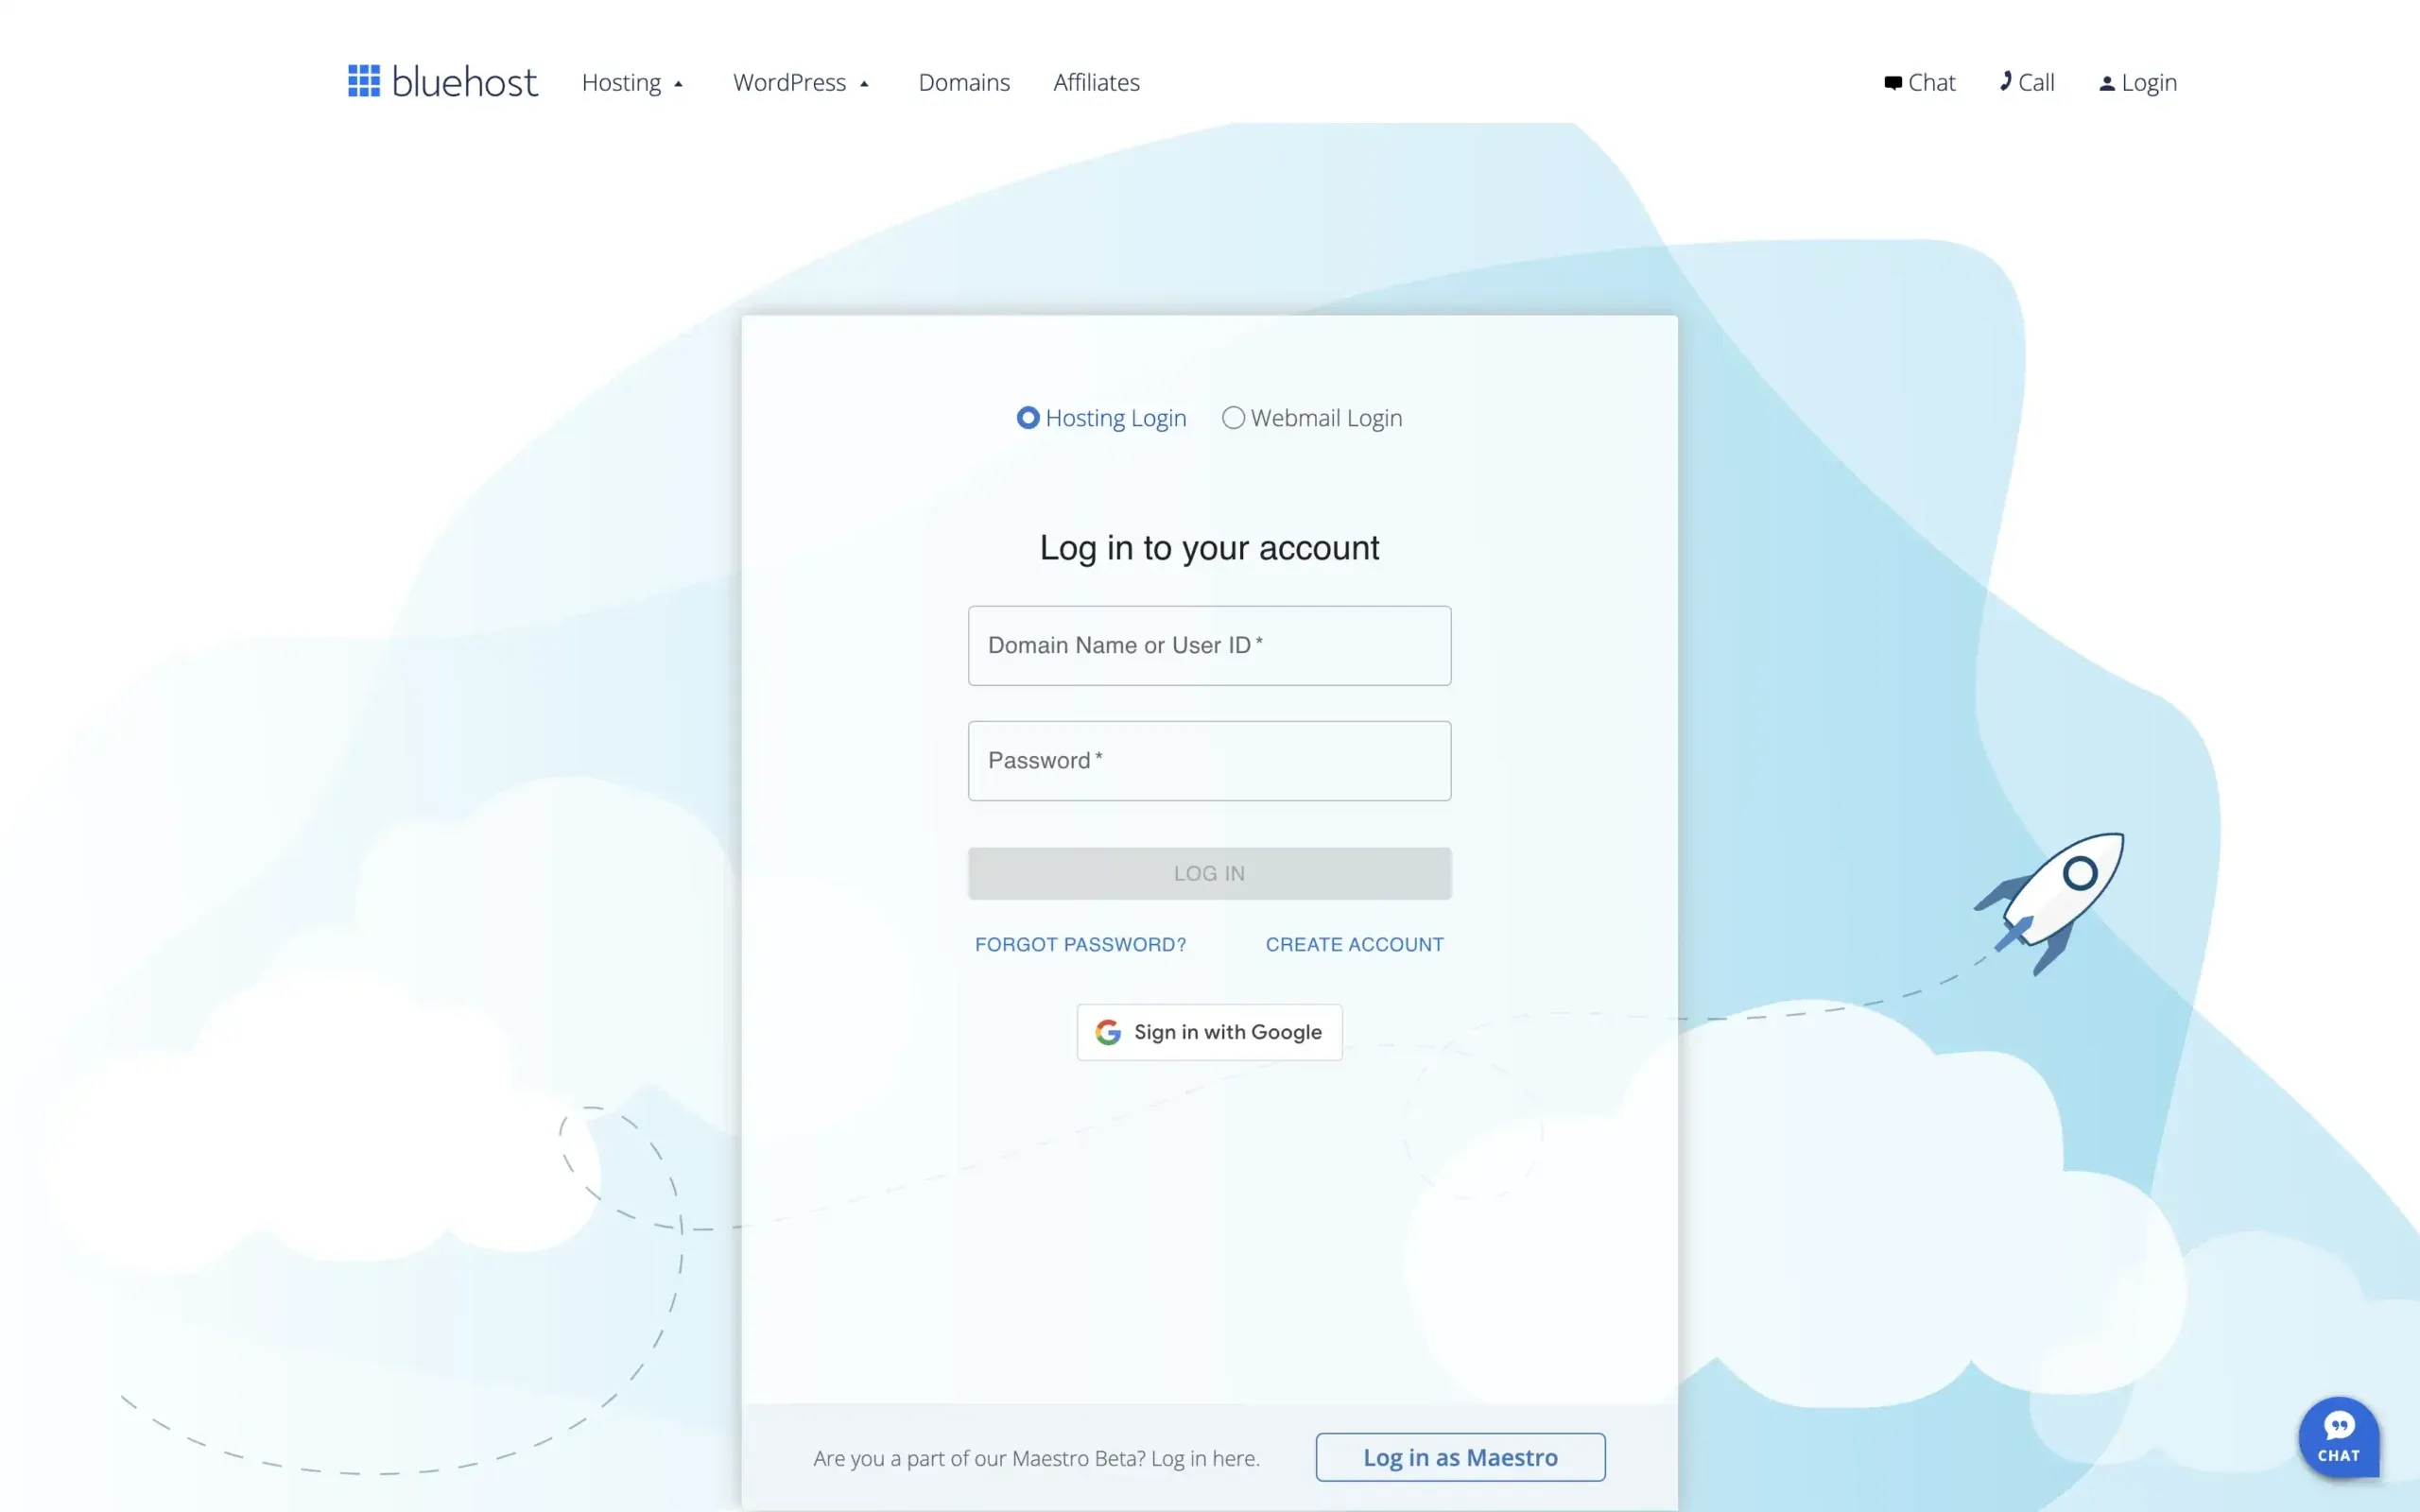
After logging in, we are shown the dashboard where we can adjust all of our settings regarding our domains on Bluehost. Next, click on Domains on the left sidebar.
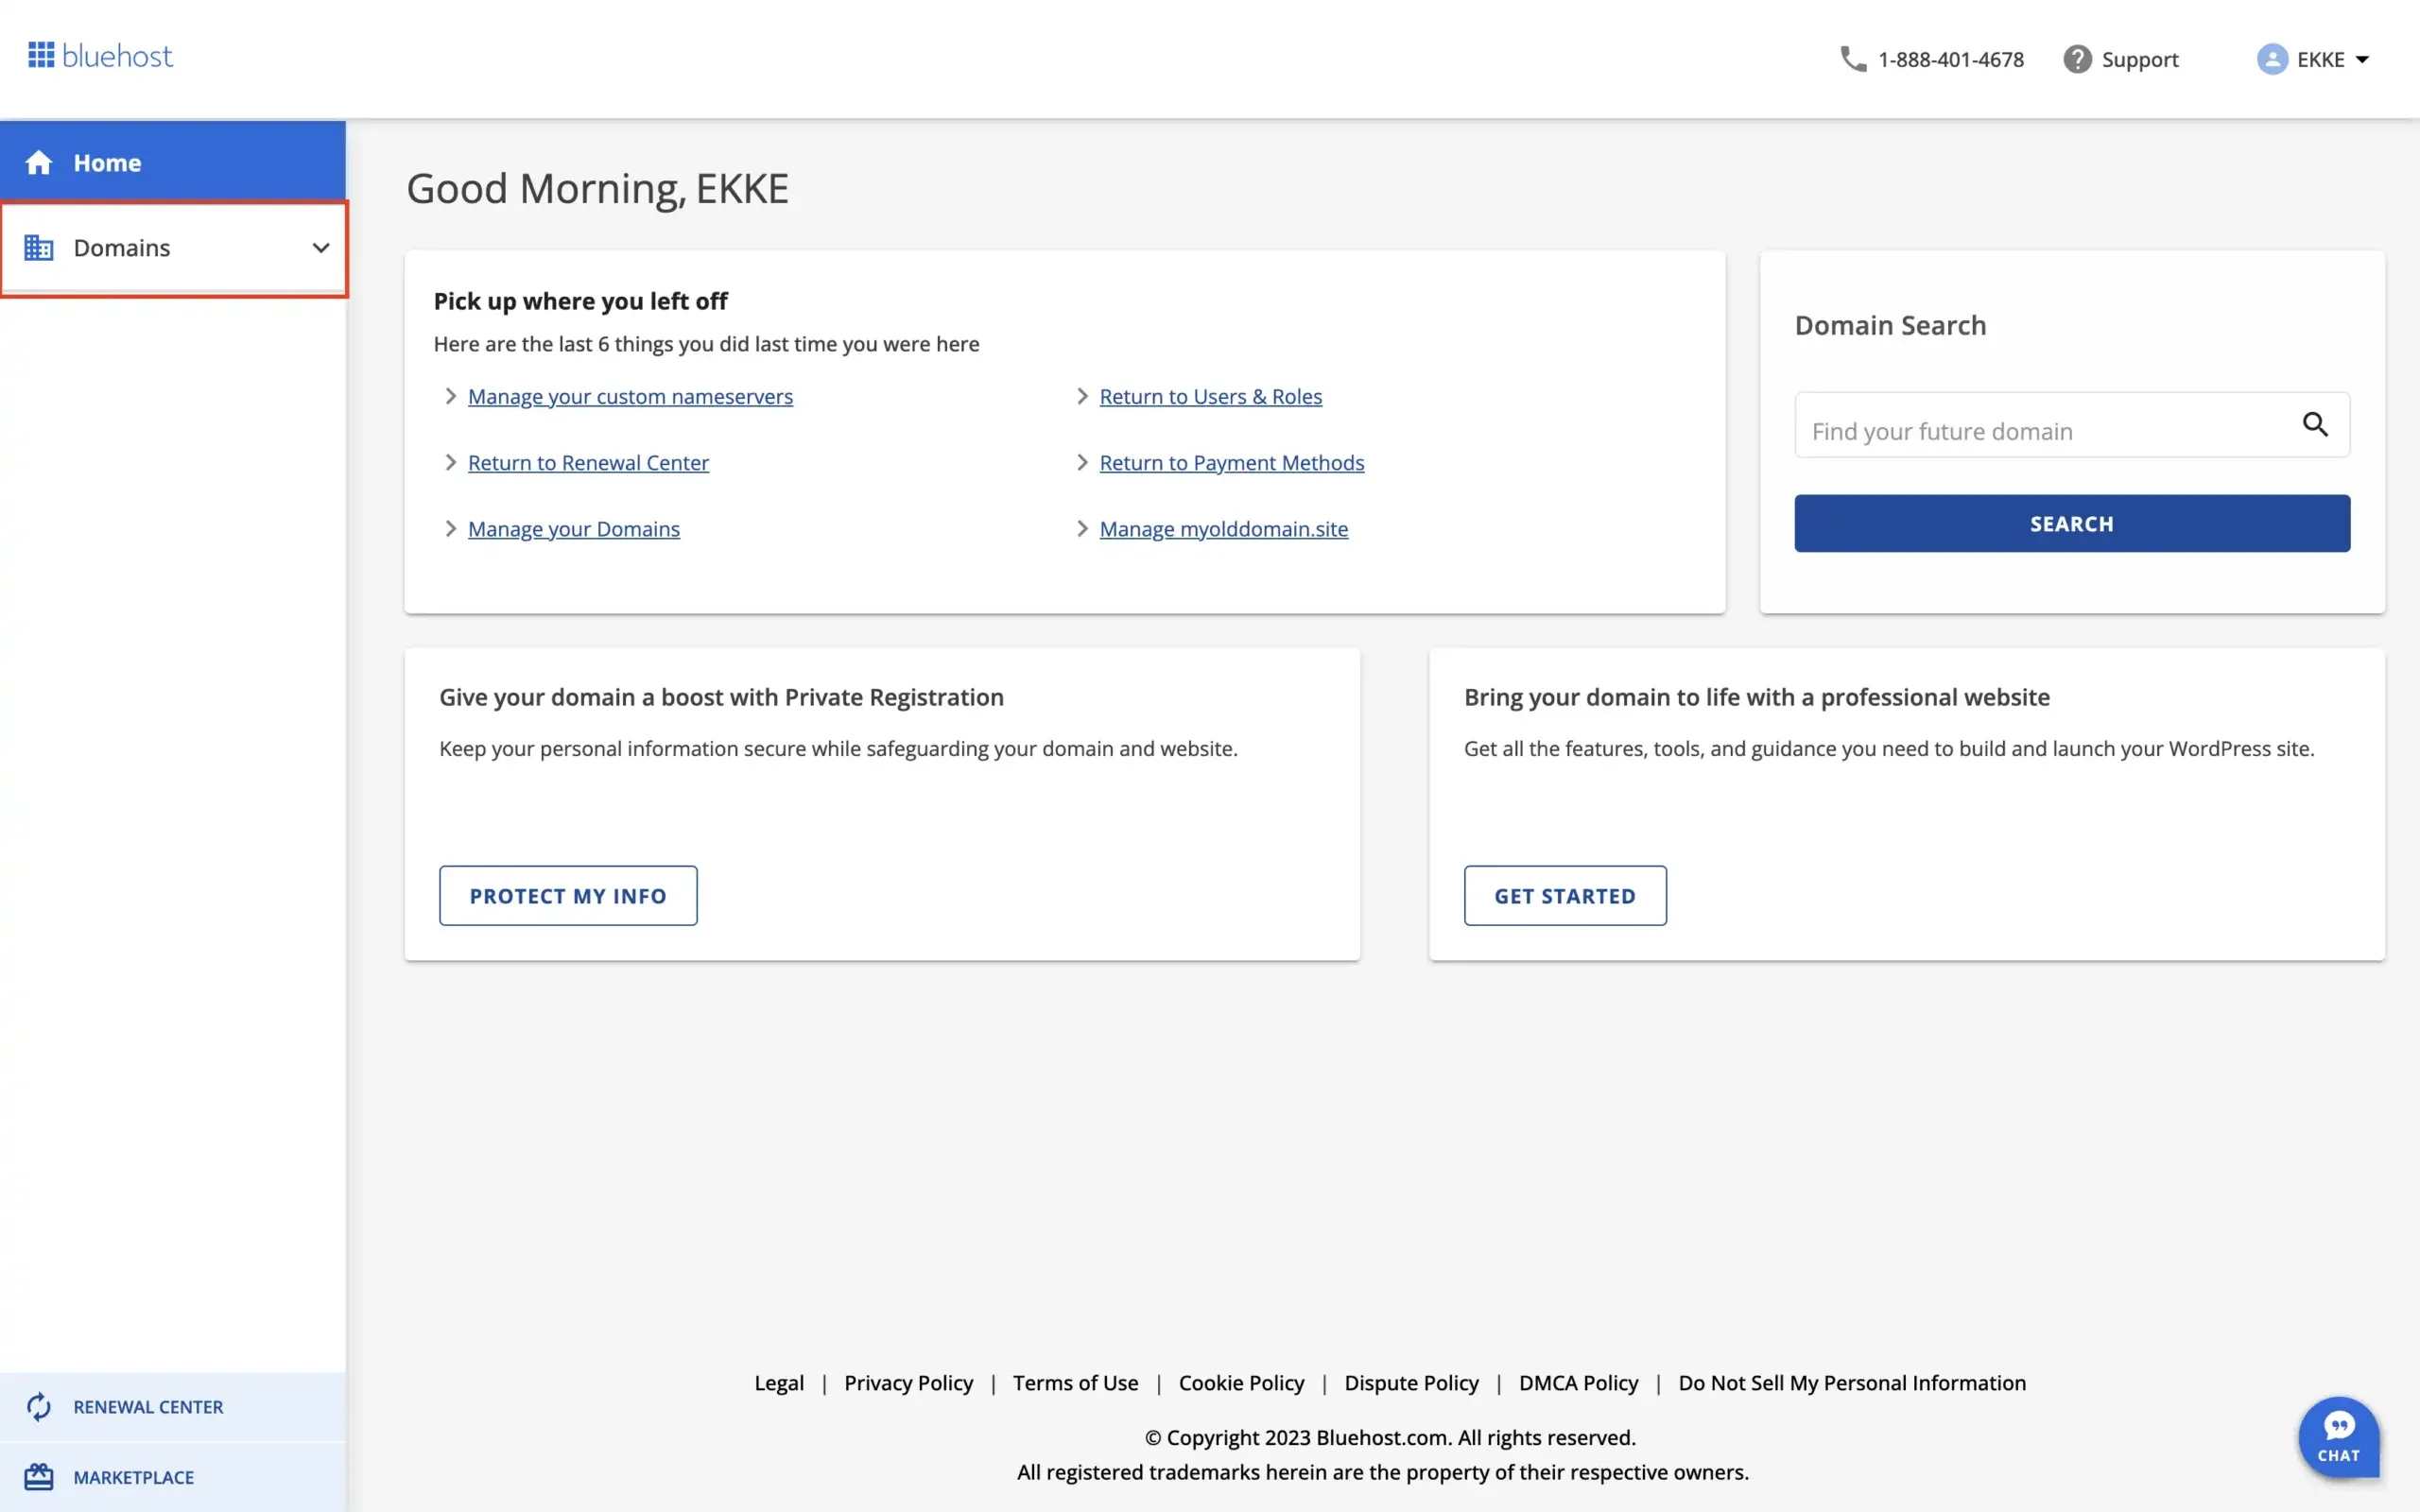
Then choose the domain you would like to manage. If you only have one domain there, you’ll be redirected to the domain details right away.
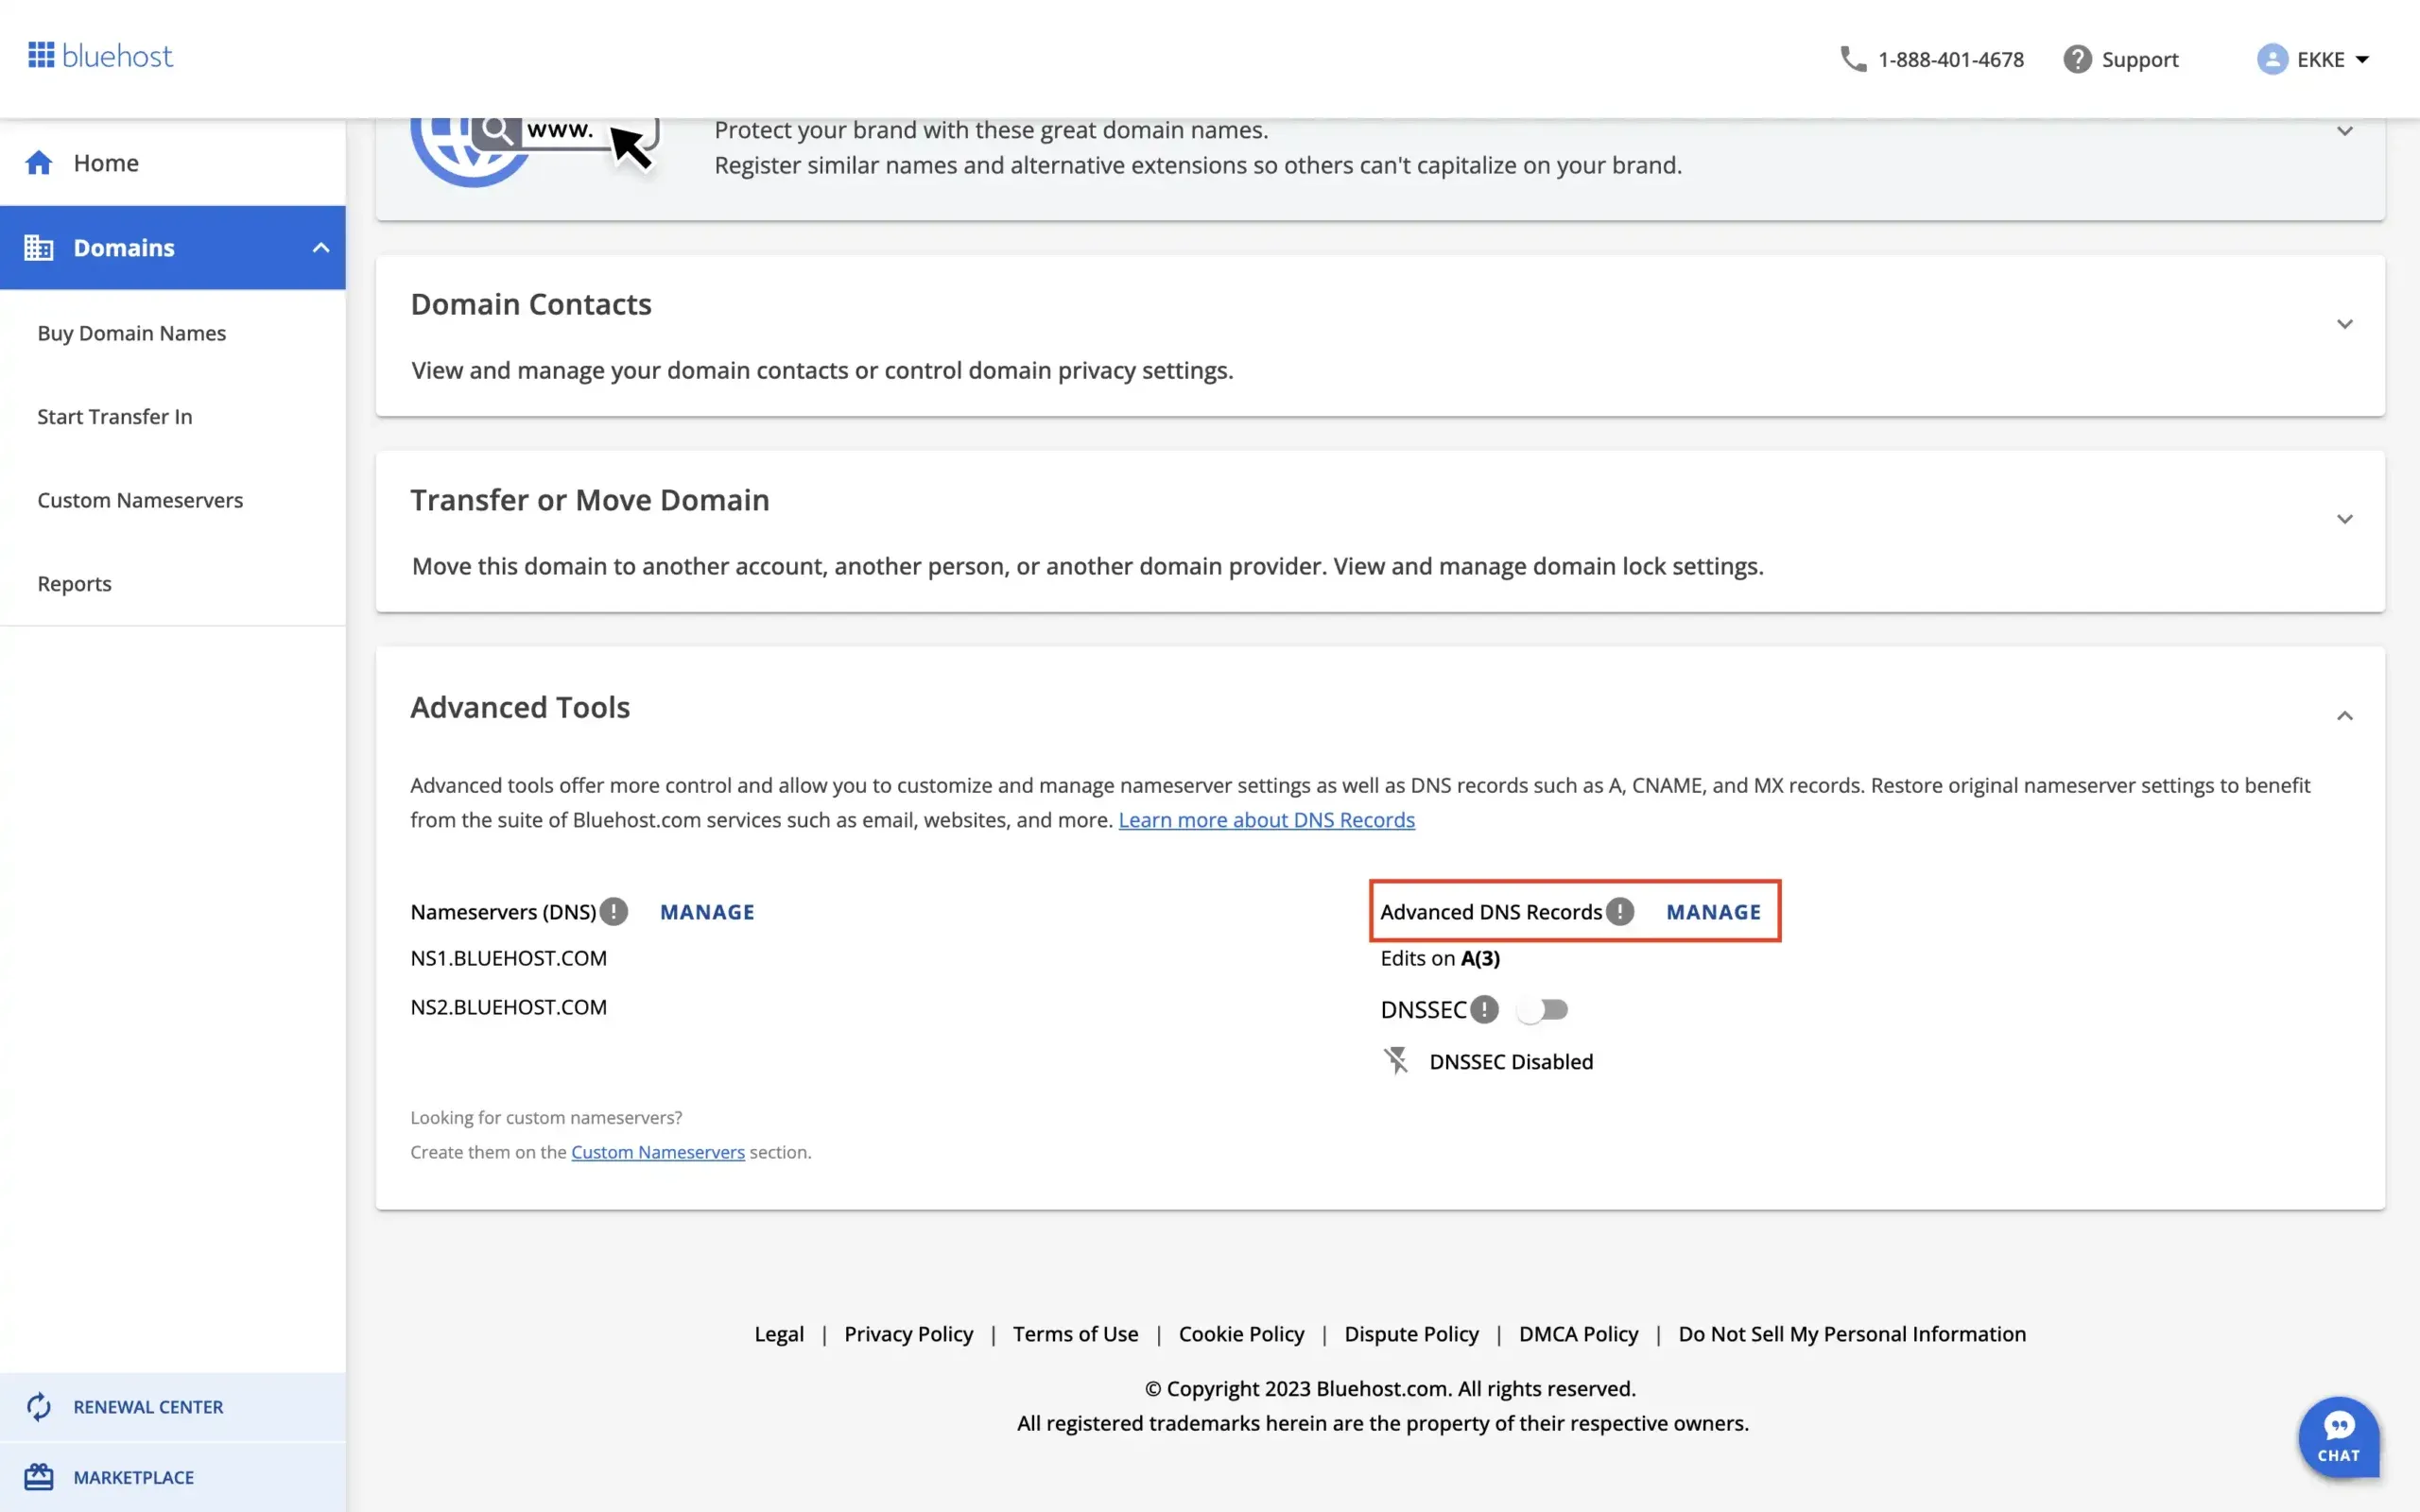
In the domain details page, scroll all the way down, and under “Advanced tools” and “Advanced DNS Records”, click “Manage”.
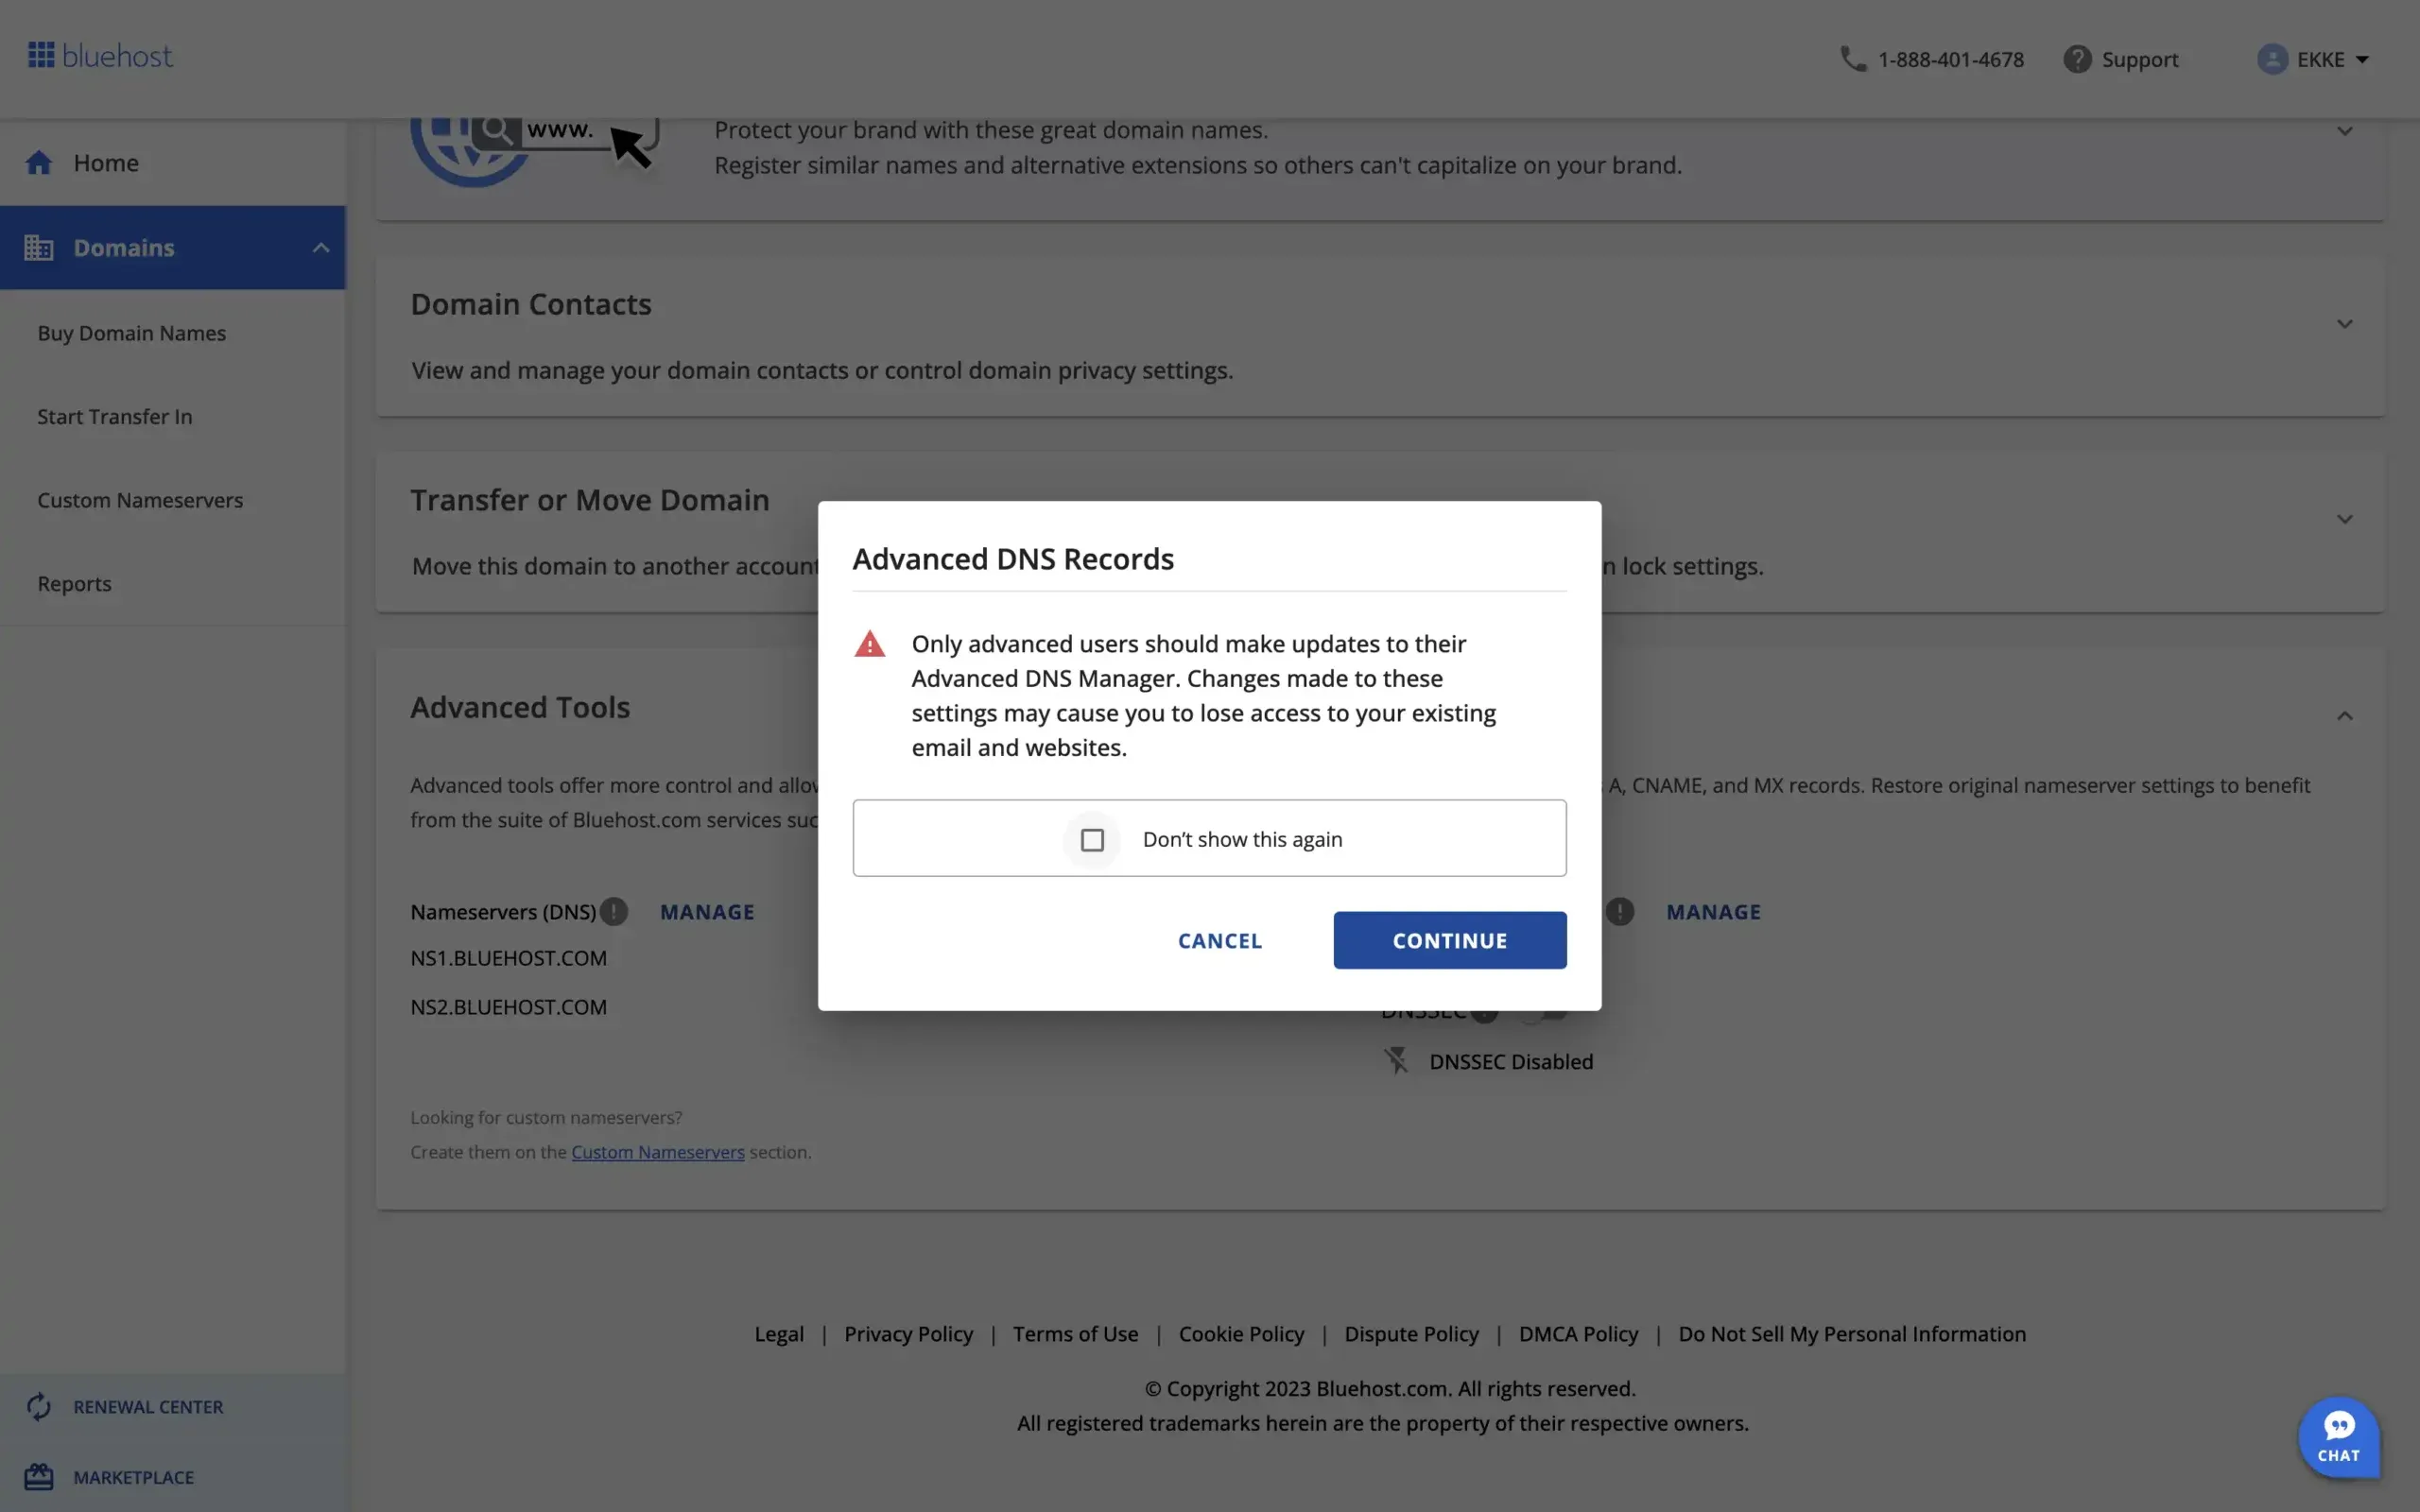
It’s possible that you will be prompted whether you are sure that you are an advanced user. If you feel confident, then click continue.
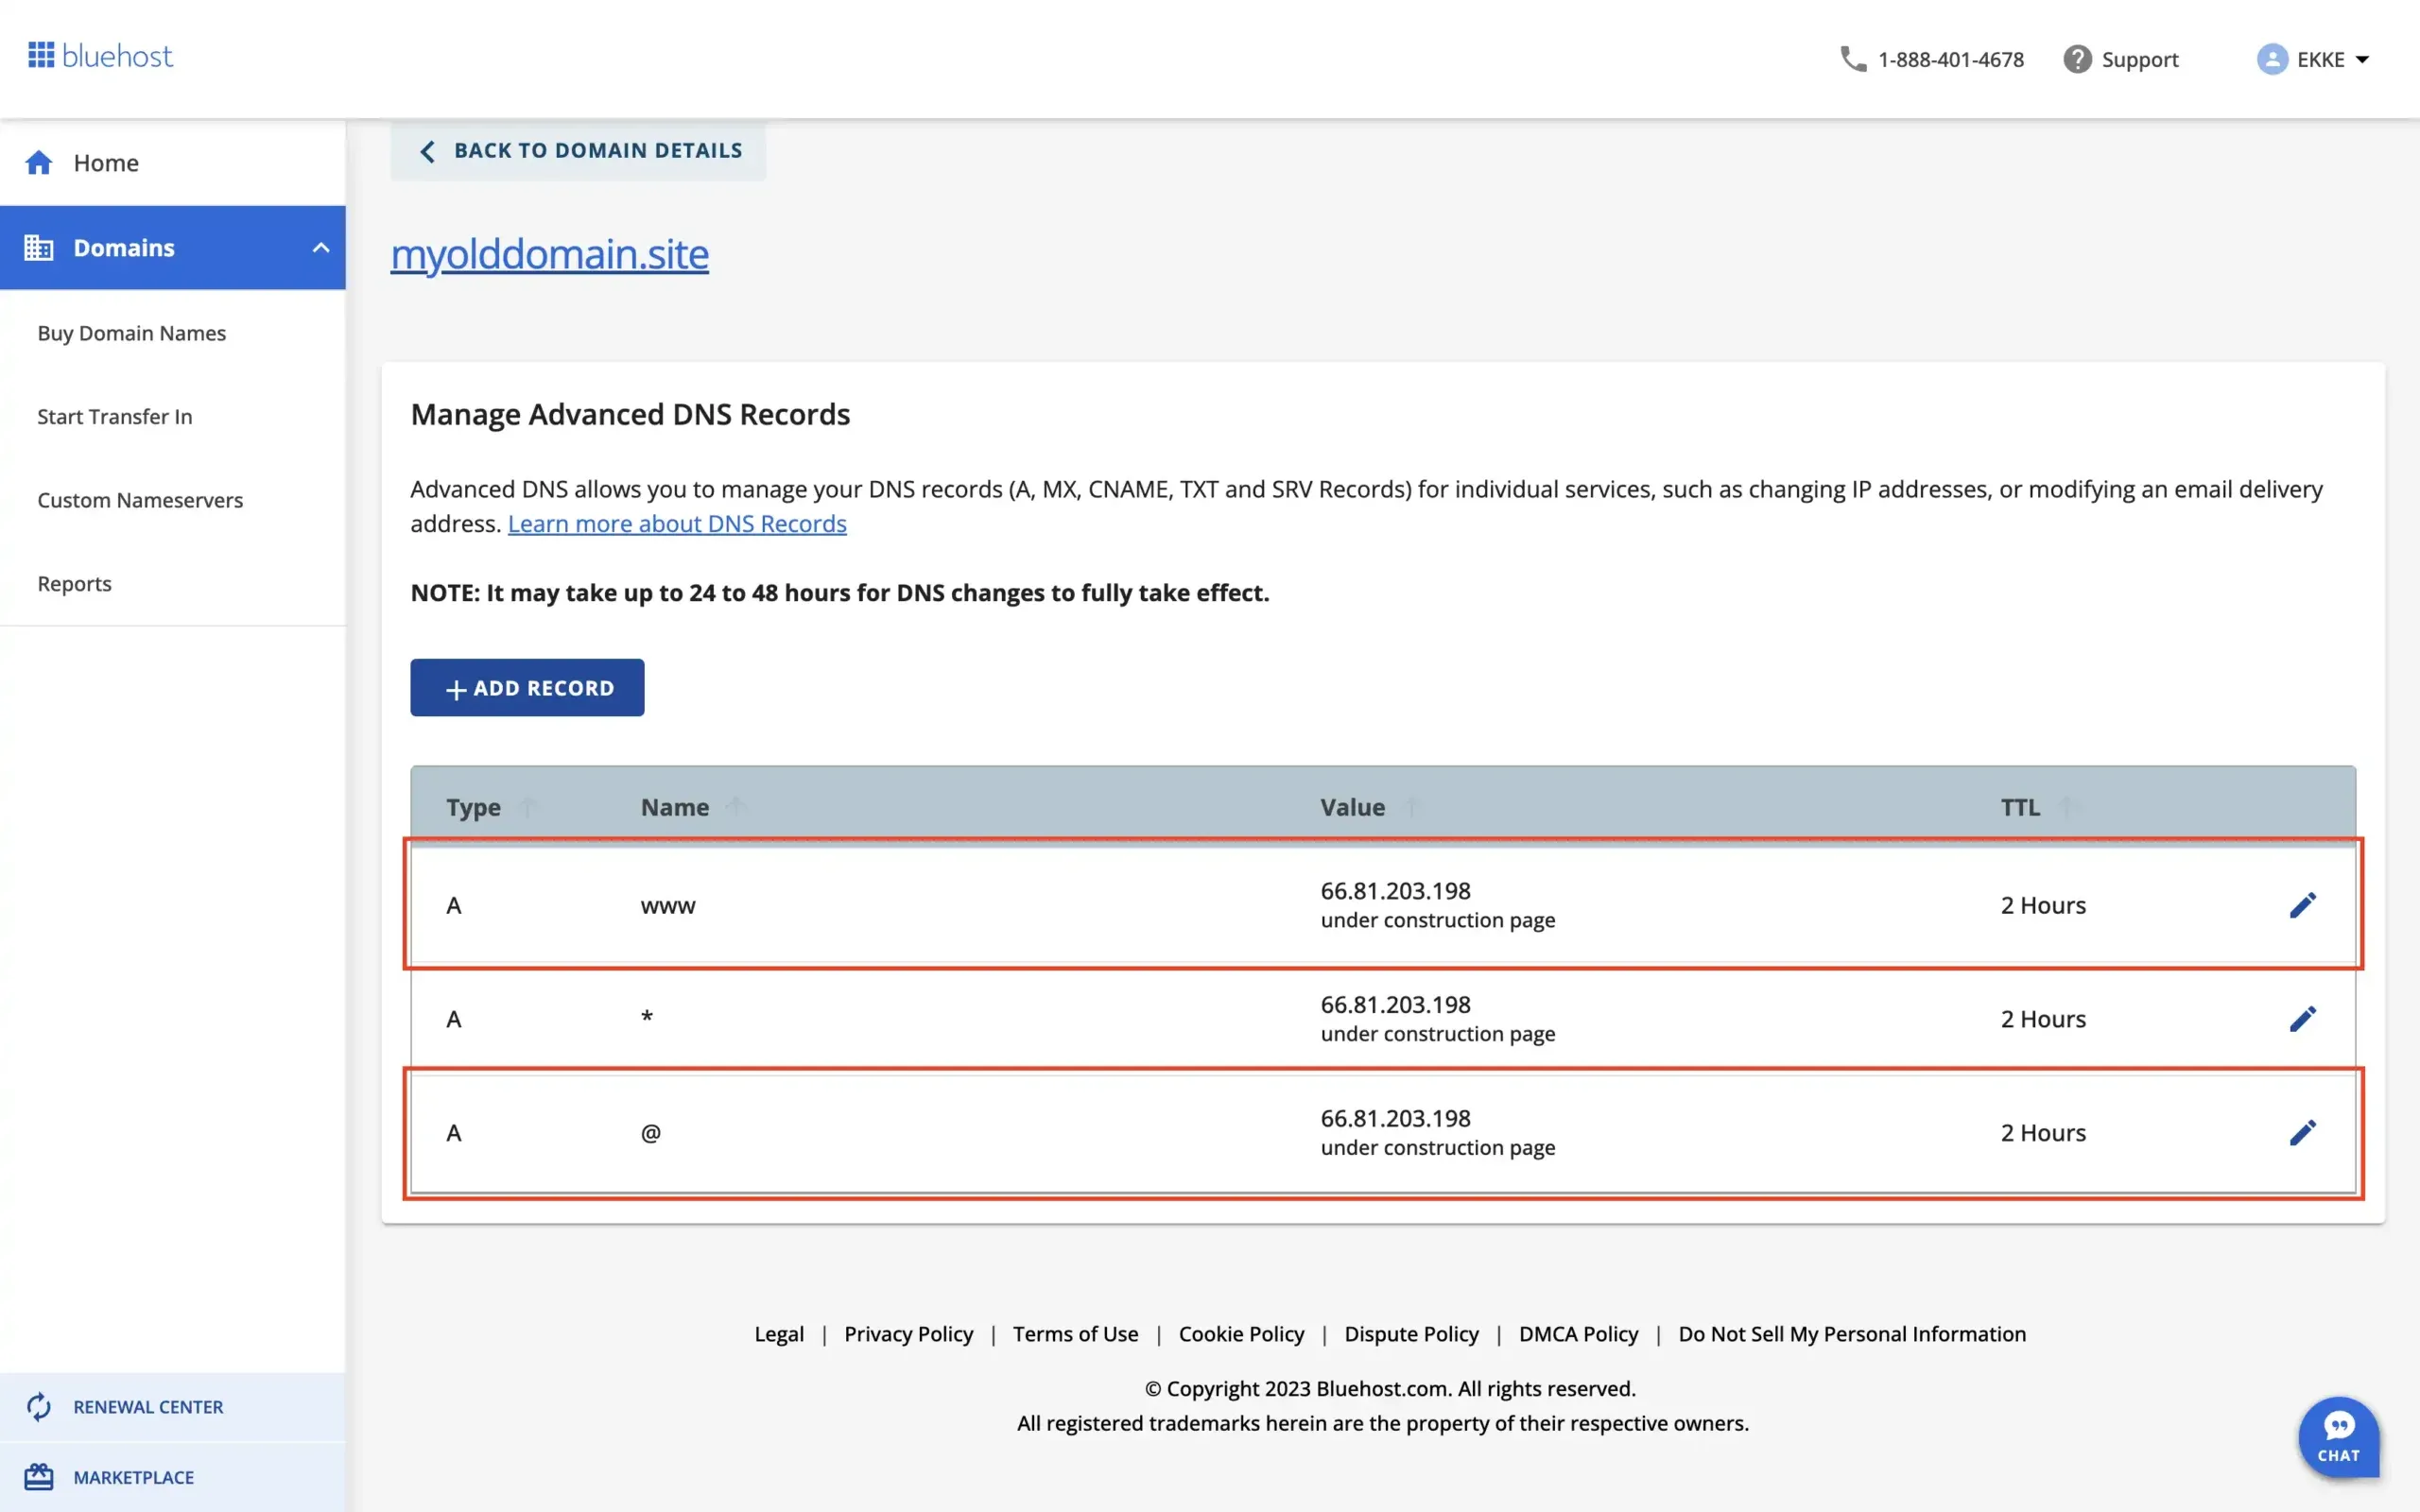
If you followed the steps exactly as we showed you, you should have a page that looks something like this:
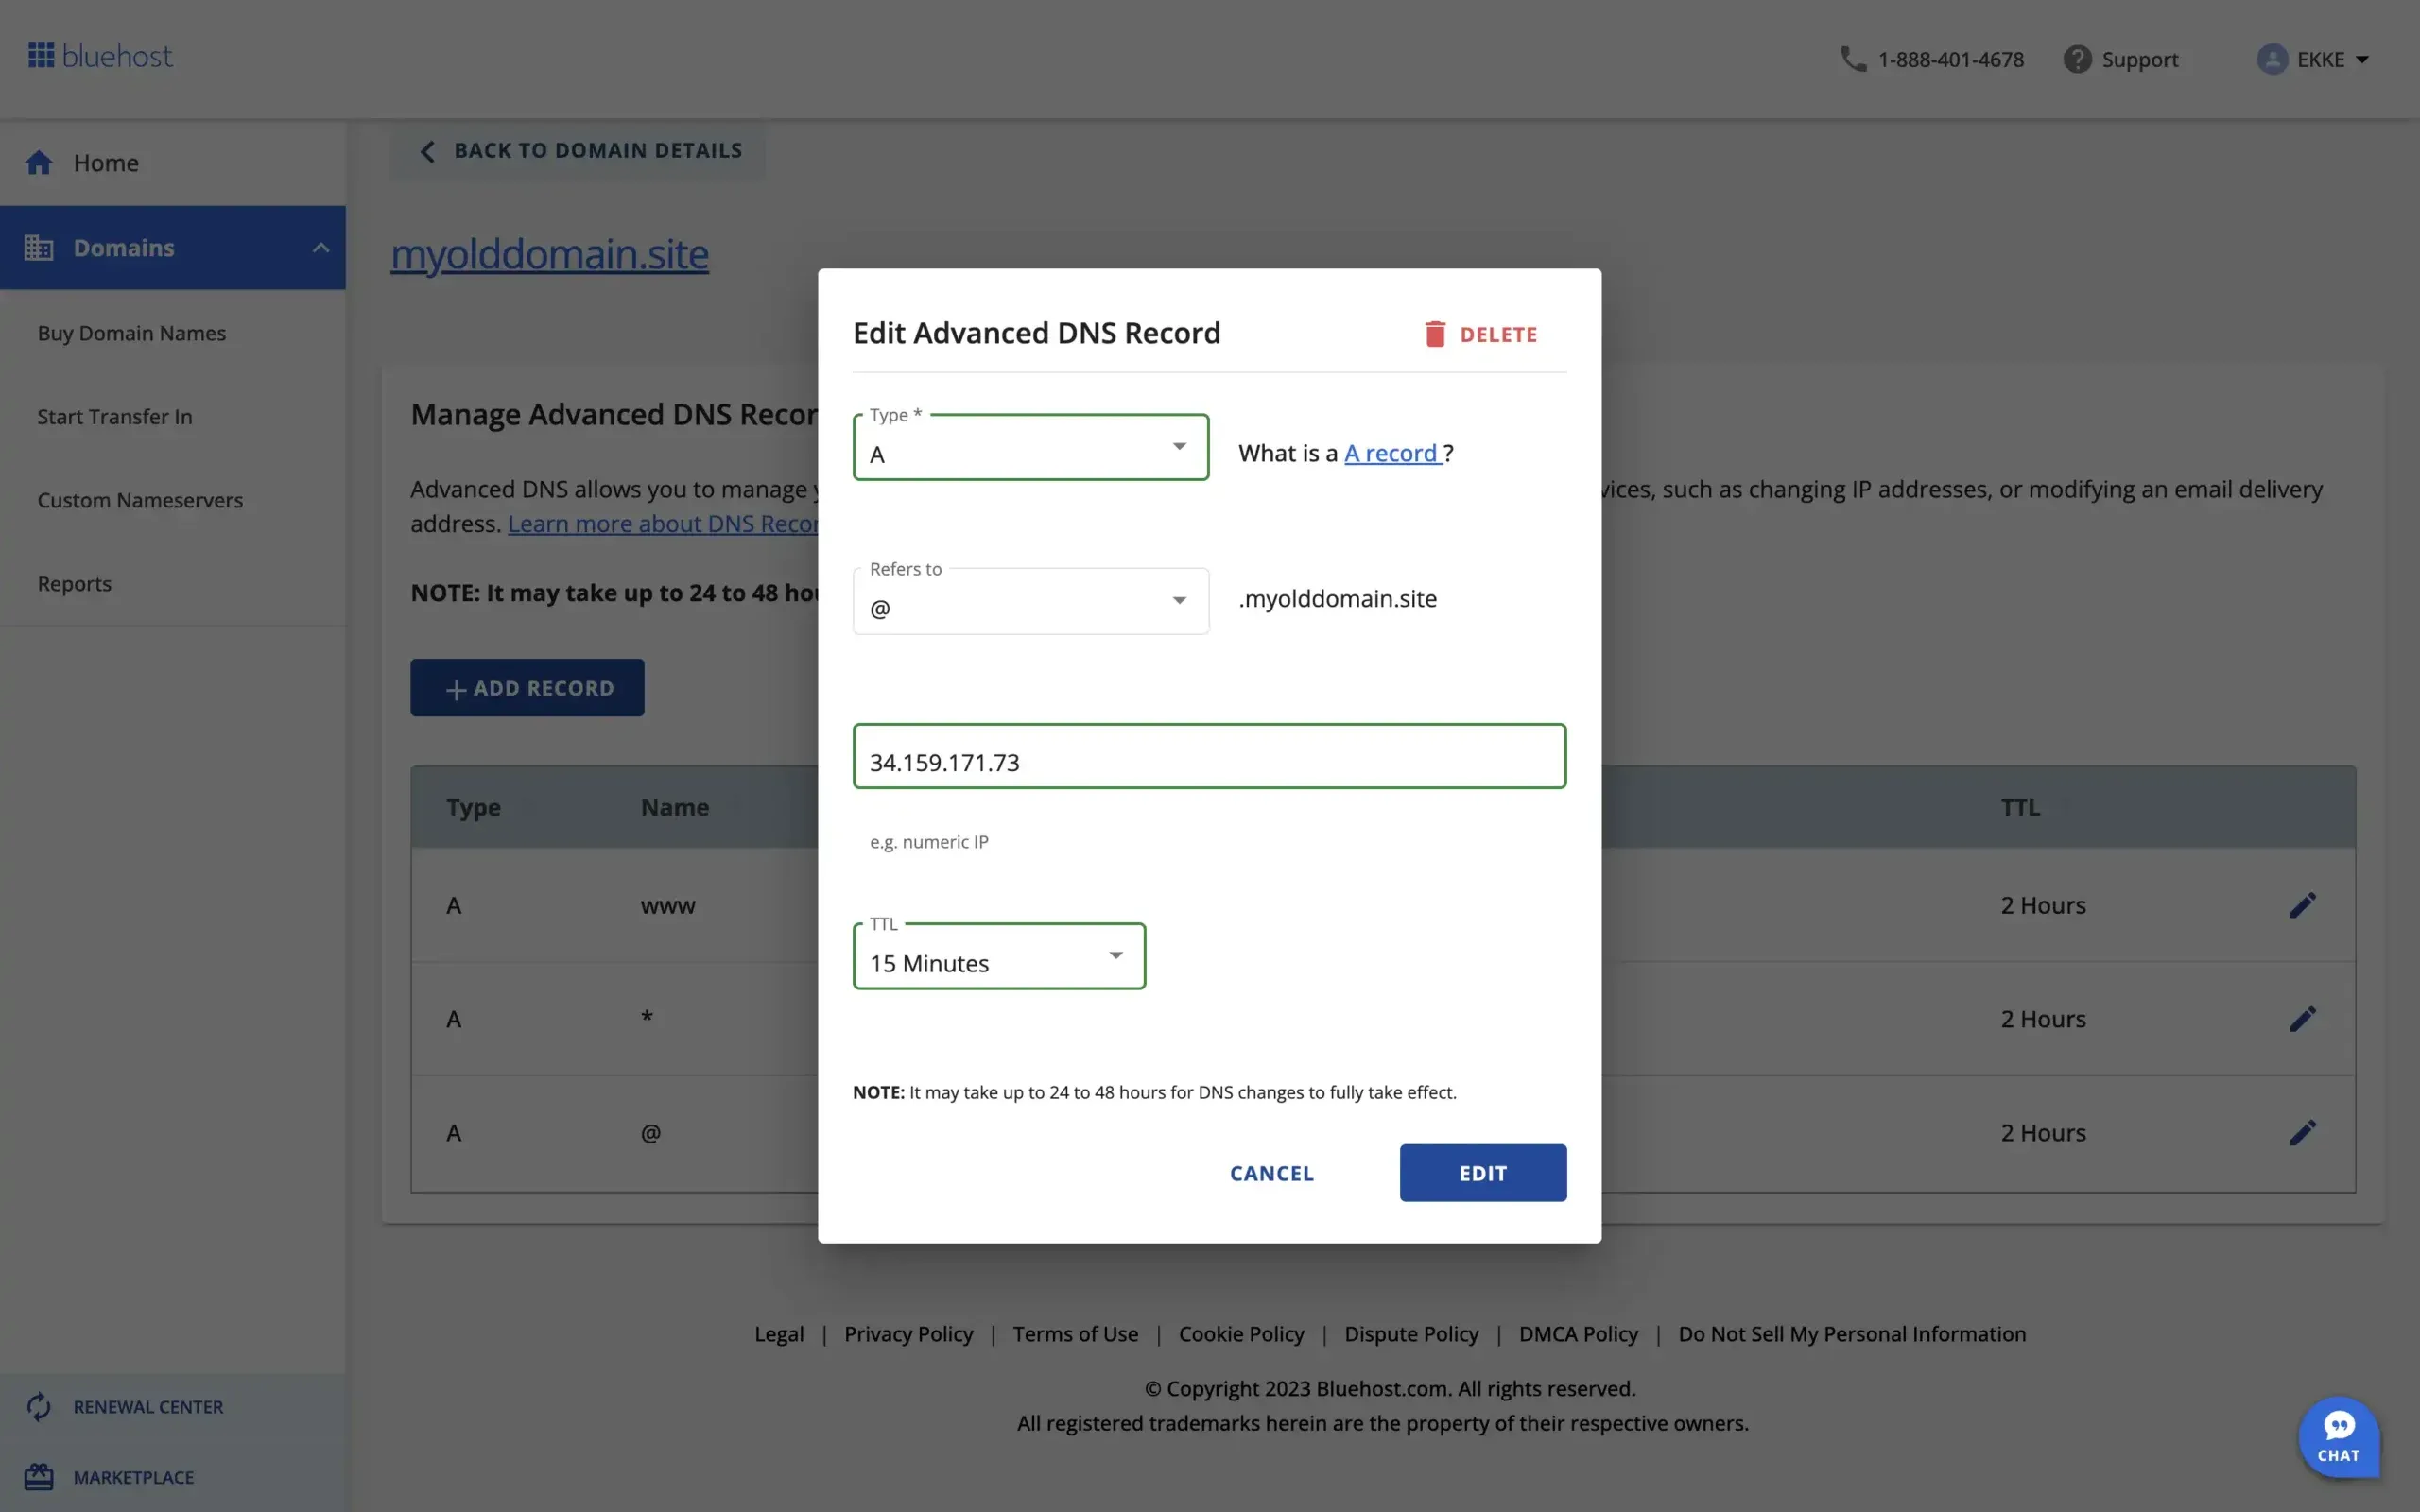
Step 4: Change the DNS
Now, let’s tweak our DNS settings. First, you want to click the edit button next to the @ domain A-type record. Here, you want to change the Value to 138.68.125.144 With that done, click Edit. You can change the TTL value to 15 minutes if you want the DNS changes to propagate slightly faster in the future.
Next, we also want to adjust the www domain records. Add the same IP as for the @ domain and optionally set the TTL to 15 minutes as well.

Now, that’s all we need to do here. Just so you know you did the right thing, it should look something like this:
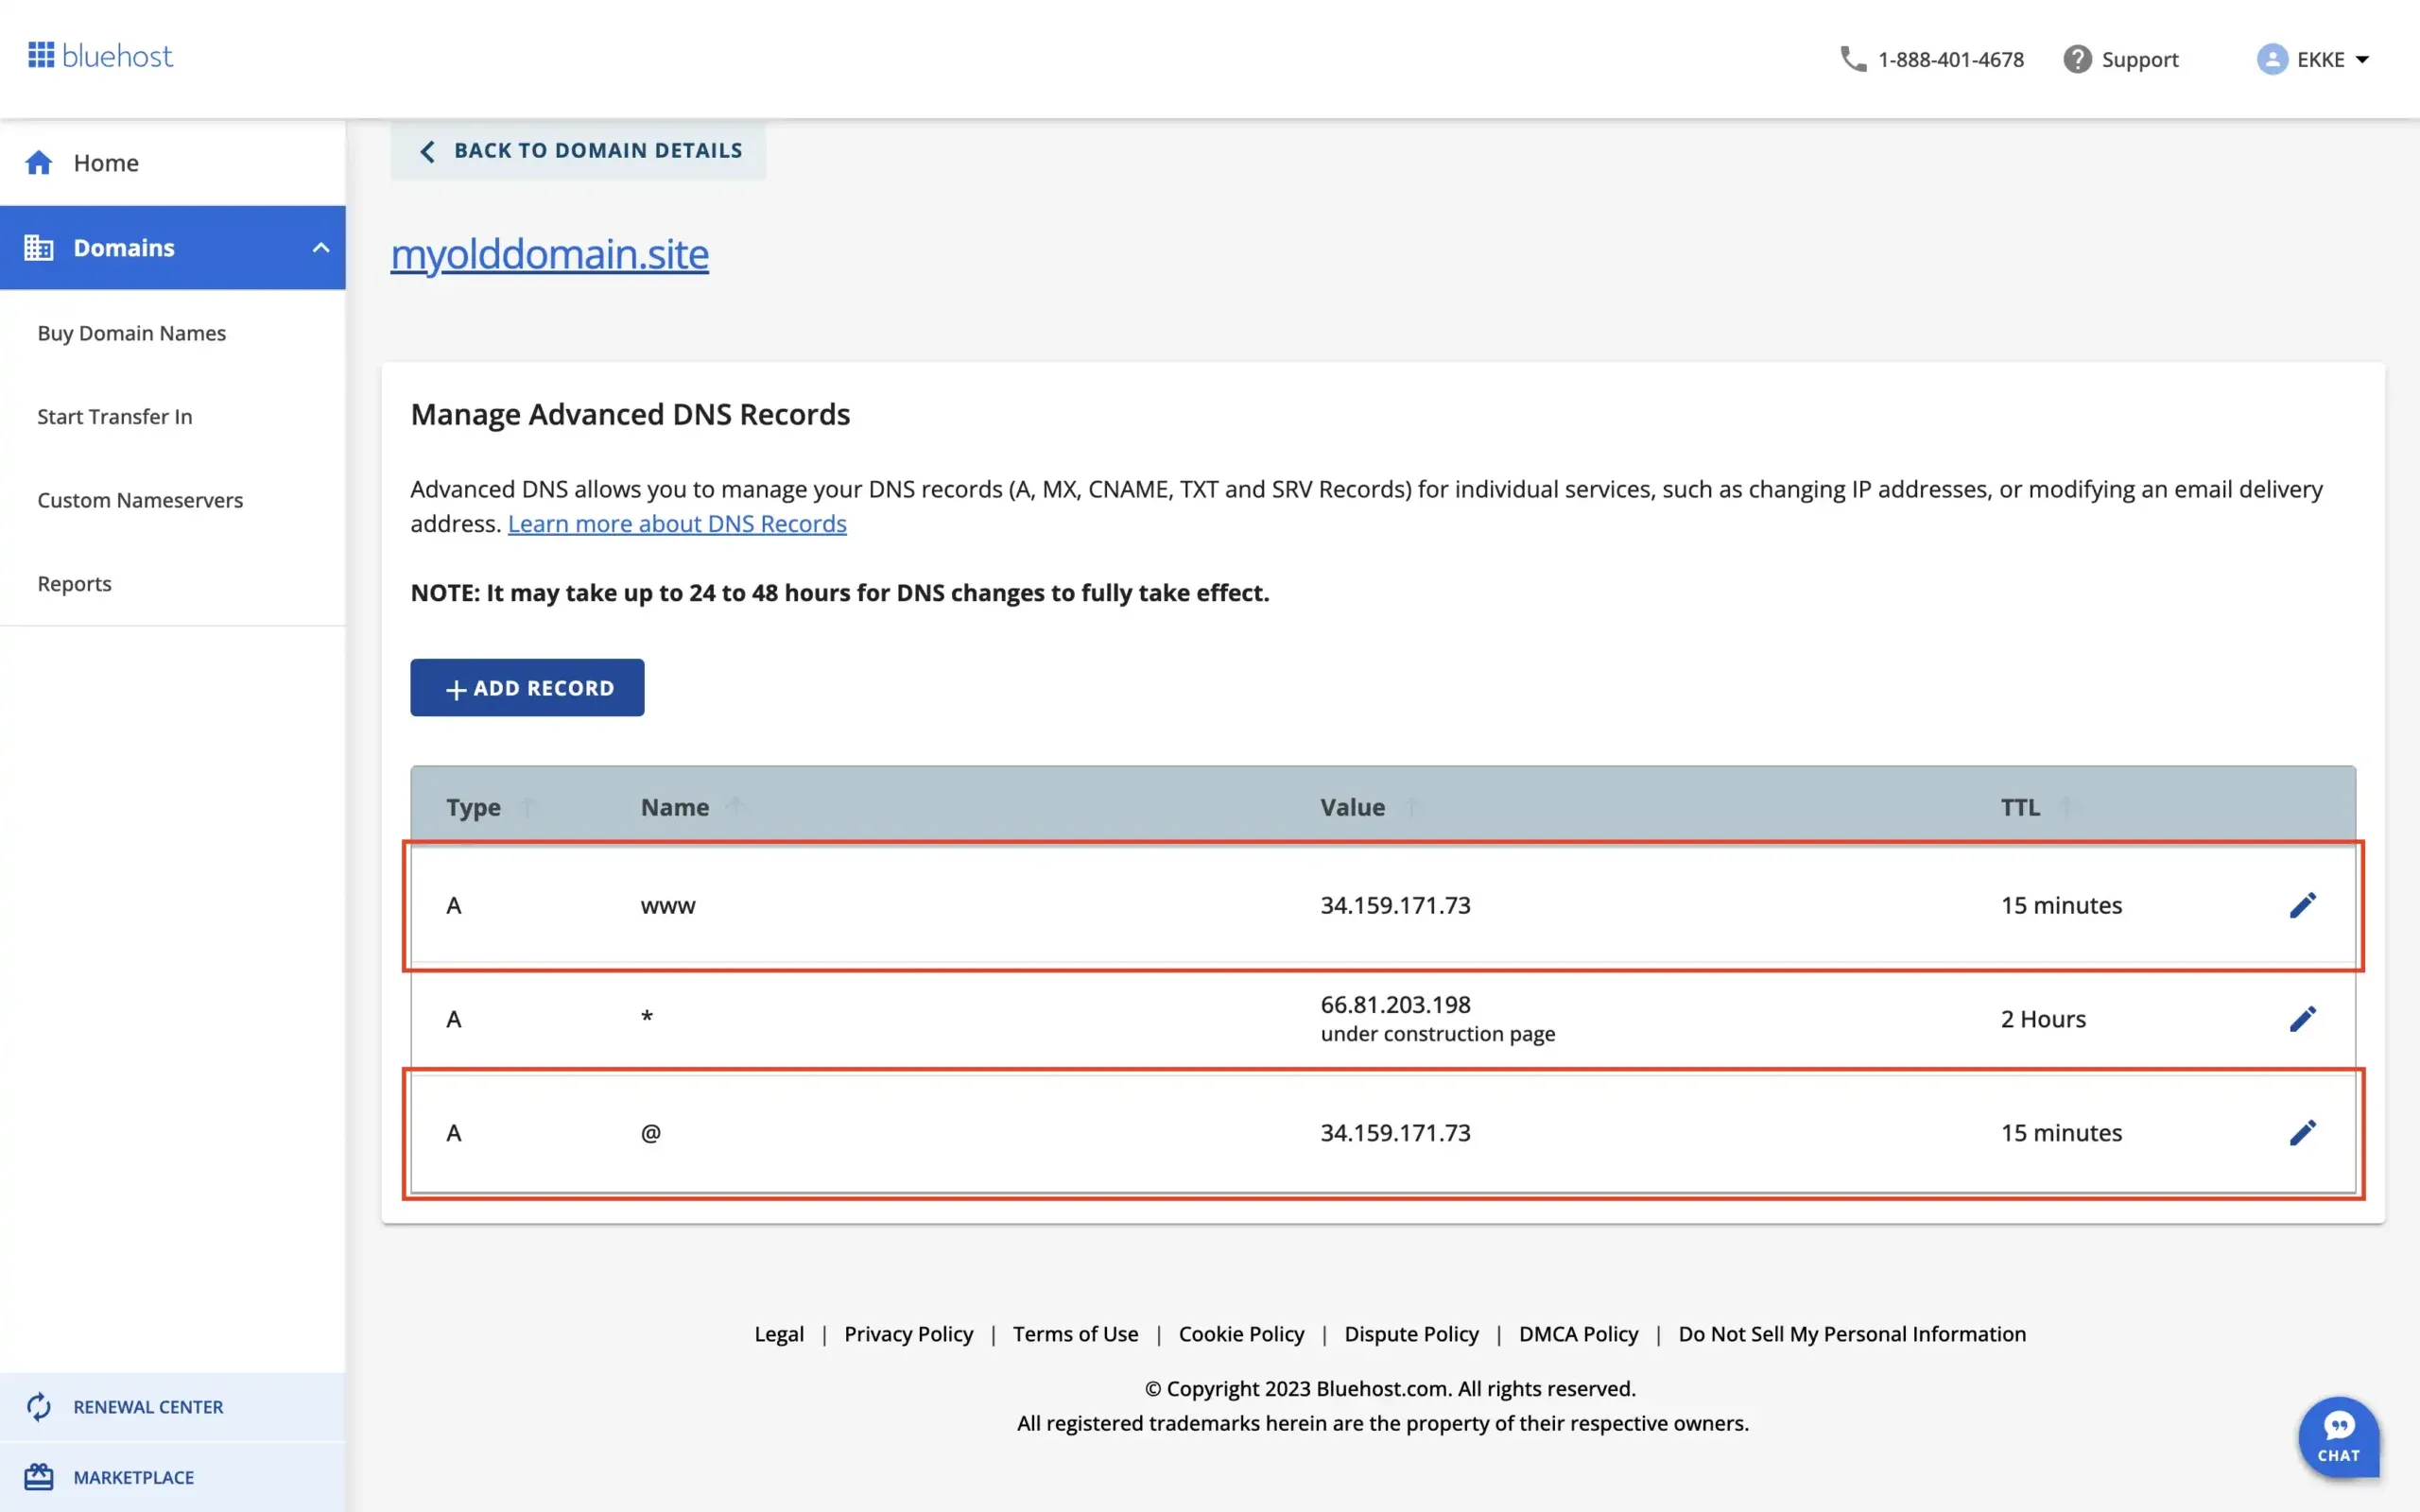
You might have some other records there as well, but you can leave them as is. Only if you run into some redirection issues should you consider debugging why it doesn’t work.
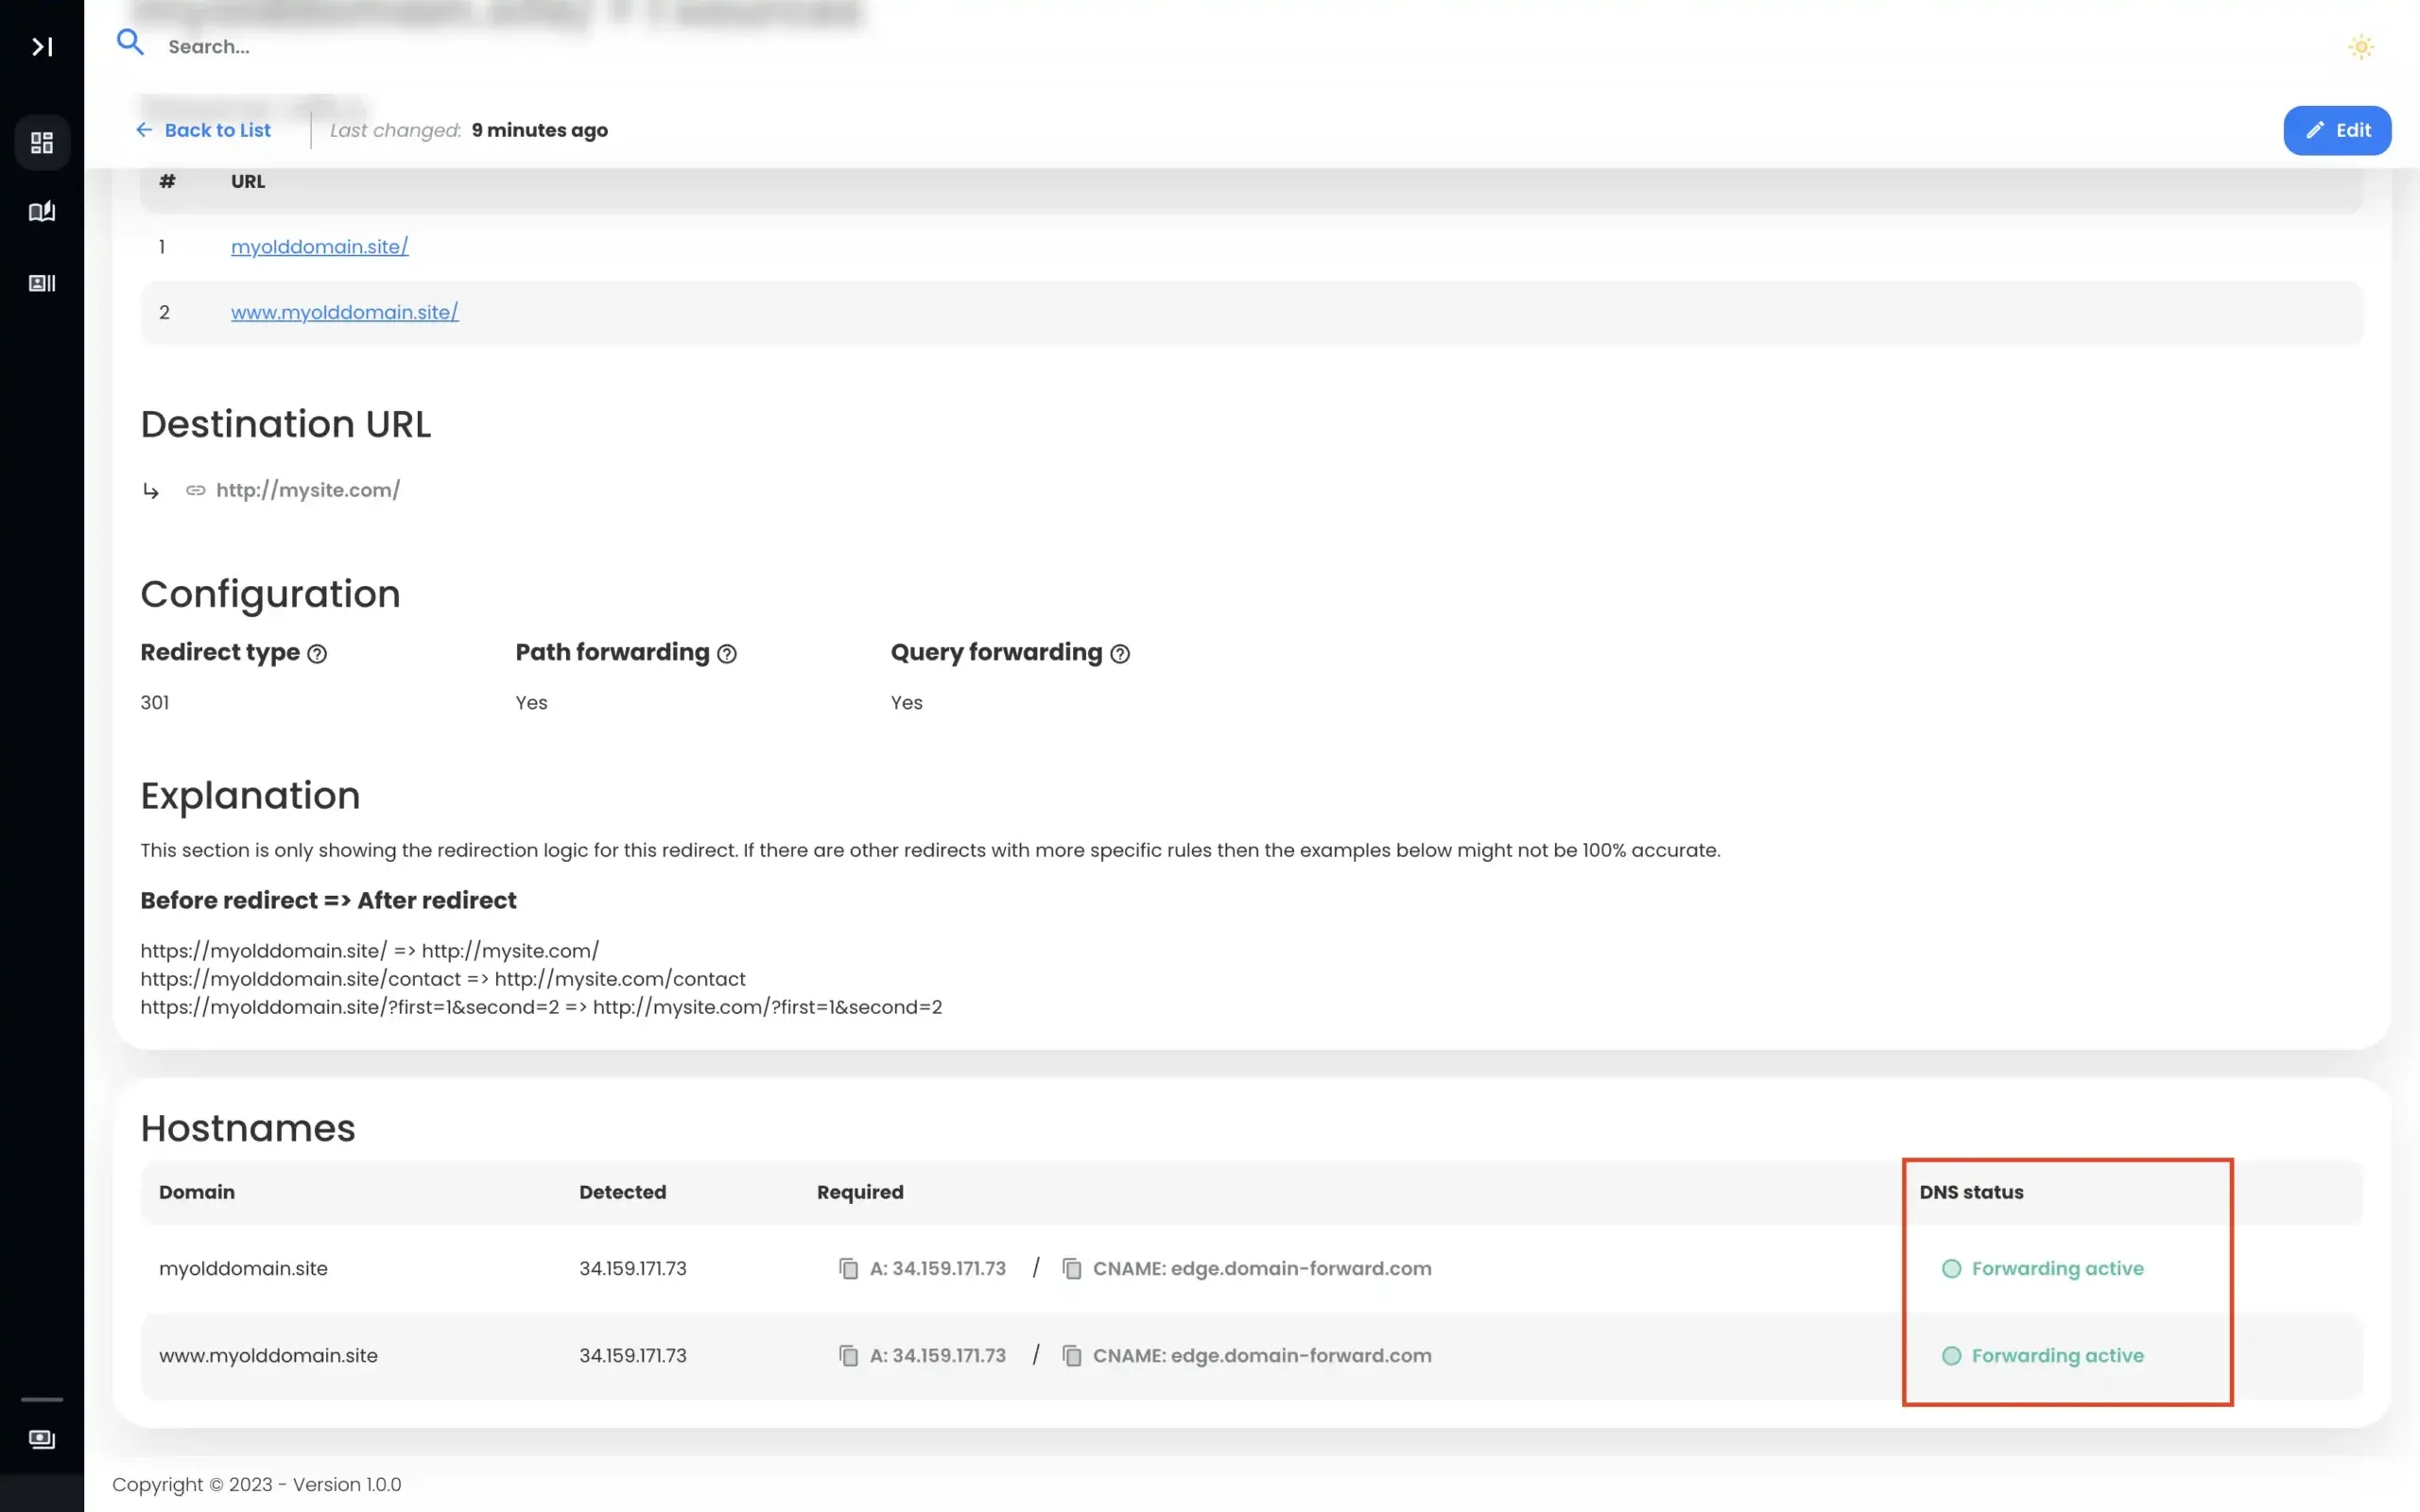
Step 5: Verify DNS changes at Domain-Forward.com
Once your changes have been effected on Bluehost, head over to Domain-Forward.com to see if the DNS changes reflect there as well.
Here is what ours looks like, showing that our DNS change at Bluehost was successful.
Note: The DNS change isn’t always instant. It can take an hour or even up to 48h for the changes to go live. So have some patience.
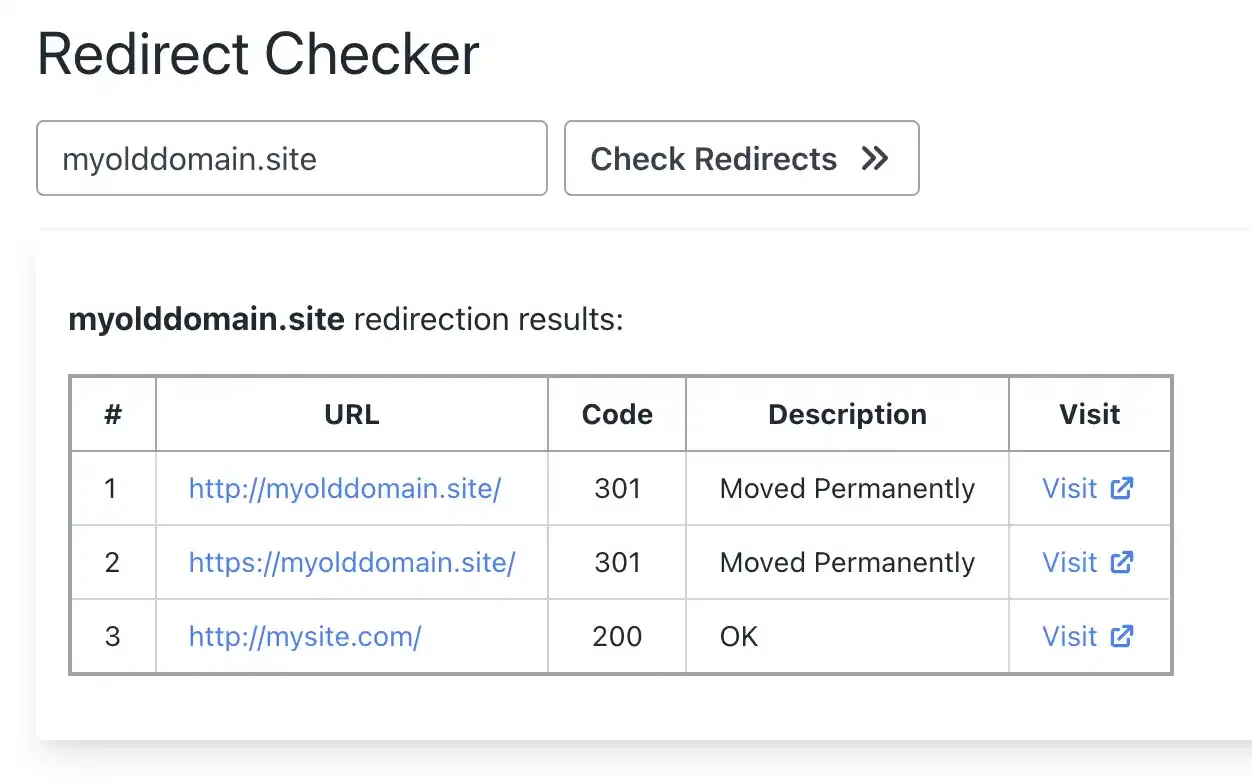
Step 6: Verify Redirect Using Online Tools
Now that we have set up the domain forwarding and the DNS entries, it’s time to check if the redirection is working correctly. Below is an image from an online “redirect testing tool,” confirming our redirection is functioning correctly.
Bluehost (No Forwarding) vs Domain-Forward.com
| Feature | Bluehost | Domain-Forward.com |
|---|---|---|
| Built-in forwarding | No | Yes |
| HTTPS support | N/A | Yes (automatic SSL) |
| 301 redirects | N/A (requires hosting) | Yes |
| Analytics | No | Yes (clicks, geography, devices) |
| www + non-www | Manual DNS only | Handled together |
| Hosting required | Yes (for server redirects) | No |
| Price | Hosting plan needed | Free plan (5 domains) |
Not sure what type of redirect you need? Check our guide to URL forwarding and redirect types. You can also verify your setup works with our redirect tester tool.
If you’re coming from another registrar, we have similar guides for GoDaddy, Namecheap, Hostinger, Porkbun, Name.com, and Squarespace.
Stop Losing Traffic From Your Bluehost Domain
Without a redirect, every visitor to your Bluehost domain hits a dead end. Every backlink loses its value. Every bookmark fails.
Since Bluehost doesn’t offer forwarding, Domain-Forward.com is the fastest path to a working redirect: free HTTPS, proper 301 redirects, and analytics. Update two DNS records at Bluehost and your traffic starts flowing to the right place. Your email keeps working — only A/CNAME records change, not MX records.