TL;DR: GoDaddy domain forwarding doesn’t support HTTPS — visitors see “Not Secure” warnings, your SEO takes a hit, and people leave before the redirect even fires. The fix: point your DNS at Domain-Forward.com (free plan available), which automatically provisions SSL certificates and redirects traffic over HTTPS with proper 301 redirects. Setup takes 5 minutes.
You set up domain forwarding on GoDaddy. It looks like it’s working. Then you check the URL with https:// and… nothing. Your visitors see a browser warning. Google flags your redirect as insecure. Your old domain’s SEO value is leaking instead of flowing to your new site.
This is the single biggest problem with GoDaddy domain forwarding: it does not support HTTPS. And in a world where browsers mark every HTTP site as “Not Secure,” that’s a dealbreaker.
If you’re here because your GoDaddy forwarding isn’t working over HTTPS, or because visitors are complaining about security warnings, you’re in the right place. We’ll show you exactly what’s broken, why, and how to fix it in under 10 minutes.
Why GoDaddy Domain Forwarding Breaks HTTPS
GoDaddy’s forwarding feature works by creating a server-side redirect from your domain to a destination URL. The problem: GoDaddy doesn’t provision an SSL certificate for forwarded domains.
Here’s what happens when someone visits https://your-forwarded-domain.com:
- The browser tries to establish a secure HTTPS connection
- GoDaddy has no SSL certificate for that domain
- The browser shows a “Not Secure” or “Your connection is not private” warning
- Most visitors hit “Back” — they never reach your destination site
This means that every visitor who types your domain with https:// (or whose browser auto-upgrades to HTTPS) will bounce. That’s increasingly everyone, since Chrome, Safari, and Firefox now prefer HTTPS by default.
The SEO damage is real
Beyond lost visitors, there’s an SEO problem. Google treats HTTPS as a ranking signal. If your redirect only works over HTTP, search engines may:
- Flag the redirect chain as insecure
- Not pass full link equity from the old domain to the new one
- Index the “Not Secure” version, damaging trust signals
How to Set Up GoDaddy Domain Forwarding (HTTP Only)
If you only need HTTP forwarding (not recommended, but here’s how), GoDaddy’s built-in tool works like this:
Step 1: Sign in to GoDaddy
Go to your GoDaddy Domain Portfolio and log in.
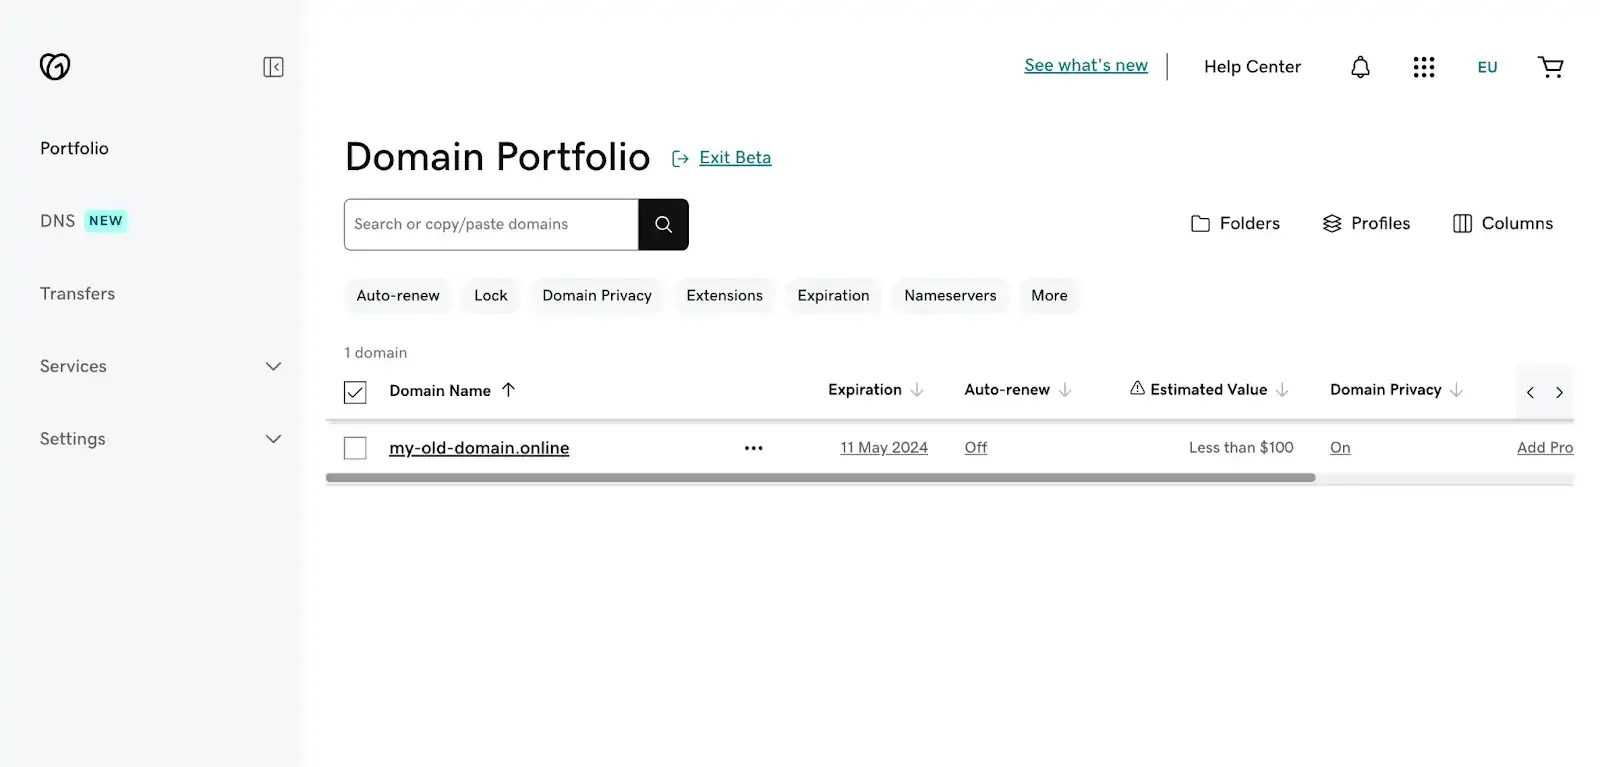
Step 2: Select your domain
Check the box next to the domain you want to forward.
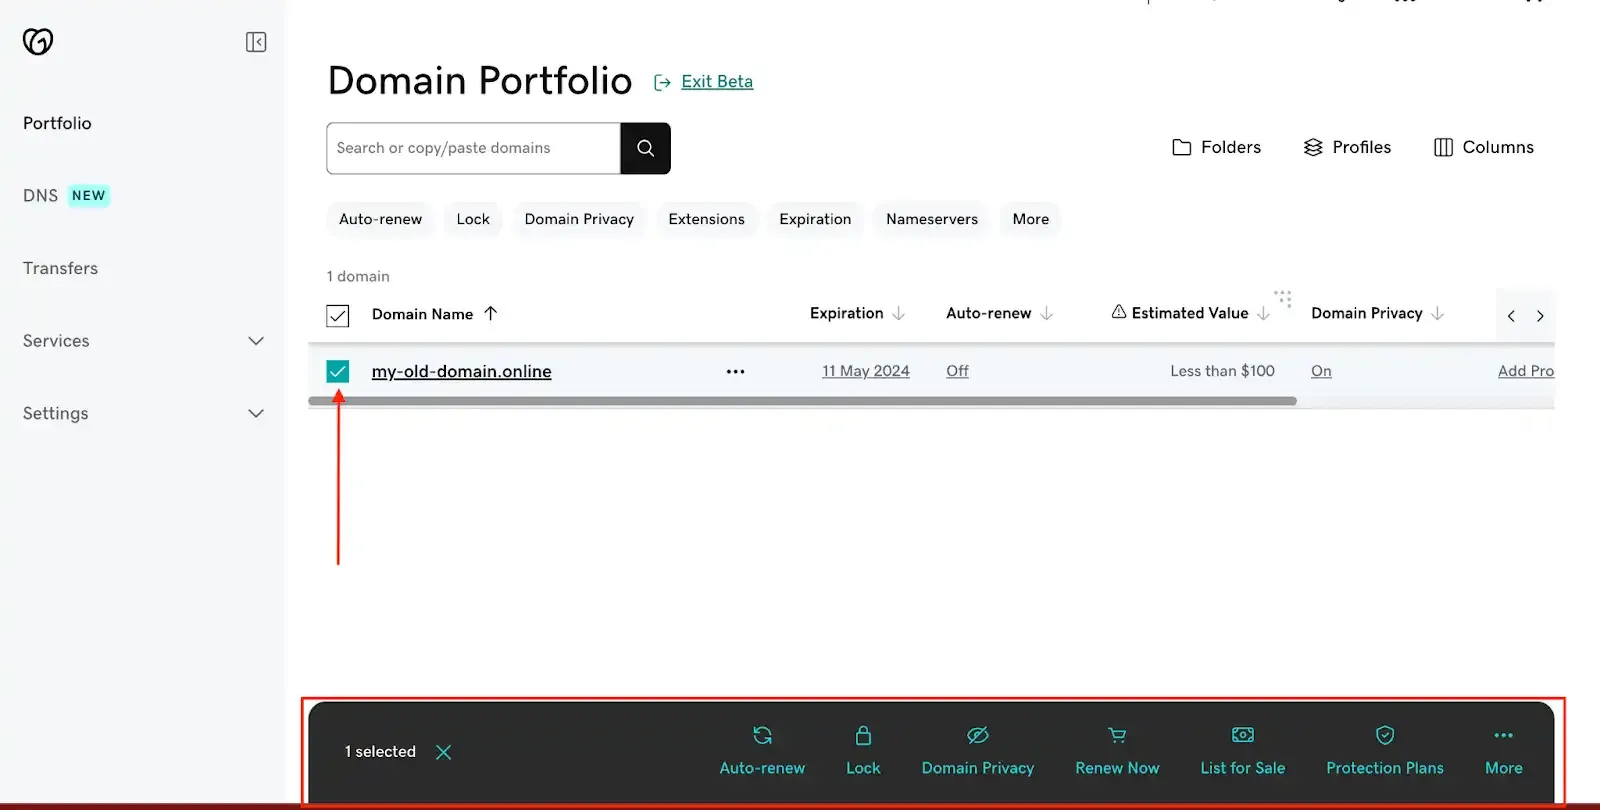
Step 3: Open the forwarding menu
Click “More” and select “Forward” from the action menu.

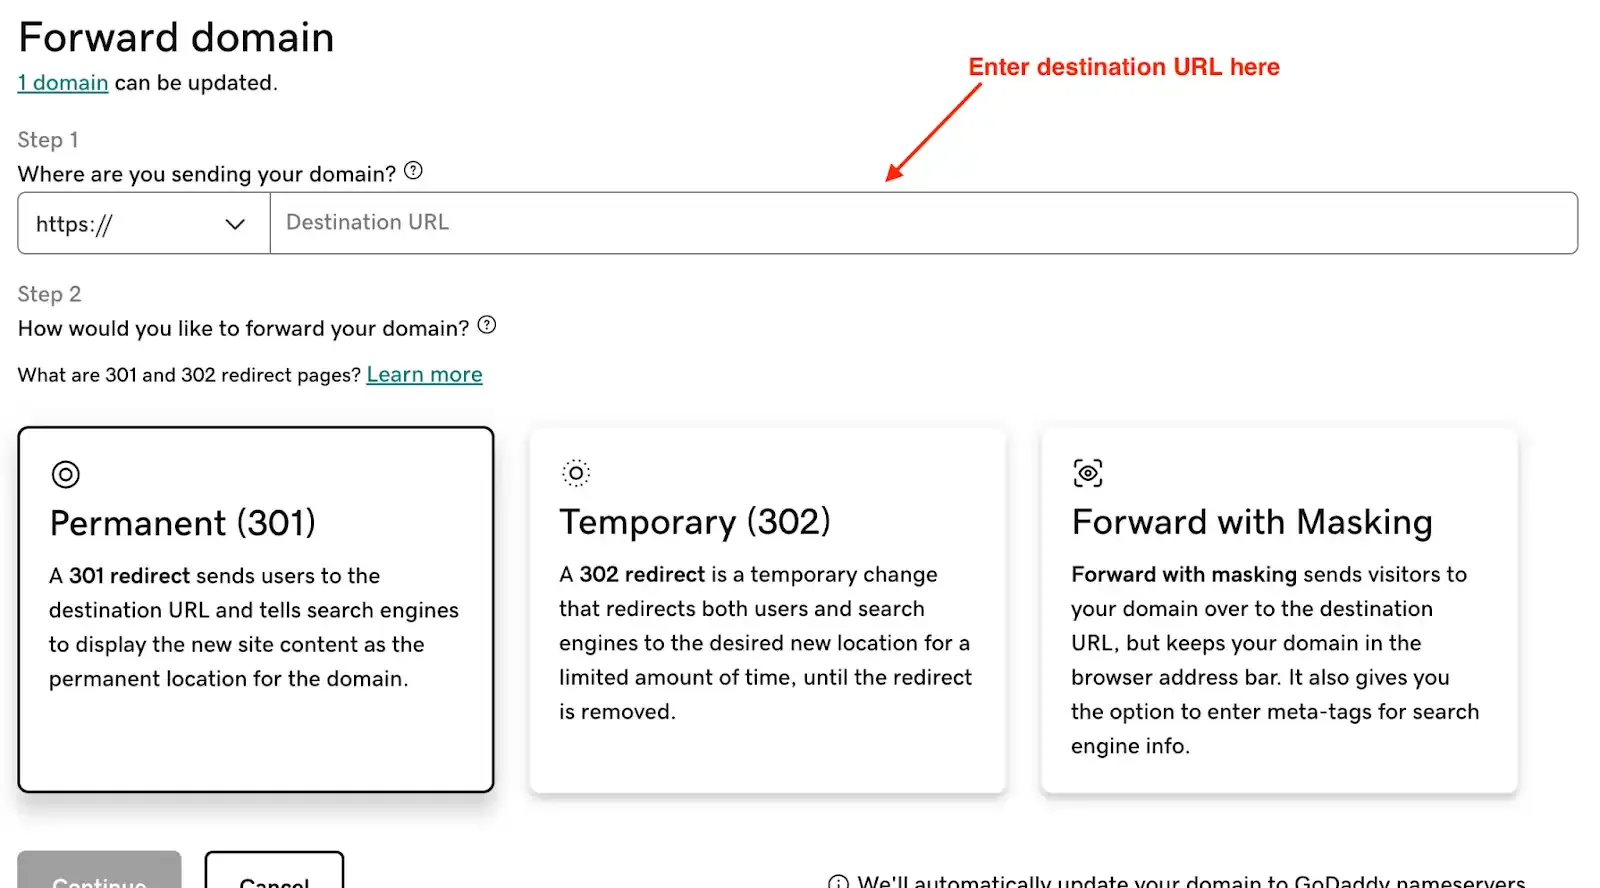
You’ll see the forwarding configuration page:

Step 4: Choose your protocol
Select http:// or https:// for the destination URL only. This does NOT enable HTTPS on your source domain.
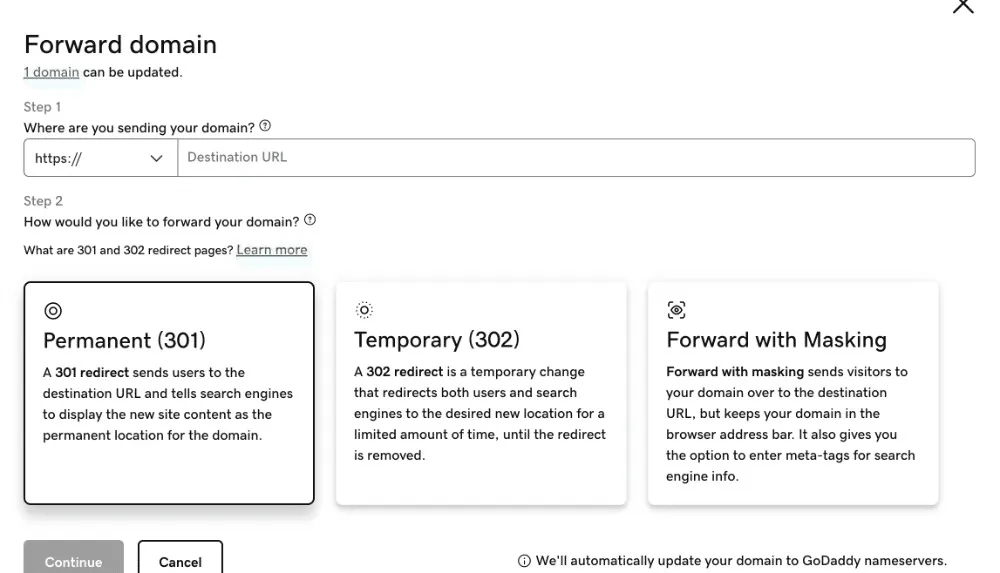
Important: The protocol you choose here only affects the destination URL. Your source domain will NOT have SSL enabled — if visitors access it via HTTPS, they’ll see security warnings.
Step 5: Enter your destination URL
Type the URL where visitors should be redirected.
GoDaddy URL rules:
- First and last character must be a number or letter
- No special characters like periods in sequence
- Maximum 1,000 characters
- No underscores
Step 6: Choose your redirect type
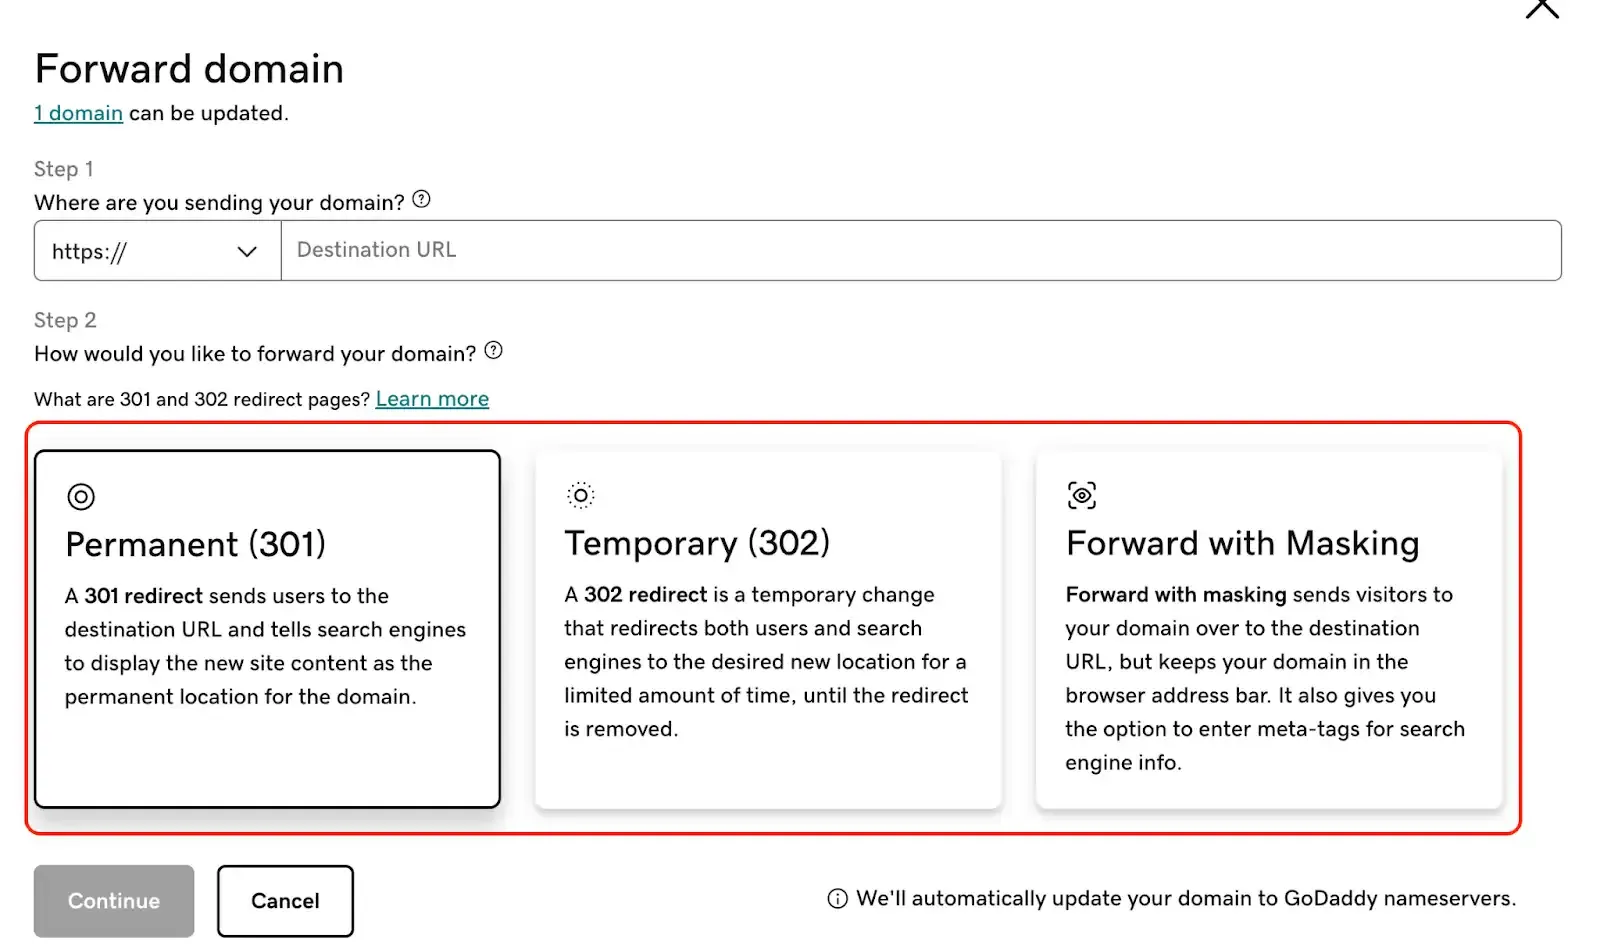
- Permanent (301/): Transfers SEO value to the destination URL. Use this for permanent domain moves.
- Temporary (302/): Doesn’t transfer SEO value. Use only for truly temporary redirects.
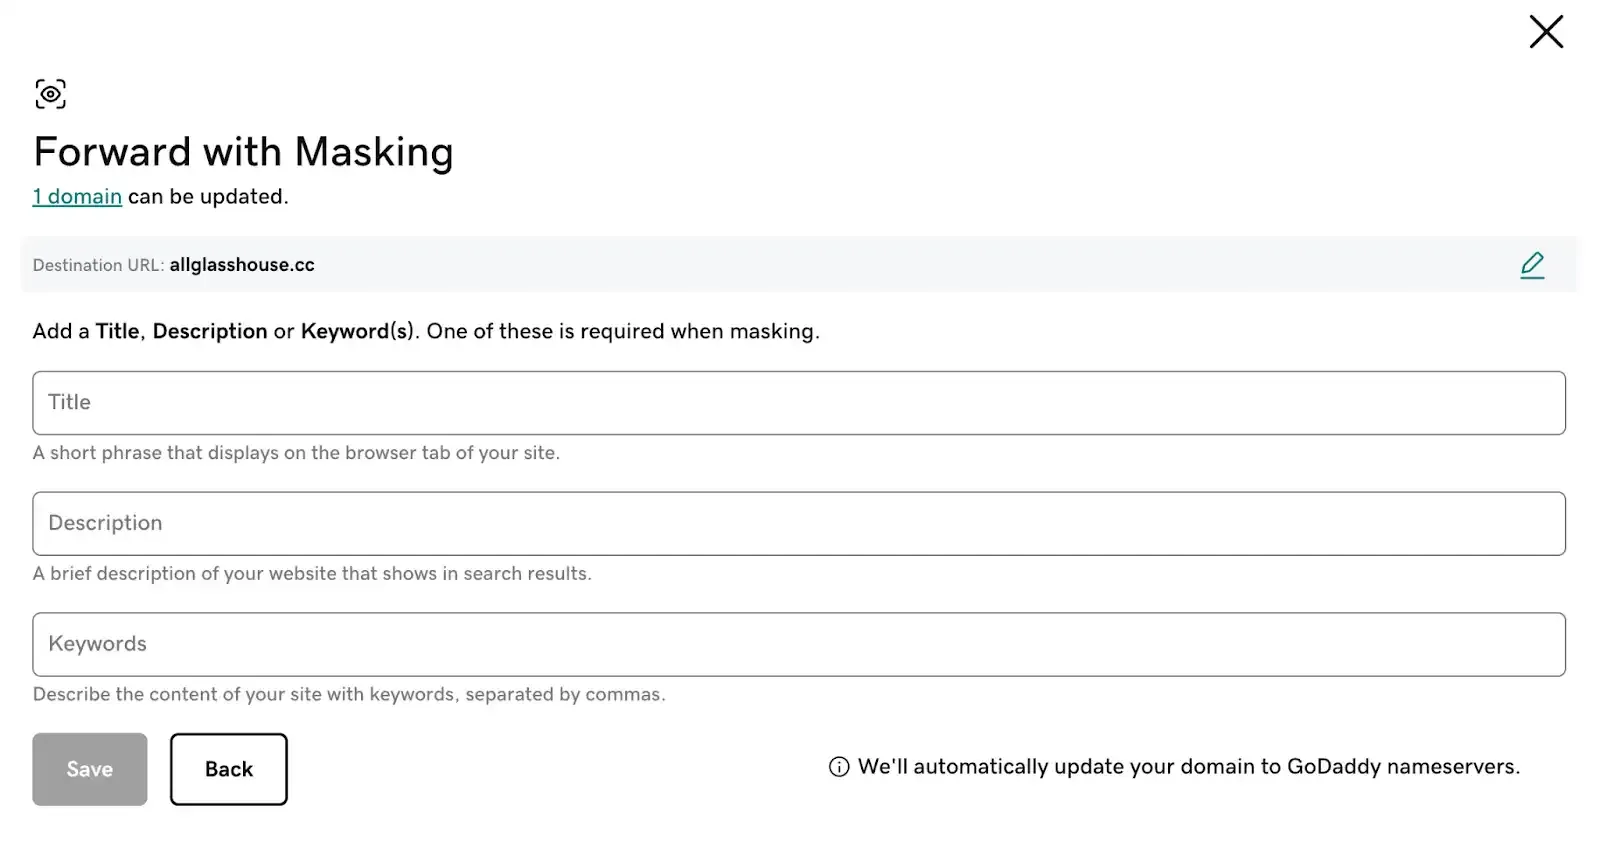
- Forward with masking: Shows your original domain in the address bar using an iframe. Not recommended for SEO — search engines can penalize masked redirects.
If you pick masking, you’ll need to provide a Title, Description, and Keywords:
After saving, DNS propagation takes anywhere from a few hours to 48 hours.
The Problem: This Only Works Over HTTP
The setup above creates a redirect that works when someone visits http://your-domain.com. But if they visit https://your-domain.com — which is what most browsers now default to — they’ll see an error.
You cannot fix this within GoDaddy. They don’t offer SSL certificates for simply forwarded domains. This is a fundamental limitation of their forwarding service.
The Fix: Domain-Forward.com — HTTPS Forwarding That Actually Works
Domain-Forward.com was built specifically to solve this problem. When you set up a redirect through Domain-Forward.com:
- Automatic SSL certificates are provisioned and auto-renewed for your domain
- HTTPS forwarding works out of the box — no configuration needed
- 301 permanent redirects properly transfer SEO value
- Analytics show you exactly how many visitors are being redirected
- Both www and non-www are handled
- Setup takes 5 minutes — and there’s a free plan
Here’s how to set it up:
Step 1: Create your free account
Sign up at Domain-Forward.com — no credit card required.
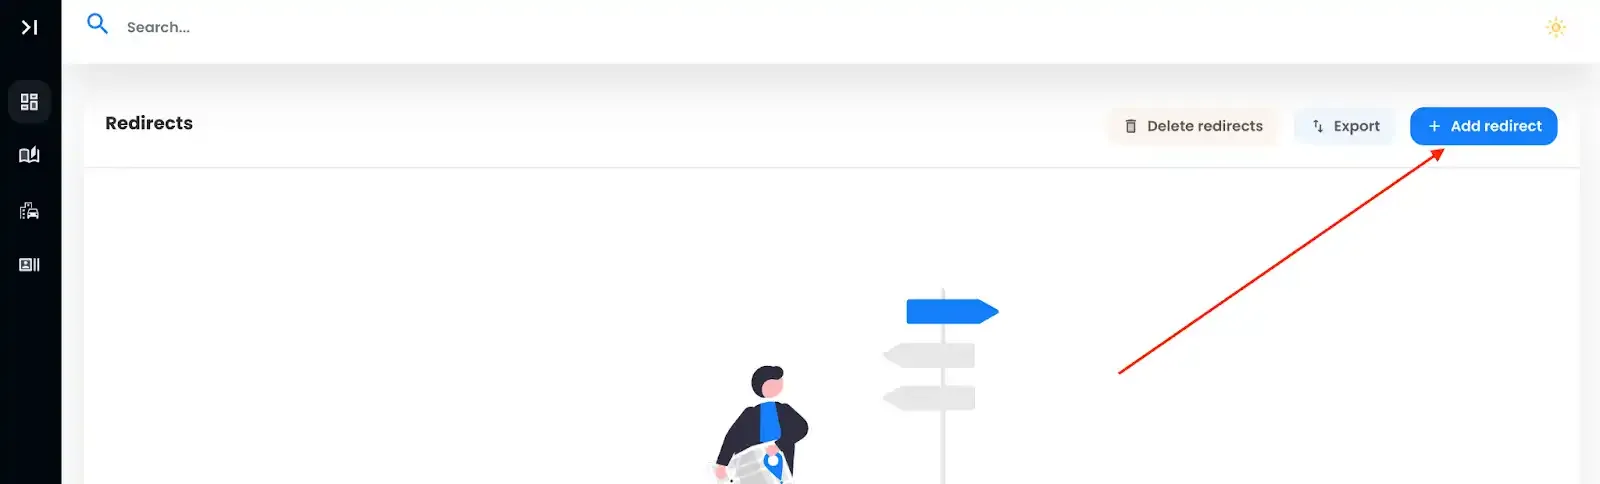
Step 2: Add your redirect
Click “Add Redirect” and enter your source domain and destination URL. Add both www and the root domain for complete coverage.
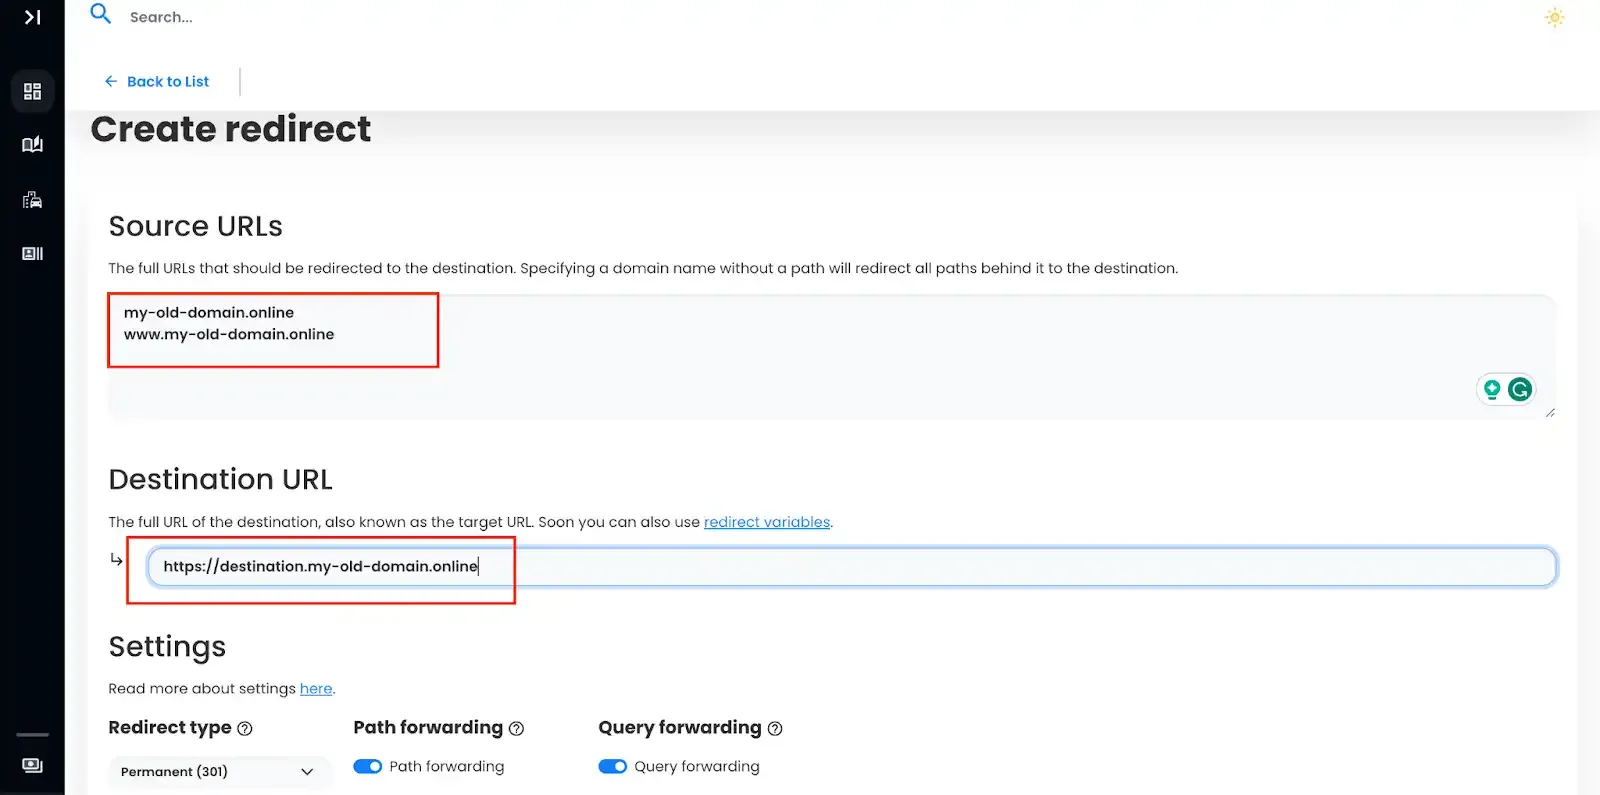
After creating the redirect, you’ll see the DNS status as “checking” — we need to update your GoDaddy DNS settings.

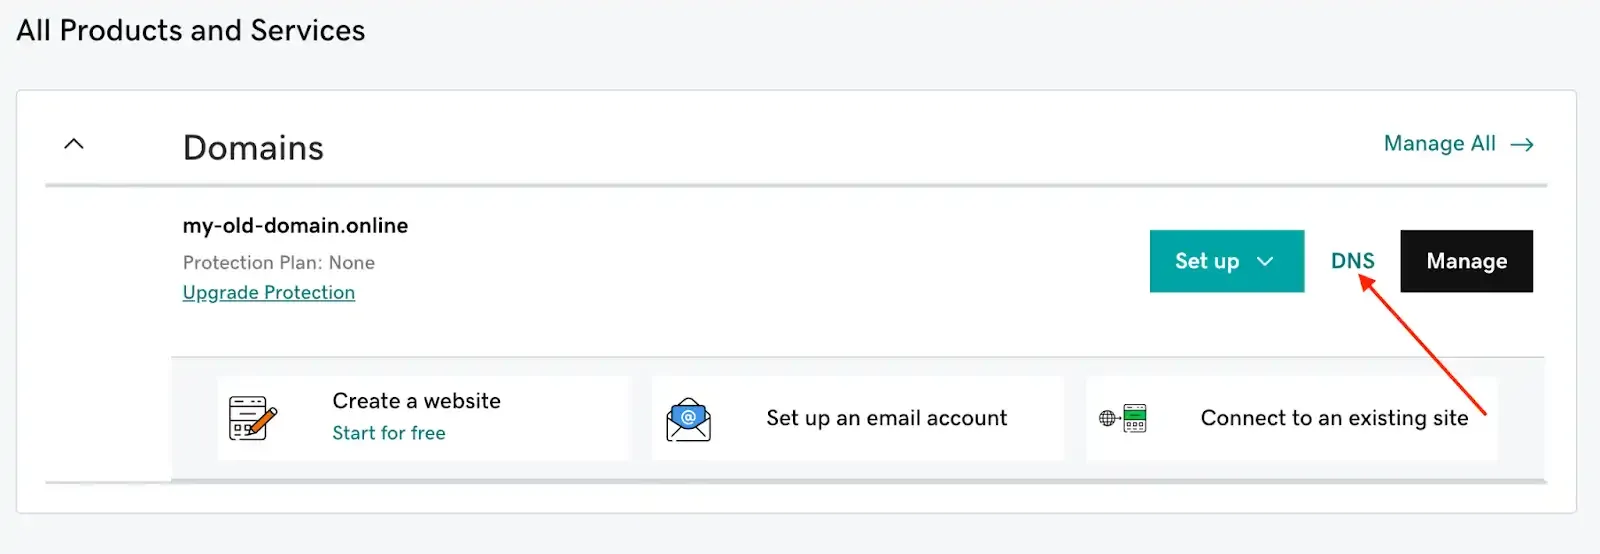
Step 3: Update DNS at GoDaddy
Log into GoDaddy, find your domain, and go to DNS settings.
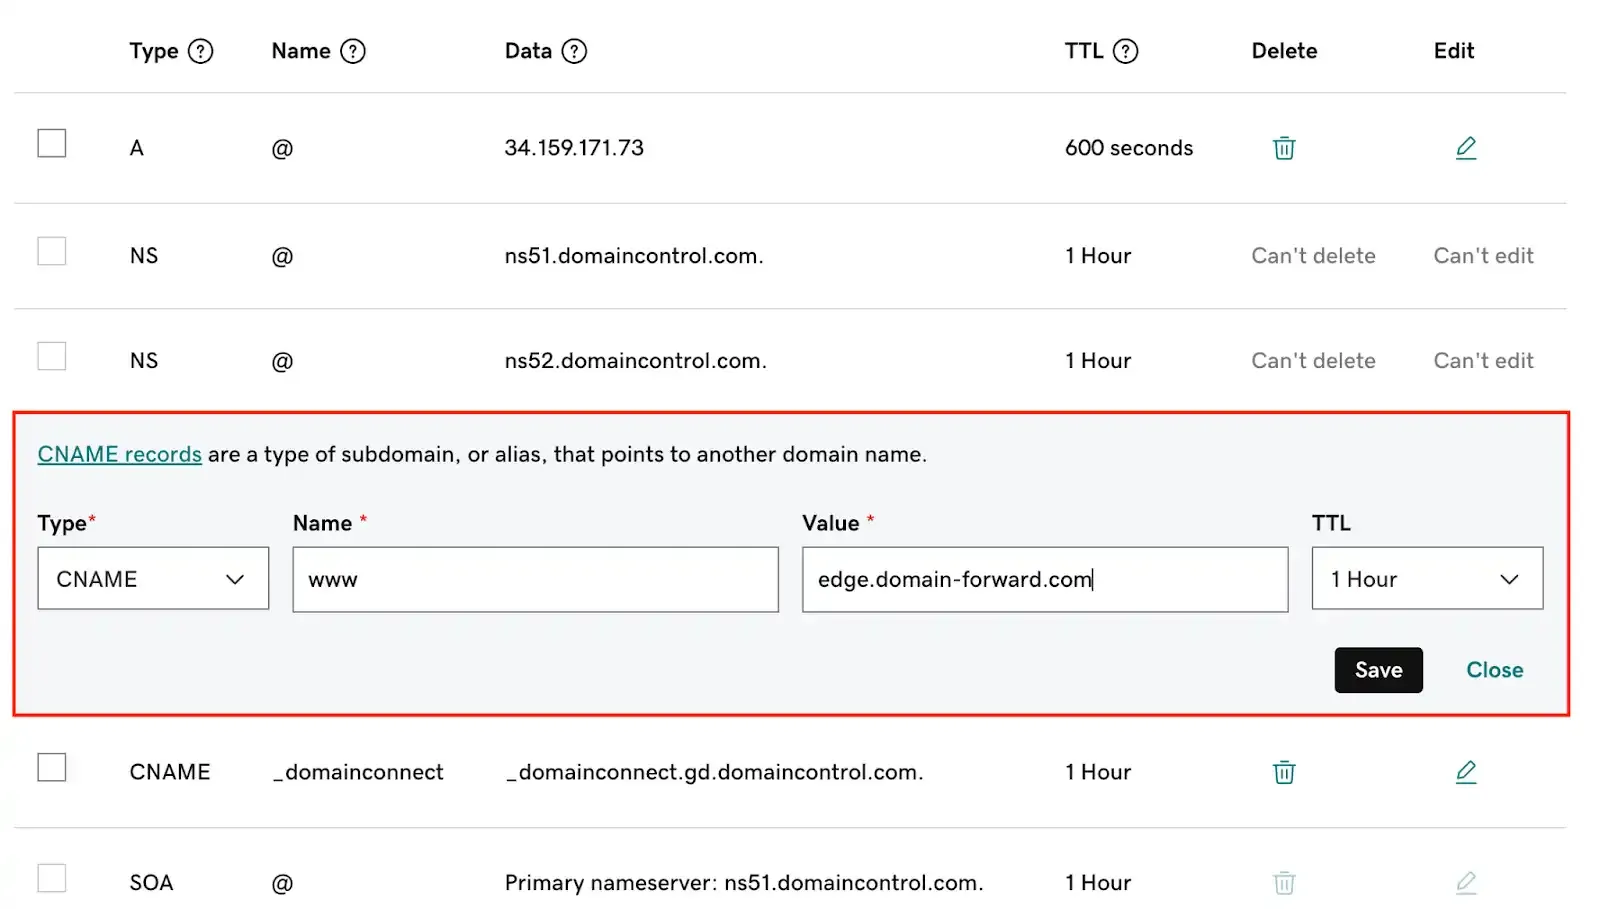
Step 4: Change your DNS records
Edit the A record — change the value to 138.68.125.144:
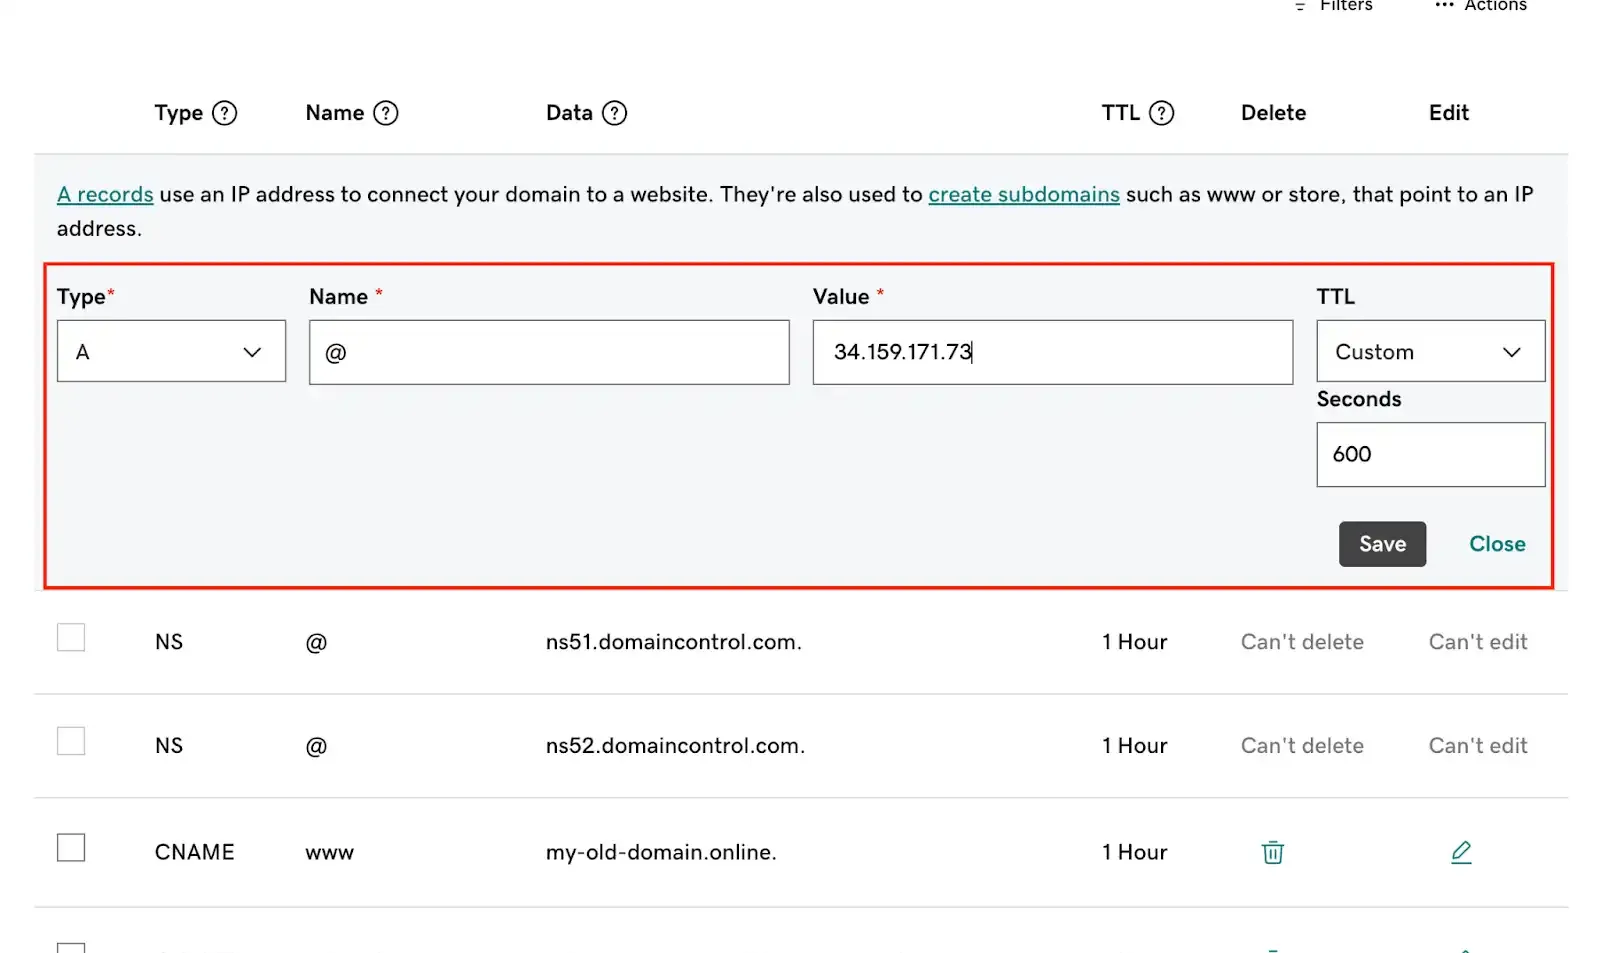
Edit the www CNAME record — change the value to edge.domain-forward.com:
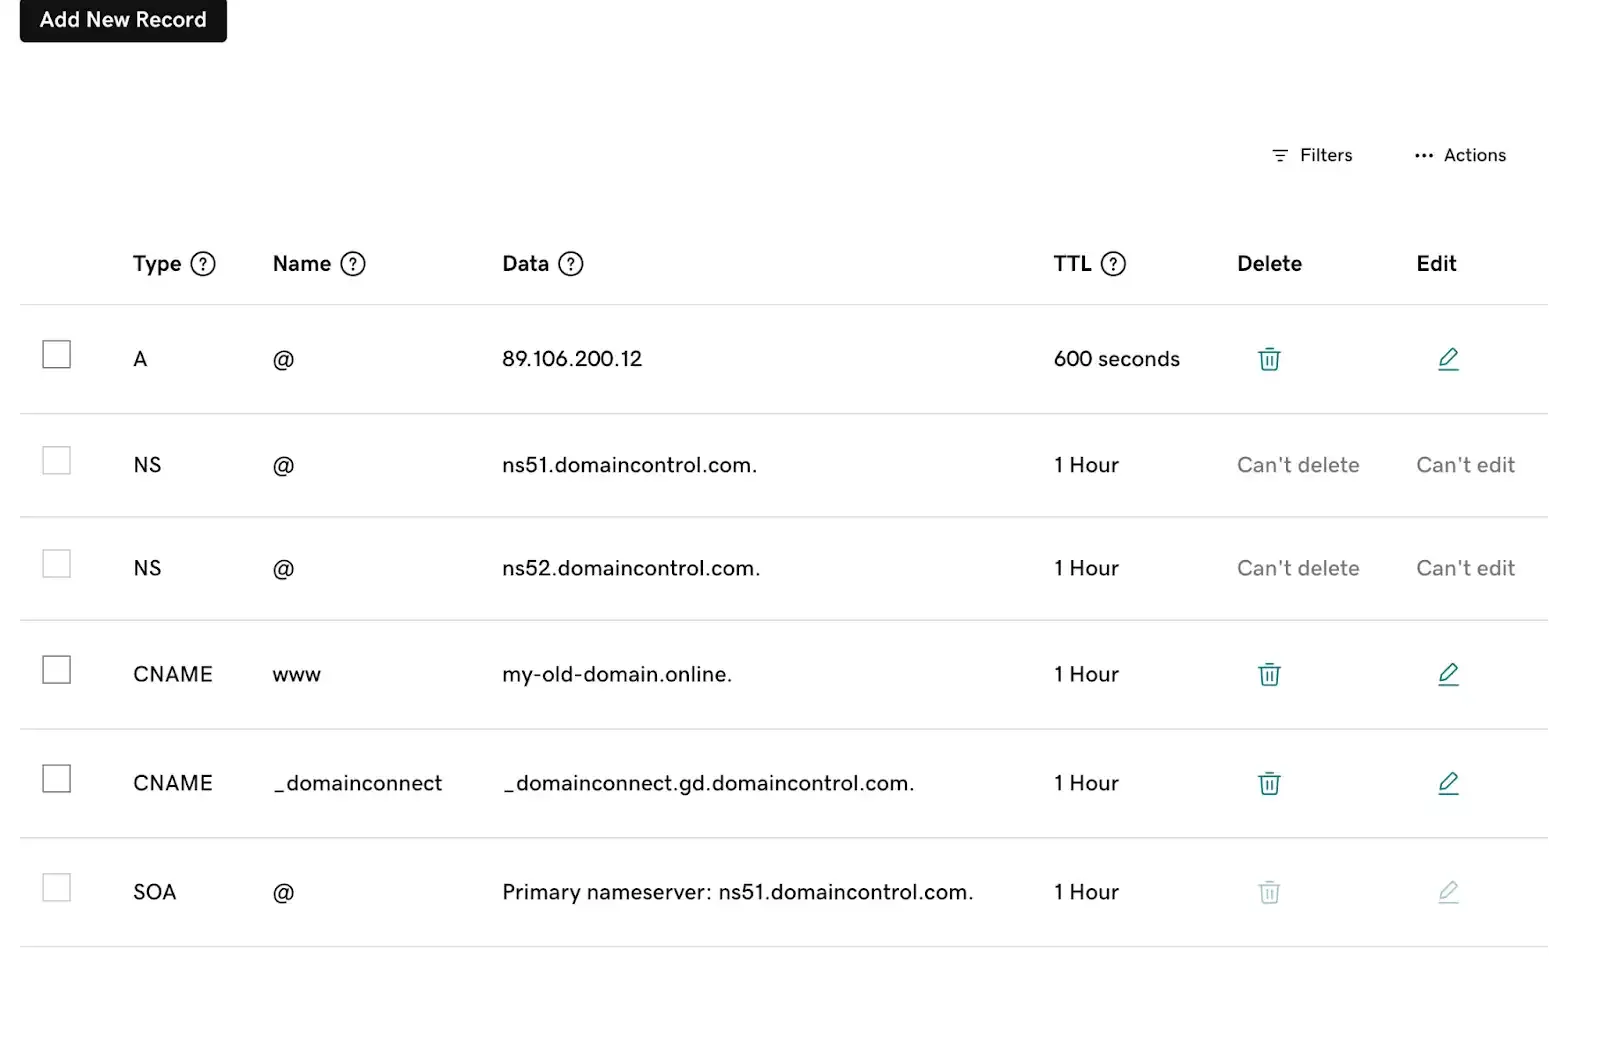
Your DNS records should now look like this:
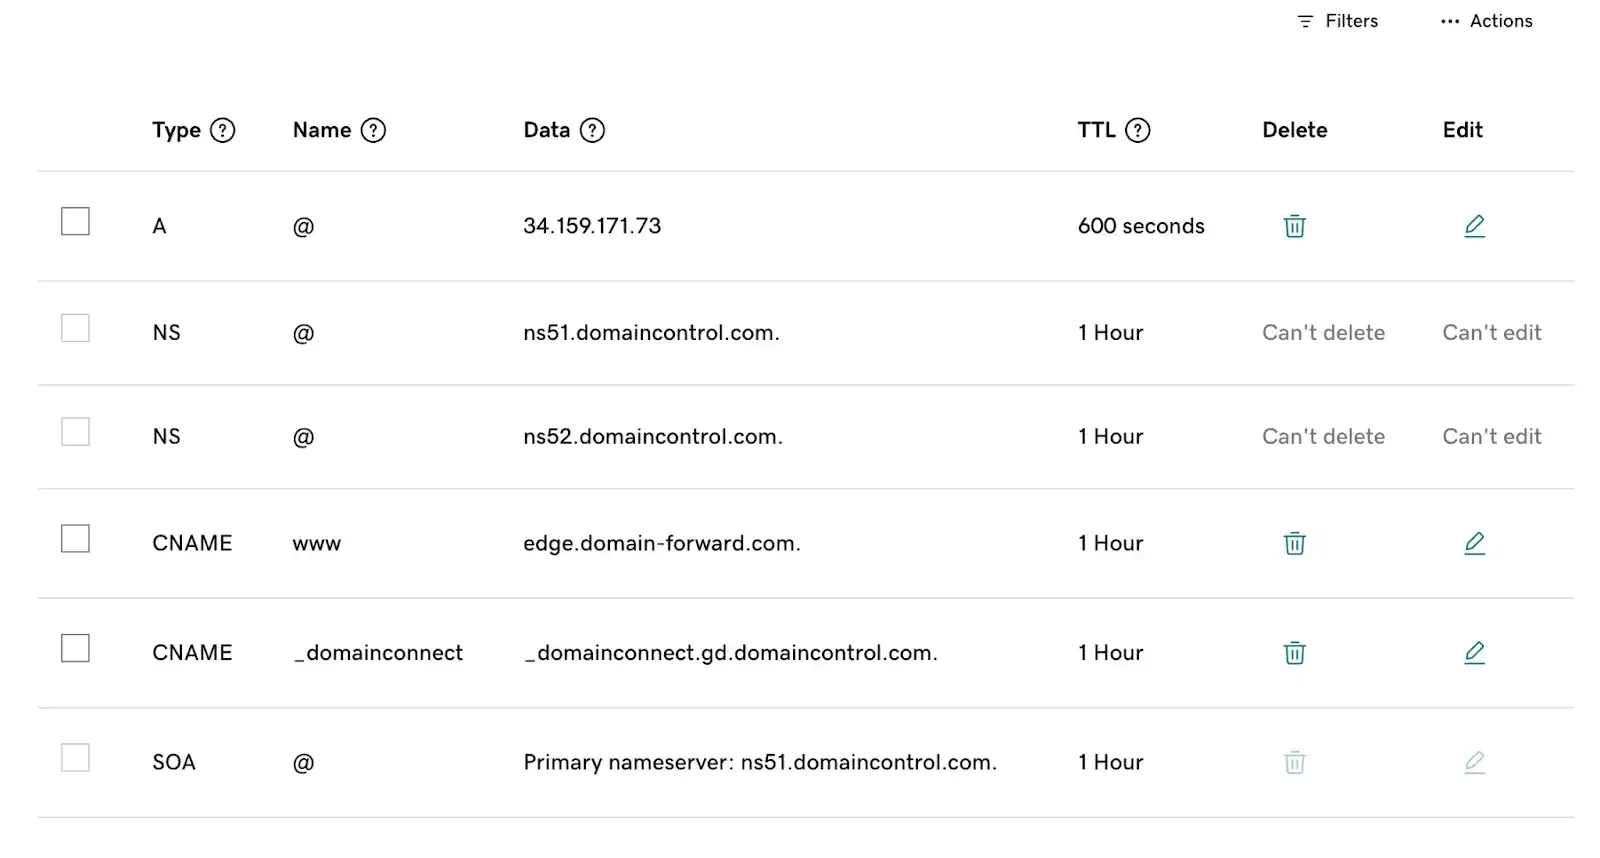
Your email will keep working. These changes only affect A and CNAME records. MX records (email) stay untouched.
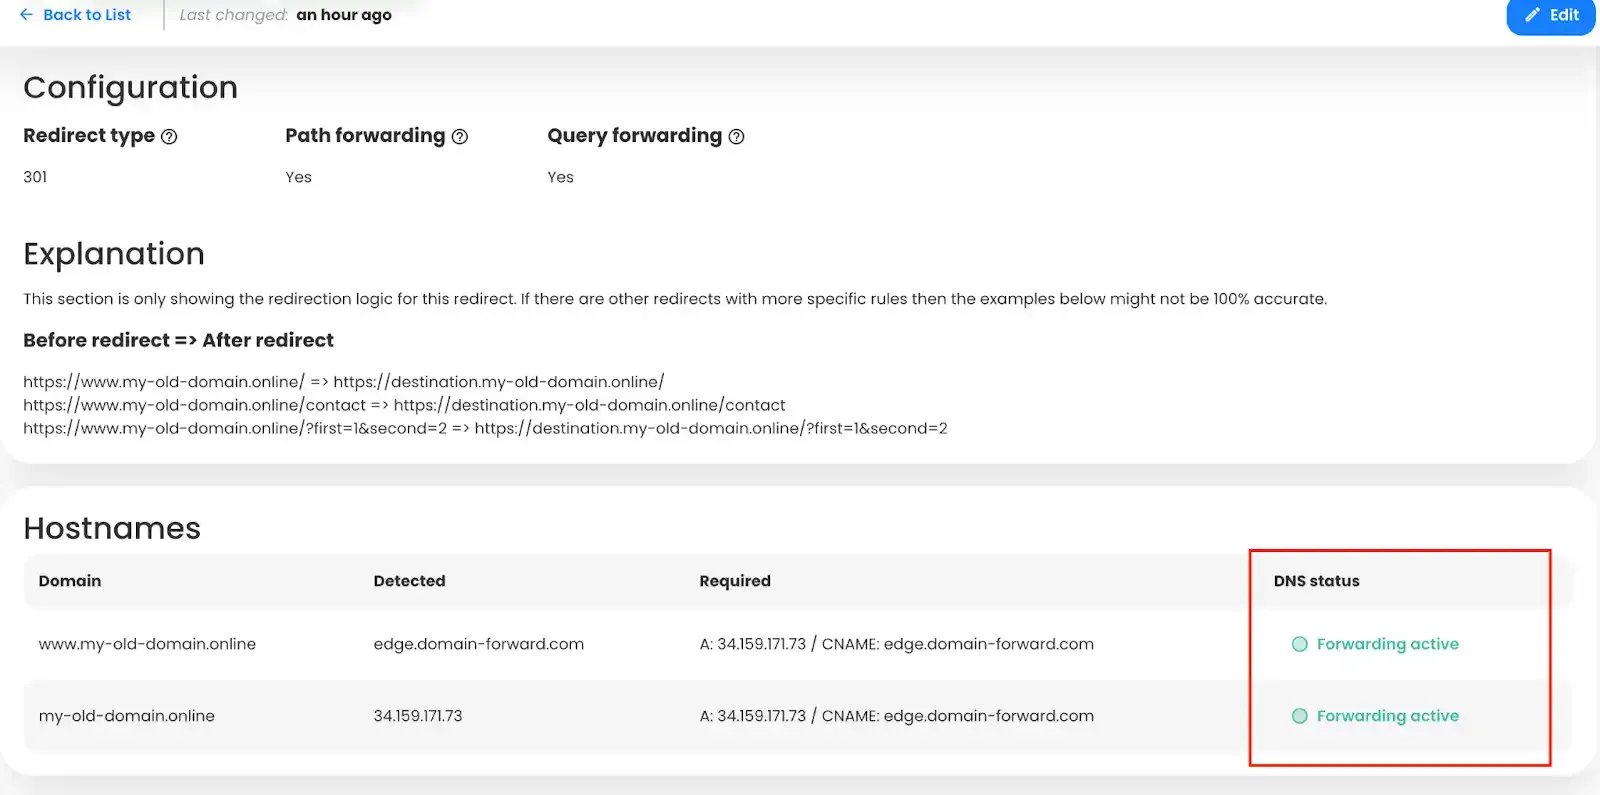
Step 5: Verify at Domain-Forward.com
Head back to Domain-Forward.com. Once DNS propagates (usually 1-4 hours, sometimes up to 48), you’ll see the status update to active:
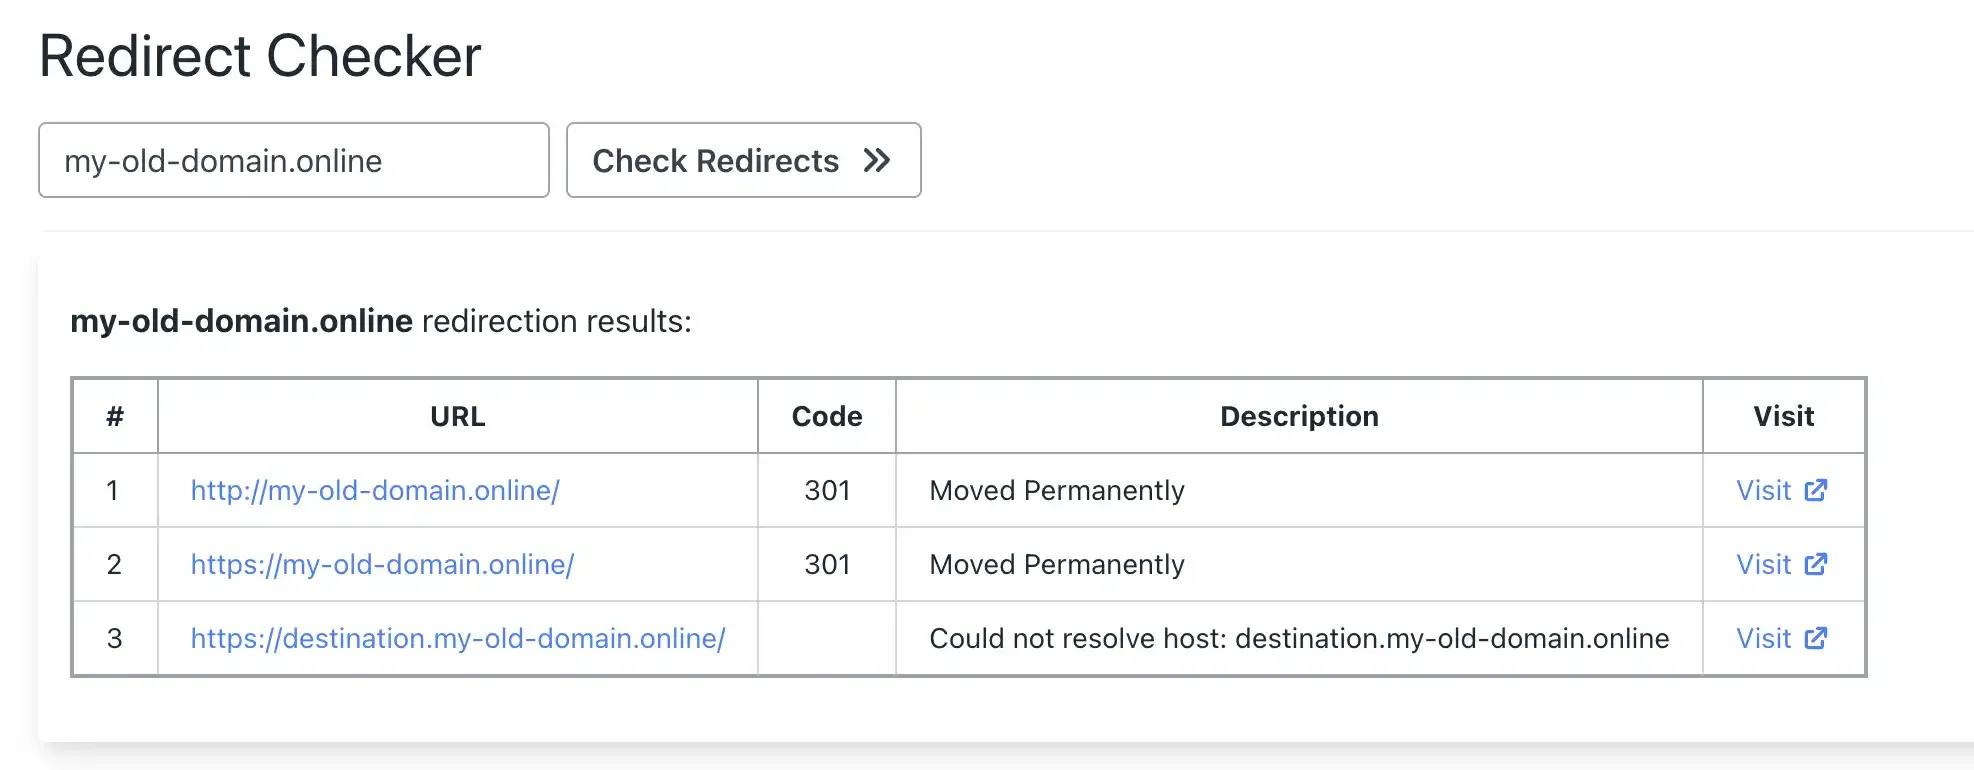
Step 6: Test your redirect
Use a redirect testing tool to confirm everything works — over both HTTP and HTTPS:
GoDaddy Forwarding vs Domain-Forward.com
| Feature | GoDaddy Forwarding | Domain-Forward.com |
|---|---|---|
| HTTPS support | No | Yes (automatic SSL) |
| SSL certificate | Not available | Auto-provisioned & renewed |
| 301 redirects | Yes | Yes |
| Analytics | No | Yes (clicks, geography, devices) |
| www + non-www | Manual setup | Handled together |
| API access | No | Yes (REST API) |
| Price | Included with domain | Free plan (5 domains) |
Not sure what type of redirect you need? Check our guide to URL forwarding and redirect types. You can also verify your setup works with our redirect tester tool.
If you’re using a different registrar, we have similar guides for Namecheap, Hostinger, IONOS, Porkbun, Name.com, and Squarespace. You can also see how GoDaddy stacks up in our GoDaddy vs Domain Forward comparison.
Stop Losing Visitors to Security Warnings
Every day your GoDaddy domain forwards over HTTP only, you’re losing visitors who see “Not Secure” warnings. You’re leaking SEO value. And you’re making your brand look unprofessional.
The fix takes 5 minutes: sign up for Domain-Forward.com, add your redirect, update two DNS records at GoDaddy, and you’re done. Automatic HTTPS, proper 301 redirects, and analytics to prove it’s working. Your email stays working — we only change A records, not MX records.