
TL;DR: IONOS domain redirects have two major problems: they use 302 (temporary) redirects that don’t transfer SEO value, and they don’t include SSL certificates for free (costs ~$10/year per domain). If you’re permanently moving a domain, you need 301 redirects with HTTPS. Domain-Forward.com provides both for free — proper 301 redirects with automatic SSL. Takes 5 minutes to set up.
You set up a domain redirect on IONOS. It seems to work. But then you check with a redirect tester and discover IONOS is using a 302 temporary redirect — not a 301 permanent one. Your SEO value isn’t transferring to your new domain. And if you need HTTPS, you’ll have to pay extra for an SSL certificate.
These aren’t minor issues. A 302 redirect tells search engines “this is temporary, keep indexing the old domain.” For a permanent domain move, that’s the opposite of what you want.
This guide explains IONOS’s redirect limitations, shows you how to set up their forwarding (if you still want to), and then provides a free alternative that actually gives you 301 redirects with HTTPS.
Why Domain Redirects Matter (And Why Getting Them Wrong Hurts)
Domain redirects send traffic from one URL to another. Simple concept, but the implementation details matter enormously:
- Wrong redirect type (302 vs 301/): A 302 tells Google “this move is temporary” — Google keeps indexing your old domain and doesn’t transfer ranking power. A 301 says “this is permanent” and transfers SEO value. IONOS uses 302 by default.
- No SSL on the redirect: If your redirect doesn’t have an SSL certificate, HTTPS visitors see security warnings. Most browsers now default to HTTPS, so this affects the majority of visitors.
- Redirect loops: Misconfigured redirects can create infinite loops (“maximum redirects exceeded”), making your domain completely inaccessible.
Common reasons you need a redirect
- Rebranding: Moving to a new domain name while keeping your old domain’s SEO juice
- Domain consolidation: Pointing .net, .org, .info variants to your main .com
- Campaign tracking: Using memorable vanity URLs for marketing
- Preventing dead links: Ensuring old bookmarks and backlinks still work
How to Set Up IONOS Domain Redirects (With Caveats)
Here’s IONOS’s built-in forwarding feature. Be aware of the limitations before you start: IONOS uses 302 redirects (not SEO-friendly 301s) and doesn’t include free SSL.
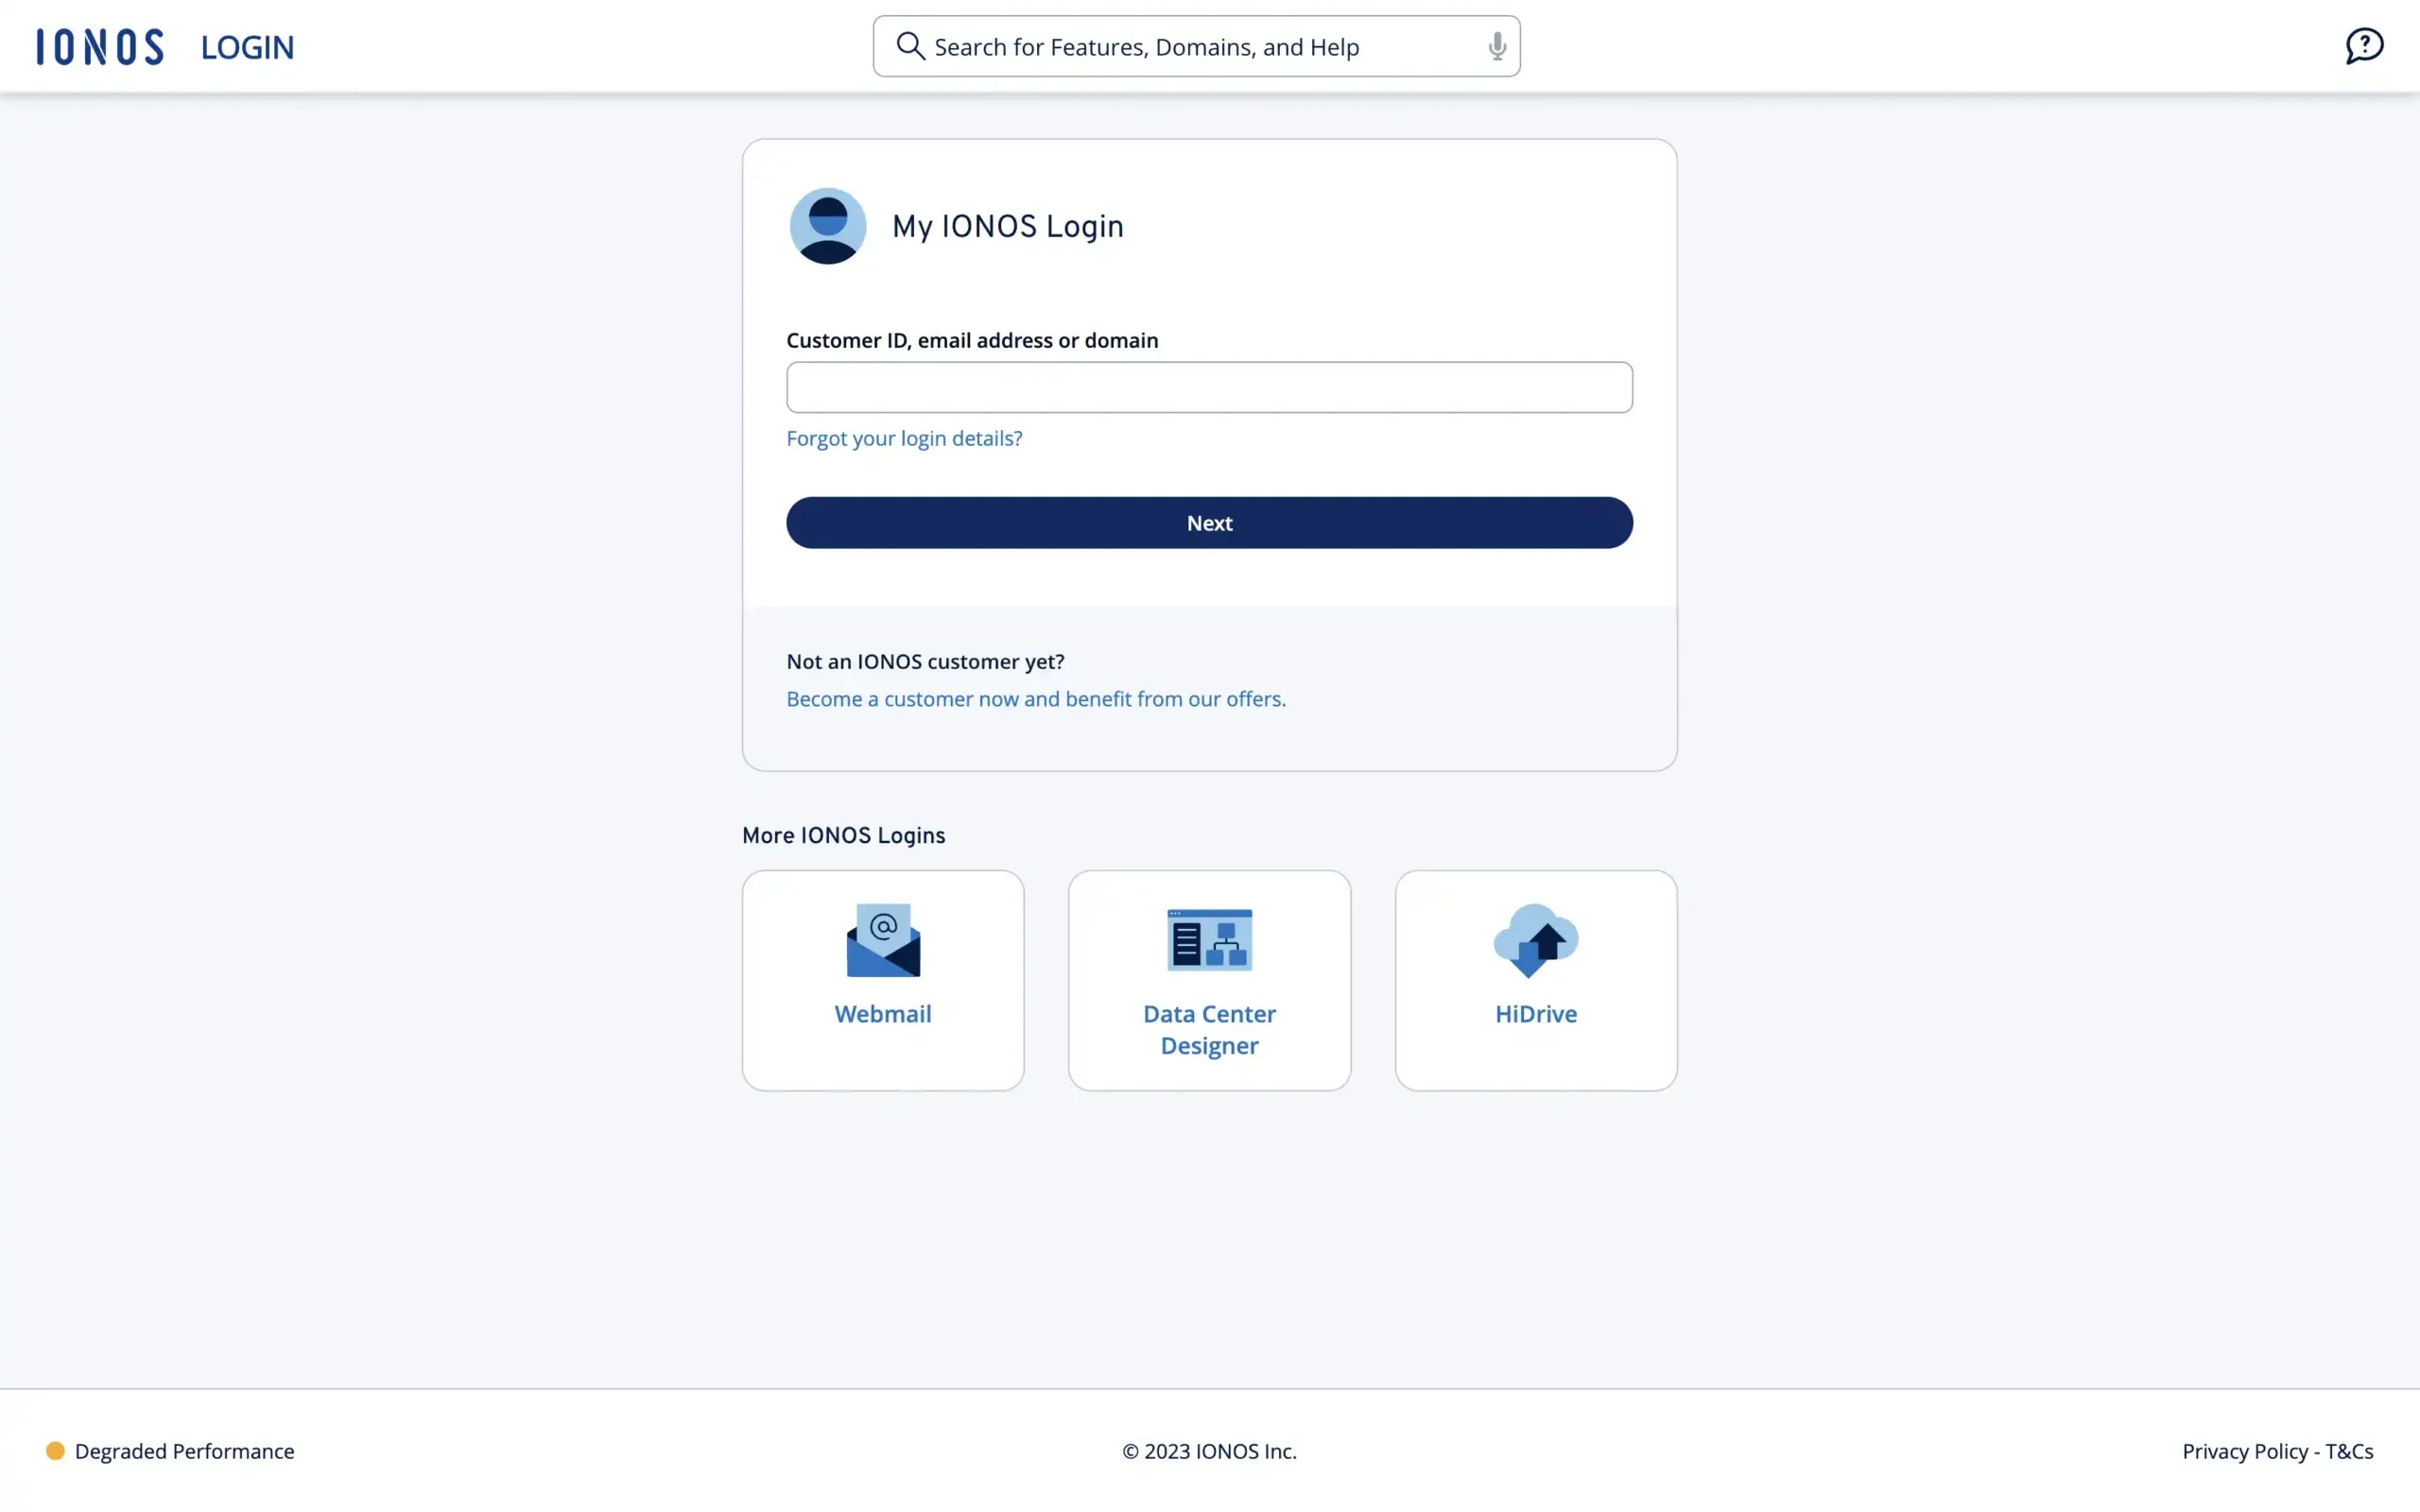
Step 1: Login to Your Account
Visit the IONOS website and sign in to your account dashboard.
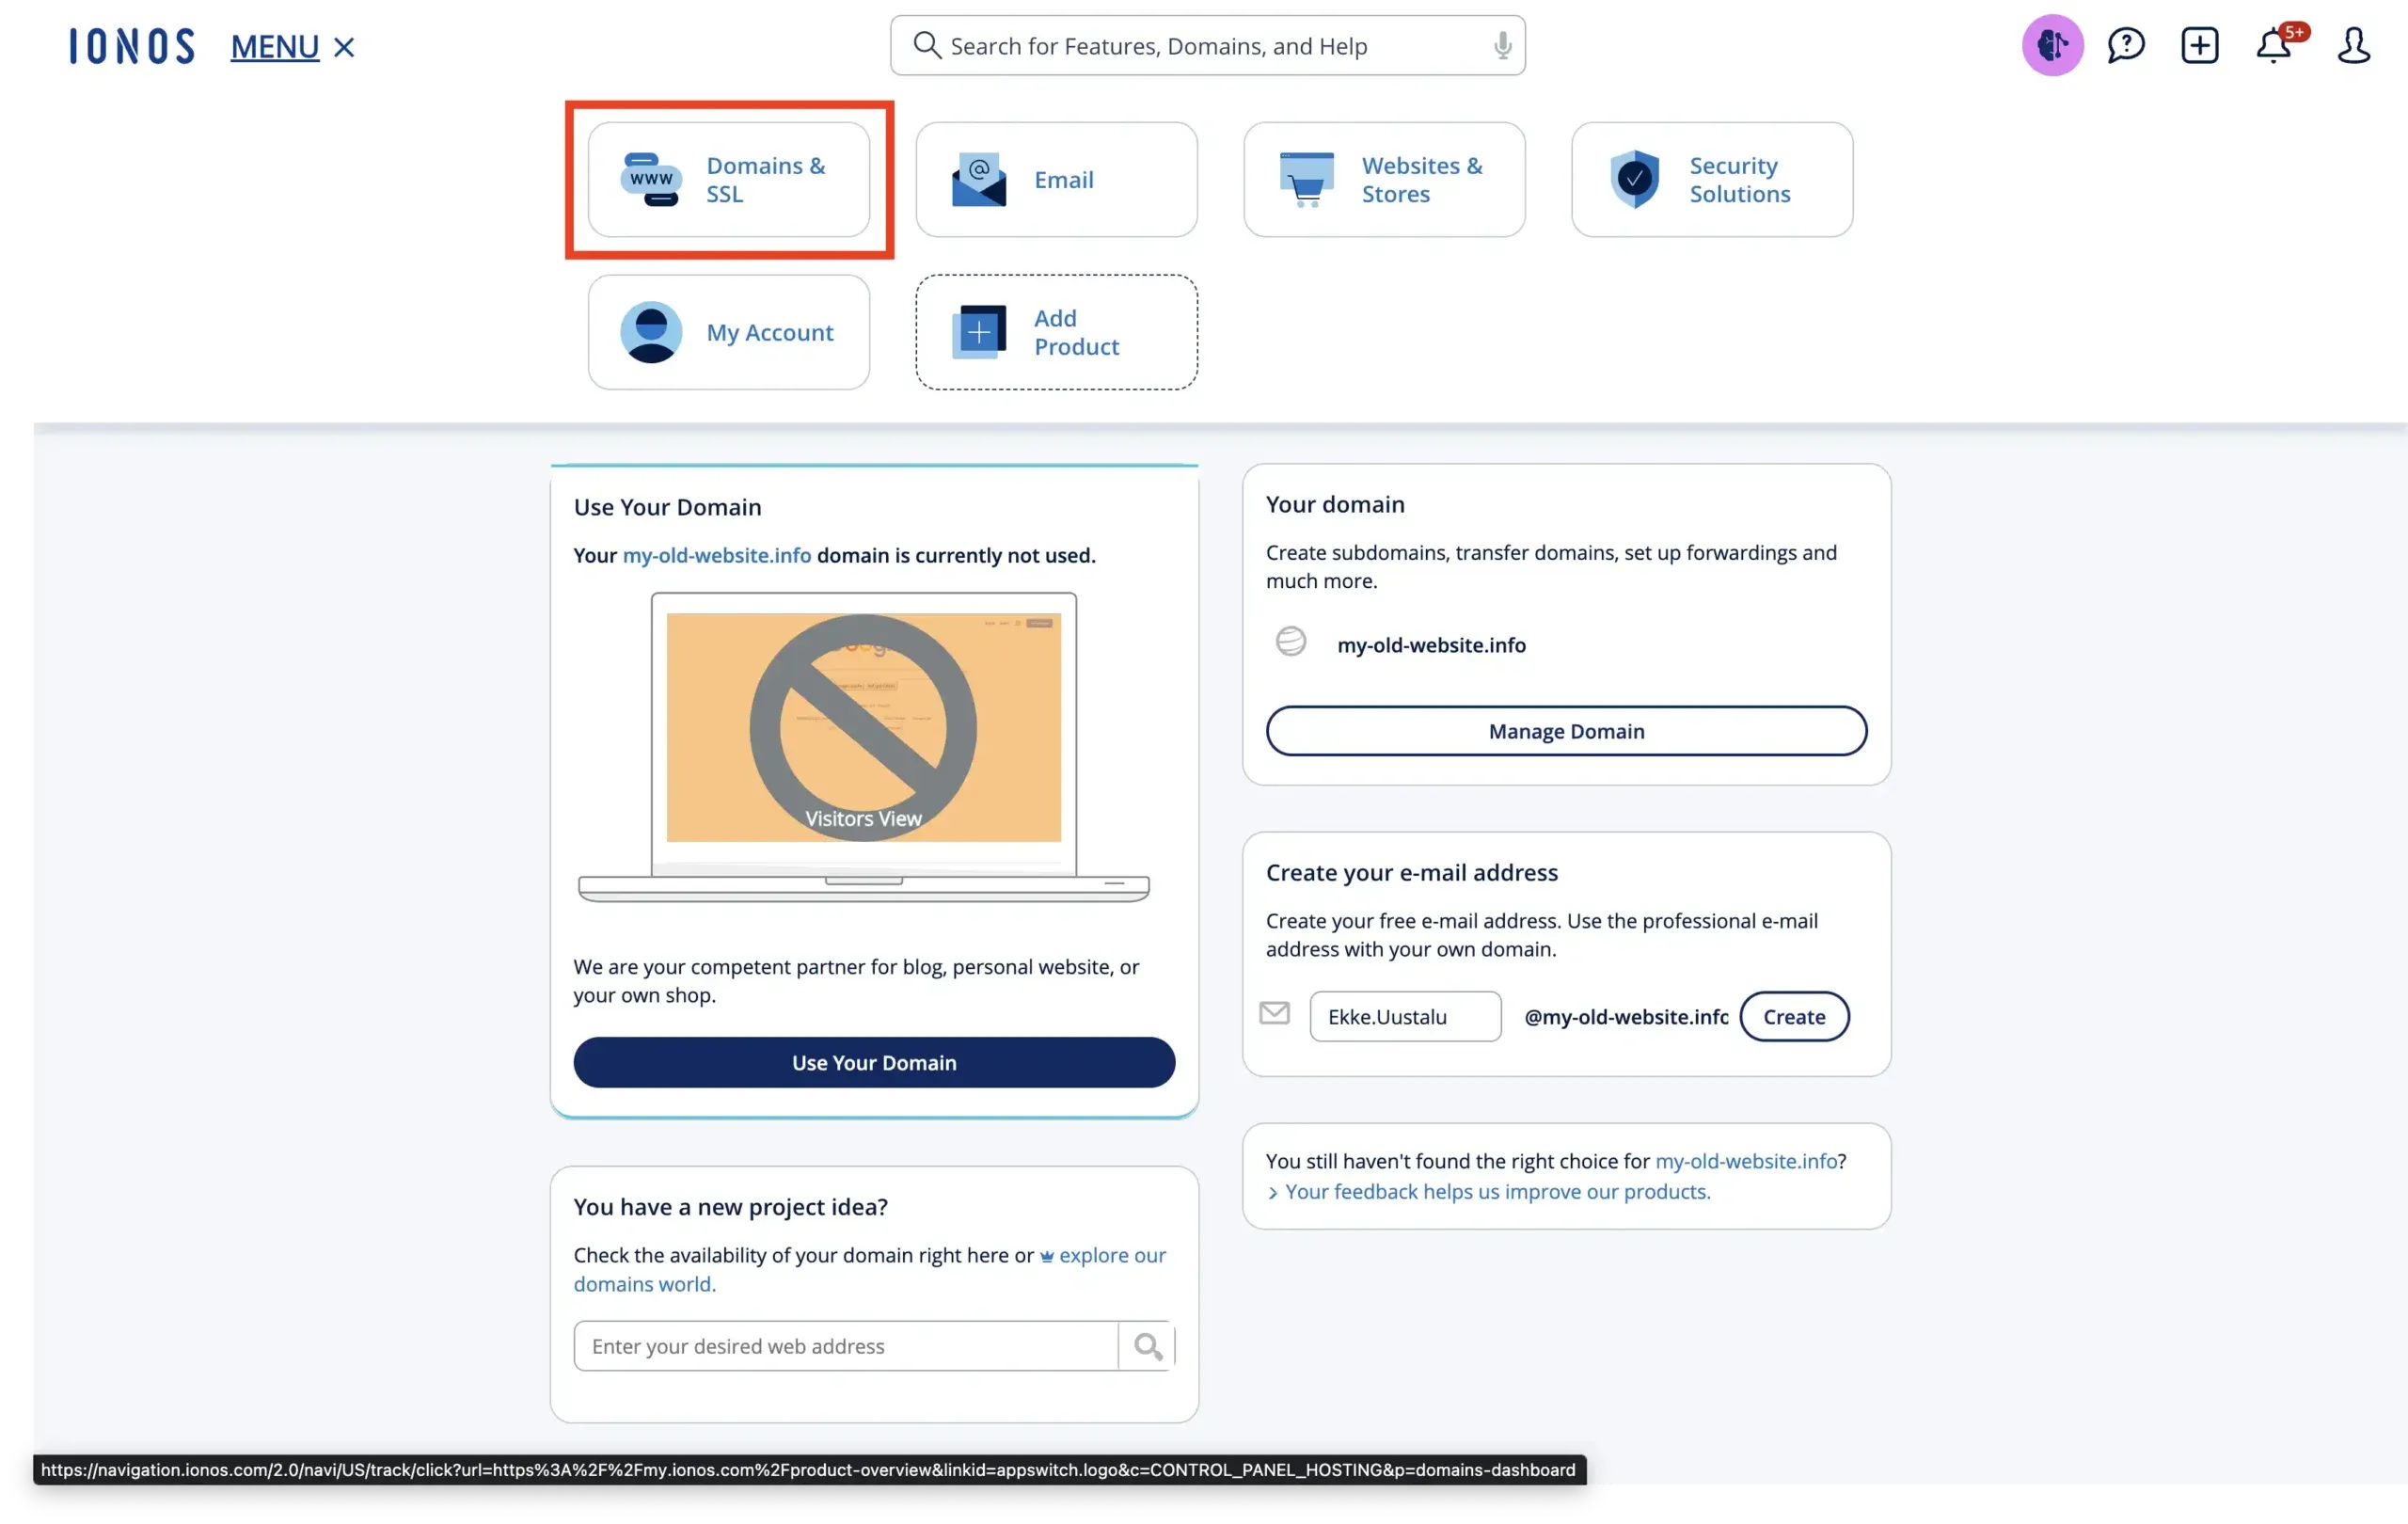
Step 2: Manage Domains
After you have logged in, you’ll see the dashboard. In the menu at the top of the page, locate the section titled “Domains & SSL.” Click on it to view your registered domains.
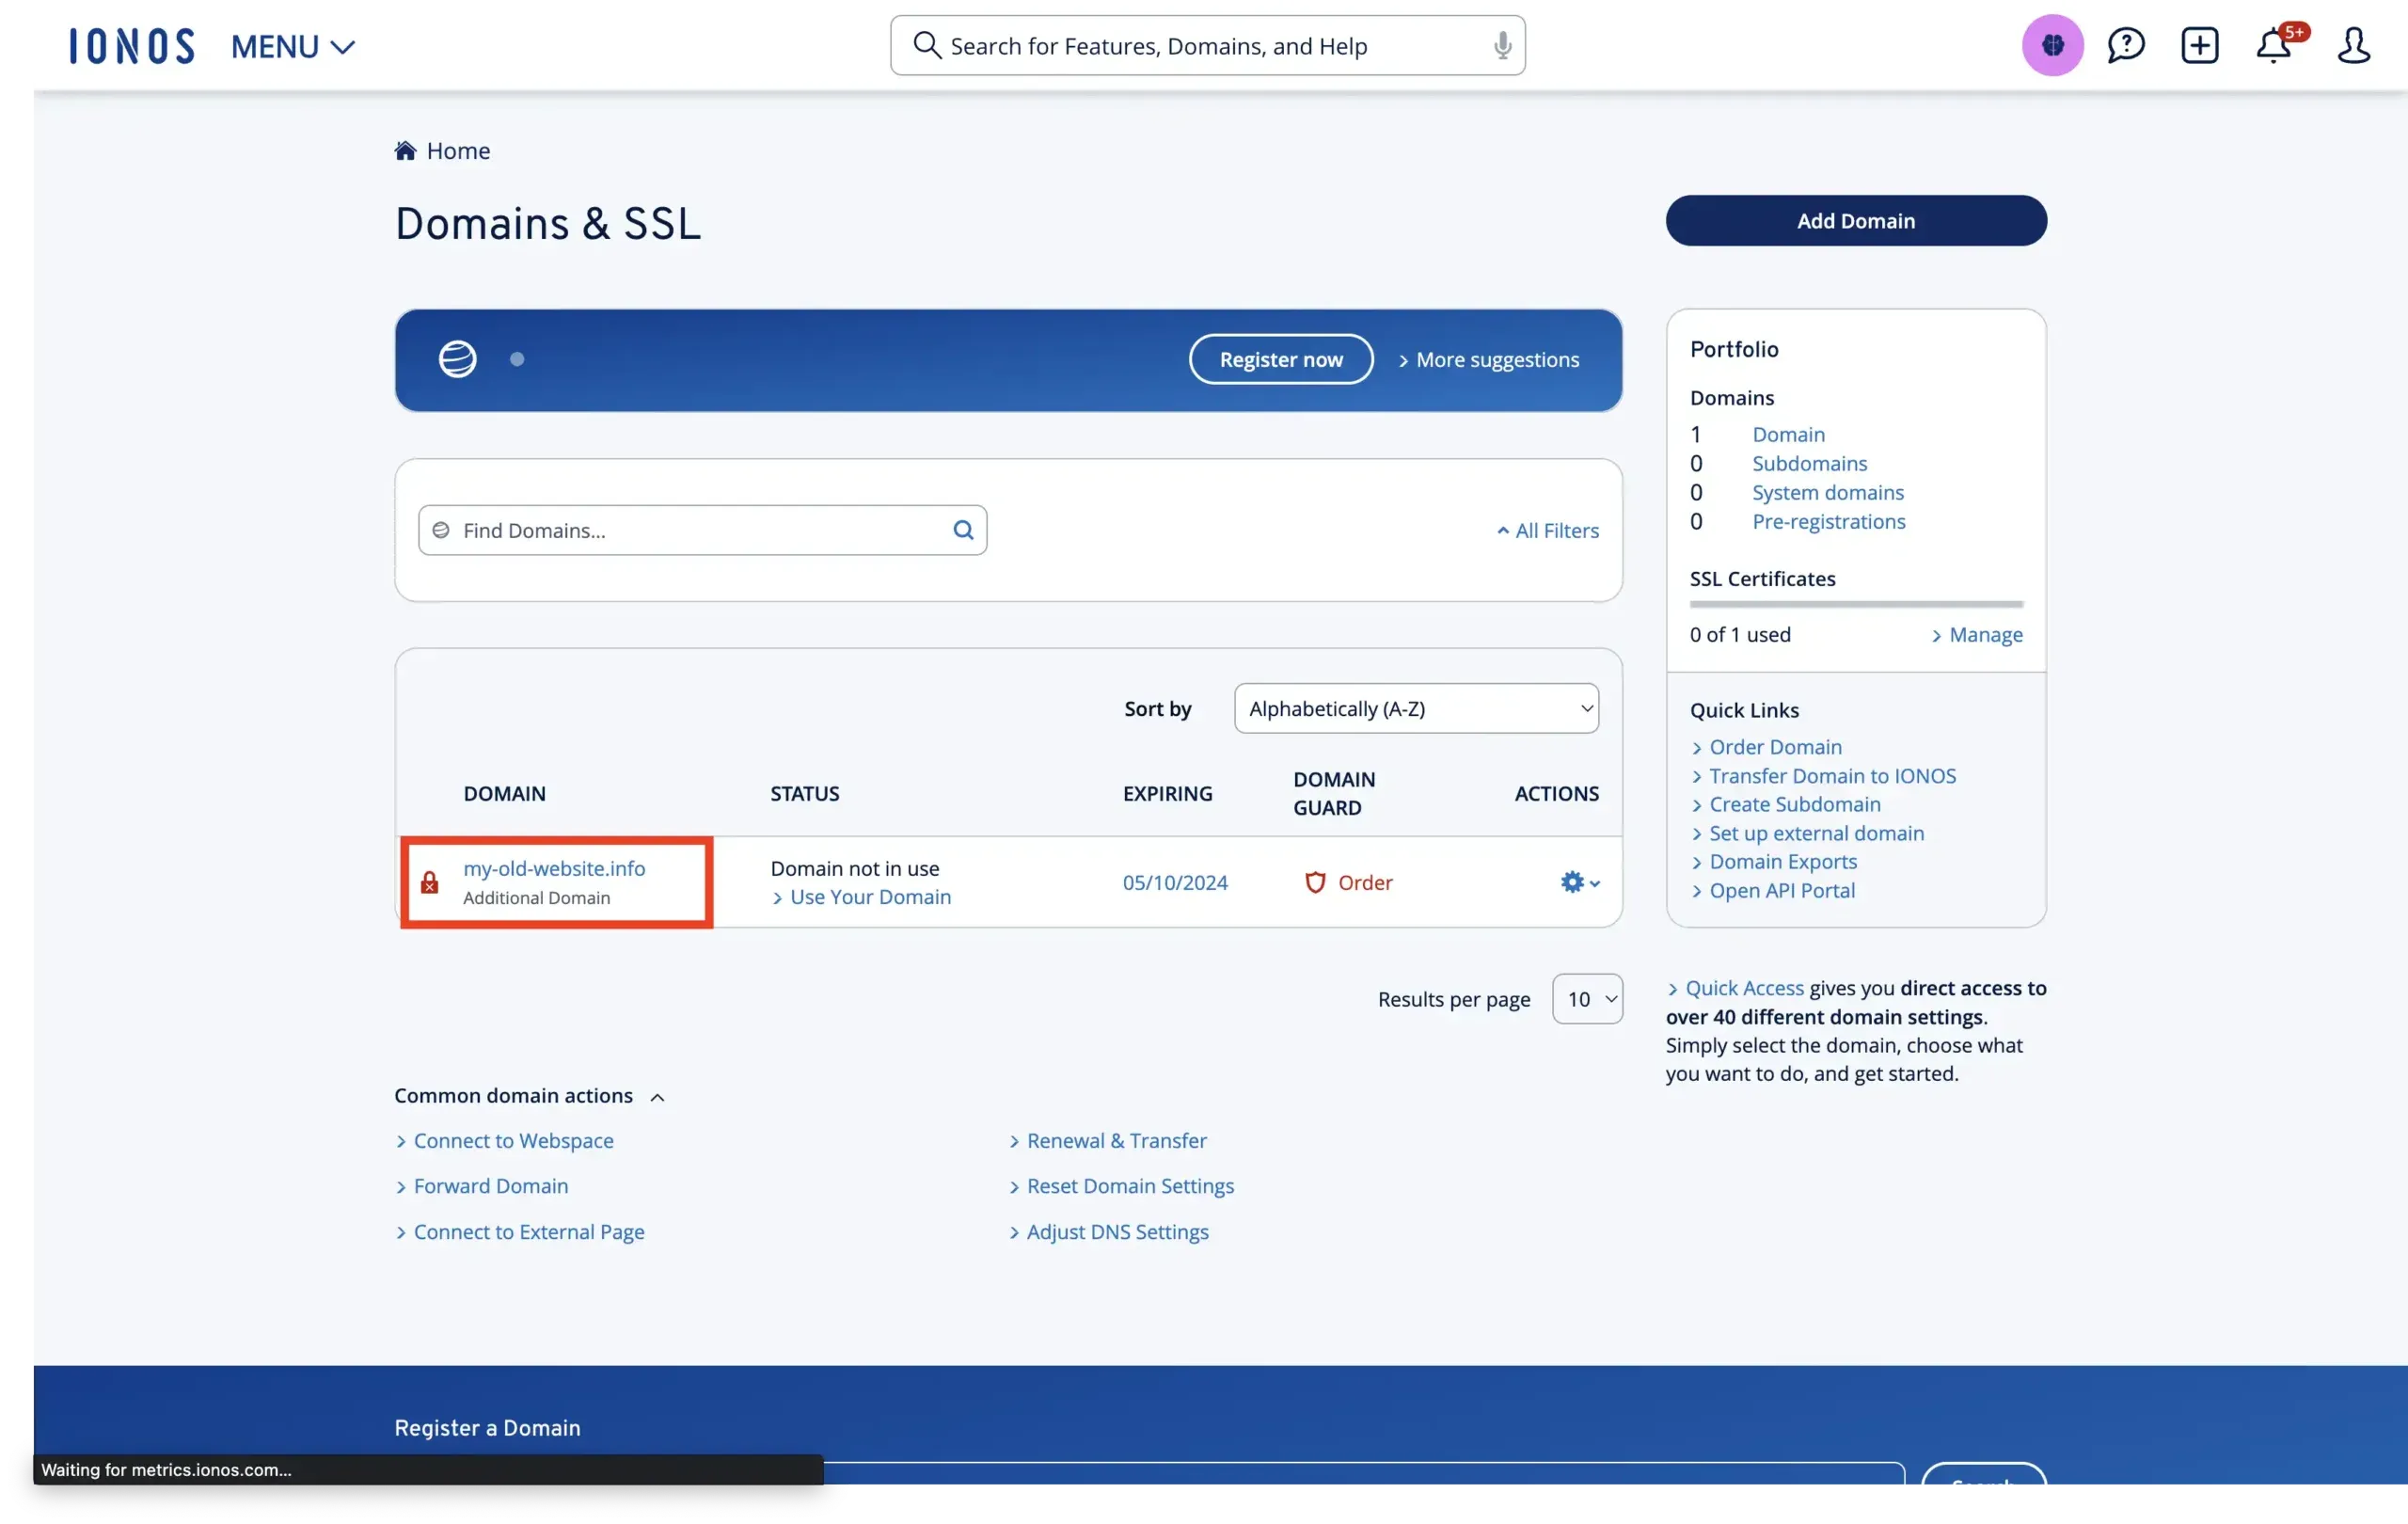
Step 3: Select Domain
Choose the domain you want to redirect from your list of active domains. Just click on the name that looks like a link.
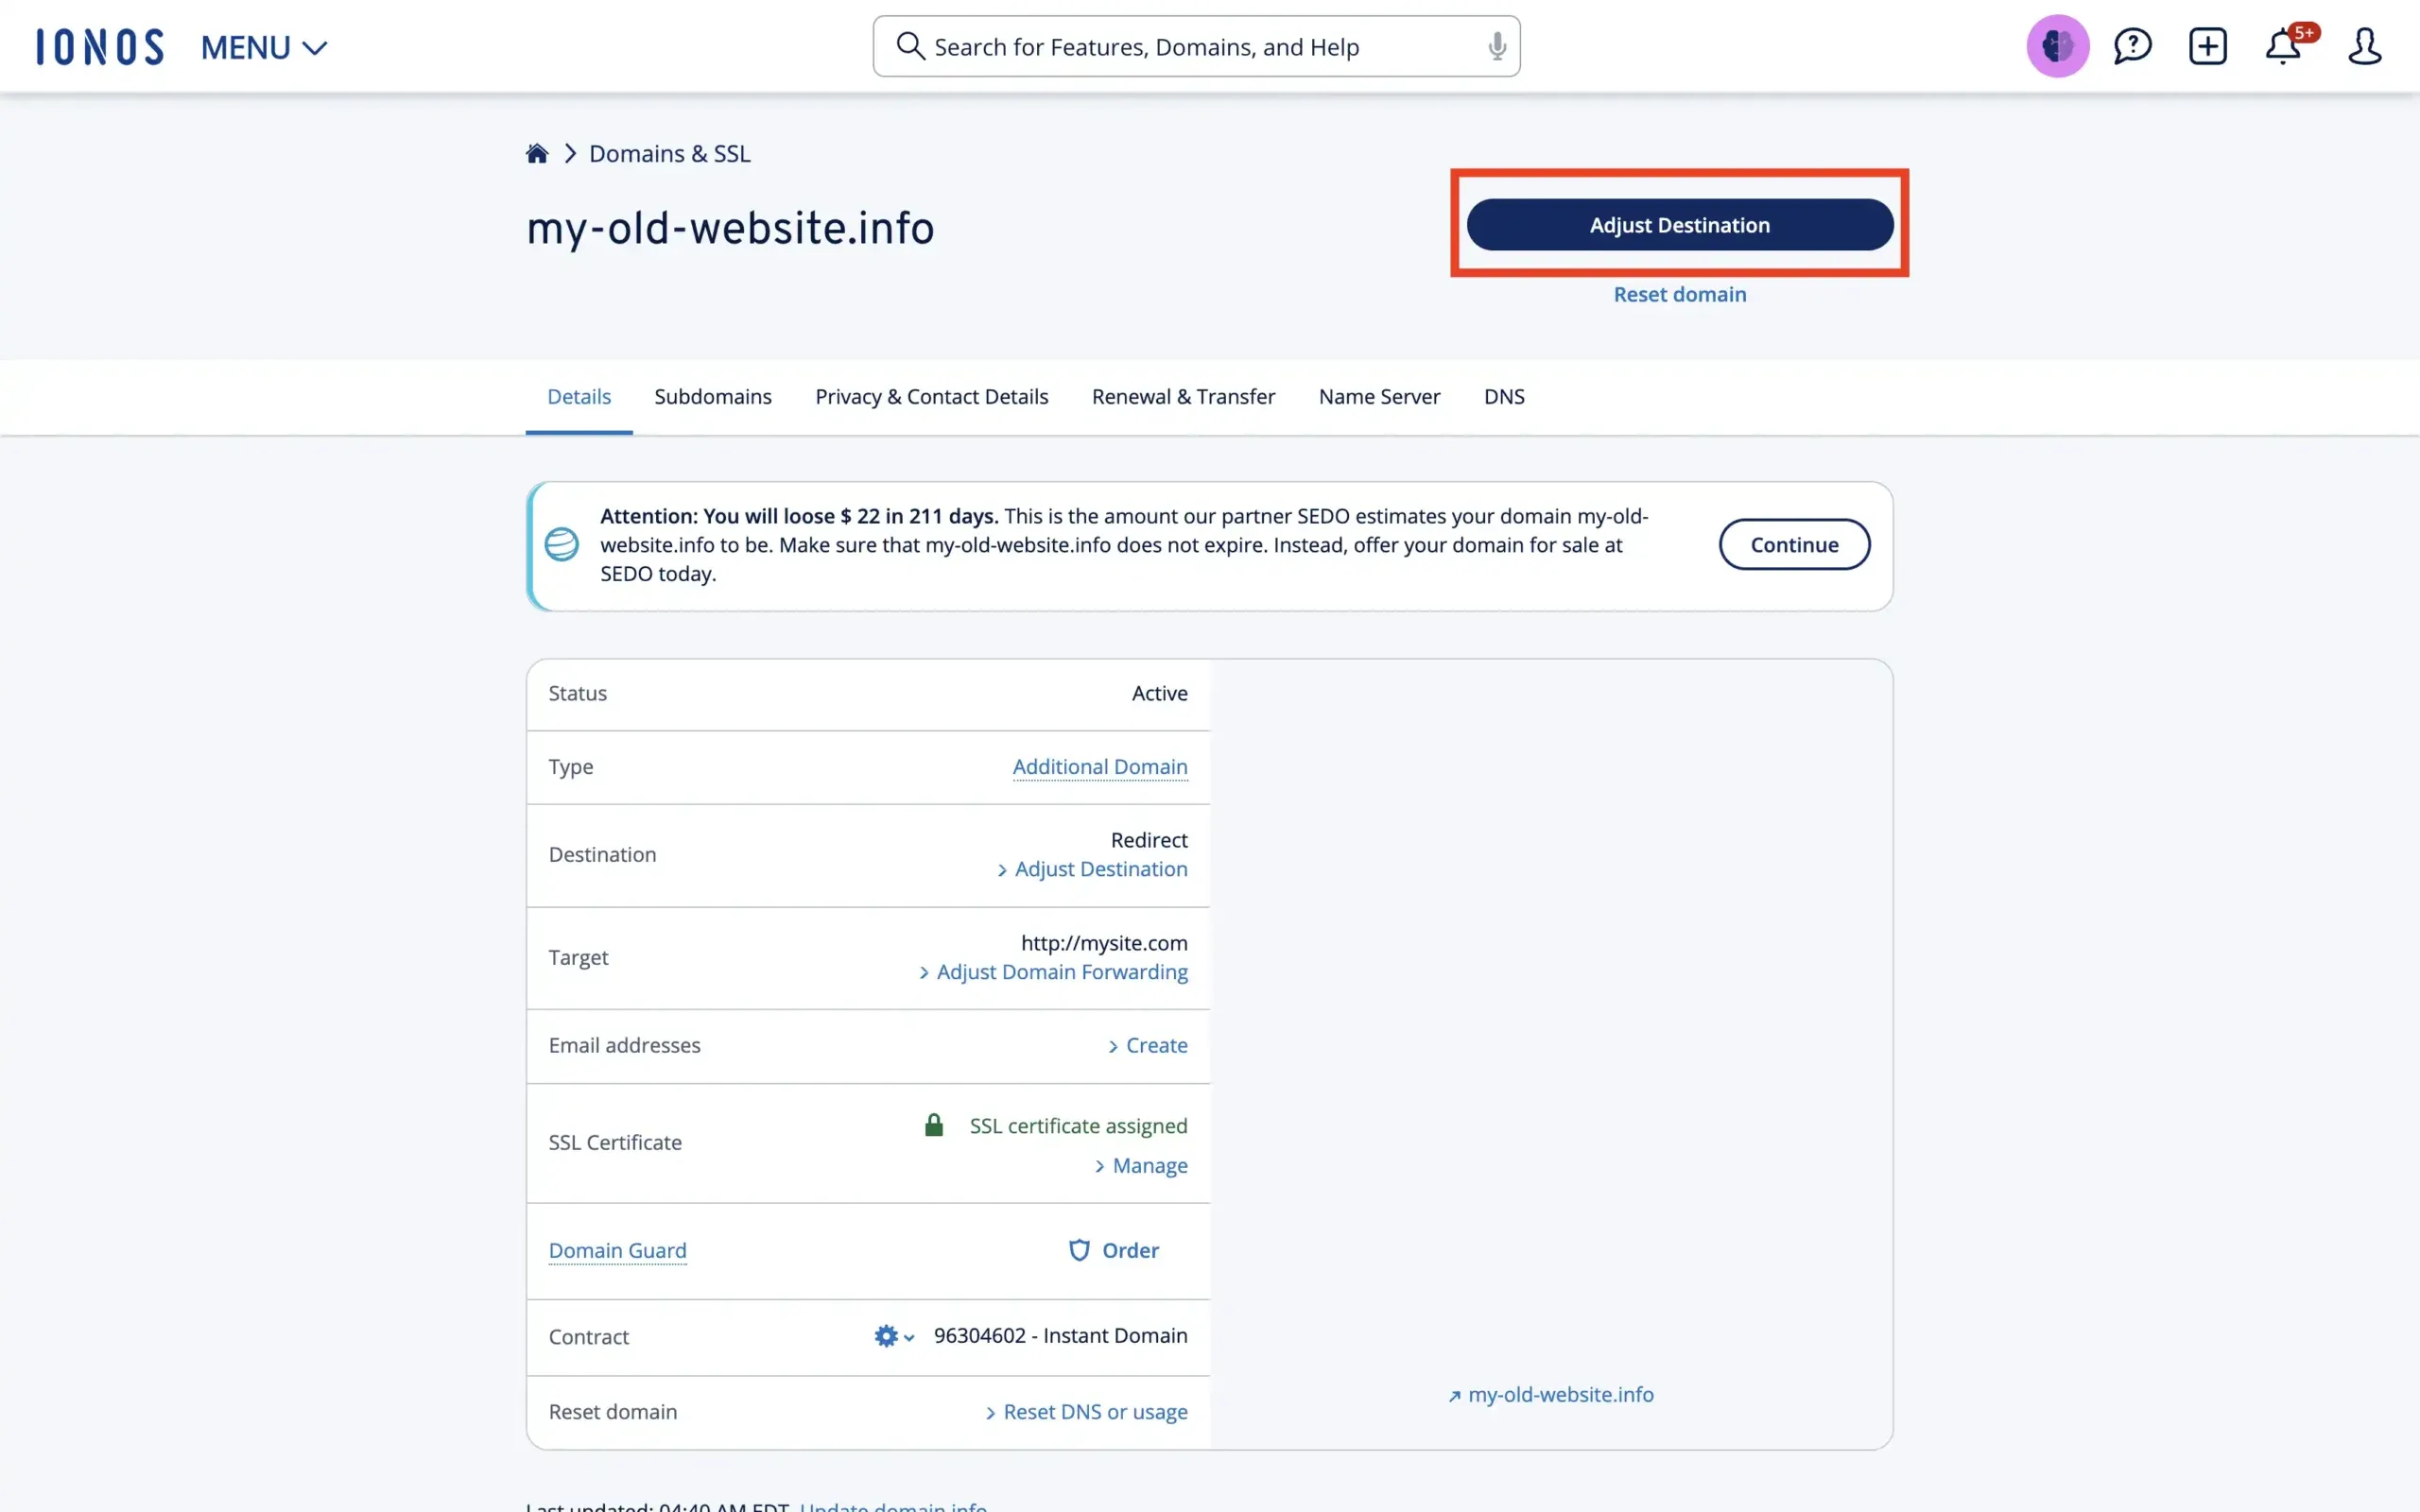
Step 4: Adjust Domain Settings
At the top of the screen, click on the button “Adjust Destination”.
After that, from the list of options, select “Forward Domain”.

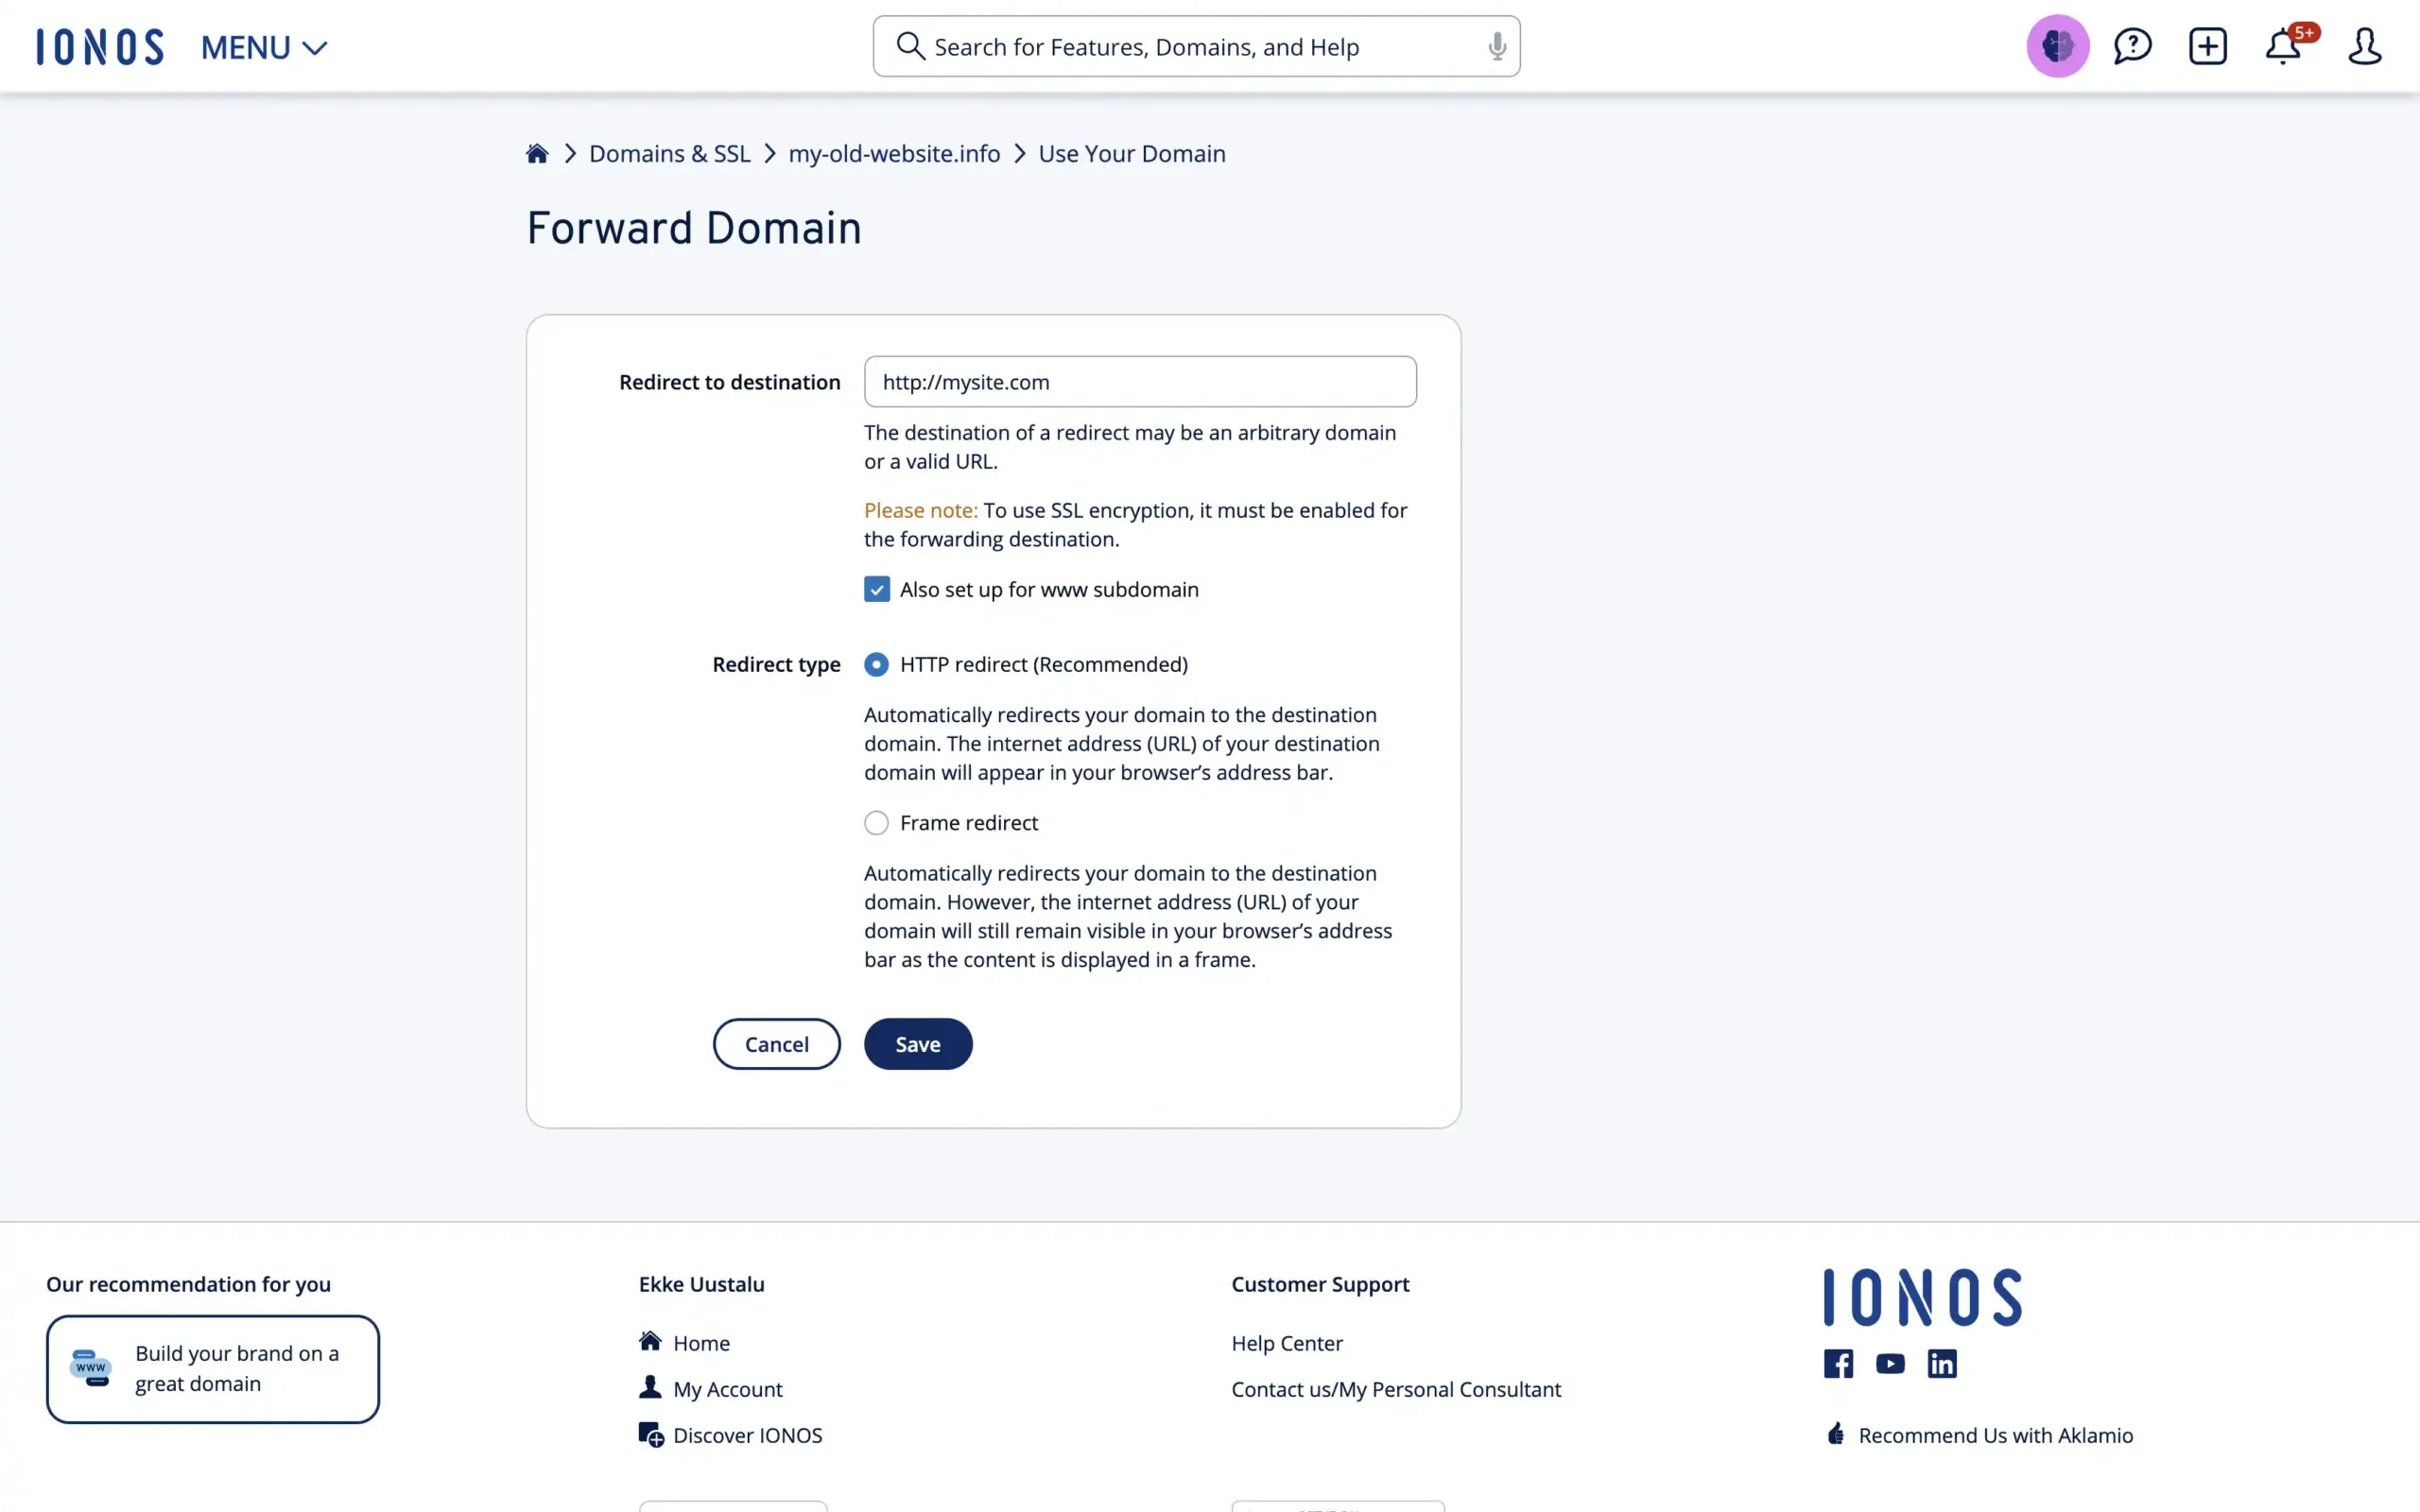
Step 5: Set up your Redirect
First, input the destination where you want to redirect your domain. Next, look for the “Redirect type” setting. Here, you can choose between an HTTP redirect or a Frame redirect. You probably want to use the HTTP if you are planning to keep the redirects like that for a longer period. Frame redirects are not great for SEO.
Just to make sure you know which one you need, here’s our blog post on redirect types.
Step 6: Save Settings
After ensuring all information is accurate, save your settings. It might take a while for the redirect to propagate across the internet. It might take anywhere from 5 minutes to 24 hours.
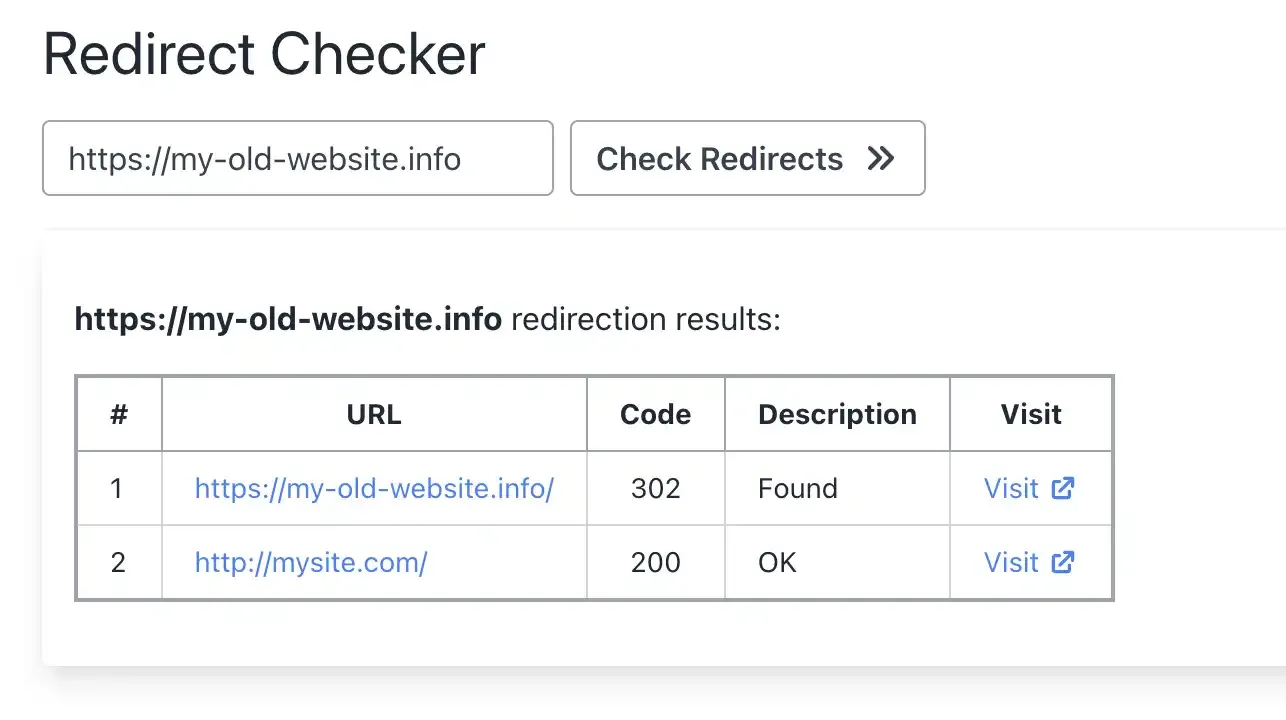
Step 7: Test your Redirect
All that is left to do is to test whether the redirect works as expected or not. In our case, we configured an SSL certificate for the redirect as well, but we recommend you check whether it costs extra for you.
Important: IONOS doesn’t include SSL for redirected domains
IONOS doesn’t automatically install an SSL certificate for domains being forwarded. Visitors using HTTPS will see security warnings.
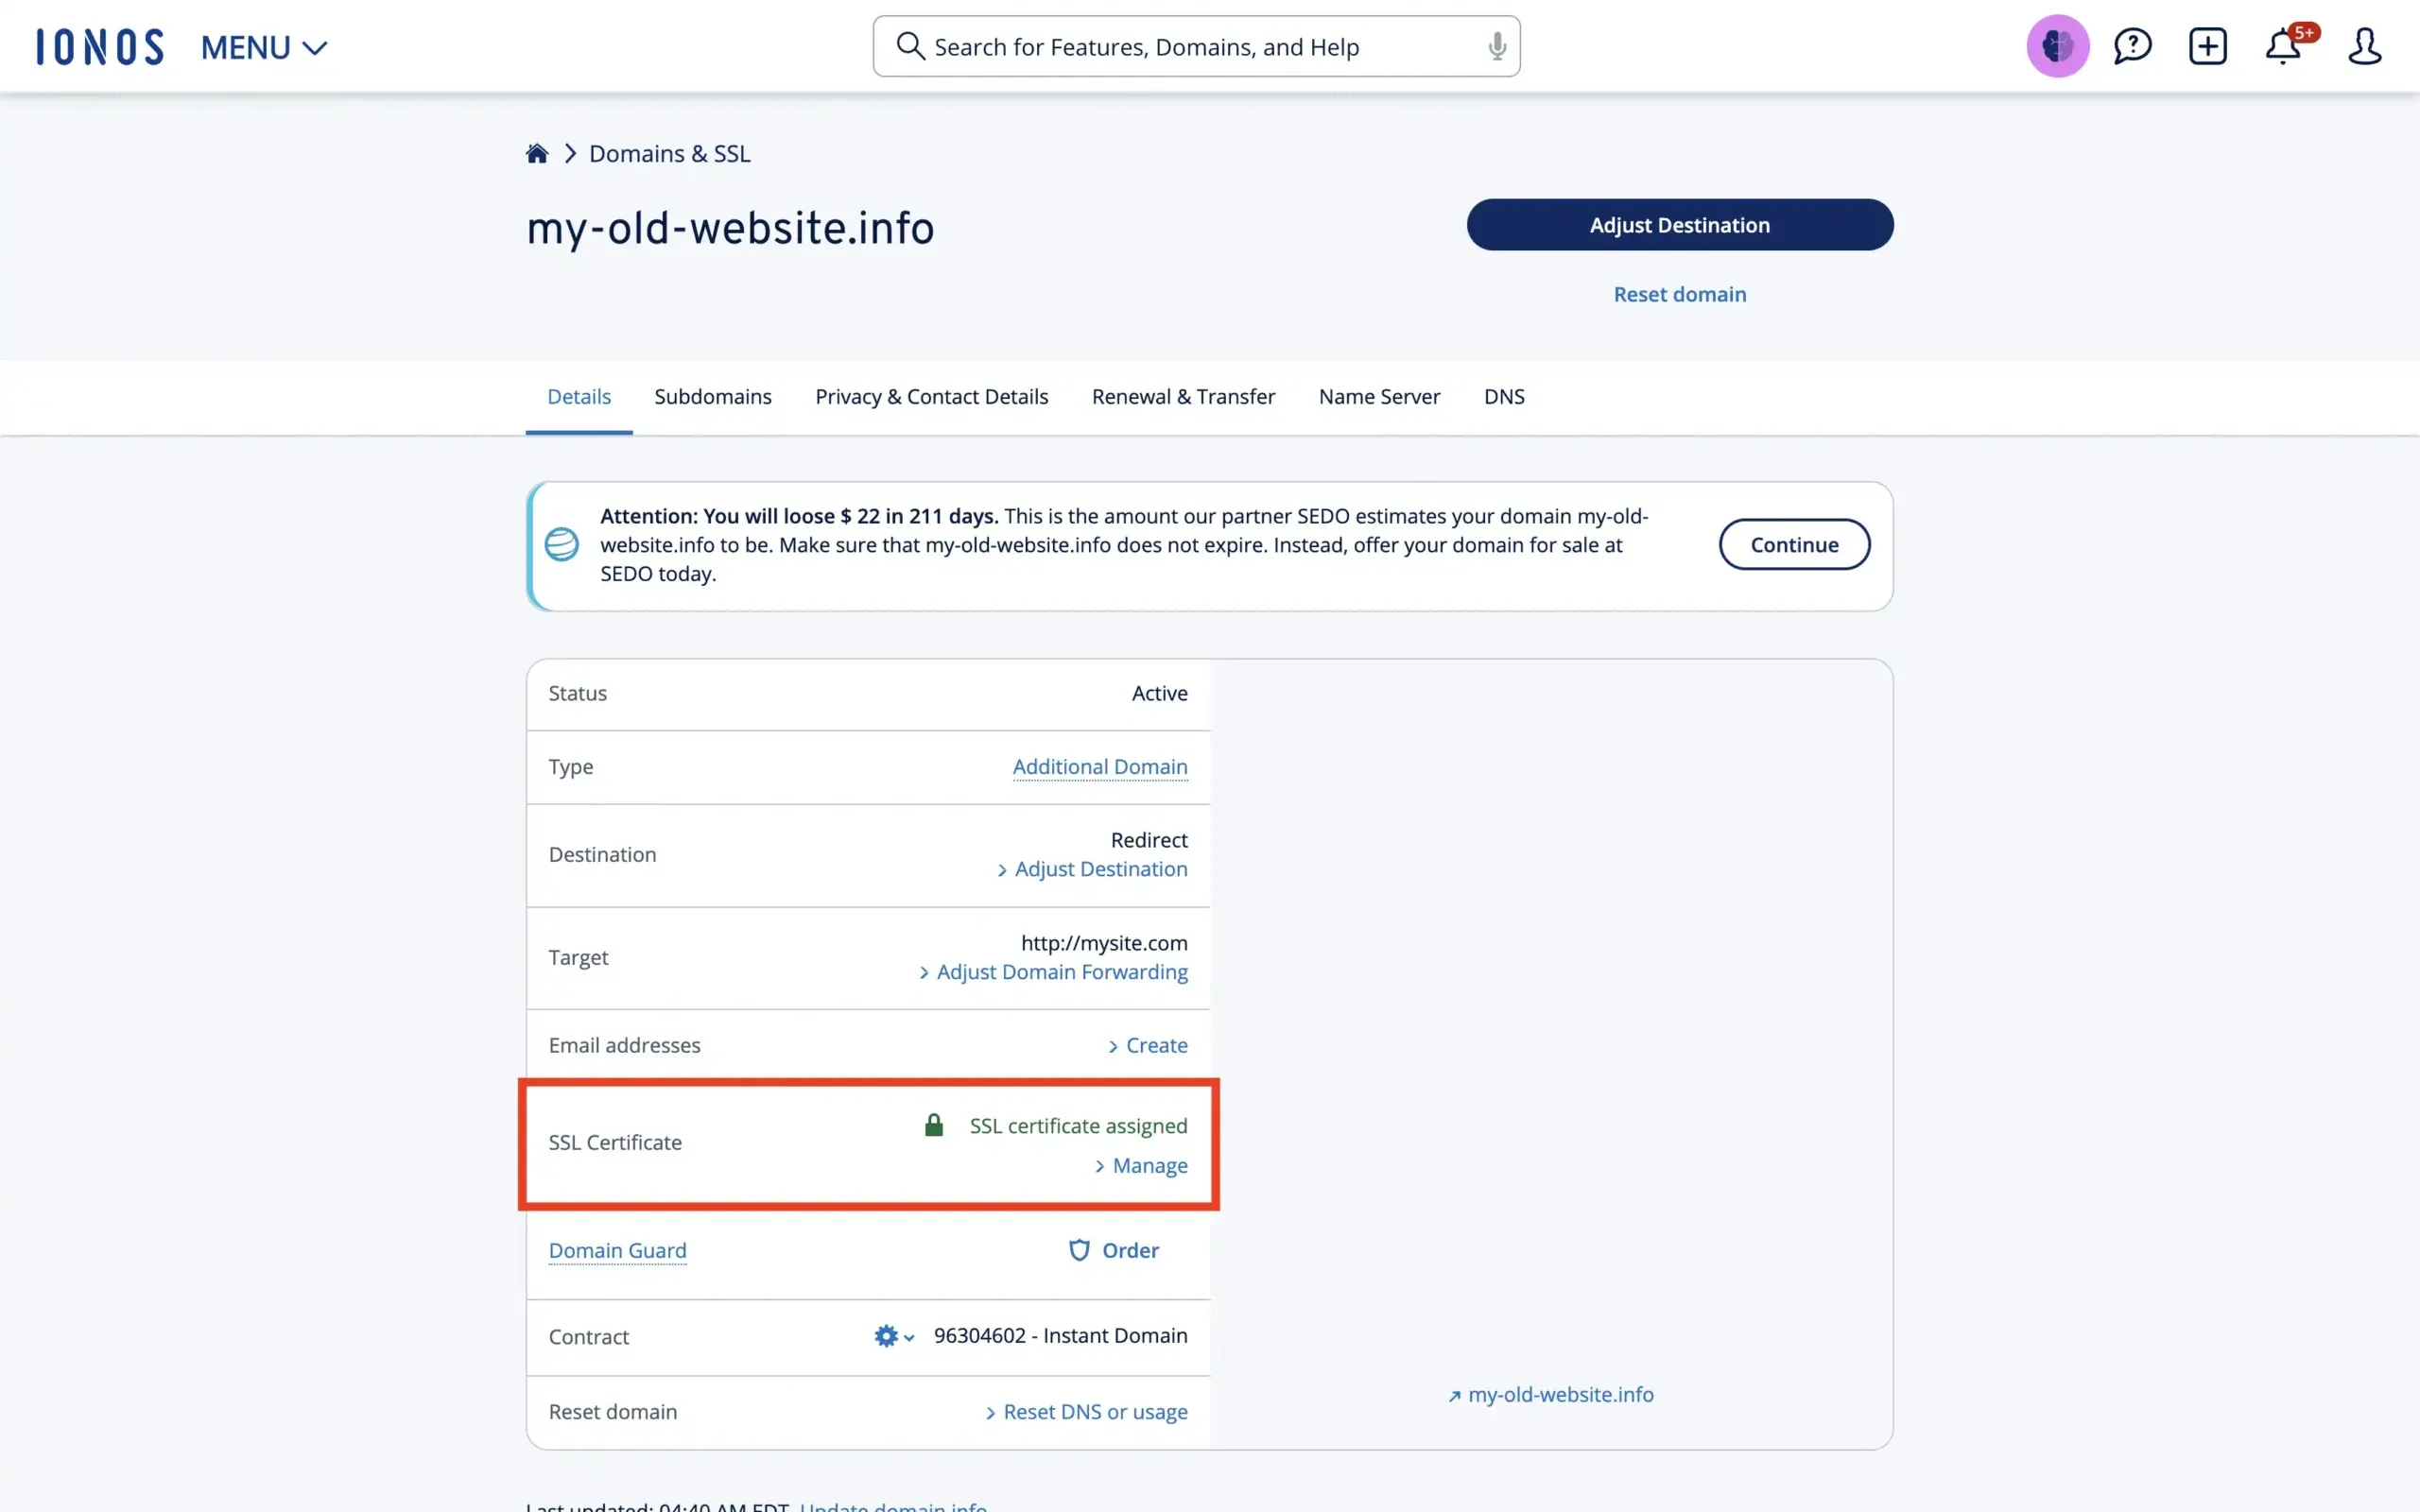
You can add certificates manually, but the pricing isn’t transparent during setup. IONOS SSL certificates cost around $10/year per domain — and you need to manage renewal yourself.
The Hidden Problems With IONOS Domain Redirects
- 302 instead of 301: IONOS uses 302 (temporary) redirects by default. This means search engines won’t transfer SEO ranking power to your new domain. For a permanent domain move, this is devastating.
- No automatic SSL: Without a certificate, HTTPS visitors see “Not Secure” warnings. Most modern browsers default to HTTPS.
- Extra cost for SSL: If you do want HTTPS, it’s ~$10/year per domain — and you have to manage it manually.
- Propagation delays: Changes can take up to 48 hours to reflect globally.
- No analytics: You can’t see how many visitors are being redirected or where they’re coming from.
- No advanced rules: No location-based or device-based redirect rules.
The Fix: Domain-Forward.com — Free 301 Redirects With Automatic HTTPS
Domain-Forward.com gives you what IONOS doesn’t:
Step 1: Register an account
The first thing you want to do is sign up for an account, which only takes a few minutes to complete.
Step 2: Add your domain to Domain-Forward.com
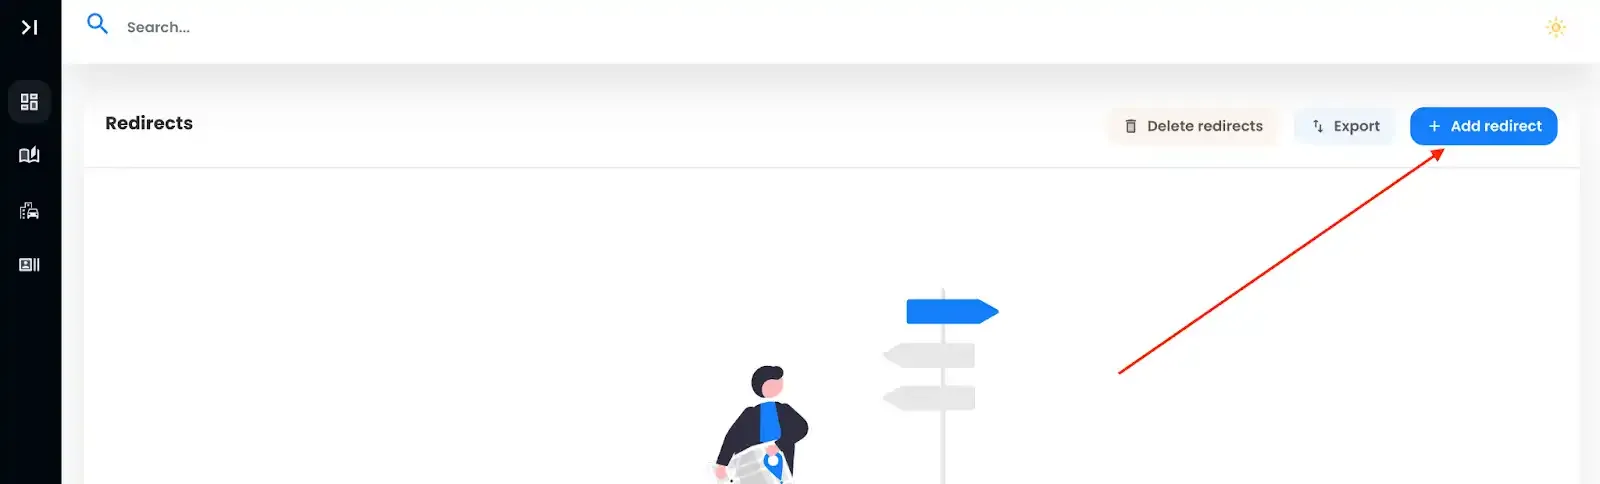
Once you have registered an account, it’s time to add the domain you’d like to redirect. All you need to do is click on the option for “Add Redirect.”
Since we already have a domain with IONOS called ‘my-old-website.info,’ we need to integrate it into the Source URL field. To make things hassle-free for your website visitors, we recommend adding both ‘www’ and the non-www version.
And that’s not all. We must also set the Destination URL, where all the magic happens – your forward-to spot.
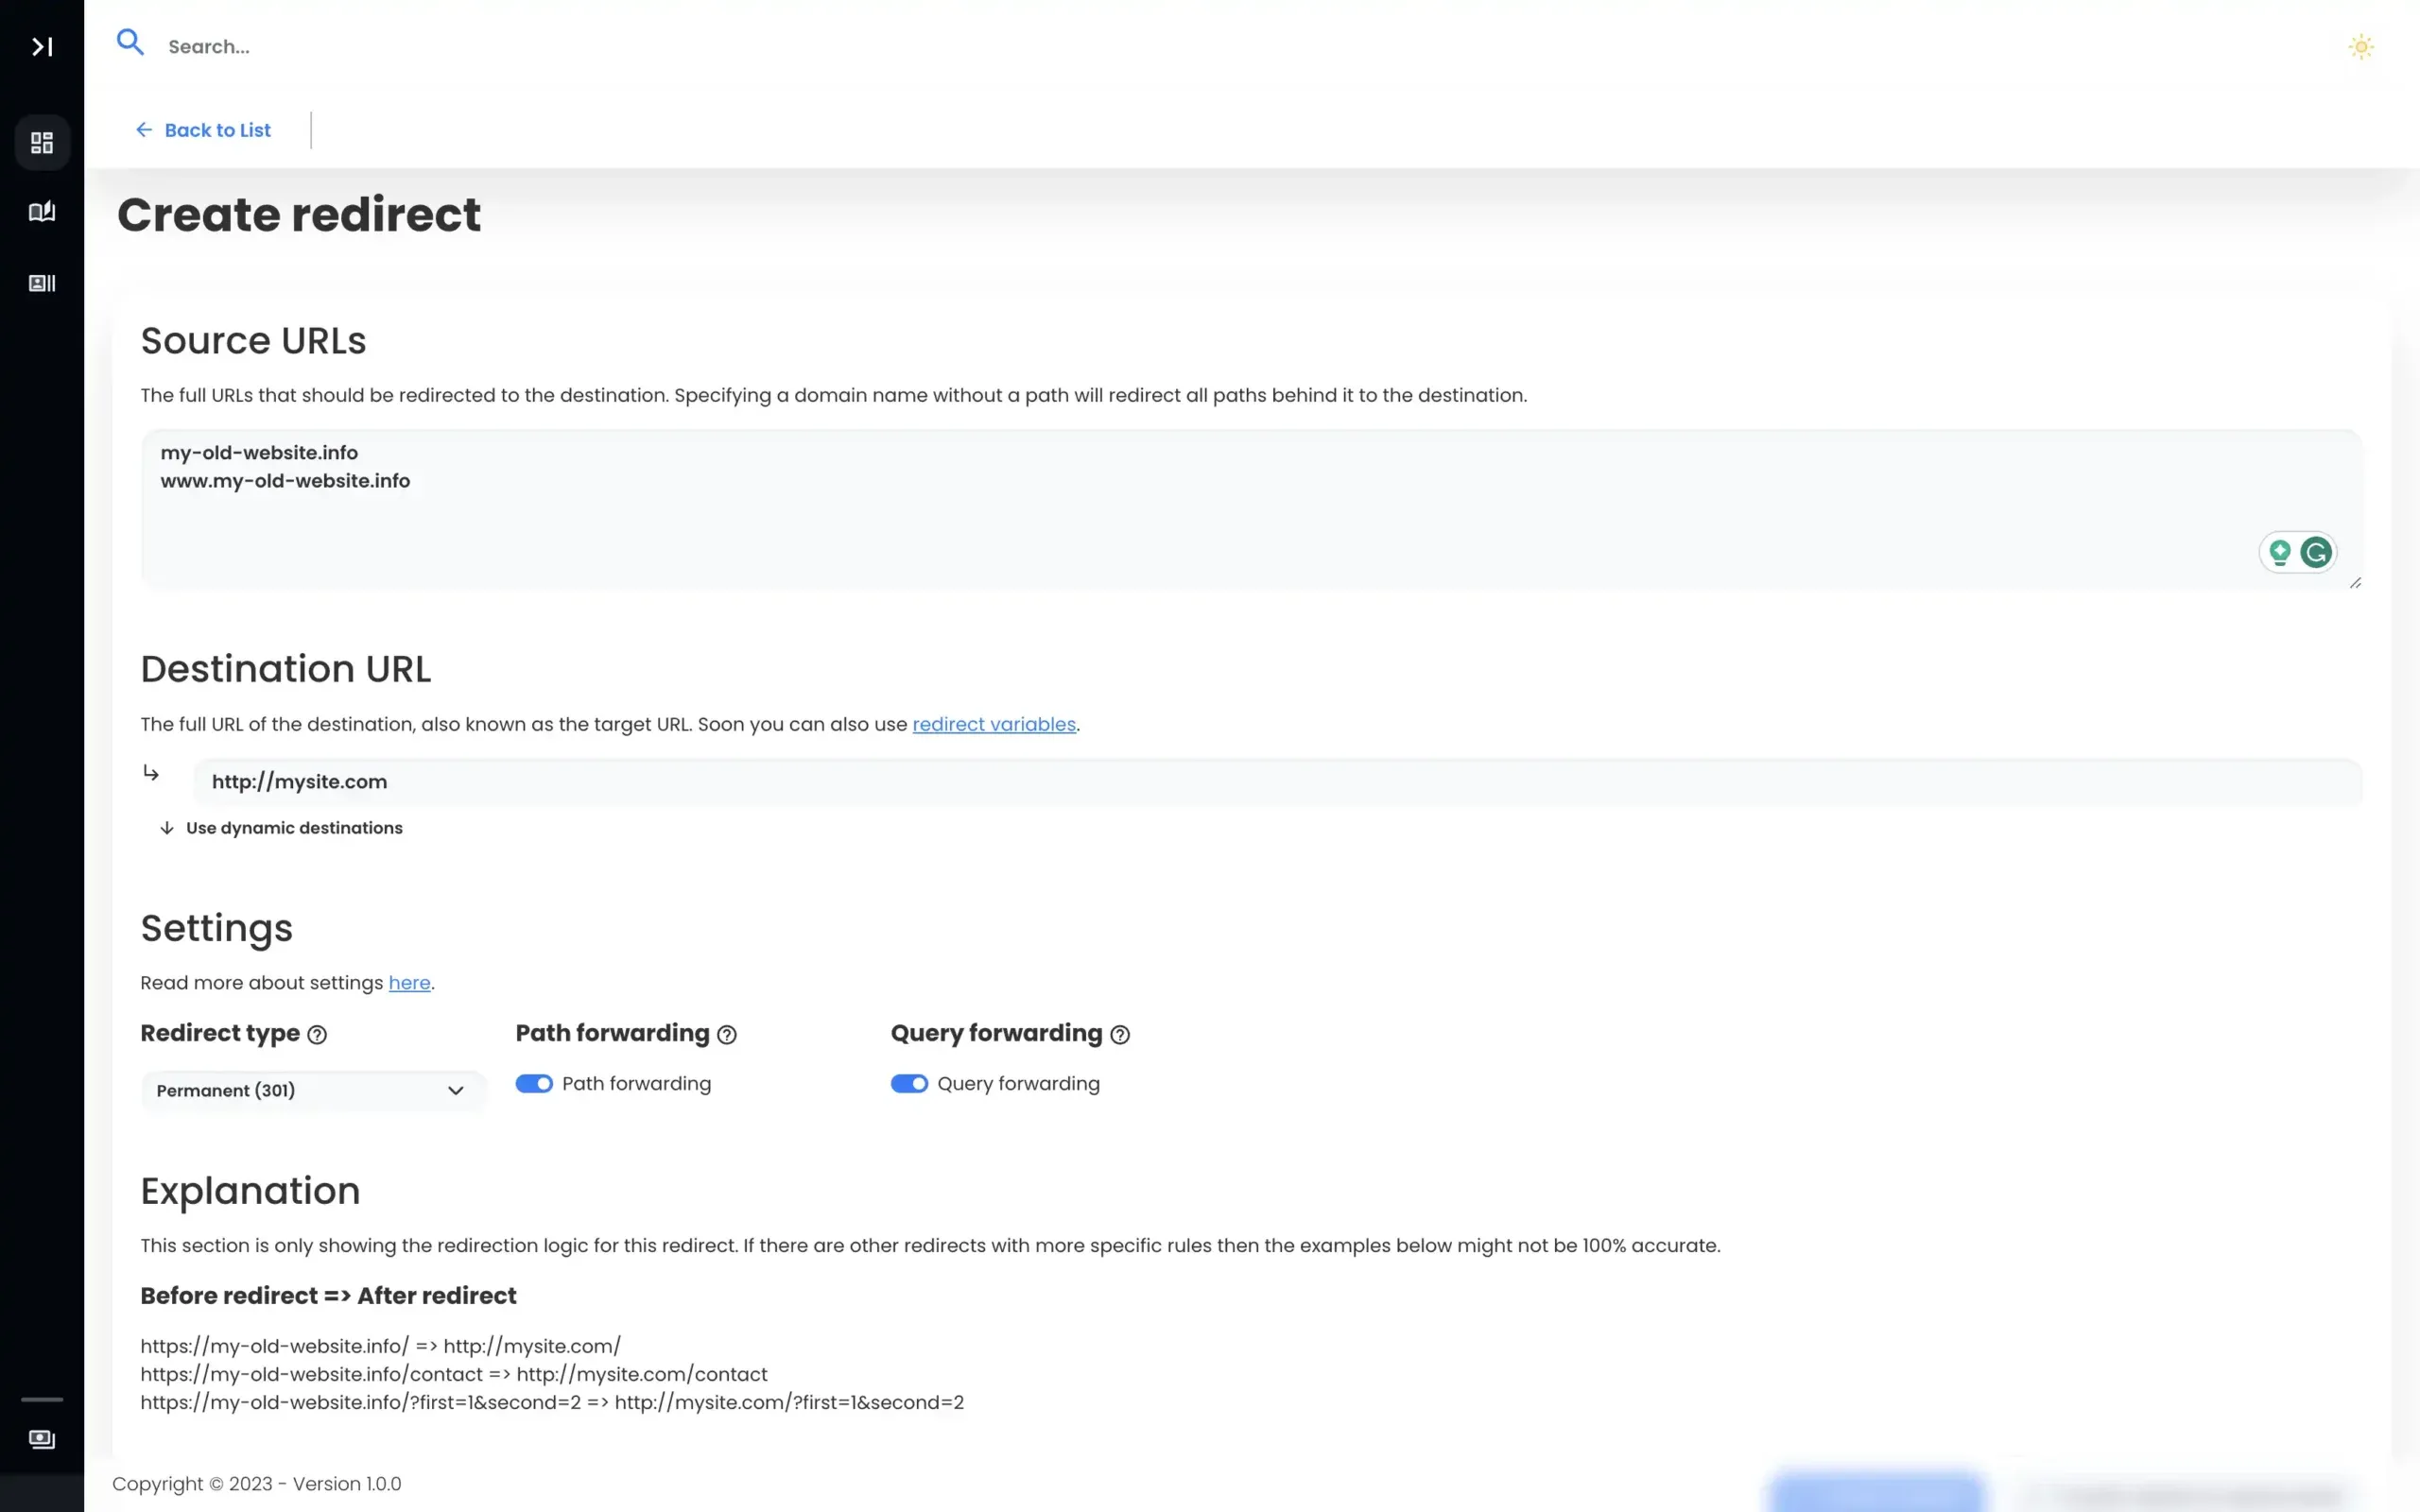
With our Source URLs and Destination URL now set, all we need to do is create our redirect.
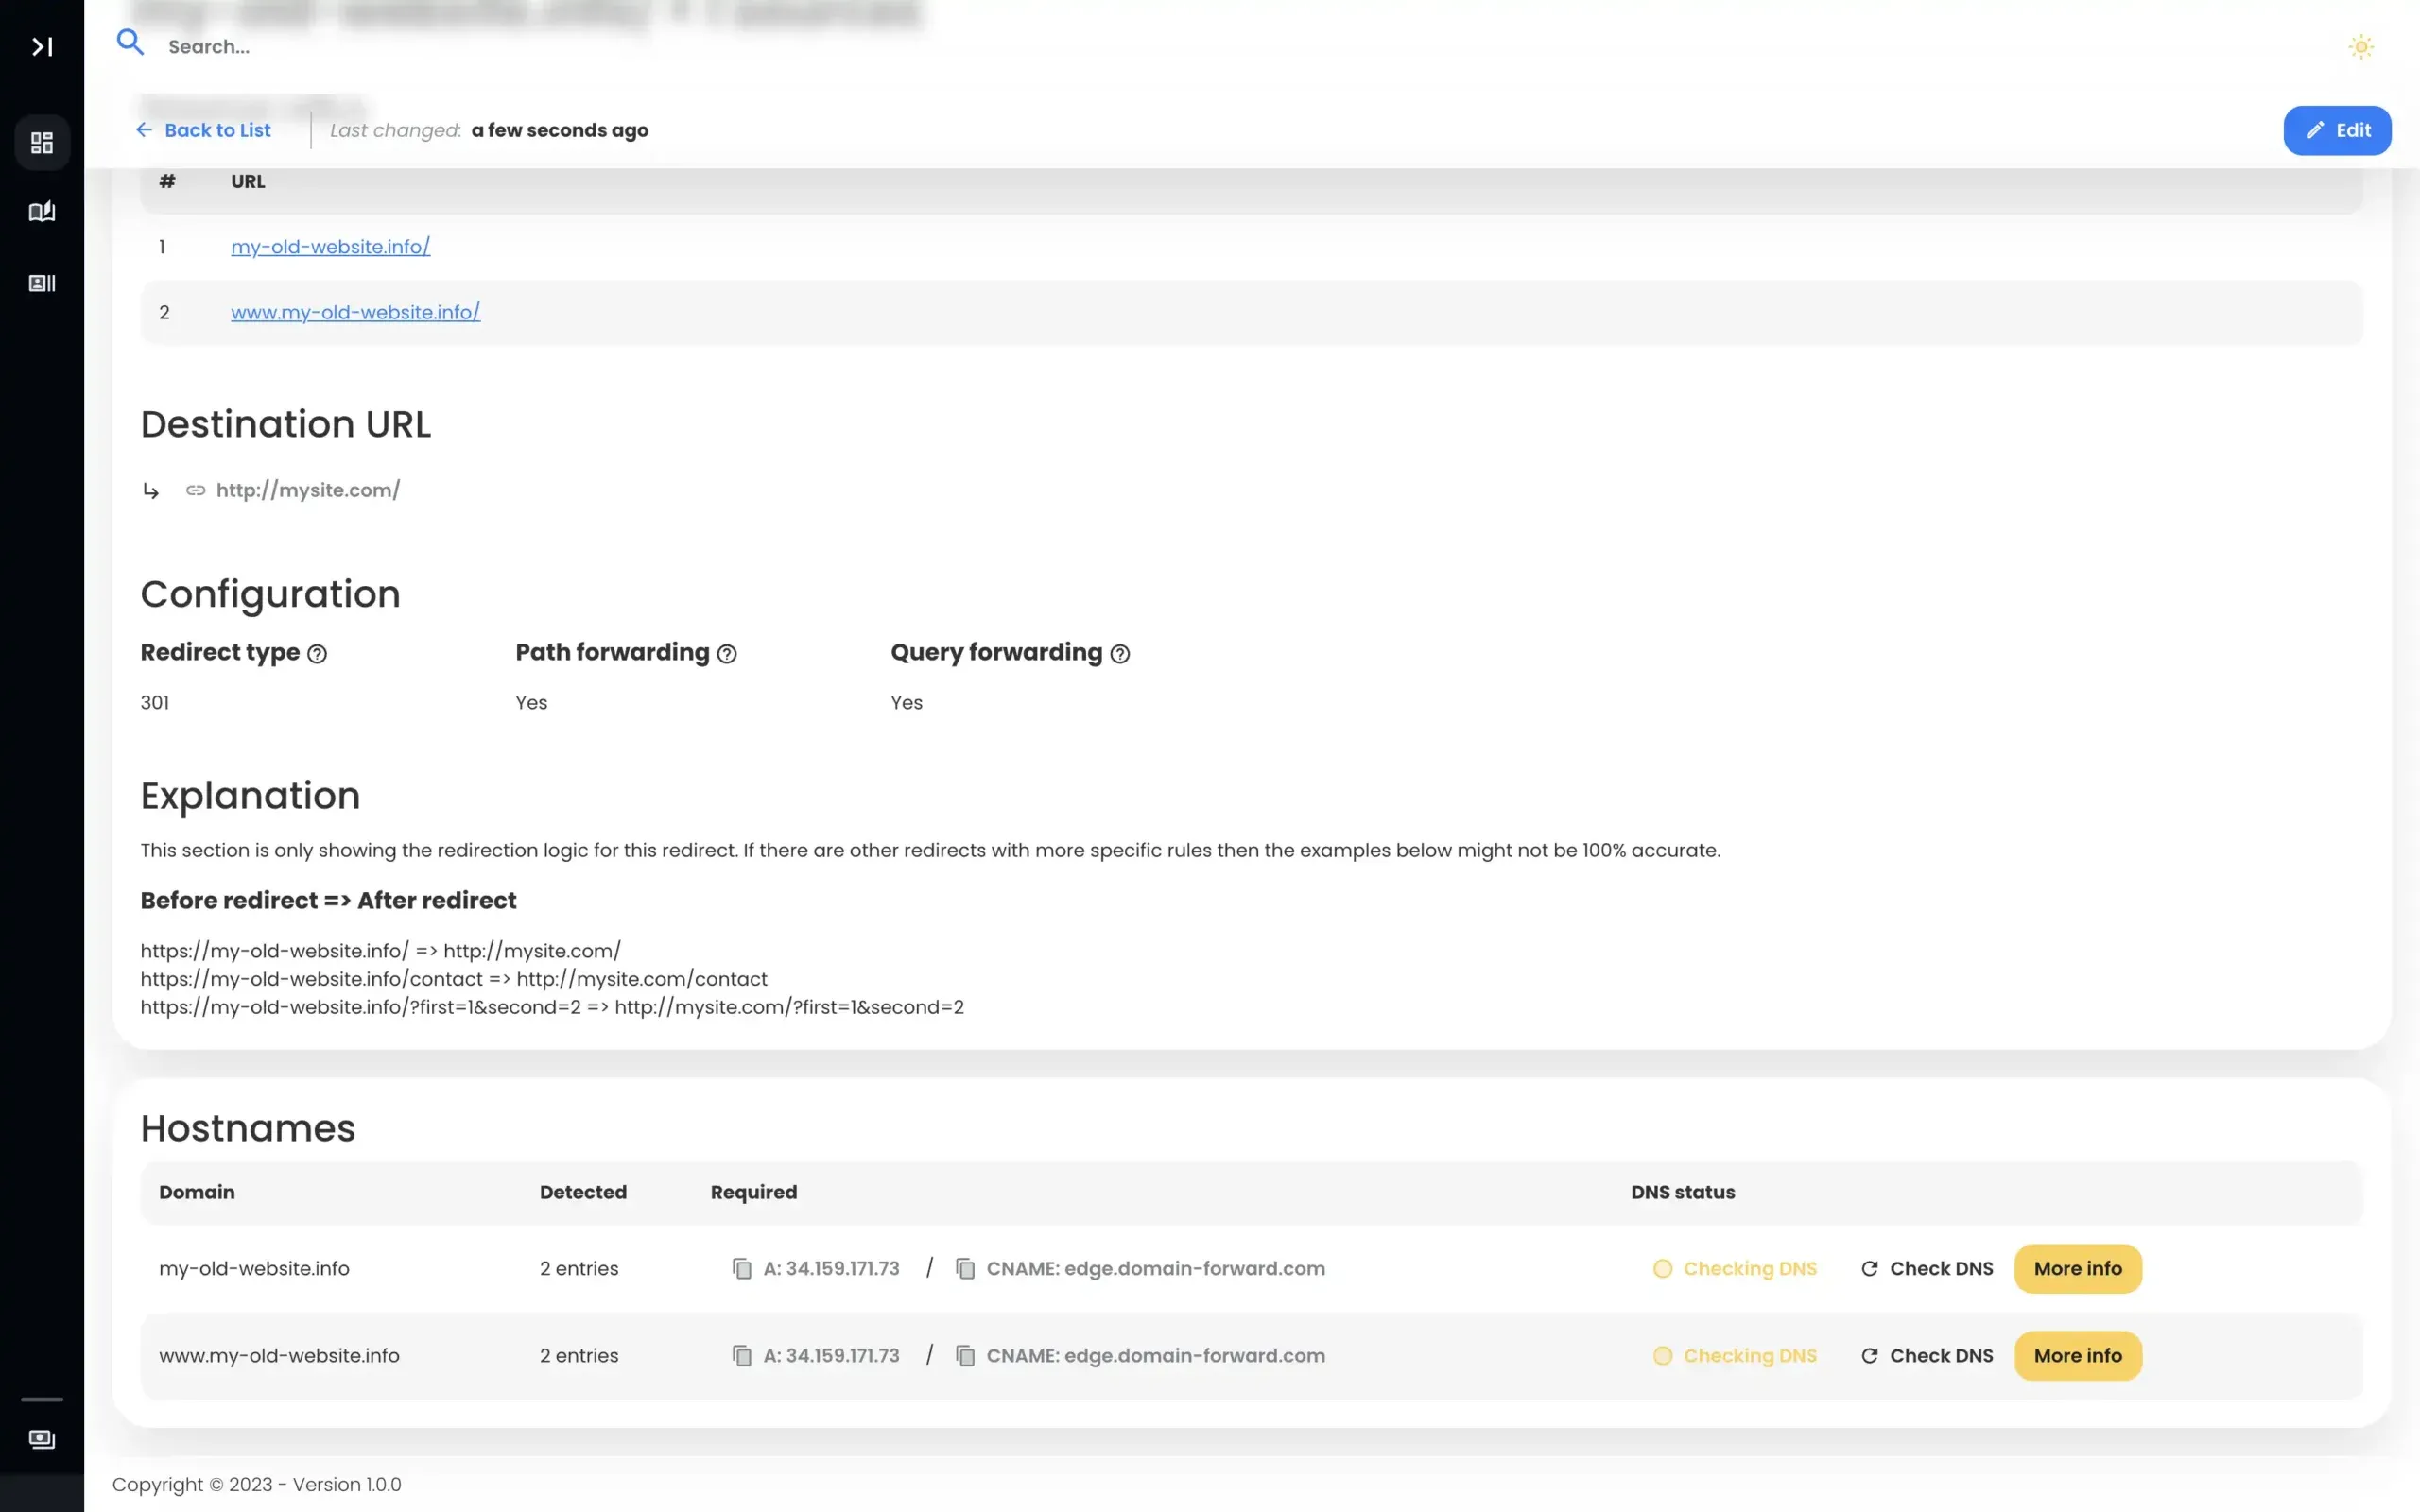
Note: After completing the domain redirect, you’ll notice the DNS status as checking. We need to fix that.
Step 3: Navigate to IONOS
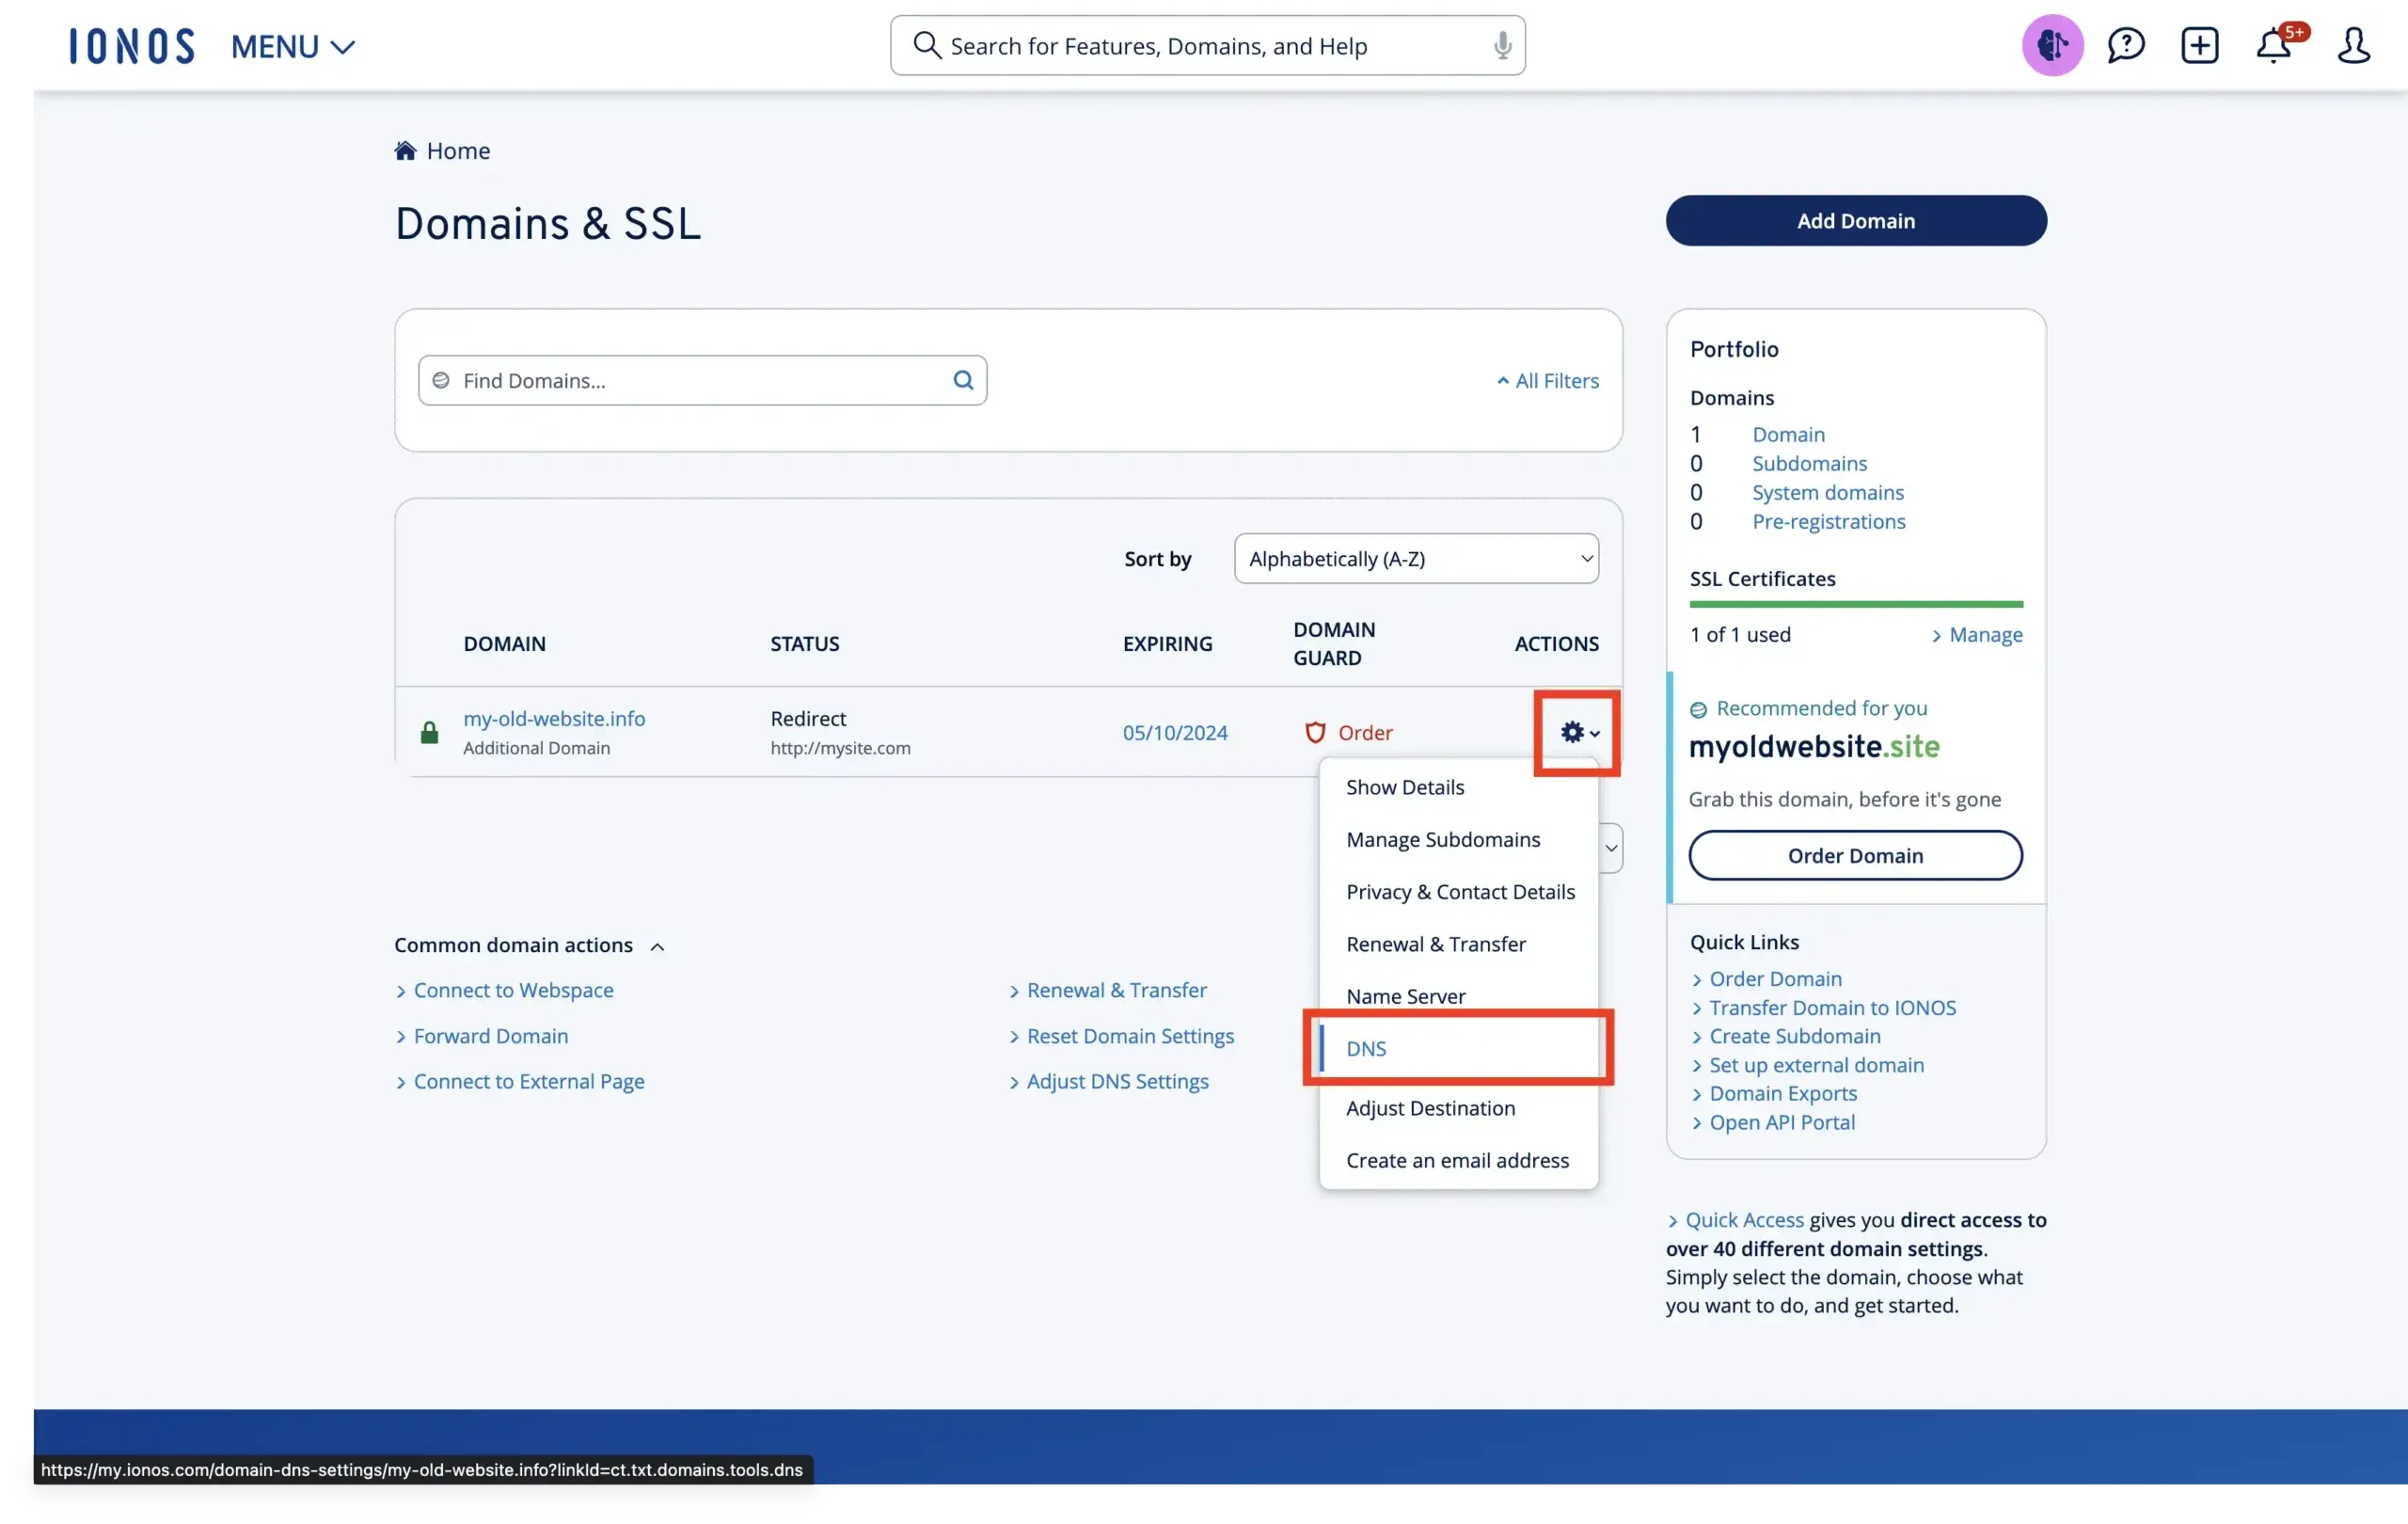
To complete redirecting using Domain-Forward.com, we need to head over to IONOS to tweak DNS changes.
To do that, log into the IONOS platform, find your domain, and select the option for DNS.
If you followed the steps exactly as we showed you, you should have a page that looks something like this:
Step 4: Change the DNS
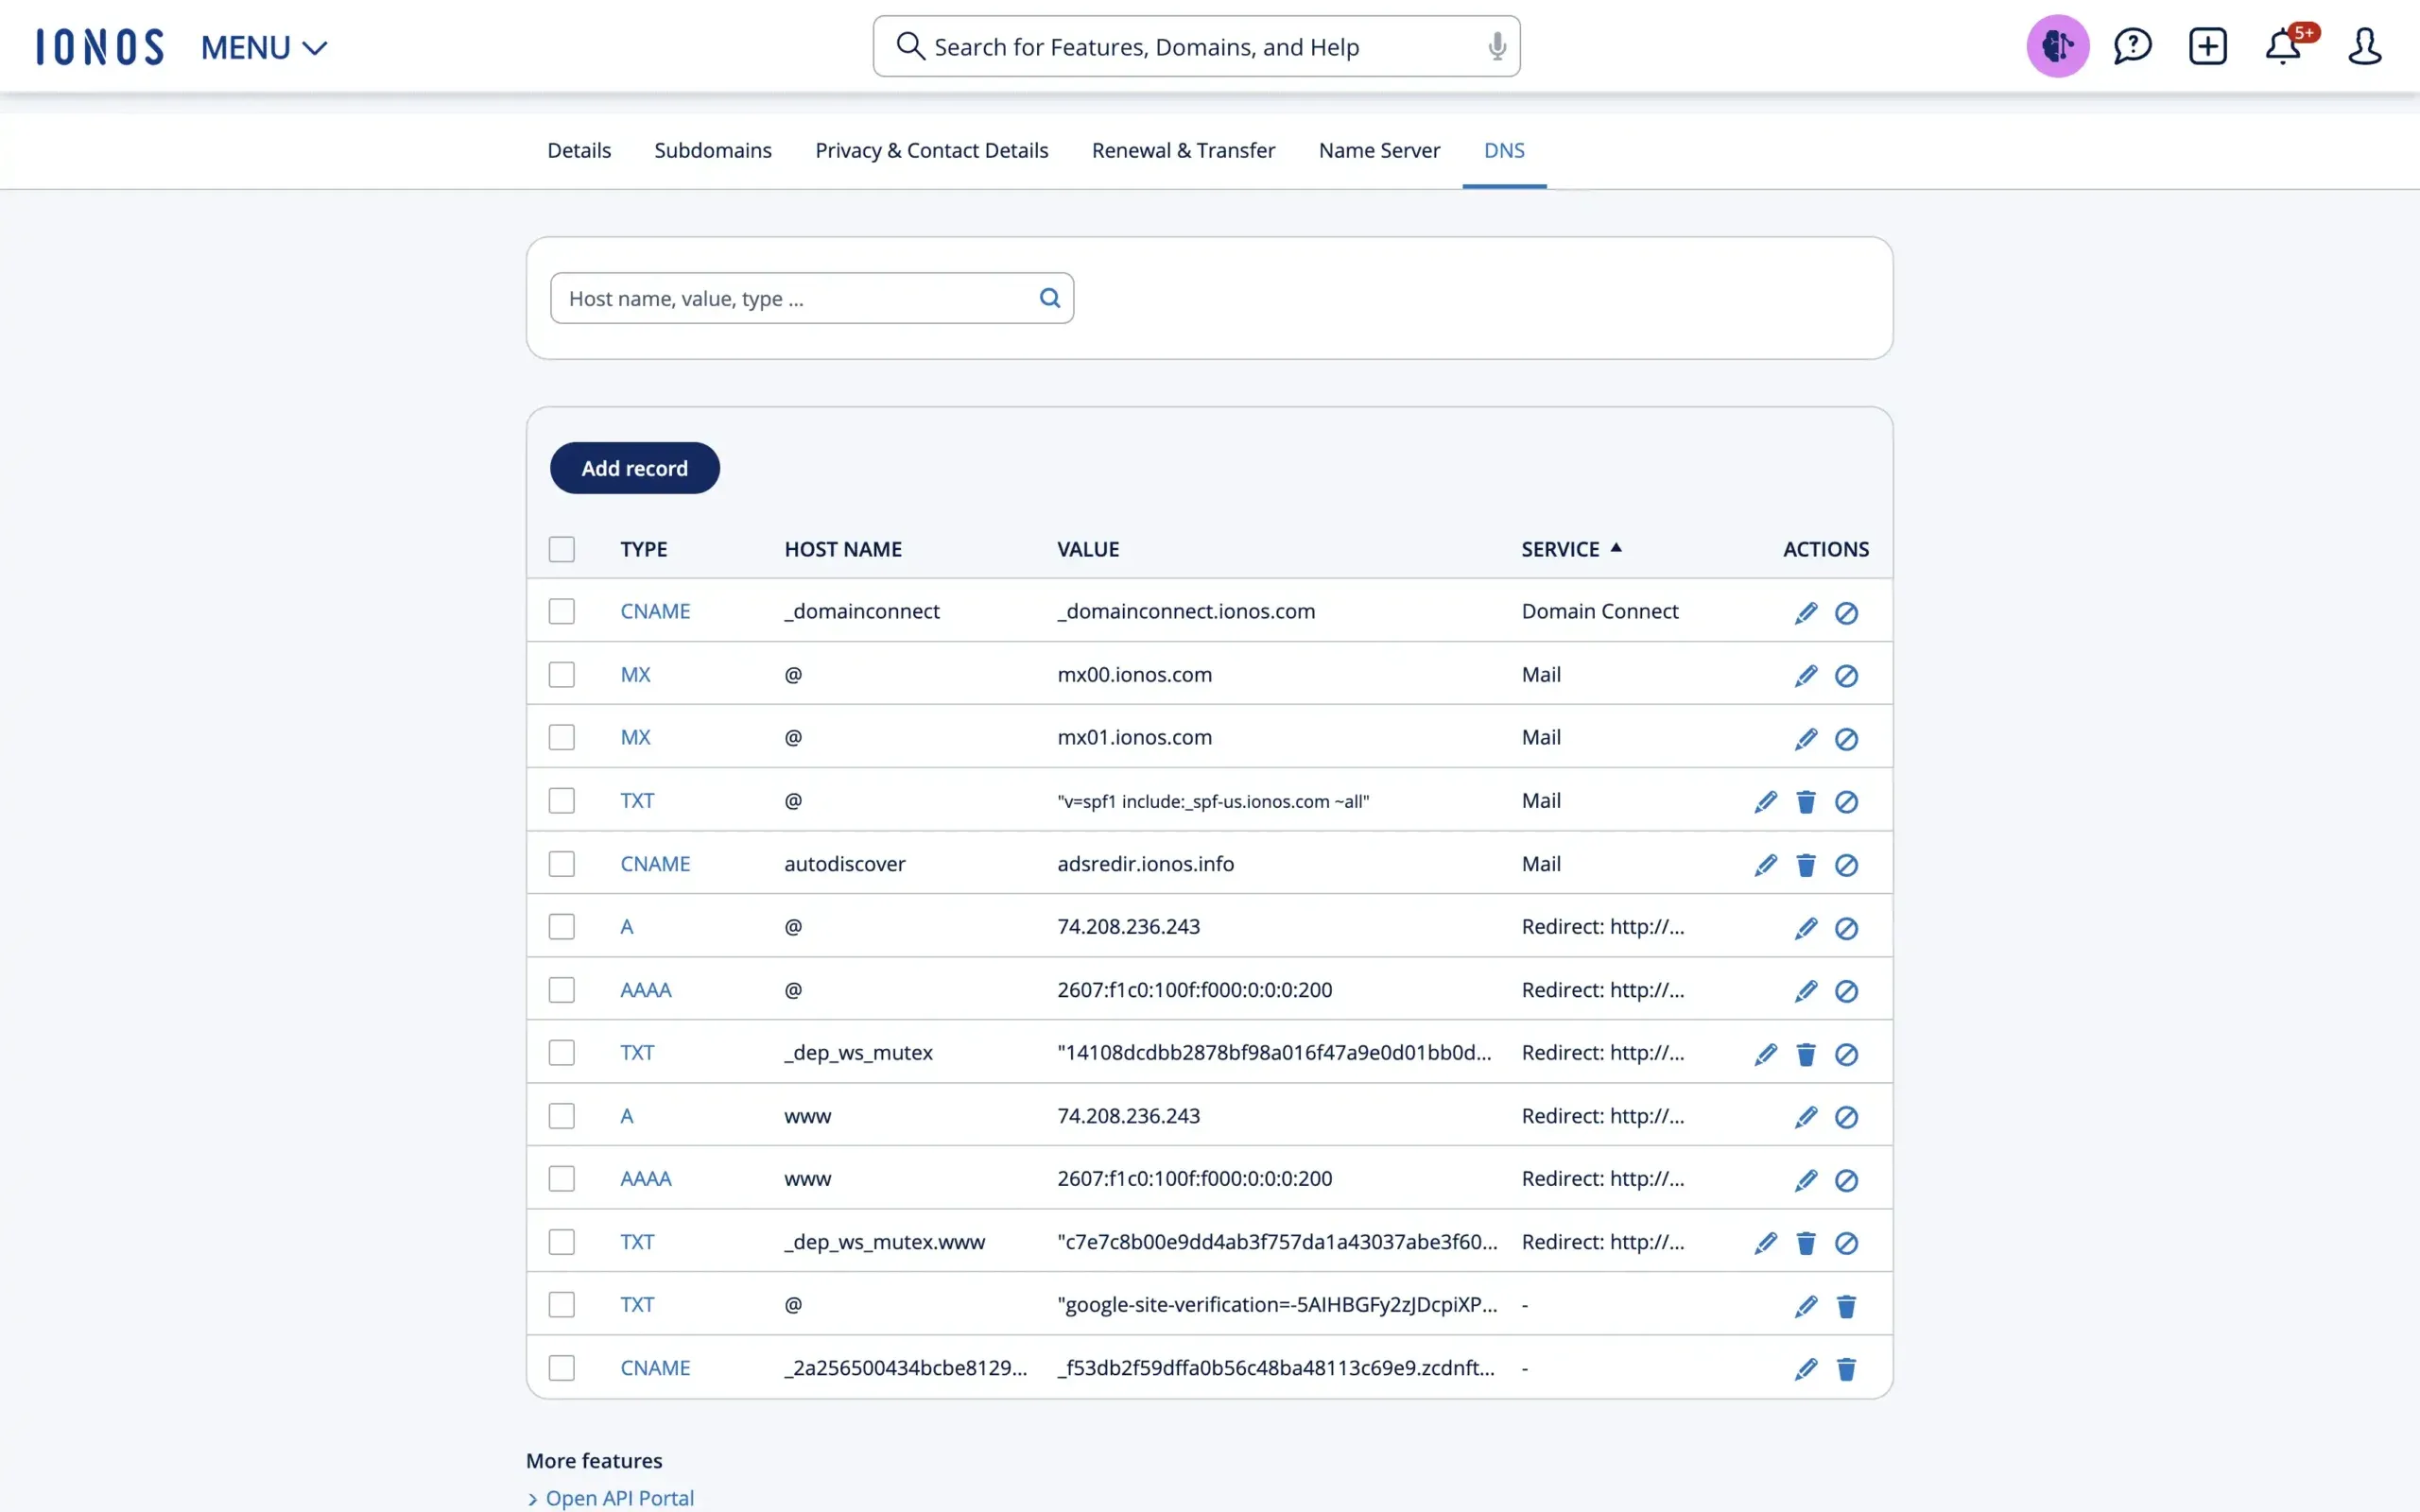
Now, let’s tweak our DNS settings. First, you want to click the edit button next to the A-type record. Here, you want to change the Value to 138.68.125.144 With that done, click Save. You can change the TTL value to 5 minutes if you want the DNS changes to propagate slightly faster in the future.
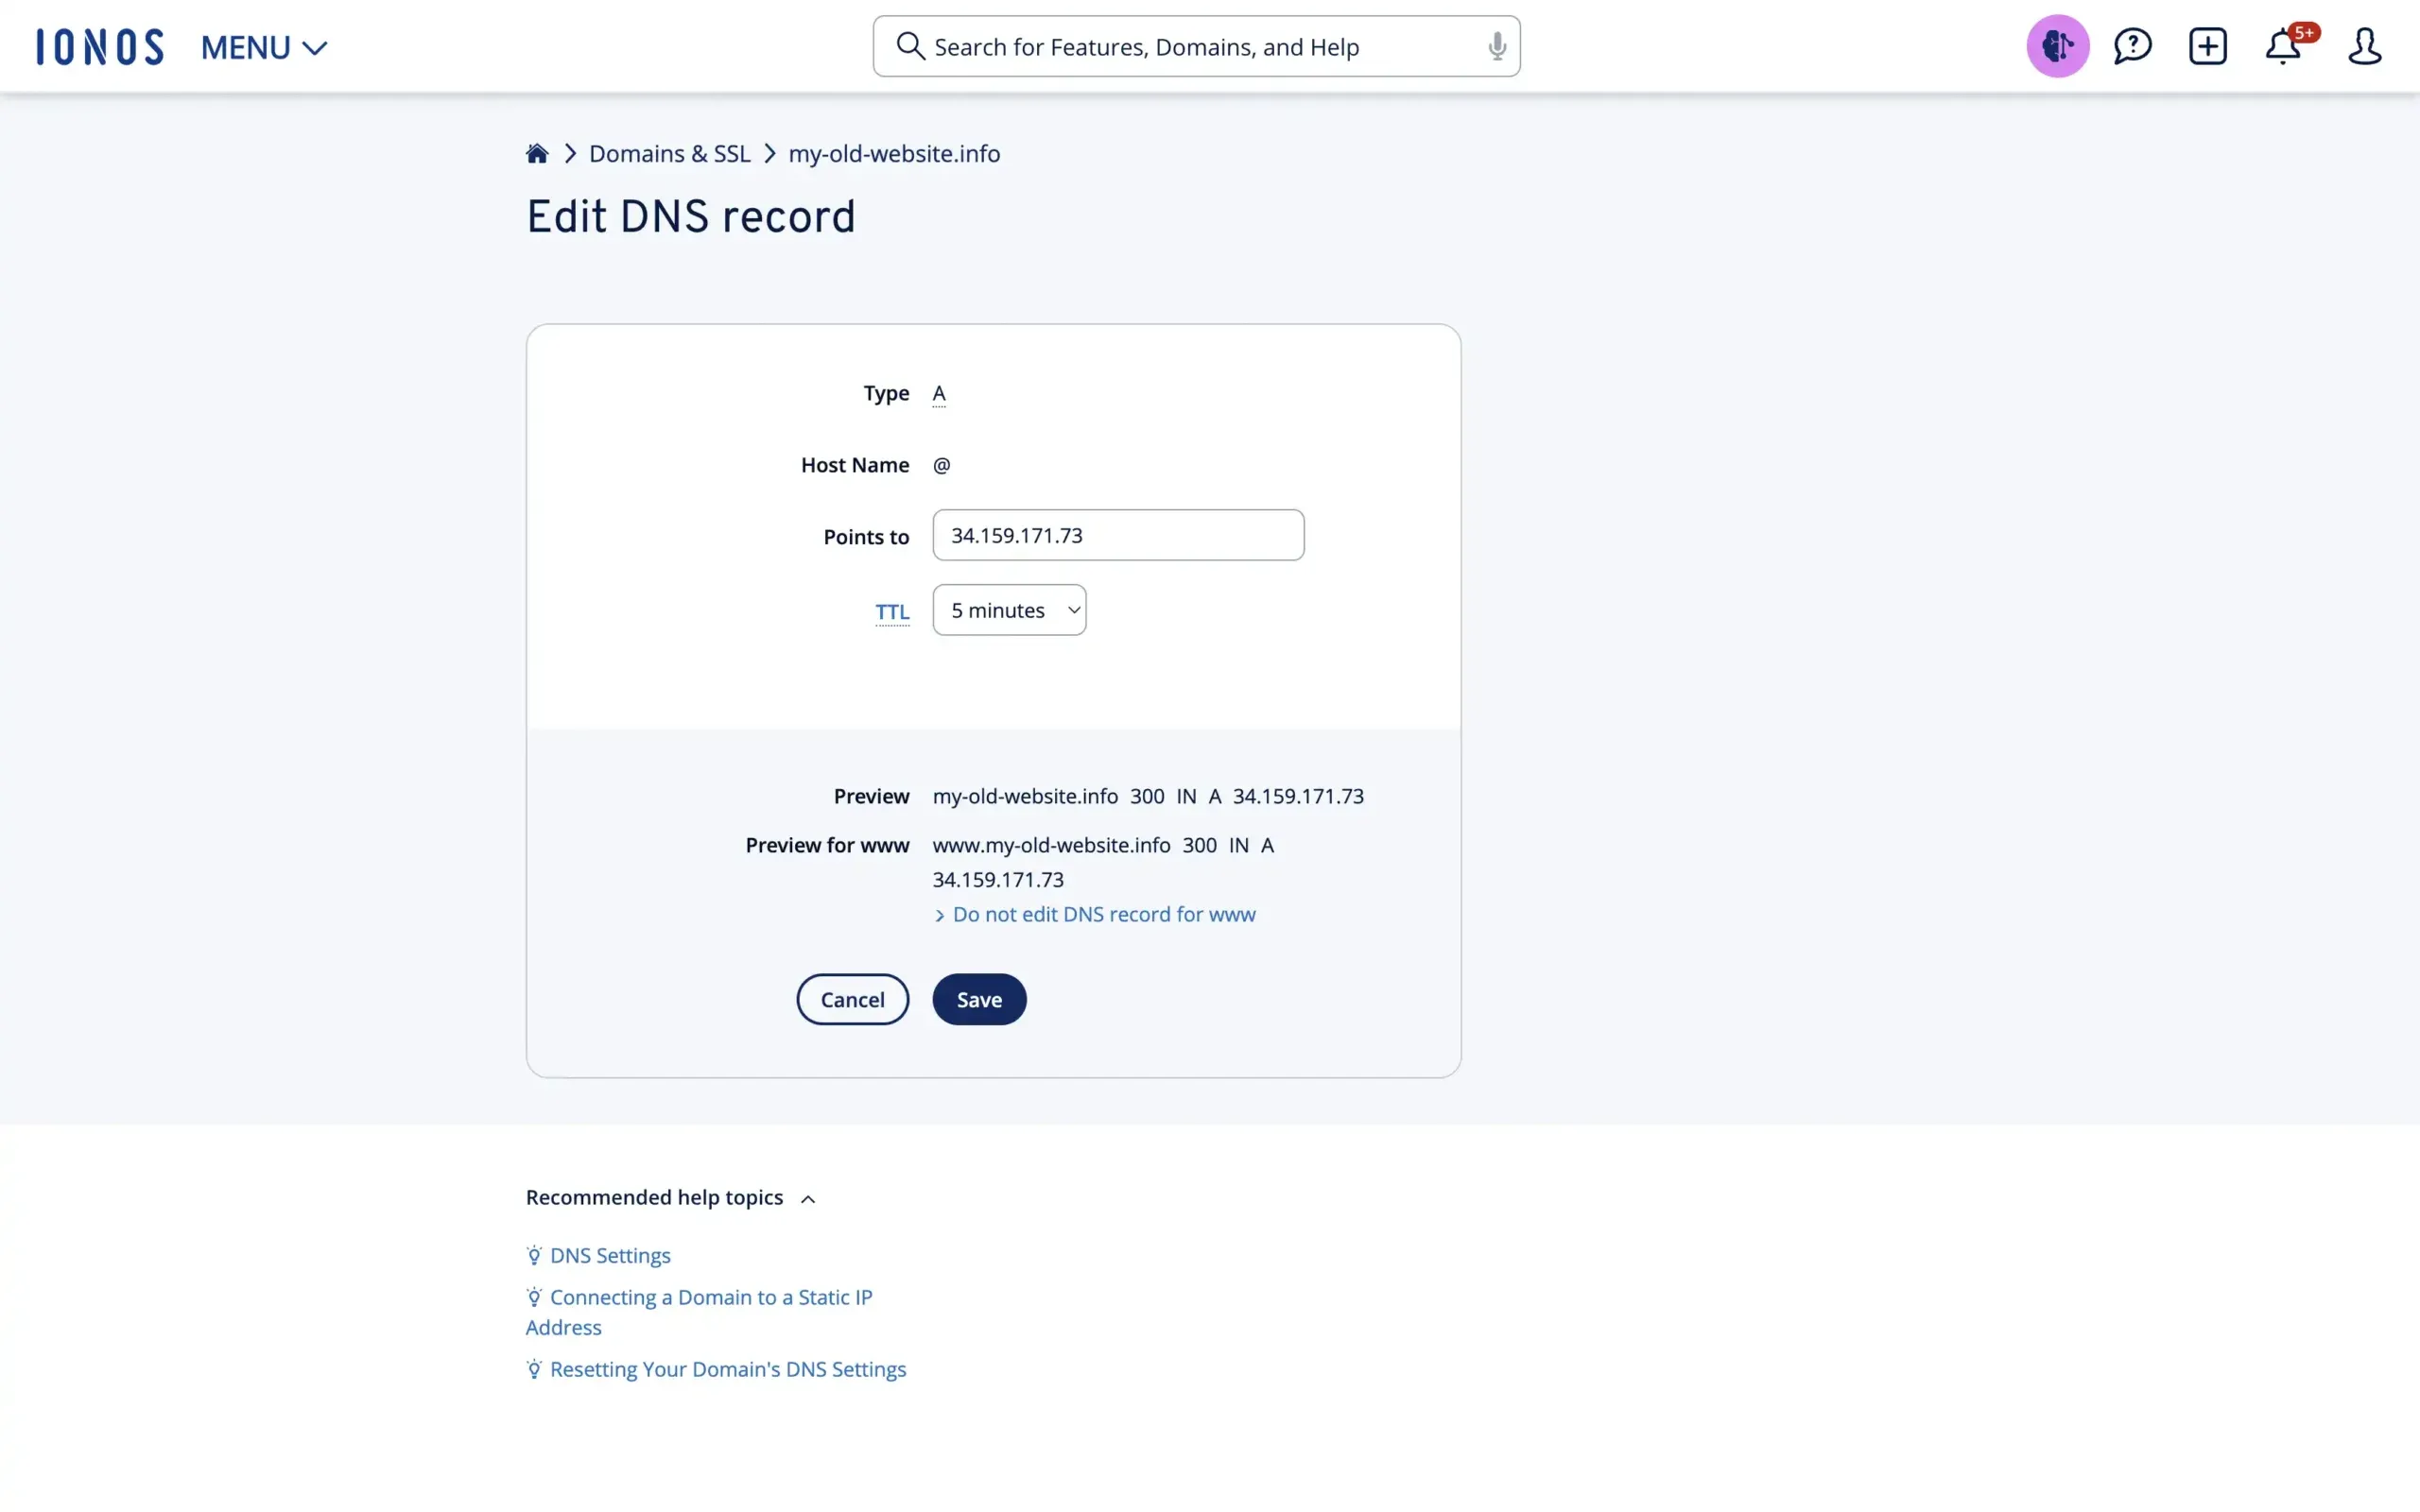
When you get a warning about the original redirect being disabled, just click Save again. The good thing with IONOS is that it also automatically adjusts the www domain records. That’s exactly what we would have done anyway so we don’t need to change anything there.
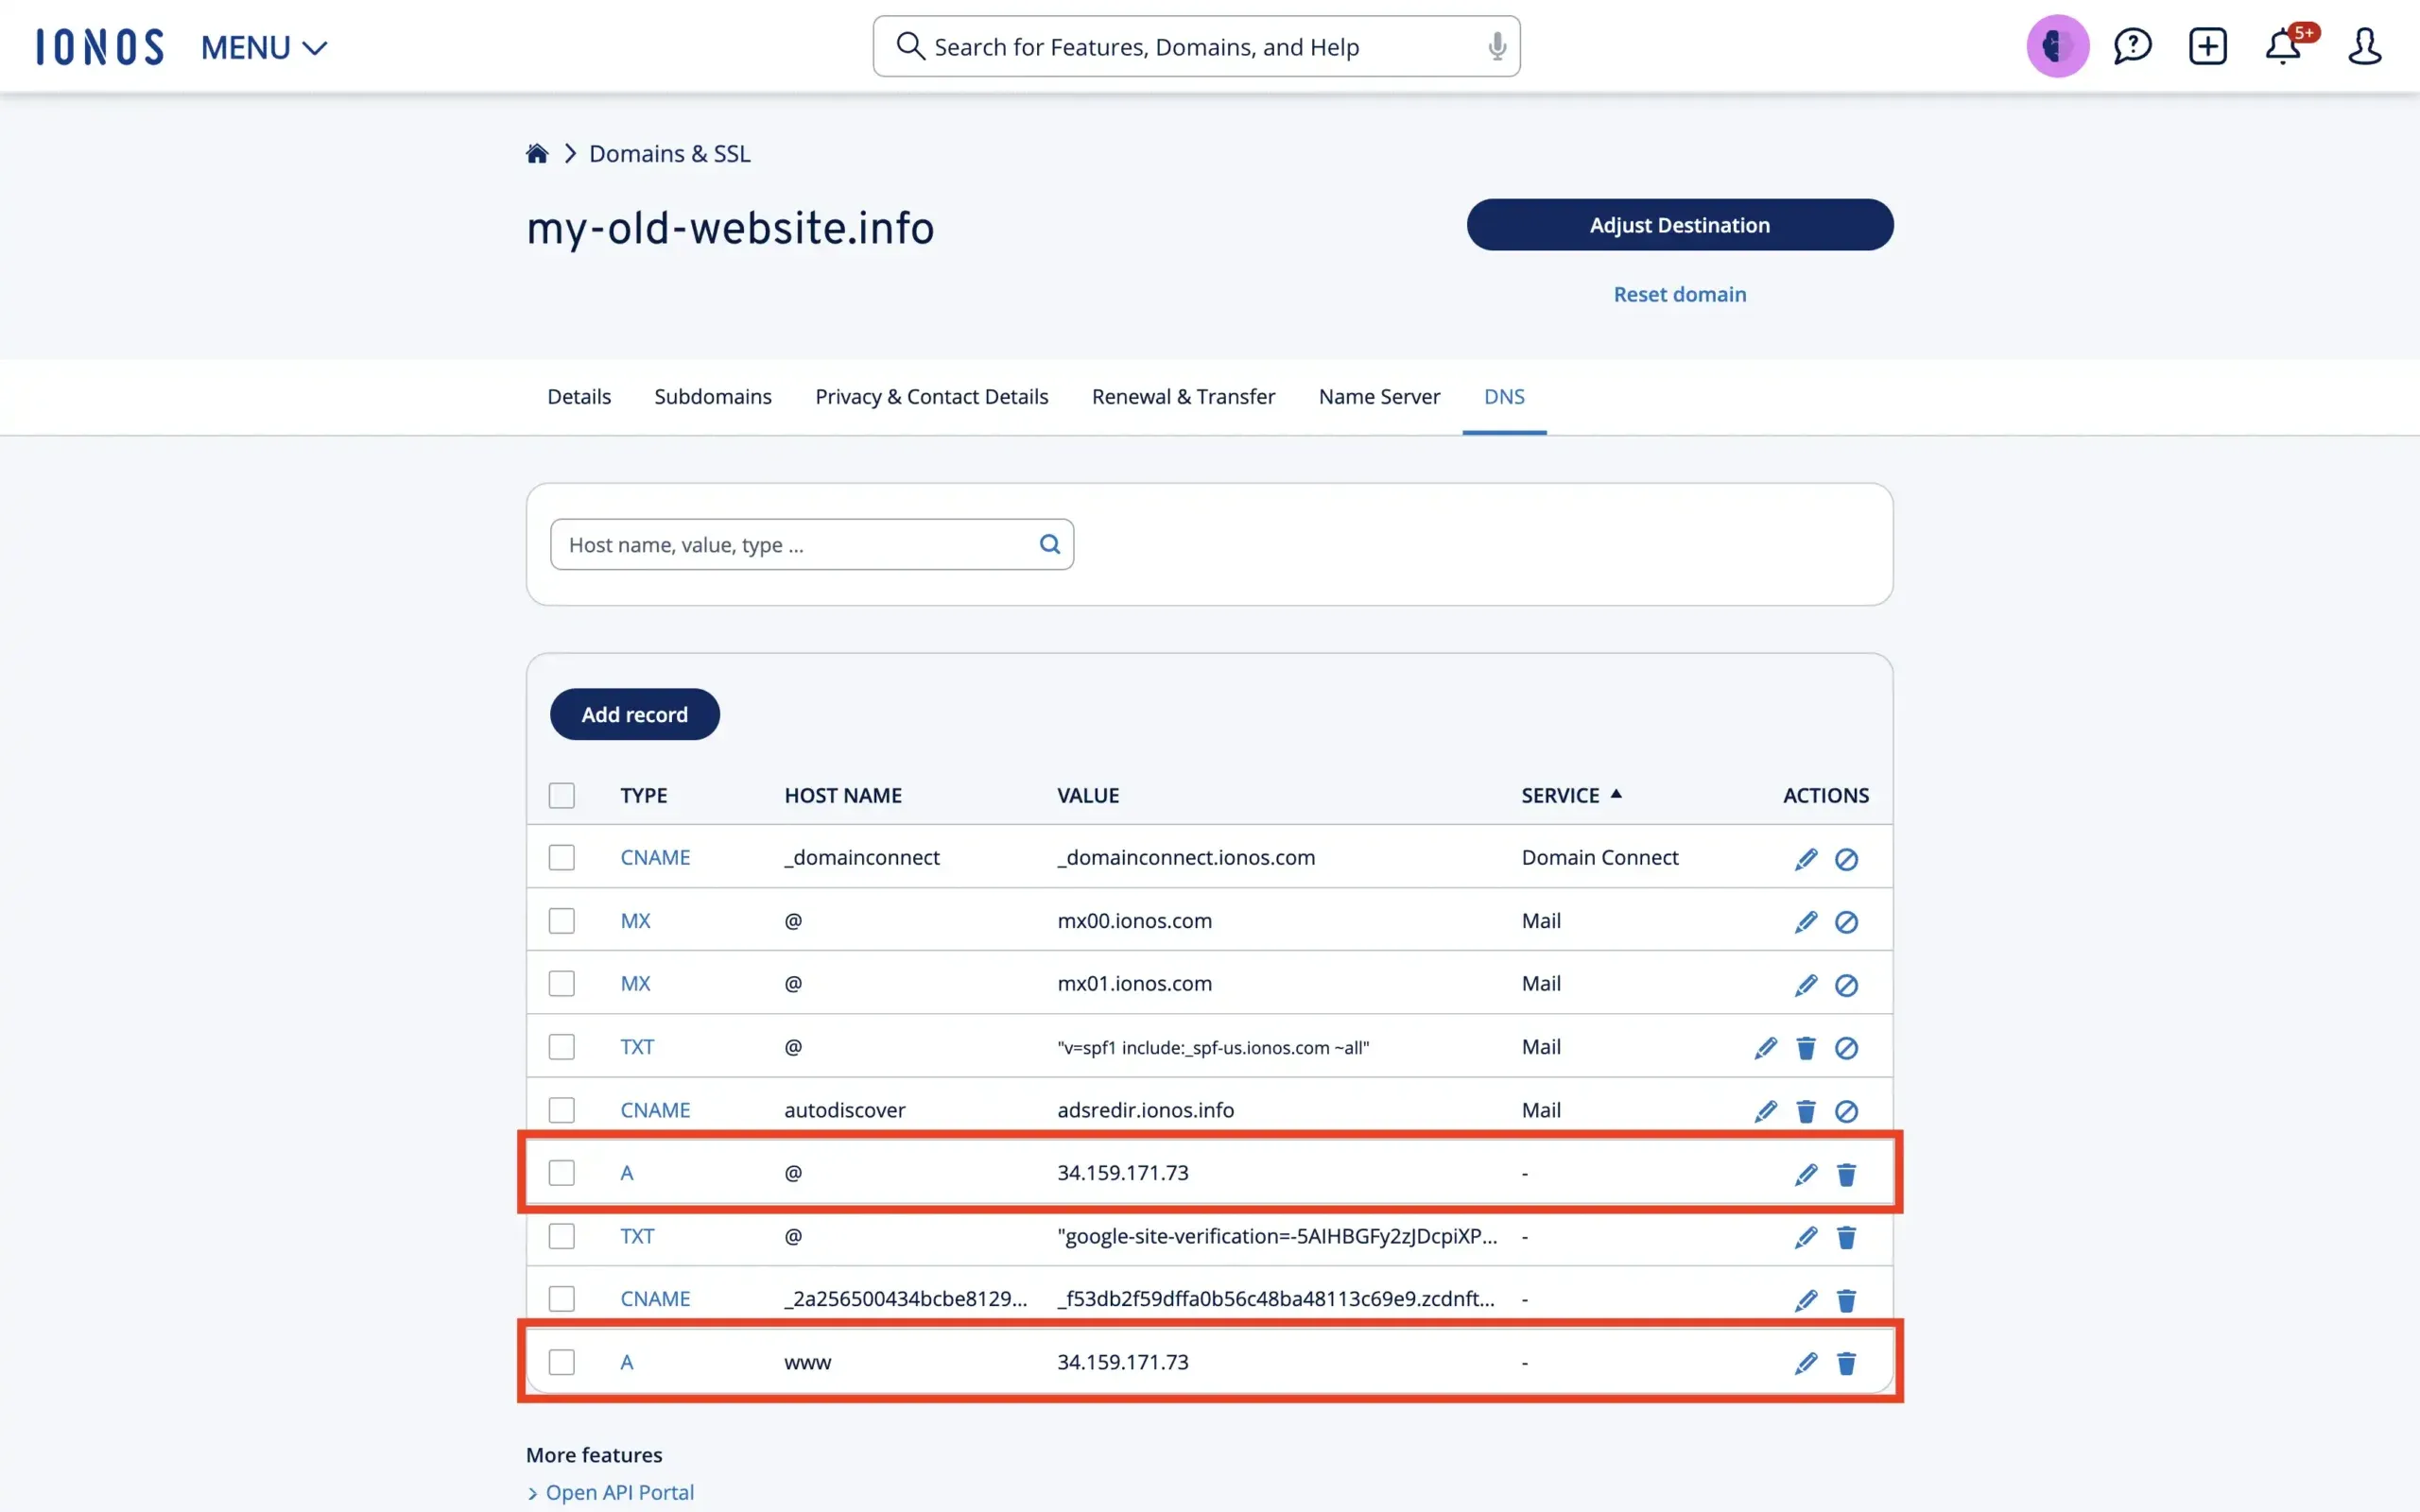
Now, that’s all we need to do here. Just so you know you did the right thing, it should look something like this:
Step 5: Verify DNS changes at Domain-Forward.com
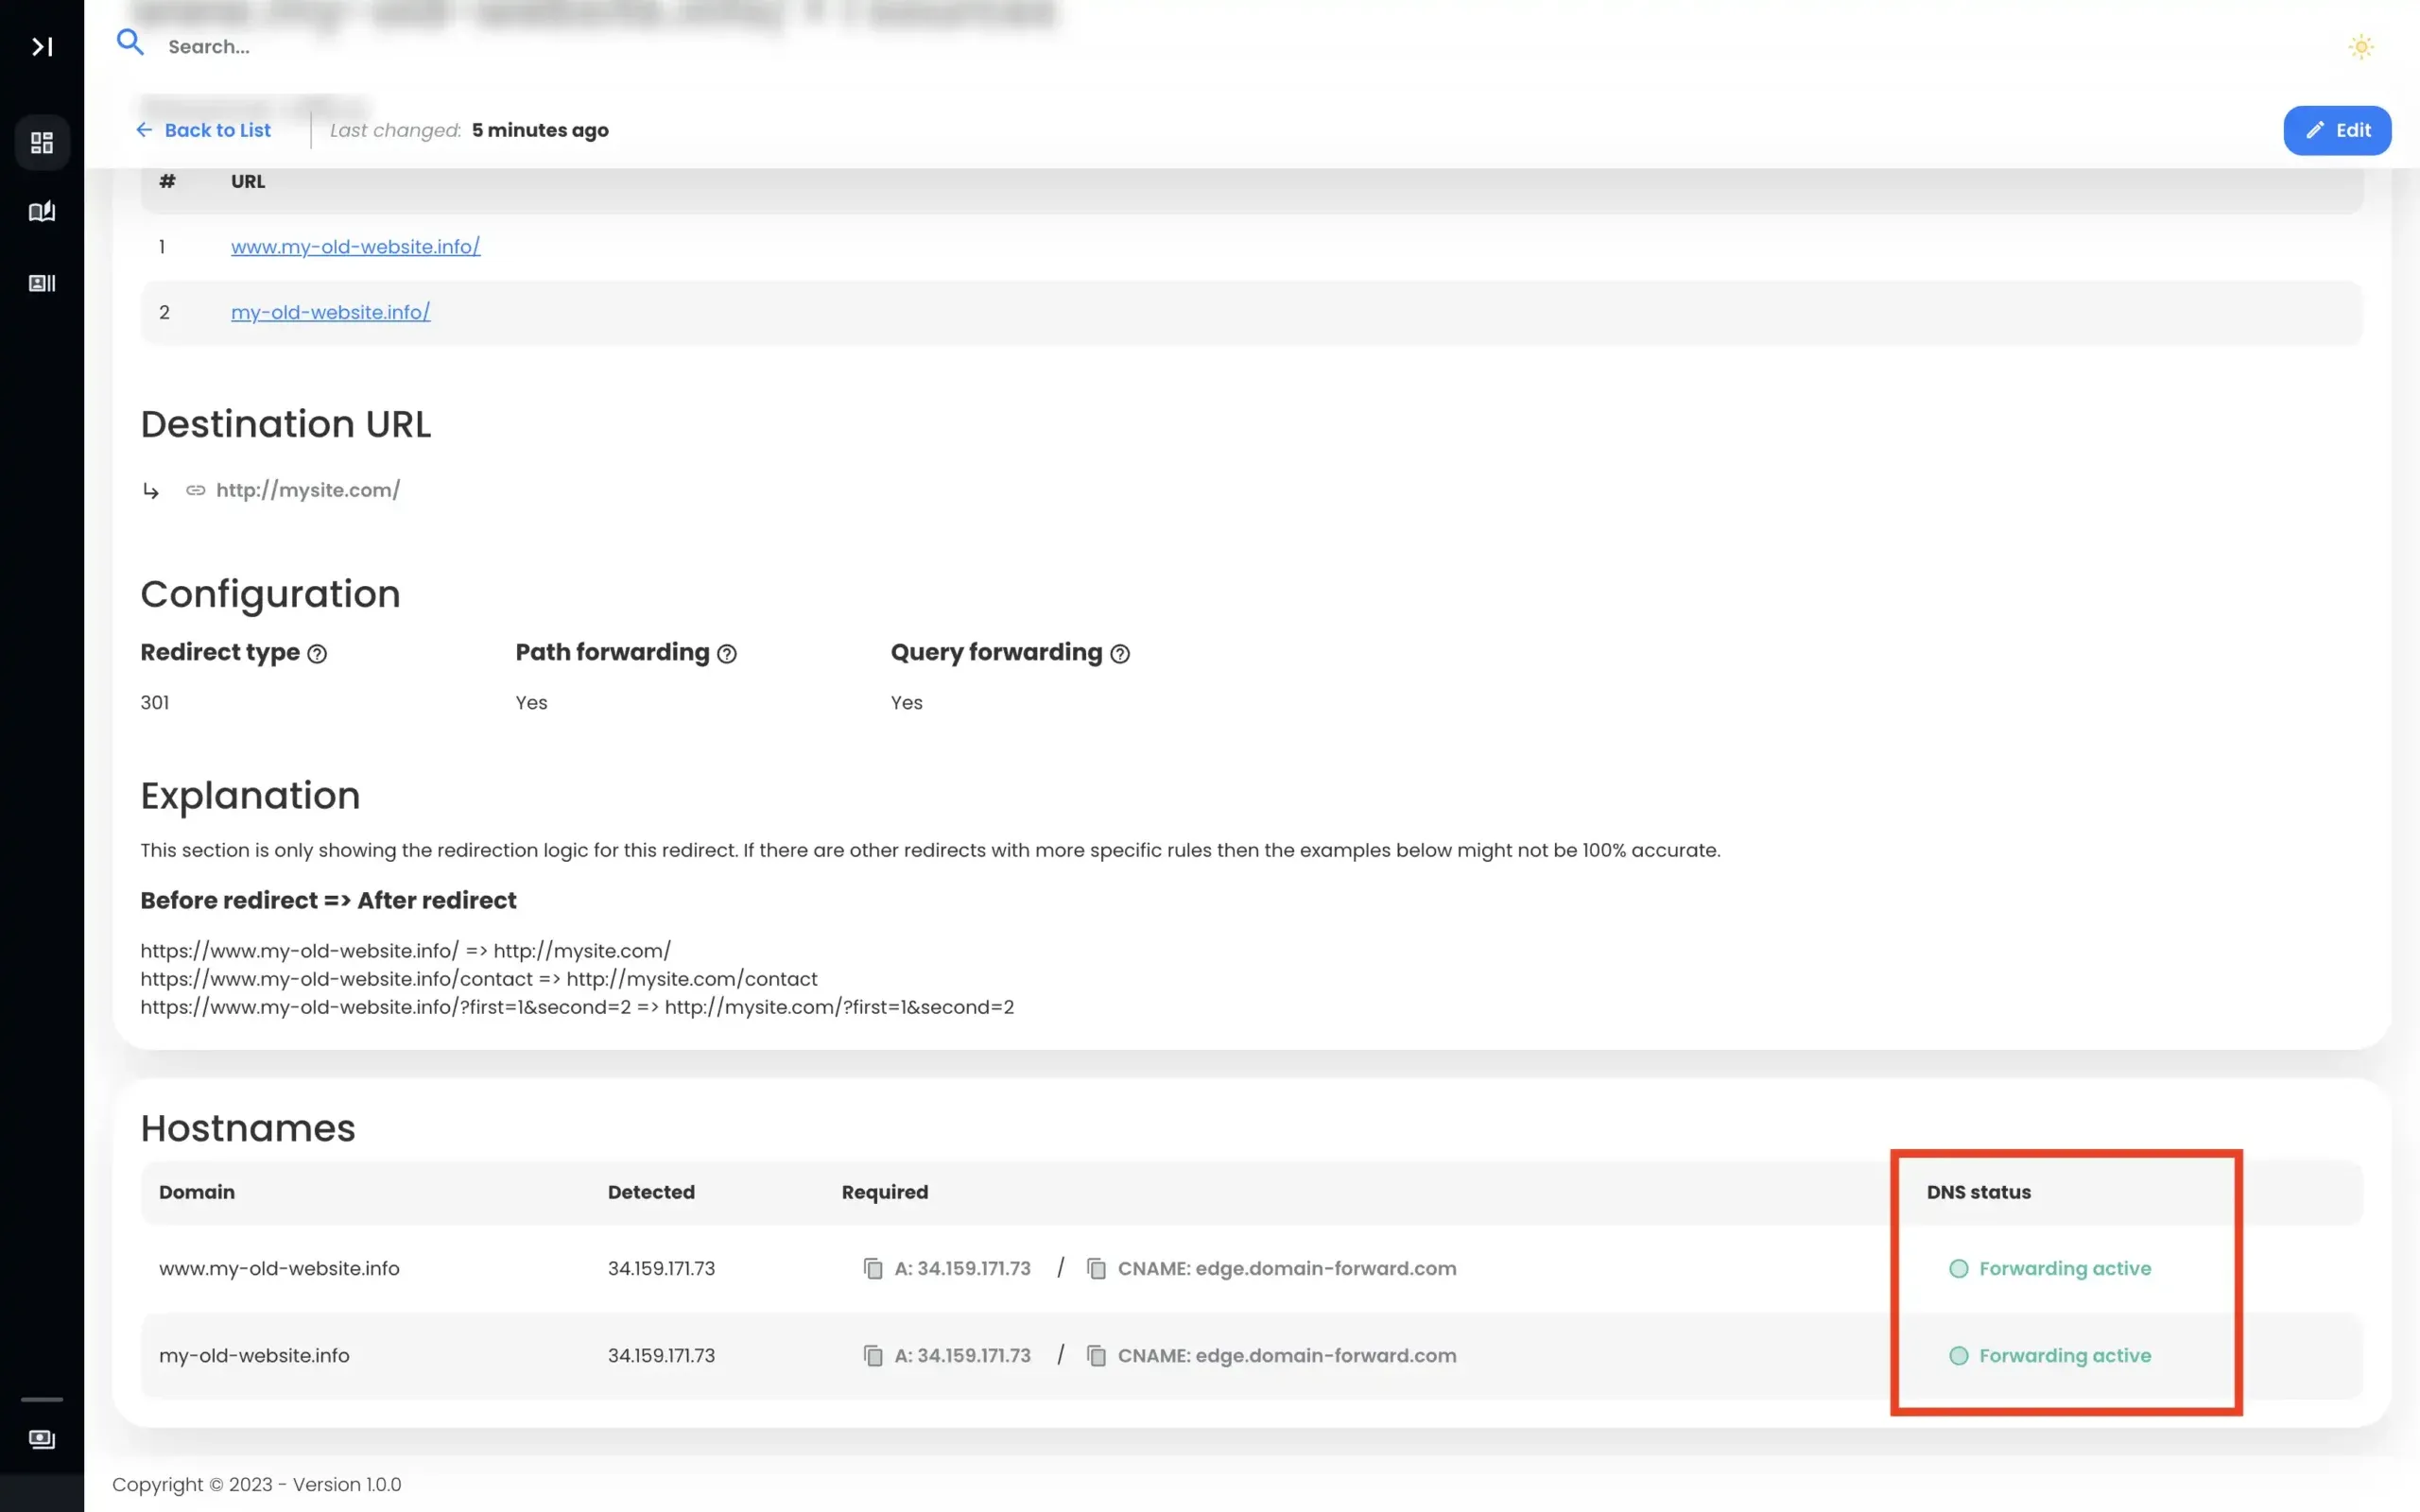
Once your changes have been effected on IONOS, head over to Domain-Forward.com to see if the DNS changes reflect.
Here is what ours looks like, showing that our DNS change at IONOS was successful.
Note: The DNS change isn’t always instant. It can take an hour or even up to 48h for the changes to go live. So have some patience.
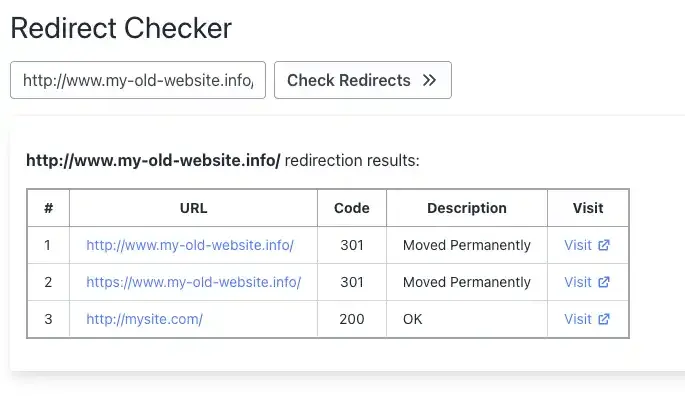
Step 6: Verify Redirect Using Online Tools
Now that we have set up the domain forwarding and the DNS entries, it’s time to check if the redirection is working correctly. Below is an image from an online “redirect testing tool,” confirming our redirection is functioning correctly.
IONOS Redirects vs Domain-Forward.com
| Feature | IONOS Forwarding | Domain-Forward.com |
|---|---|---|
| Redirect type | 302 (temporary) | 301 (permanent) |
| HTTPS/SSL | Manual, ~$10/yr per domain | Free, automatic |
| Analytics | No | Yes (clicks, geography, devices) |
| www + non-www | Auto-handled (a plus) | Handled together |
| Propagation | Up to 48 hours | Standard DNS propagation |
| Price | Free + paid SSL | Free plan (5 domains) |
Not sure what type of redirect you need? Check our guide to URL forwarding and redirect types. You can verify your setup works with our redirect tester tool.
If you’re using a different registrar, we have similar guides for GoDaddy, Namecheap, Bluehost, Porkbun, Name.com, and Squarespace.
Stop Losing SEO Value to Temporary Redirects
Every day your IONOS domain uses a 302 redirect, search engines treat the move as temporary. Your old domain keeps getting indexed. Your new domain doesn’t inherit the ranking power.
The fix takes 5 minutes: sign up for Domain-Forward.com, add your redirect with a proper 301, update one DNS record at IONOS, and you’re done. Free HTTPS, permanent redirects, and analytics to prove it’s working. Your email stays working — we only change A records, not MX records.
Not sure what type of redirect you need? Check our guide to URL forwarding and redirect types. You can also verify your setup works with our redirect tester tool.
If you’re using a different registrar, we have similar guides for GoDaddy, Namecheap, Bluehost, Porkbun, Name.com, and Squarespace.