
TL;DR: AWS Route53 can’t redirect domains on its own — you need CloudFront + a CloudFront Function. The setup takes 30+ minutes across 3 AWS services. For a simpler alternative, Domain-Forward.com does the same thing in 5 minutes with free HTTPS.
This guide walks through setting up a domain redirect using AWS Route53 and CloudFront. You’ll need this if you’re rebranding, consolidating domains, or migrating to a new domain.
The Basics
AWS Route 53
Amazon’s DNS service. It routes users to your application by translating domain names to IP addresses. Route53 alone can’t perform HTTP redirects — you need CloudFront for that. For a simpler alternative, see our AWS Route53 vs Domain Forward comparison.
Amazon CloudFront
Amazon’s CDN (content delivery network). We’re using it here because it’s the recommended method from AWS for domain redirects and is simpler to configure than the alternatives (S3 + ALB).
Without further setup, let’s get started.
Step 1: Set Up an AWS CloudFront Web Distribution
Create a CloudFront distribution for the domain you’re redirecting from.
Sign in to the AWS Management Console and open the CloudFront console at https://console.aws.amazon.com/cloudfront/.

Choose Create Distribution.
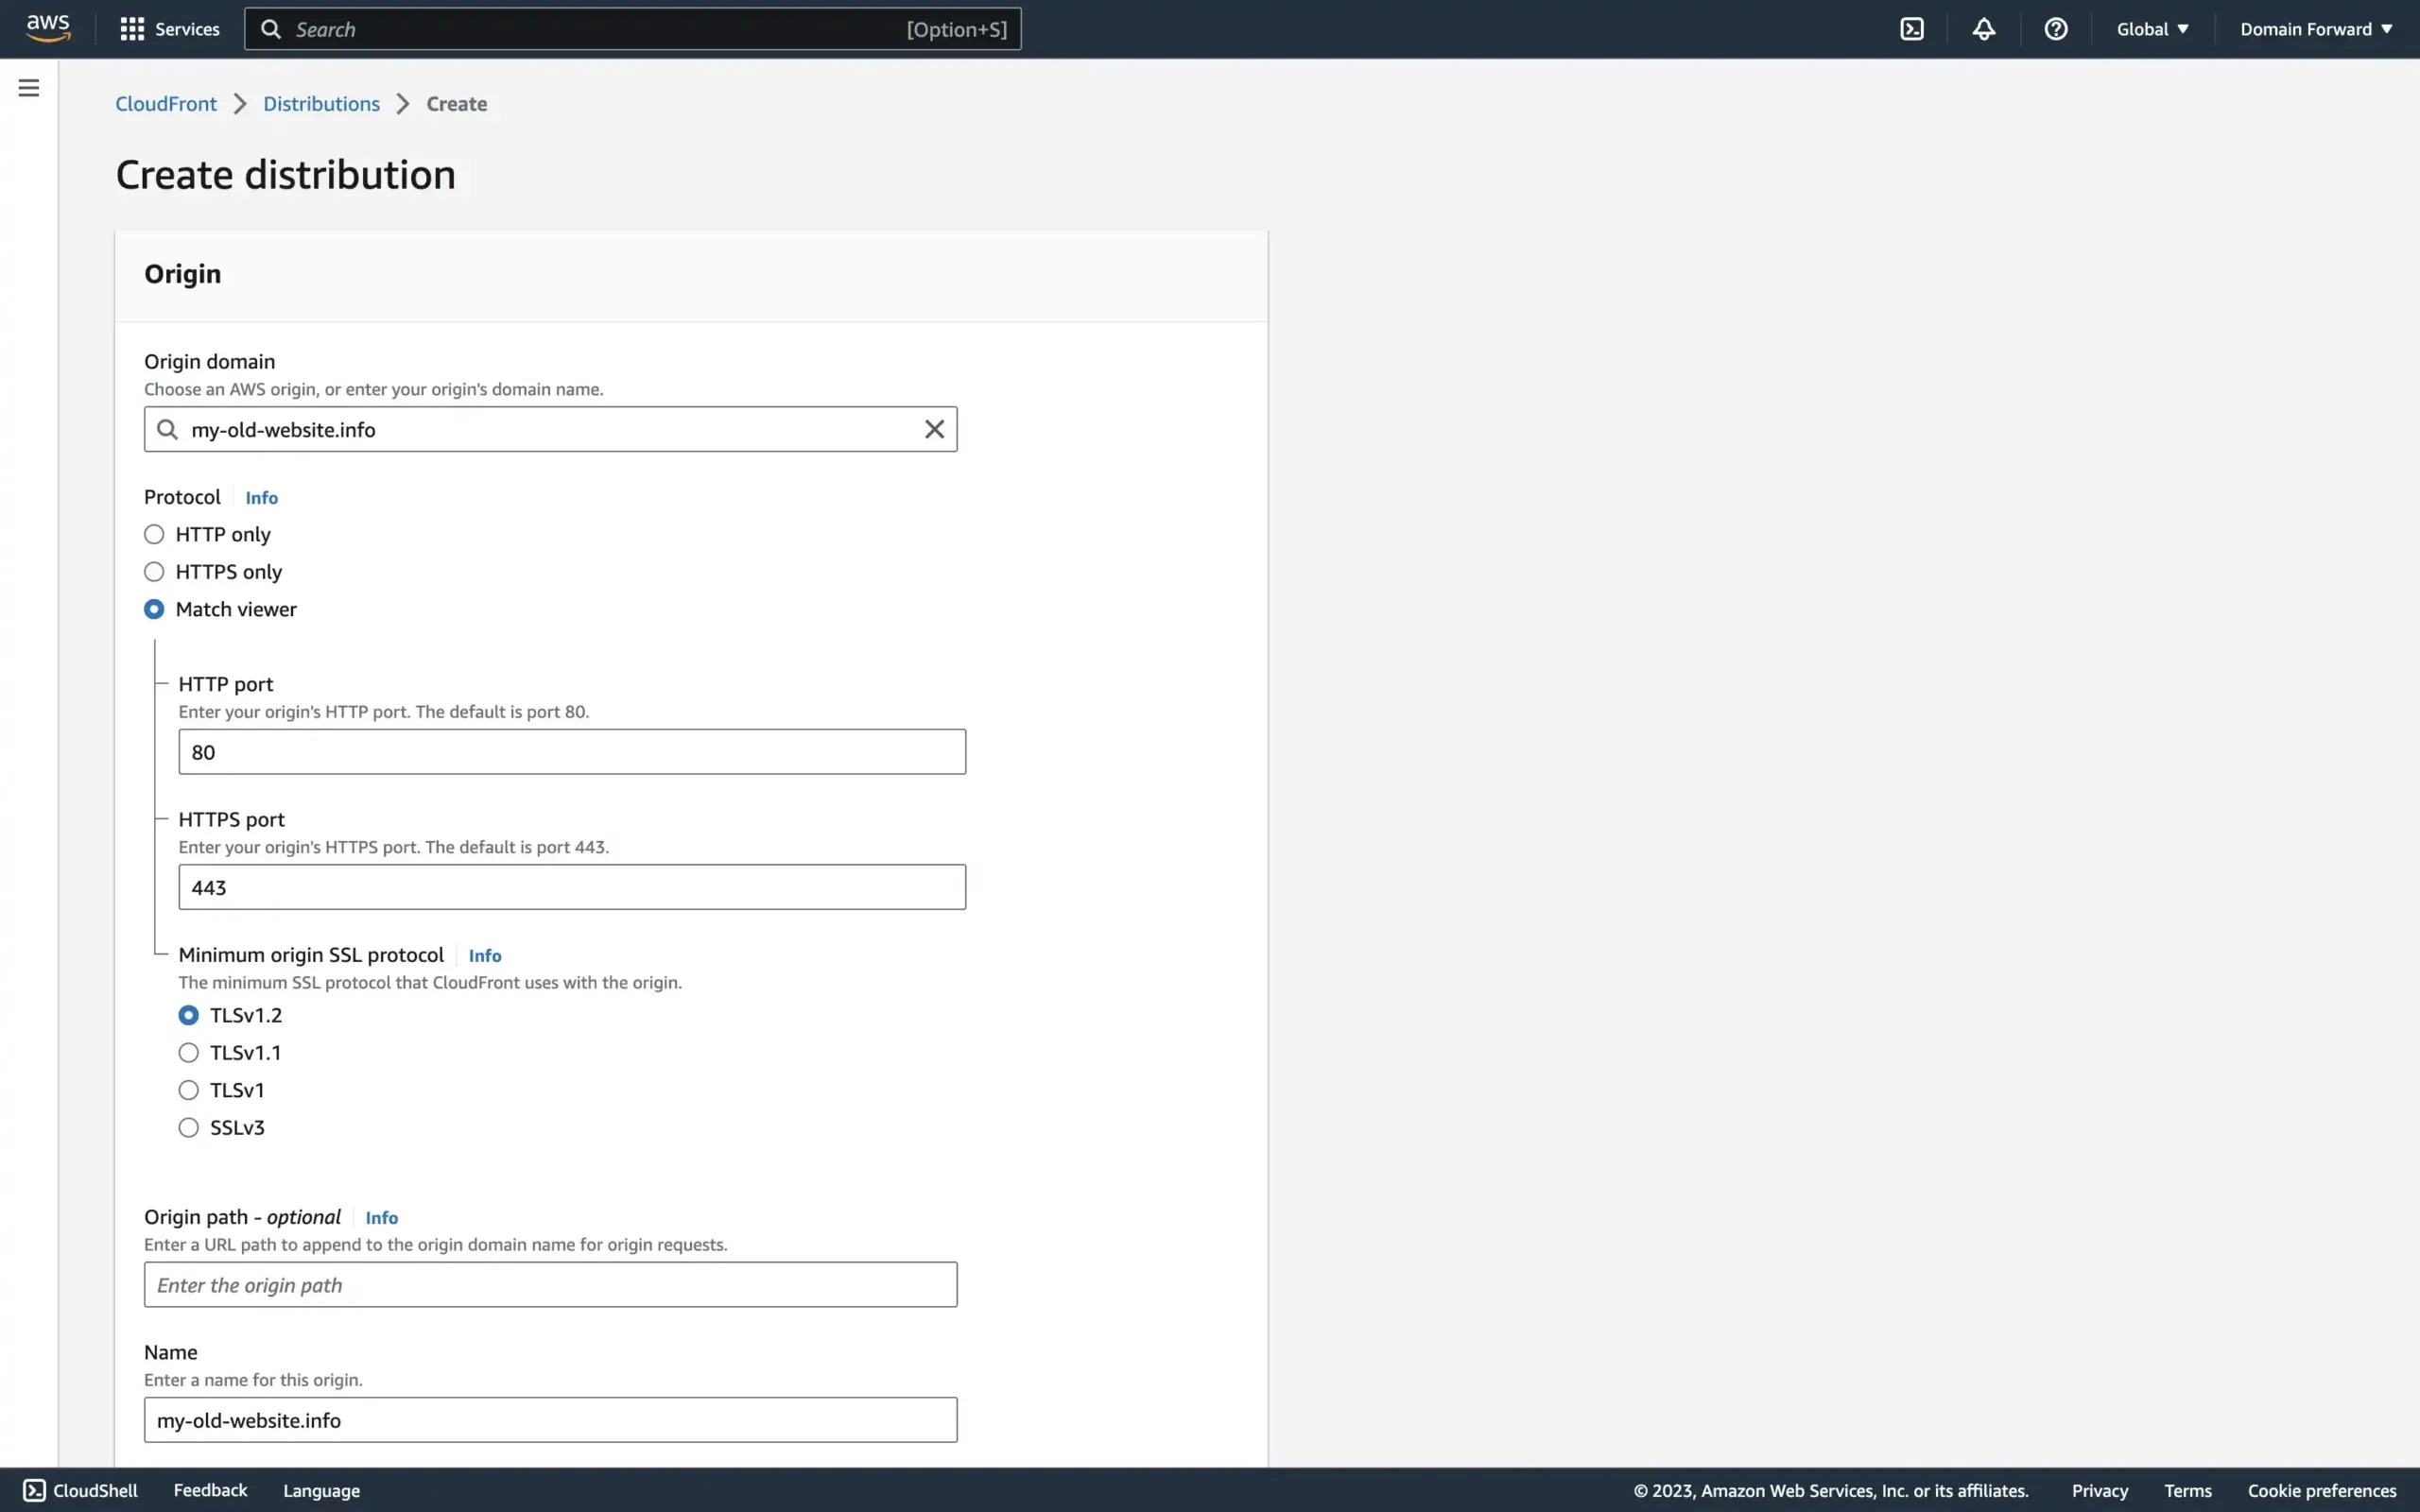
In the Origin Settings section, type the domain you are redirecting to in the Origin Domain Name box.
In the Protocol radio, select the Match viewer option.
Leave the remaining settings in the Origin Settings section at their default values.
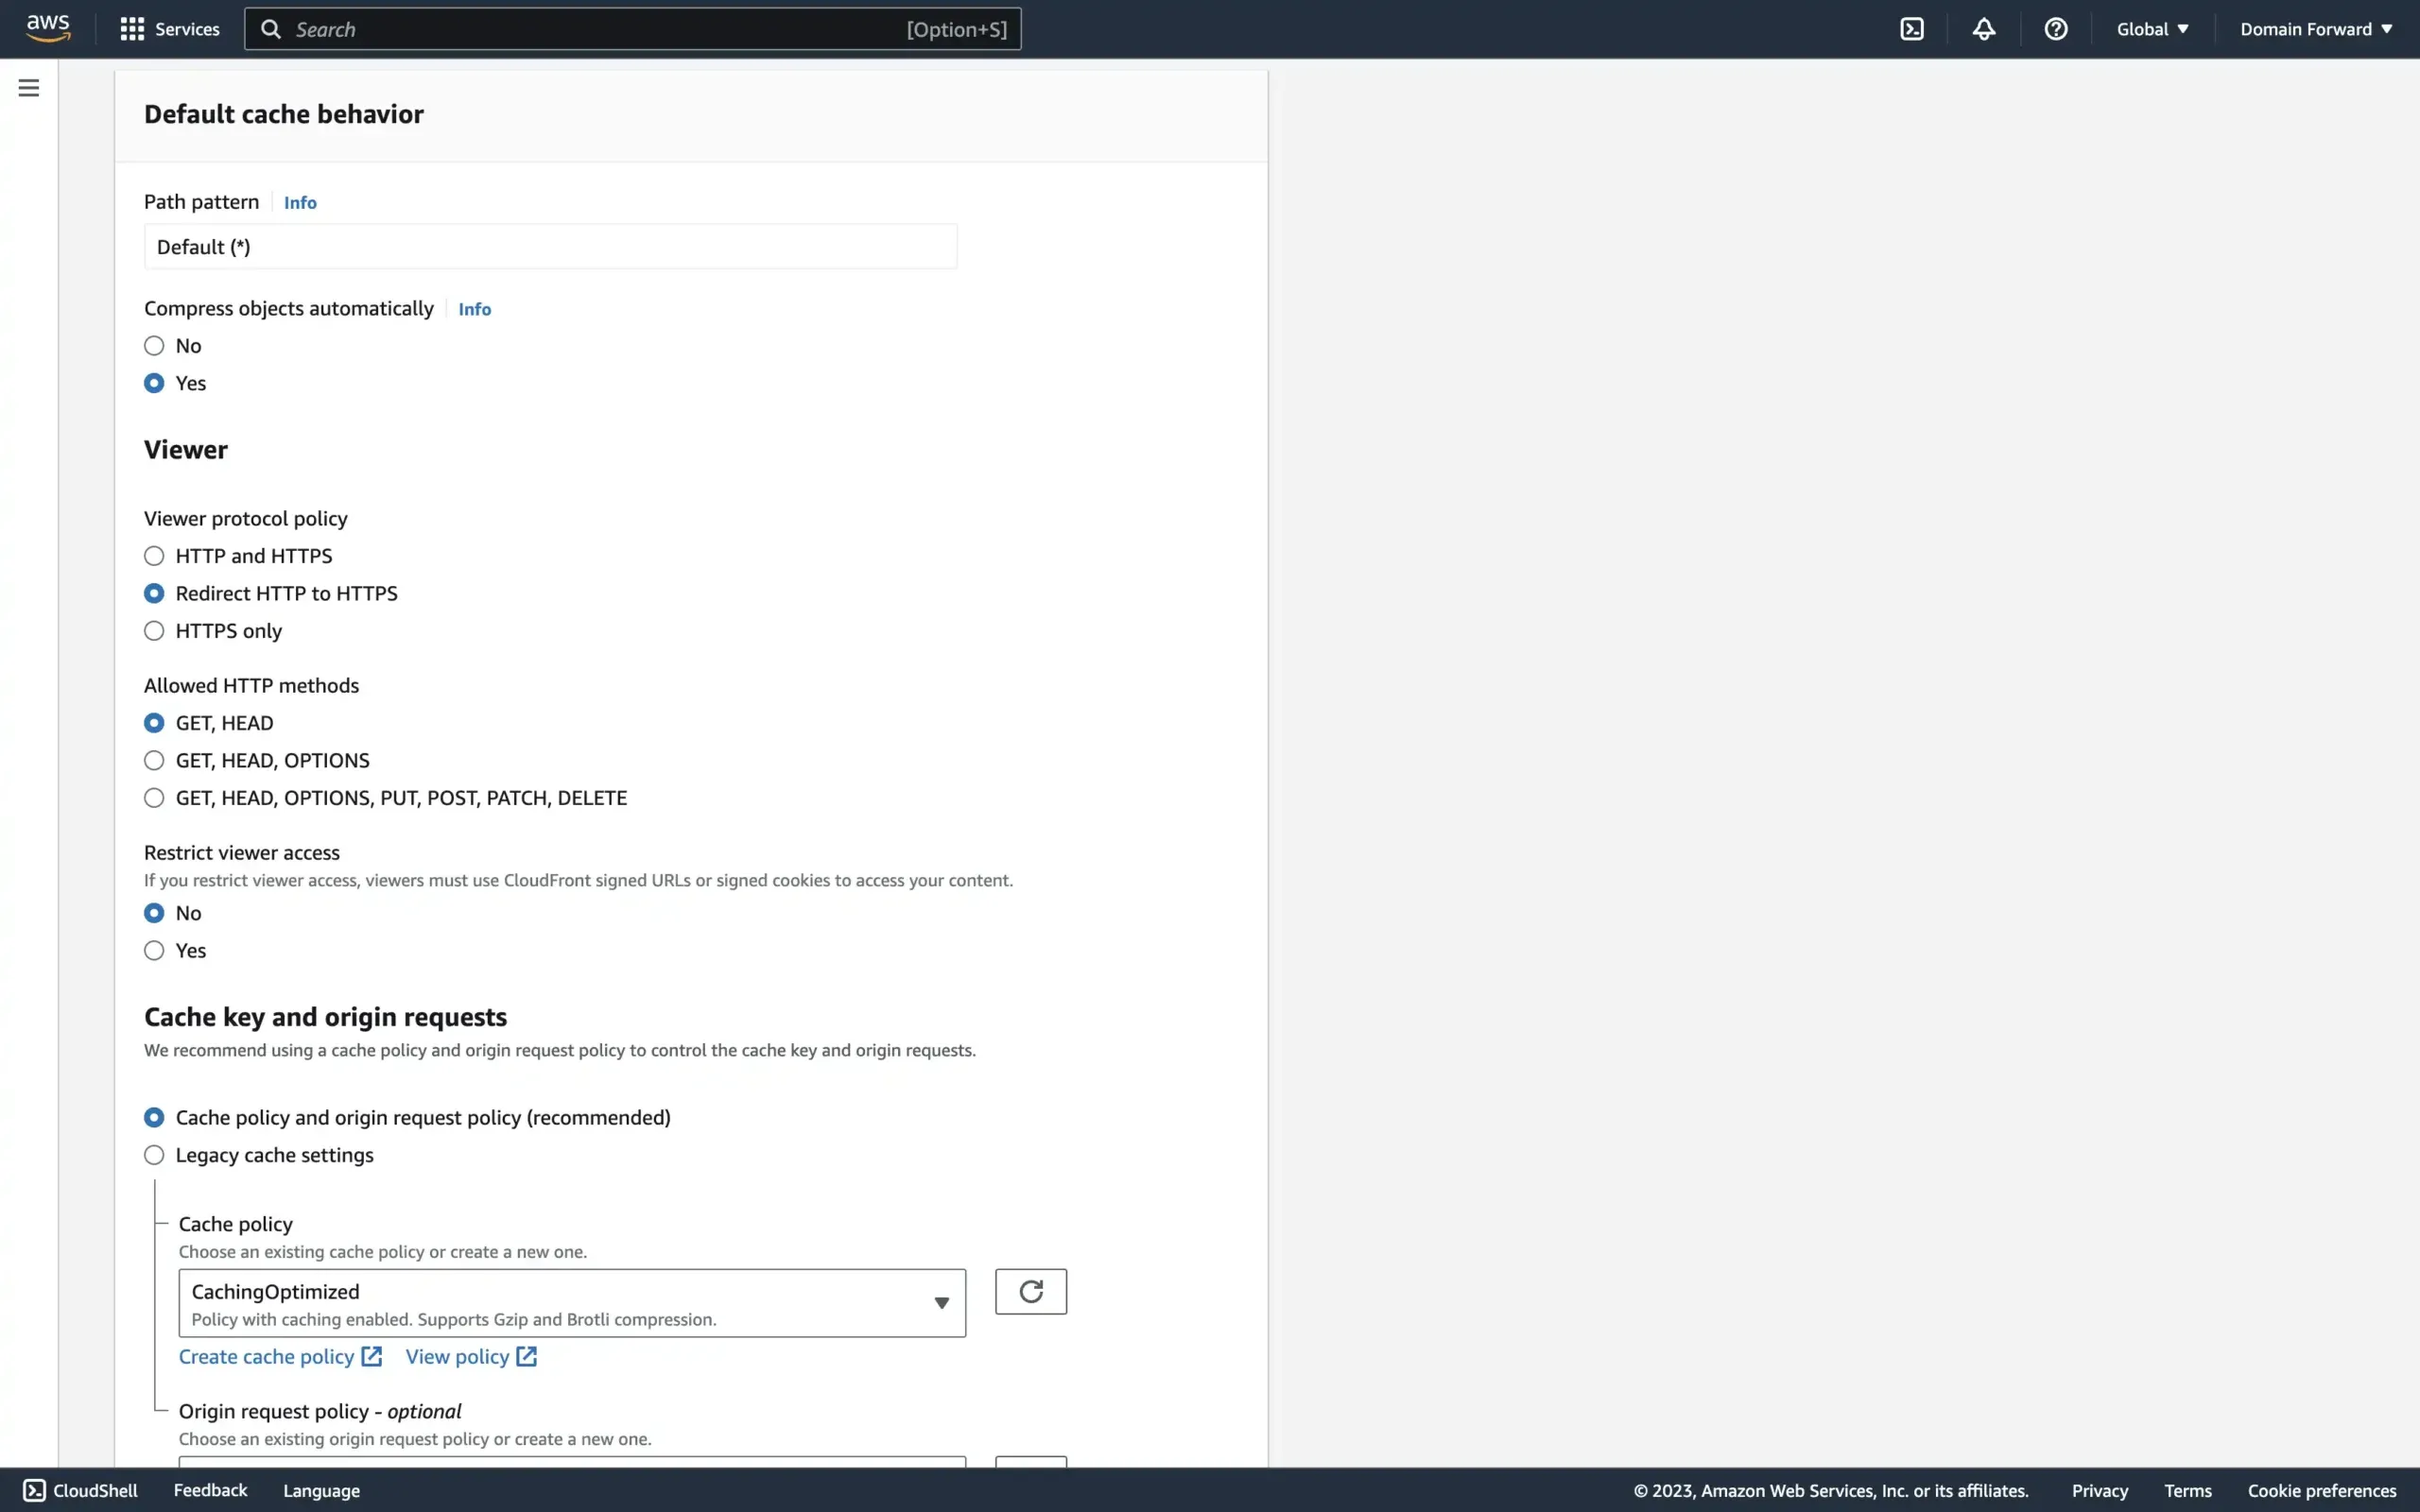
In the Default Cache Behavior Settings section, for Viewer Protocol Policy, choose Redirect HTTP to HTTPS and for Cache Policy, select CachingOptimized.
Leave the remaining settings in the Default Cache Behavior Settings section at their default values.
In the Web Application Firewall (WAF) section, you can select Do not enable security protections.
In the Settings section, for Alternate Domain Names (CNAMEs), type the domain you are redirecting from.
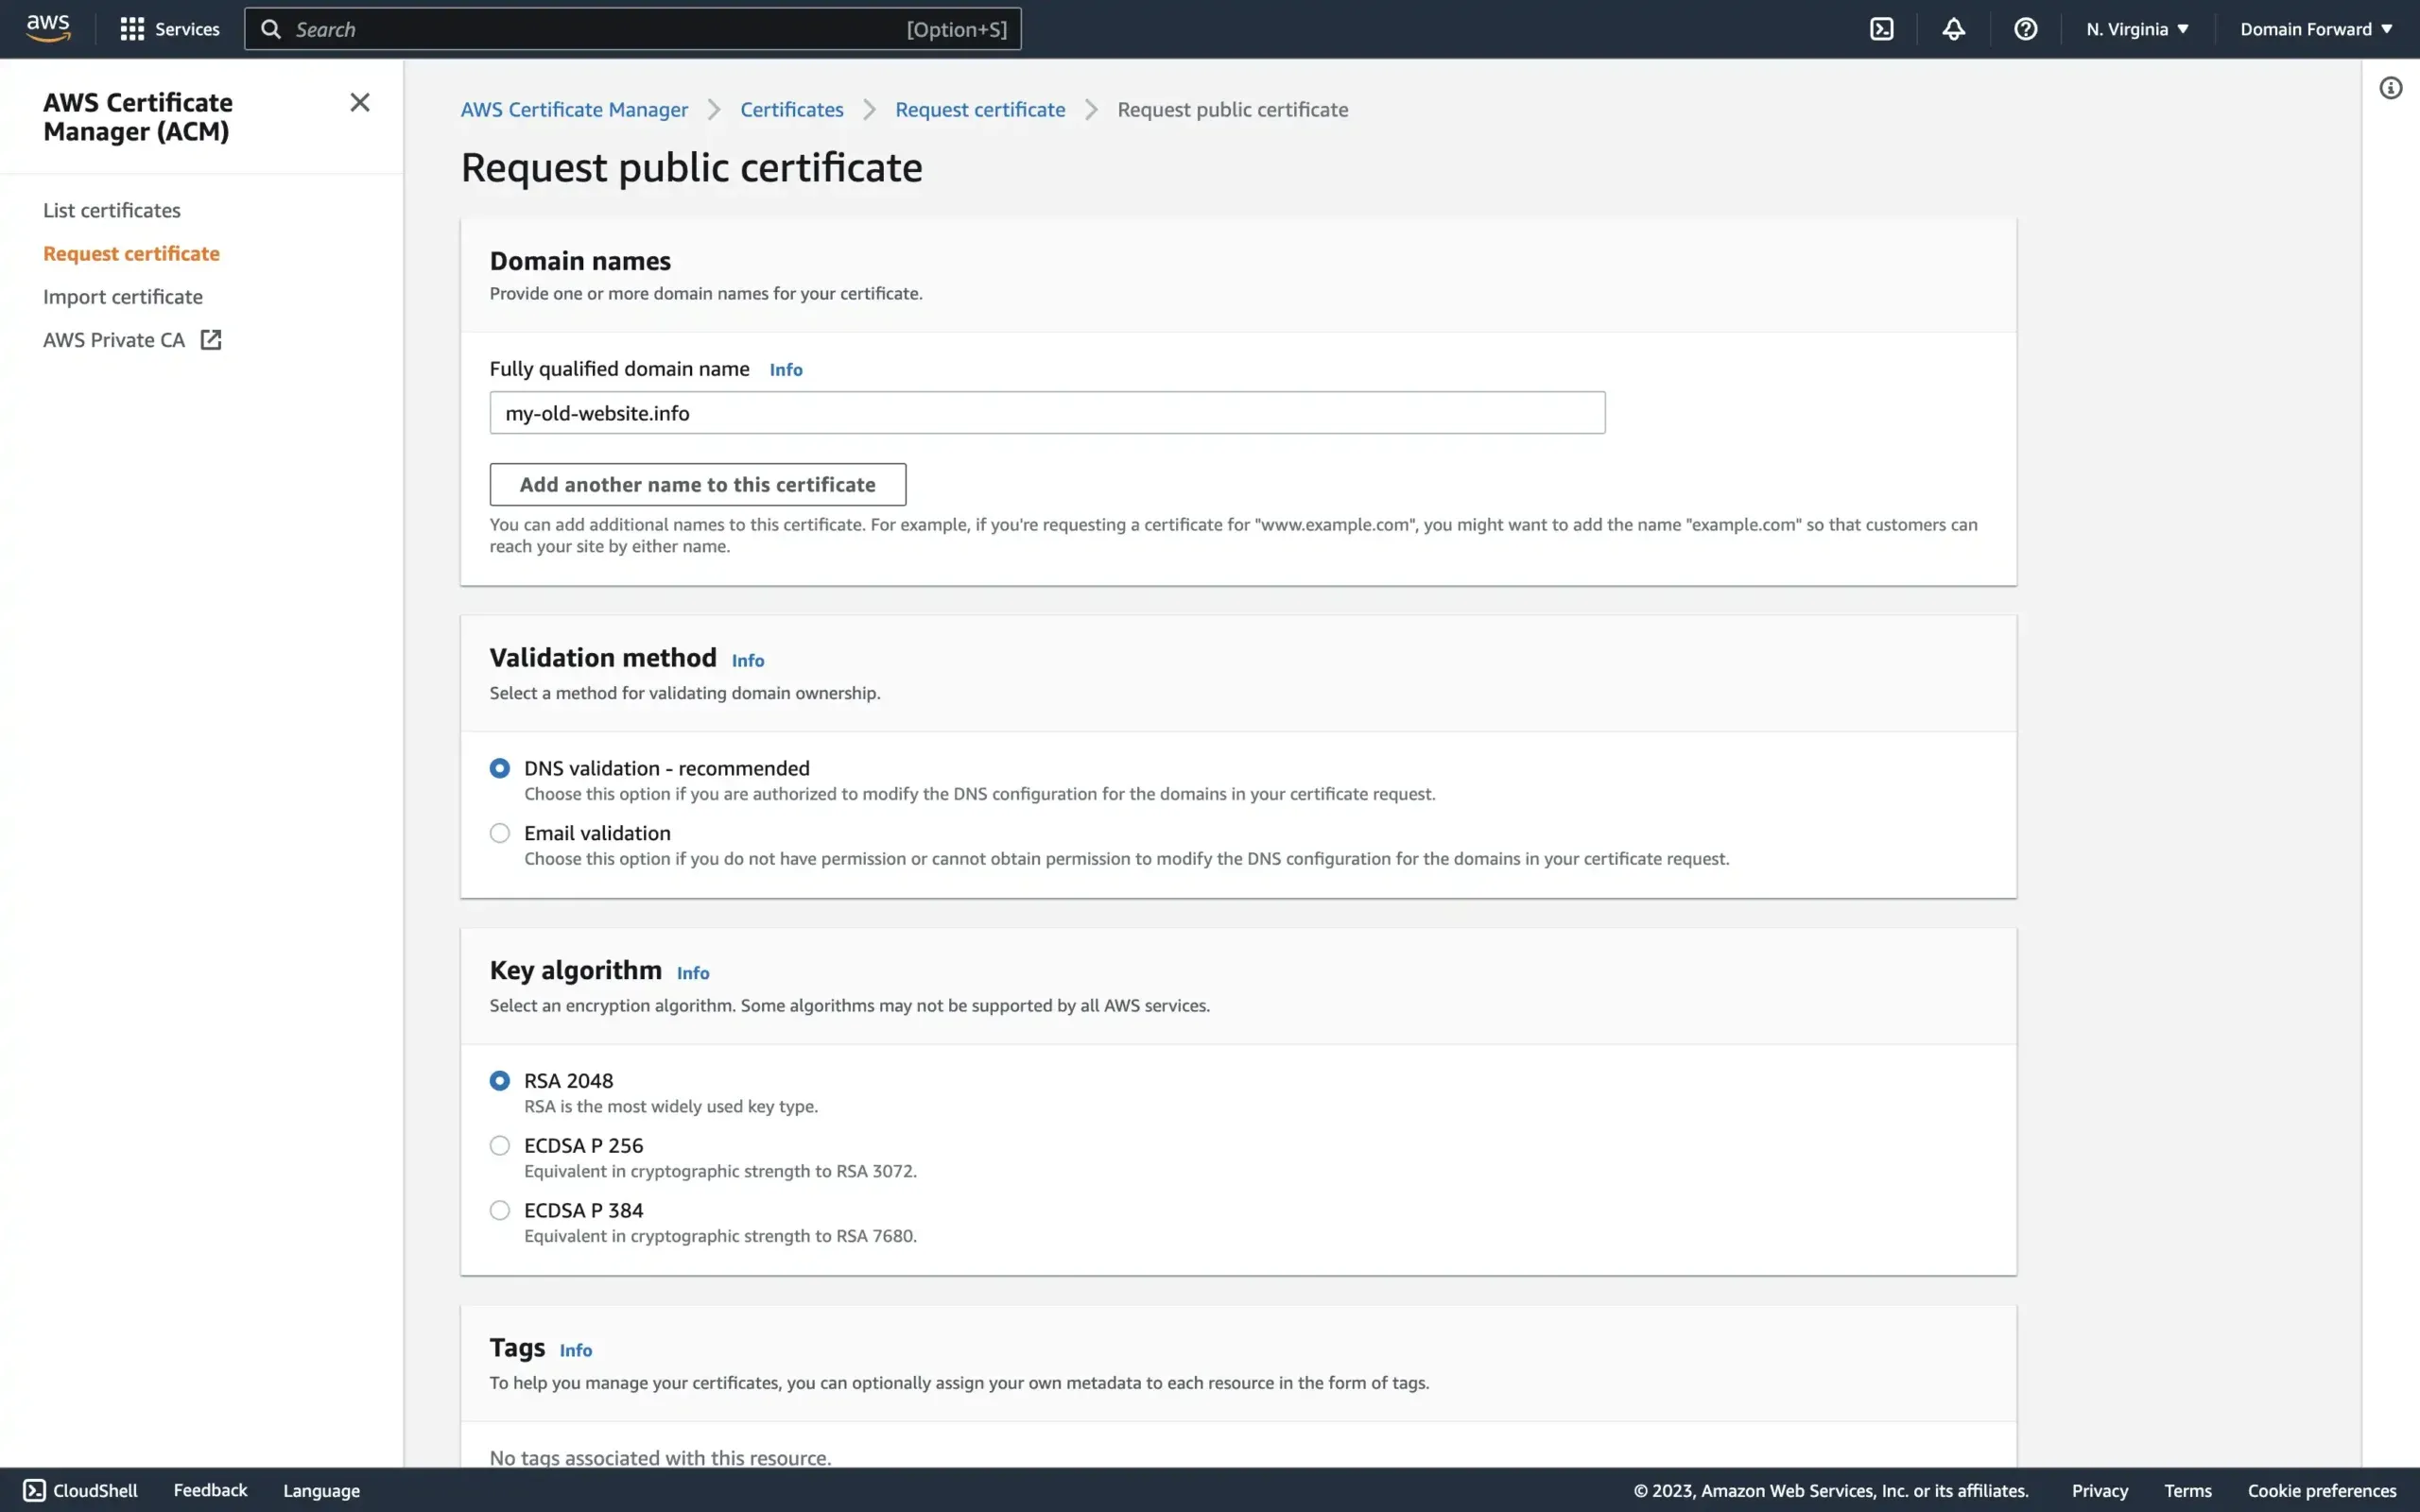
For SSL Certificate, in the Custom SSL Certificate, click on Request certificate.
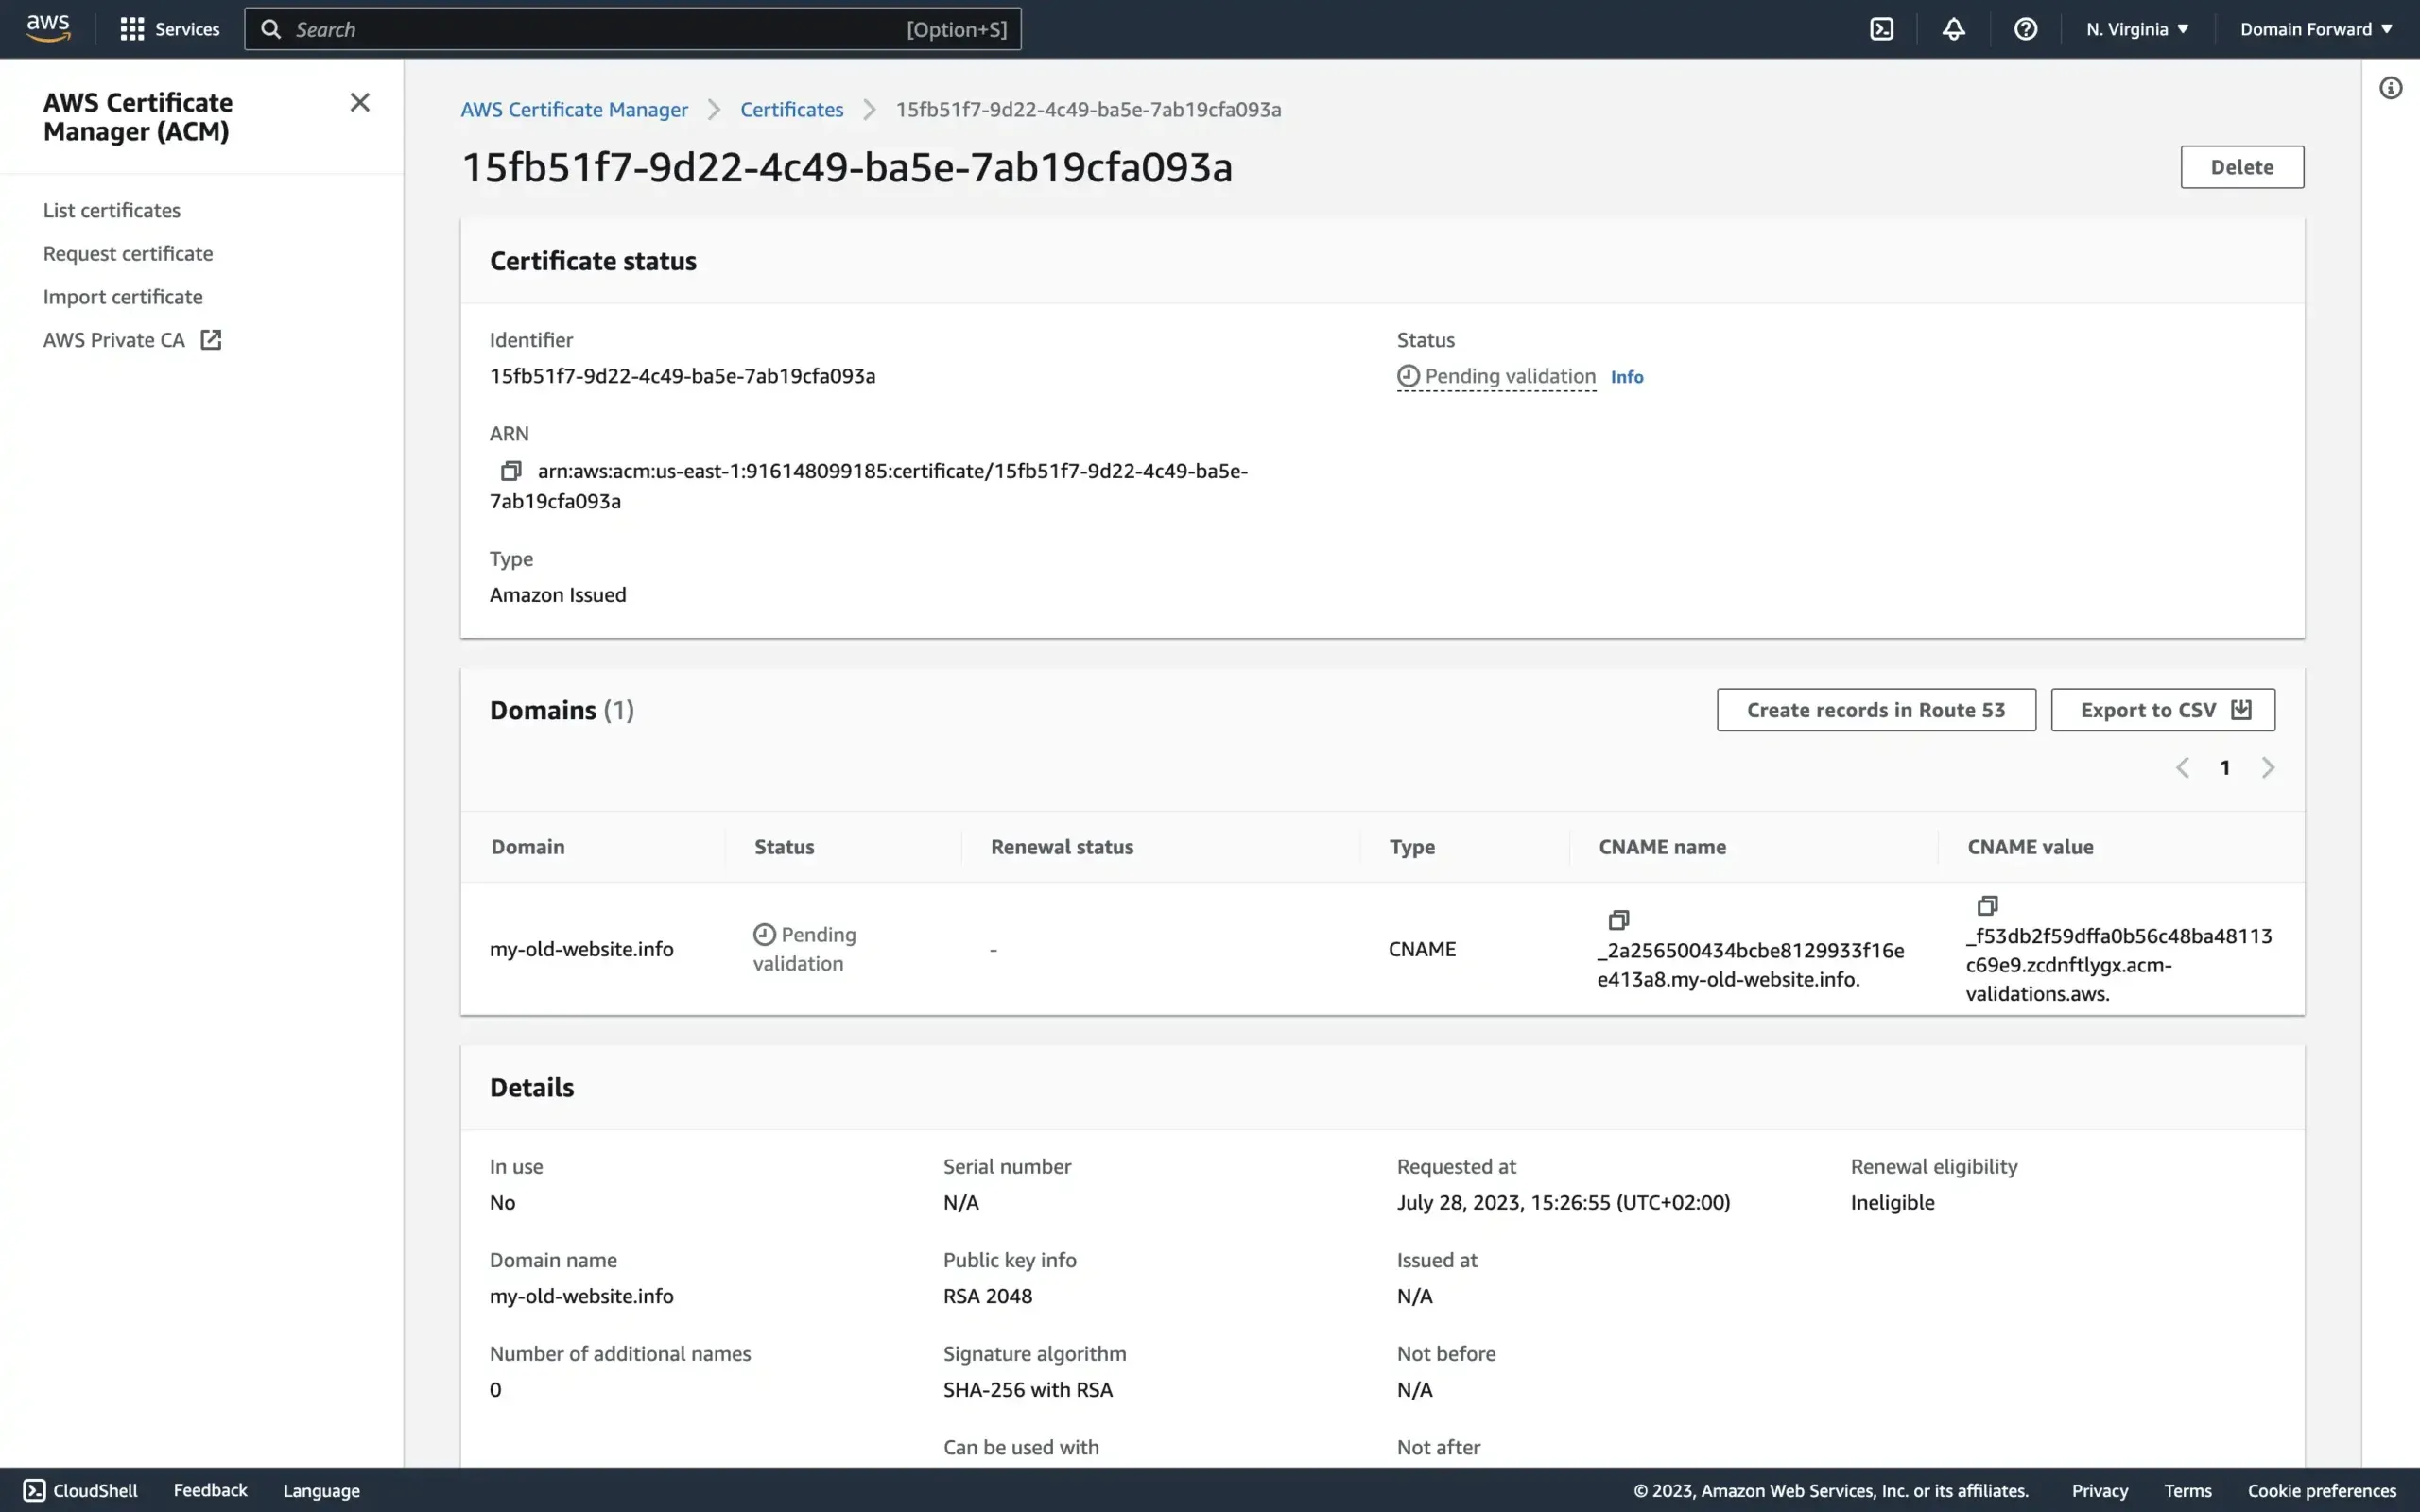
The easiest is to select the DNS validation option and configure the validation CNAME entry under Domains that is given to you after you create the certificate.
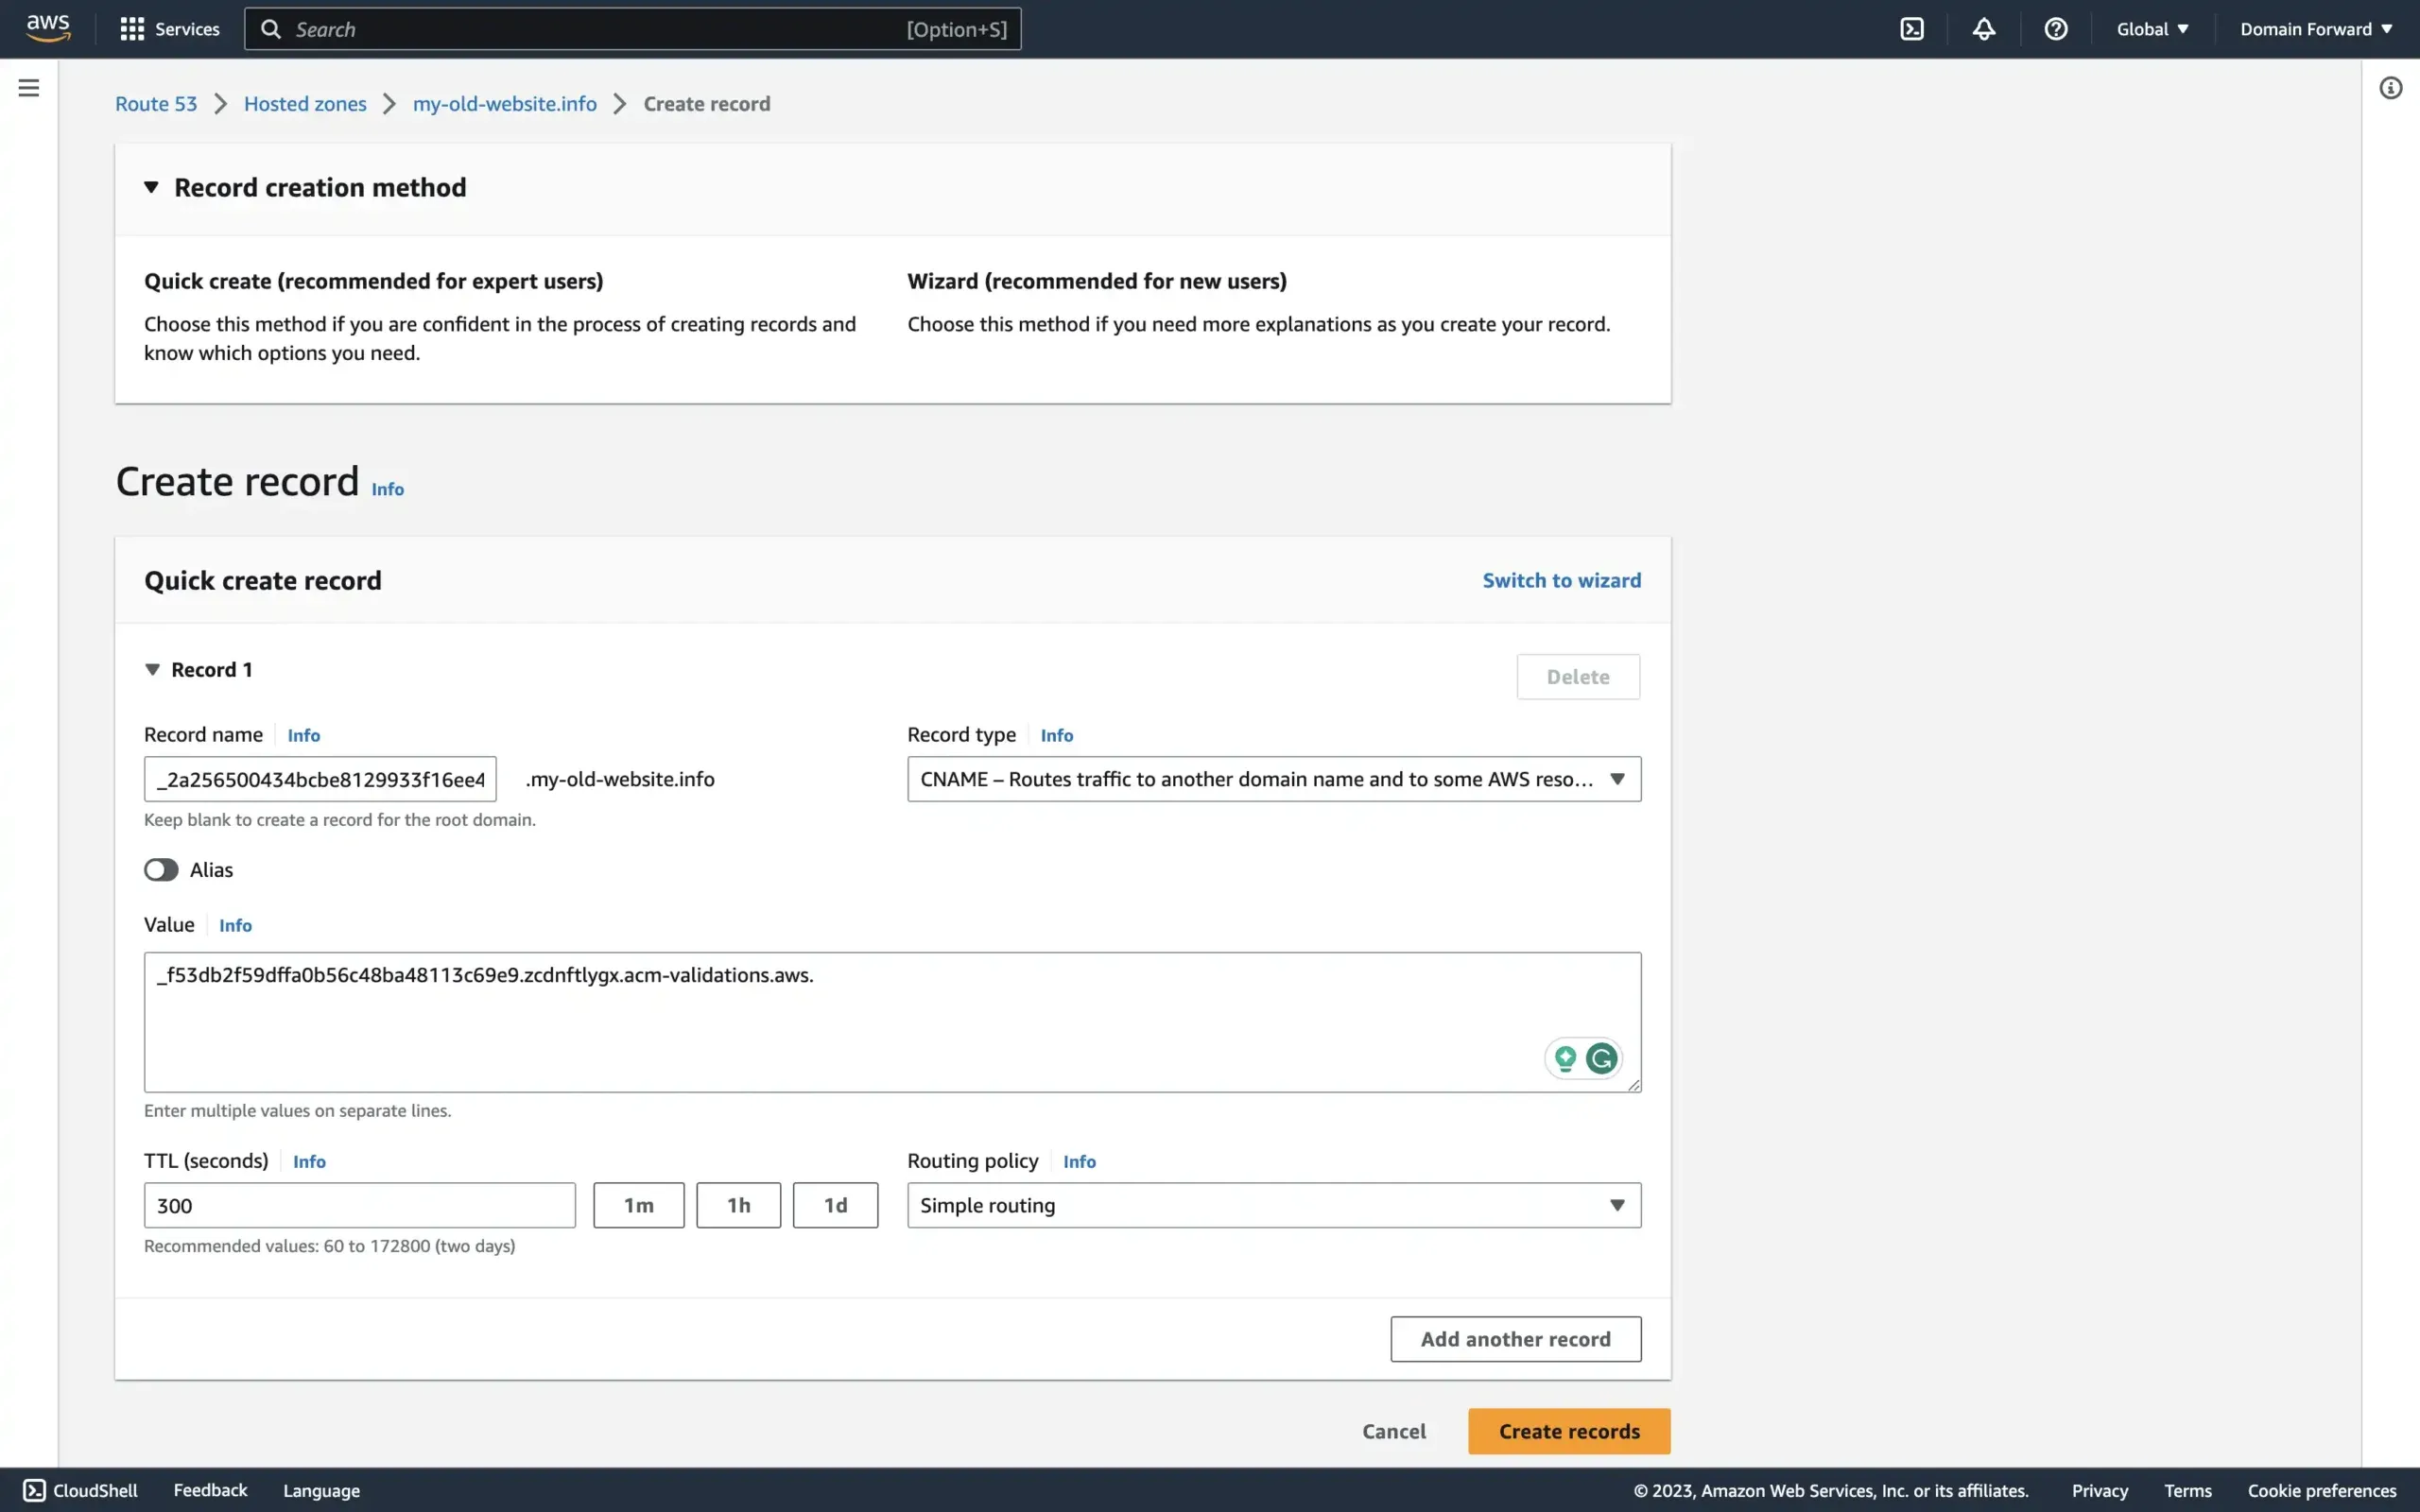
You then have to go into your Route53 settings and input the CNAME entries for your redirected domain as requested from the certificate process.
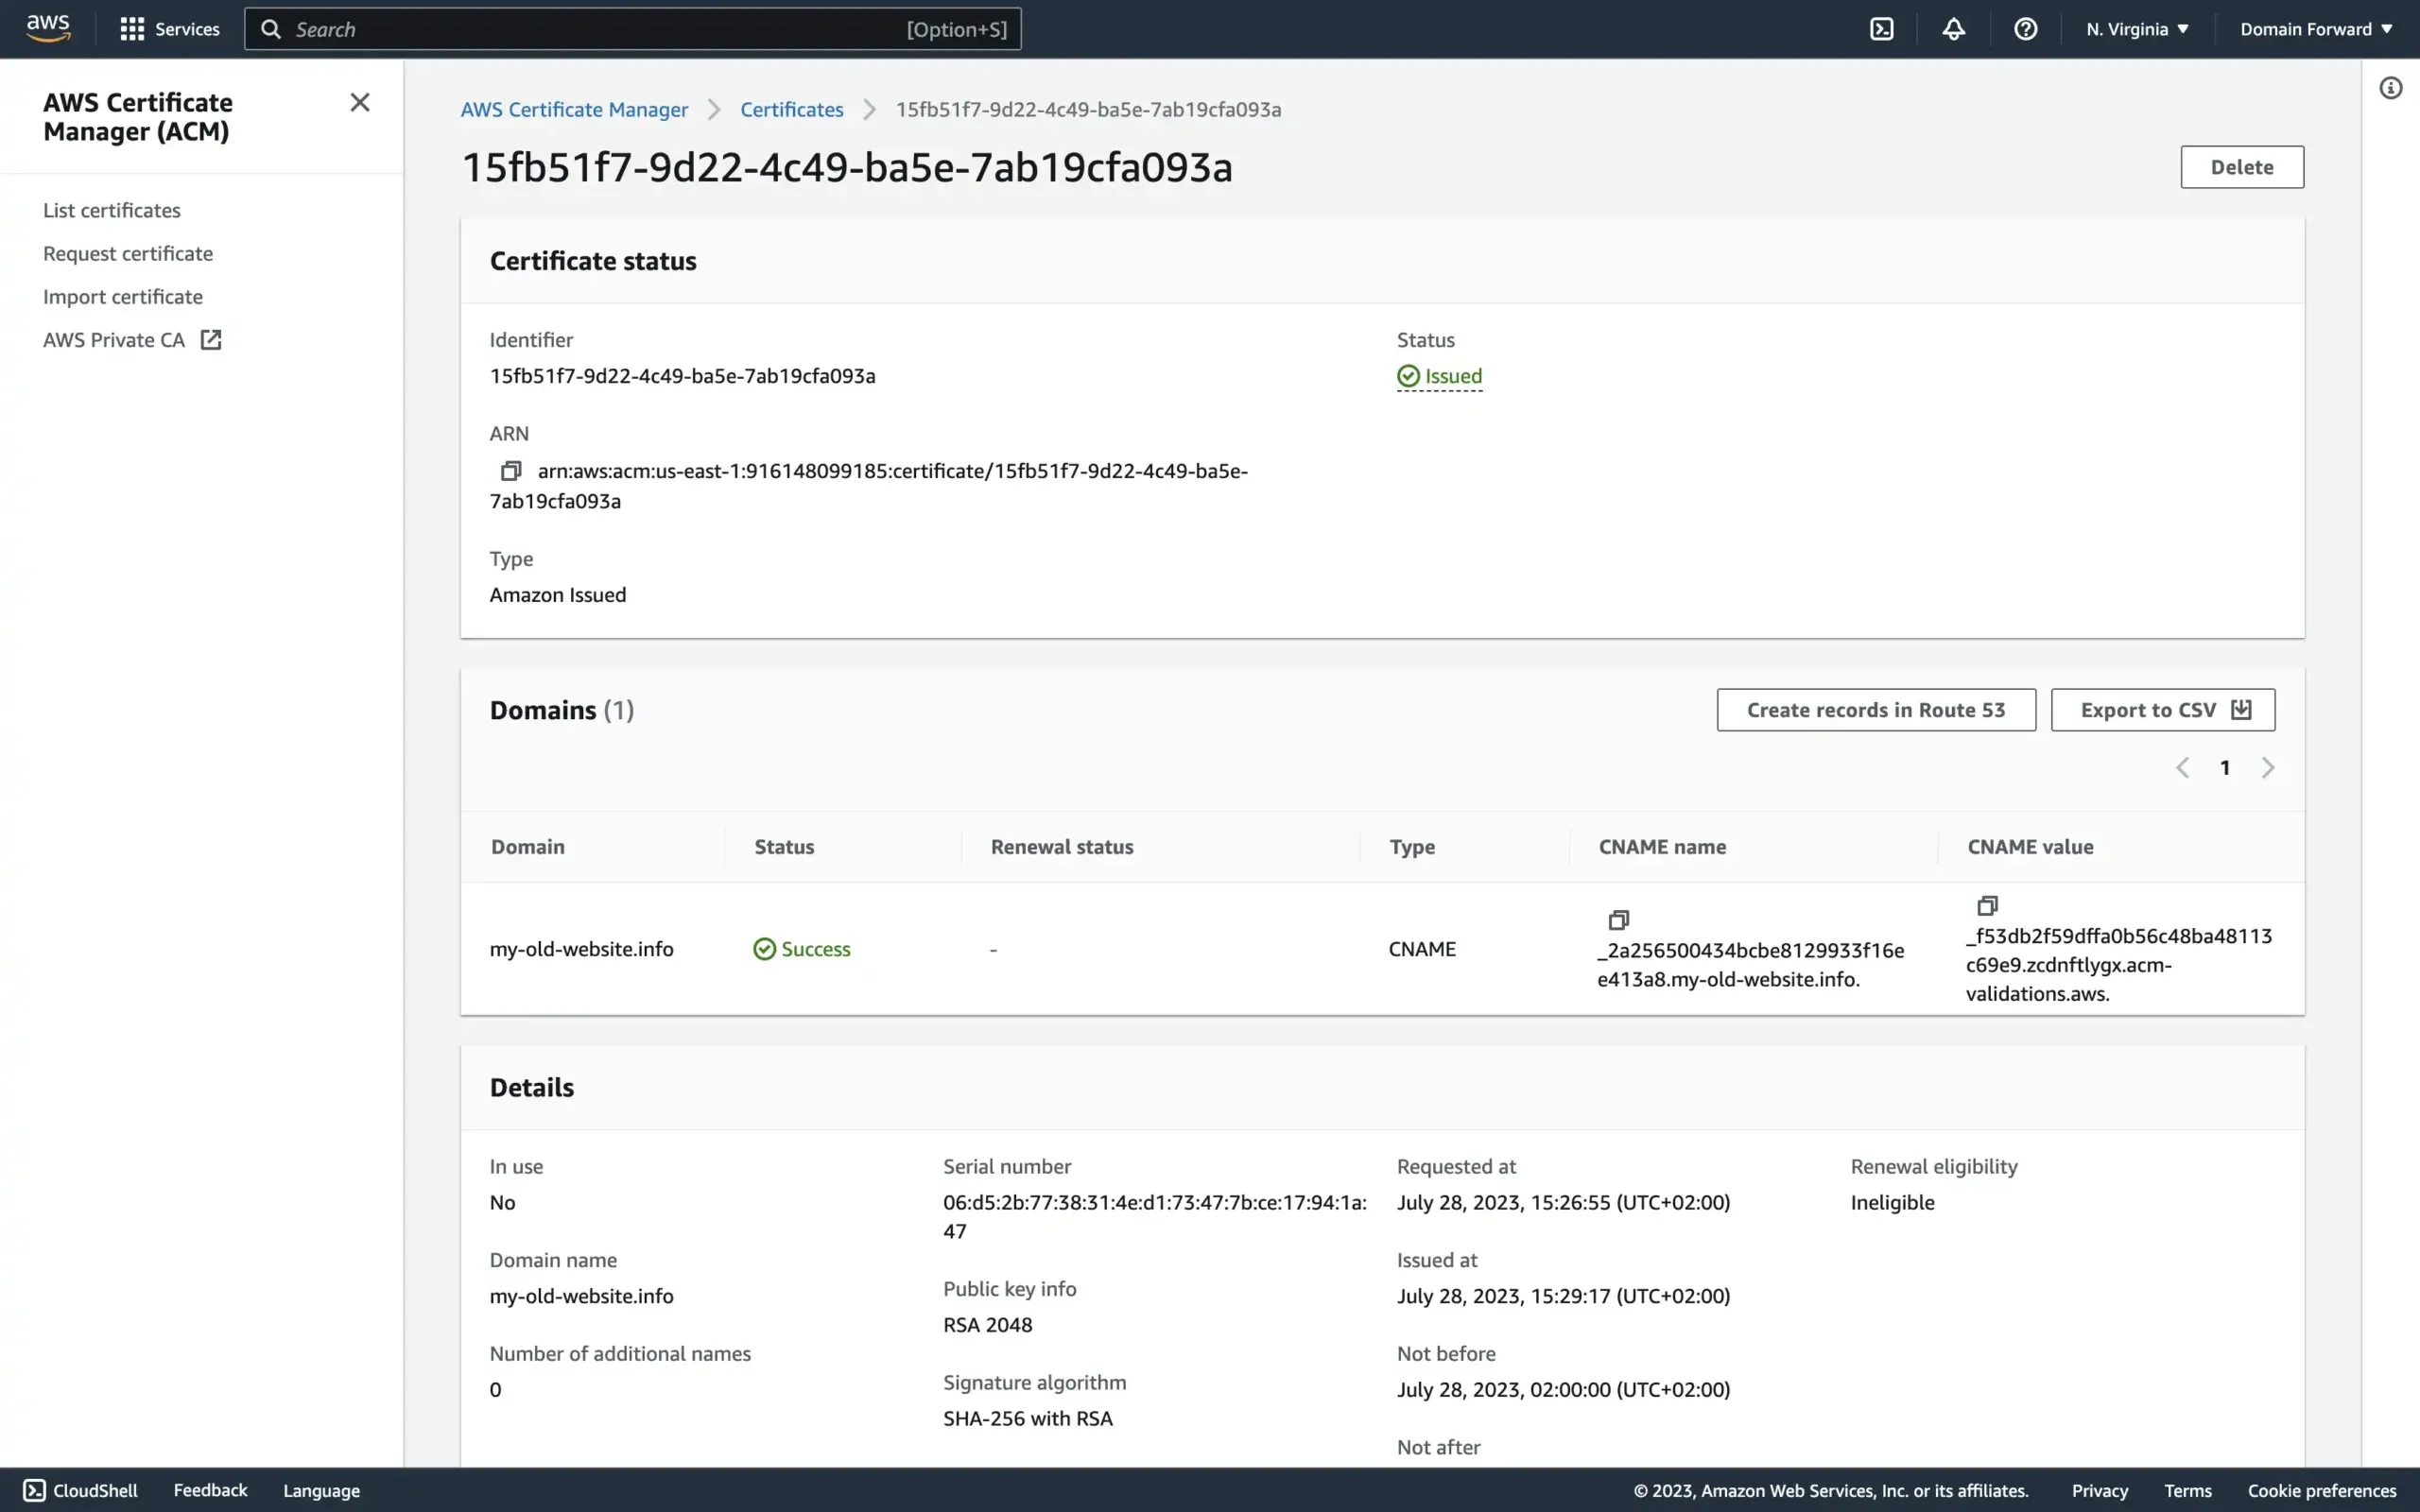
It is possible that after a few minutes the DNS settings have been picked up and the certificate is issued.

Once that is the case, go back to the CloudFront distribution tab. In the Custom SSL certificate dropdown, select the ACM certificate you just created. You may need to refresh the list.
Leave the remaining settings in the Settings section at their default values. Choose Create Distribution.
Step 2: Configure AWS Route53
Now point your domain’s DNS to the CloudFront distribution.
Open the Route53 console at https://console.aws.amazon.com/route53/.
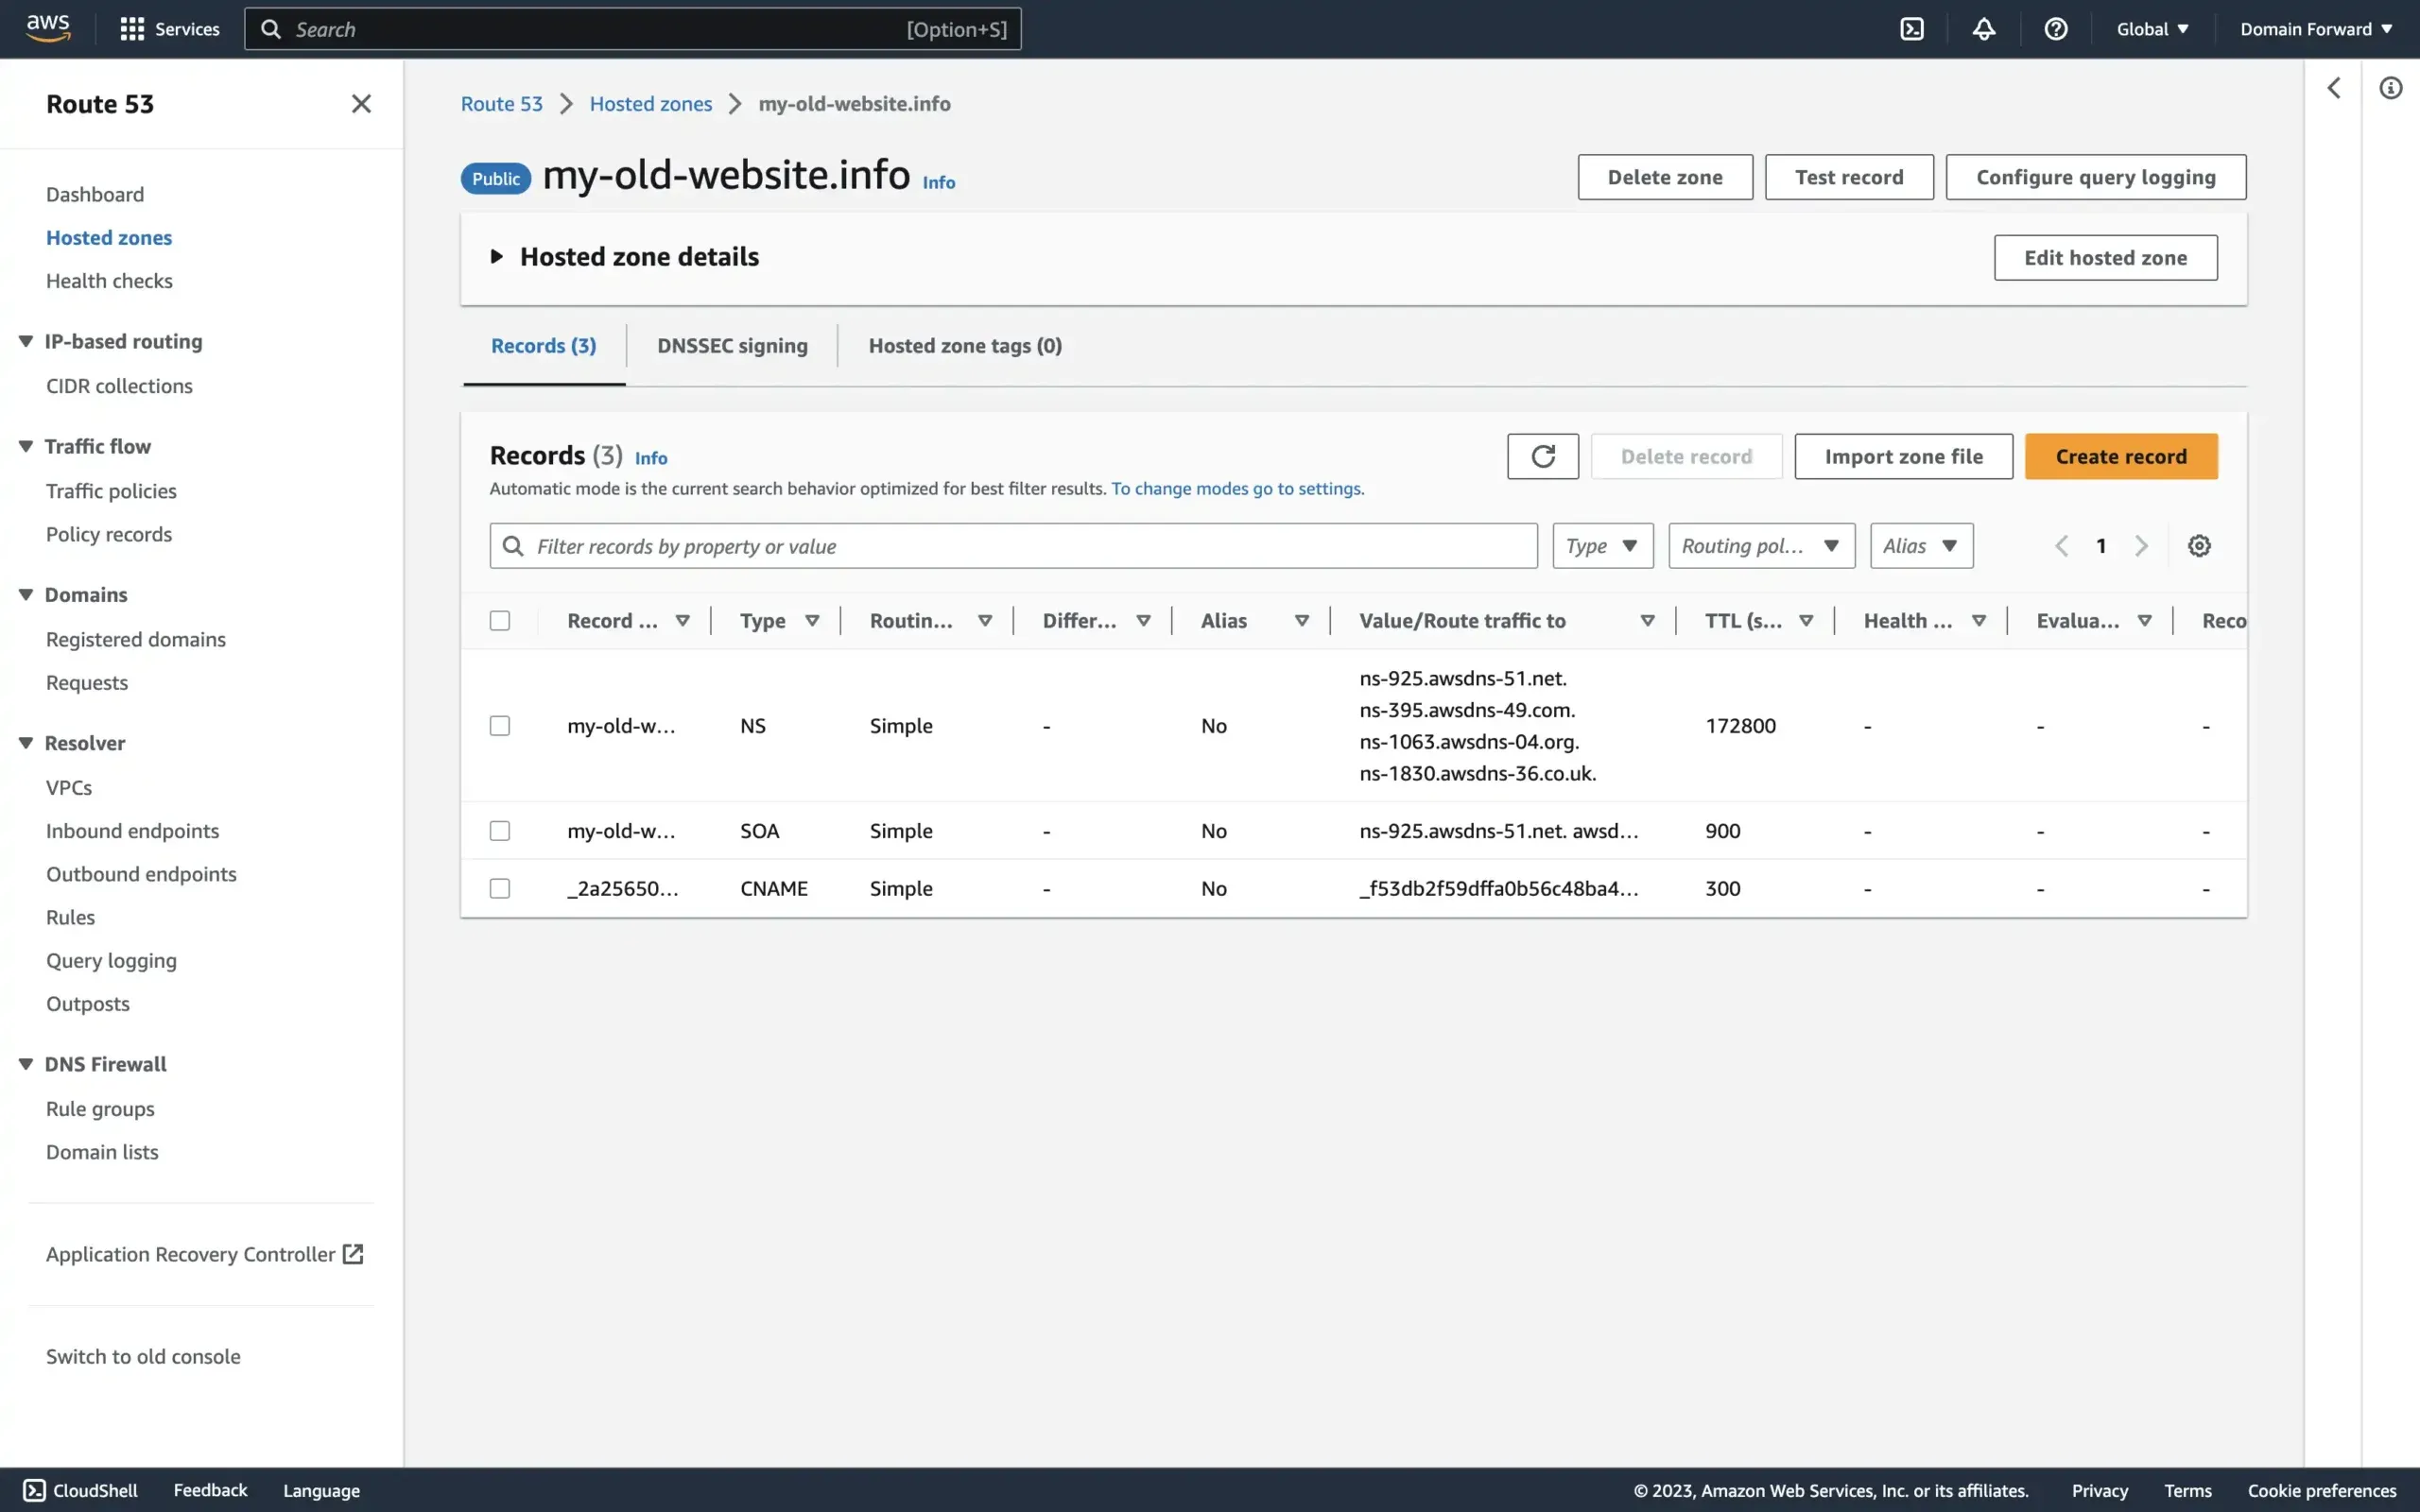
In the navigation pane, choose Hosted zones and choose the hosted zone for the domain that you’re redirecting from.
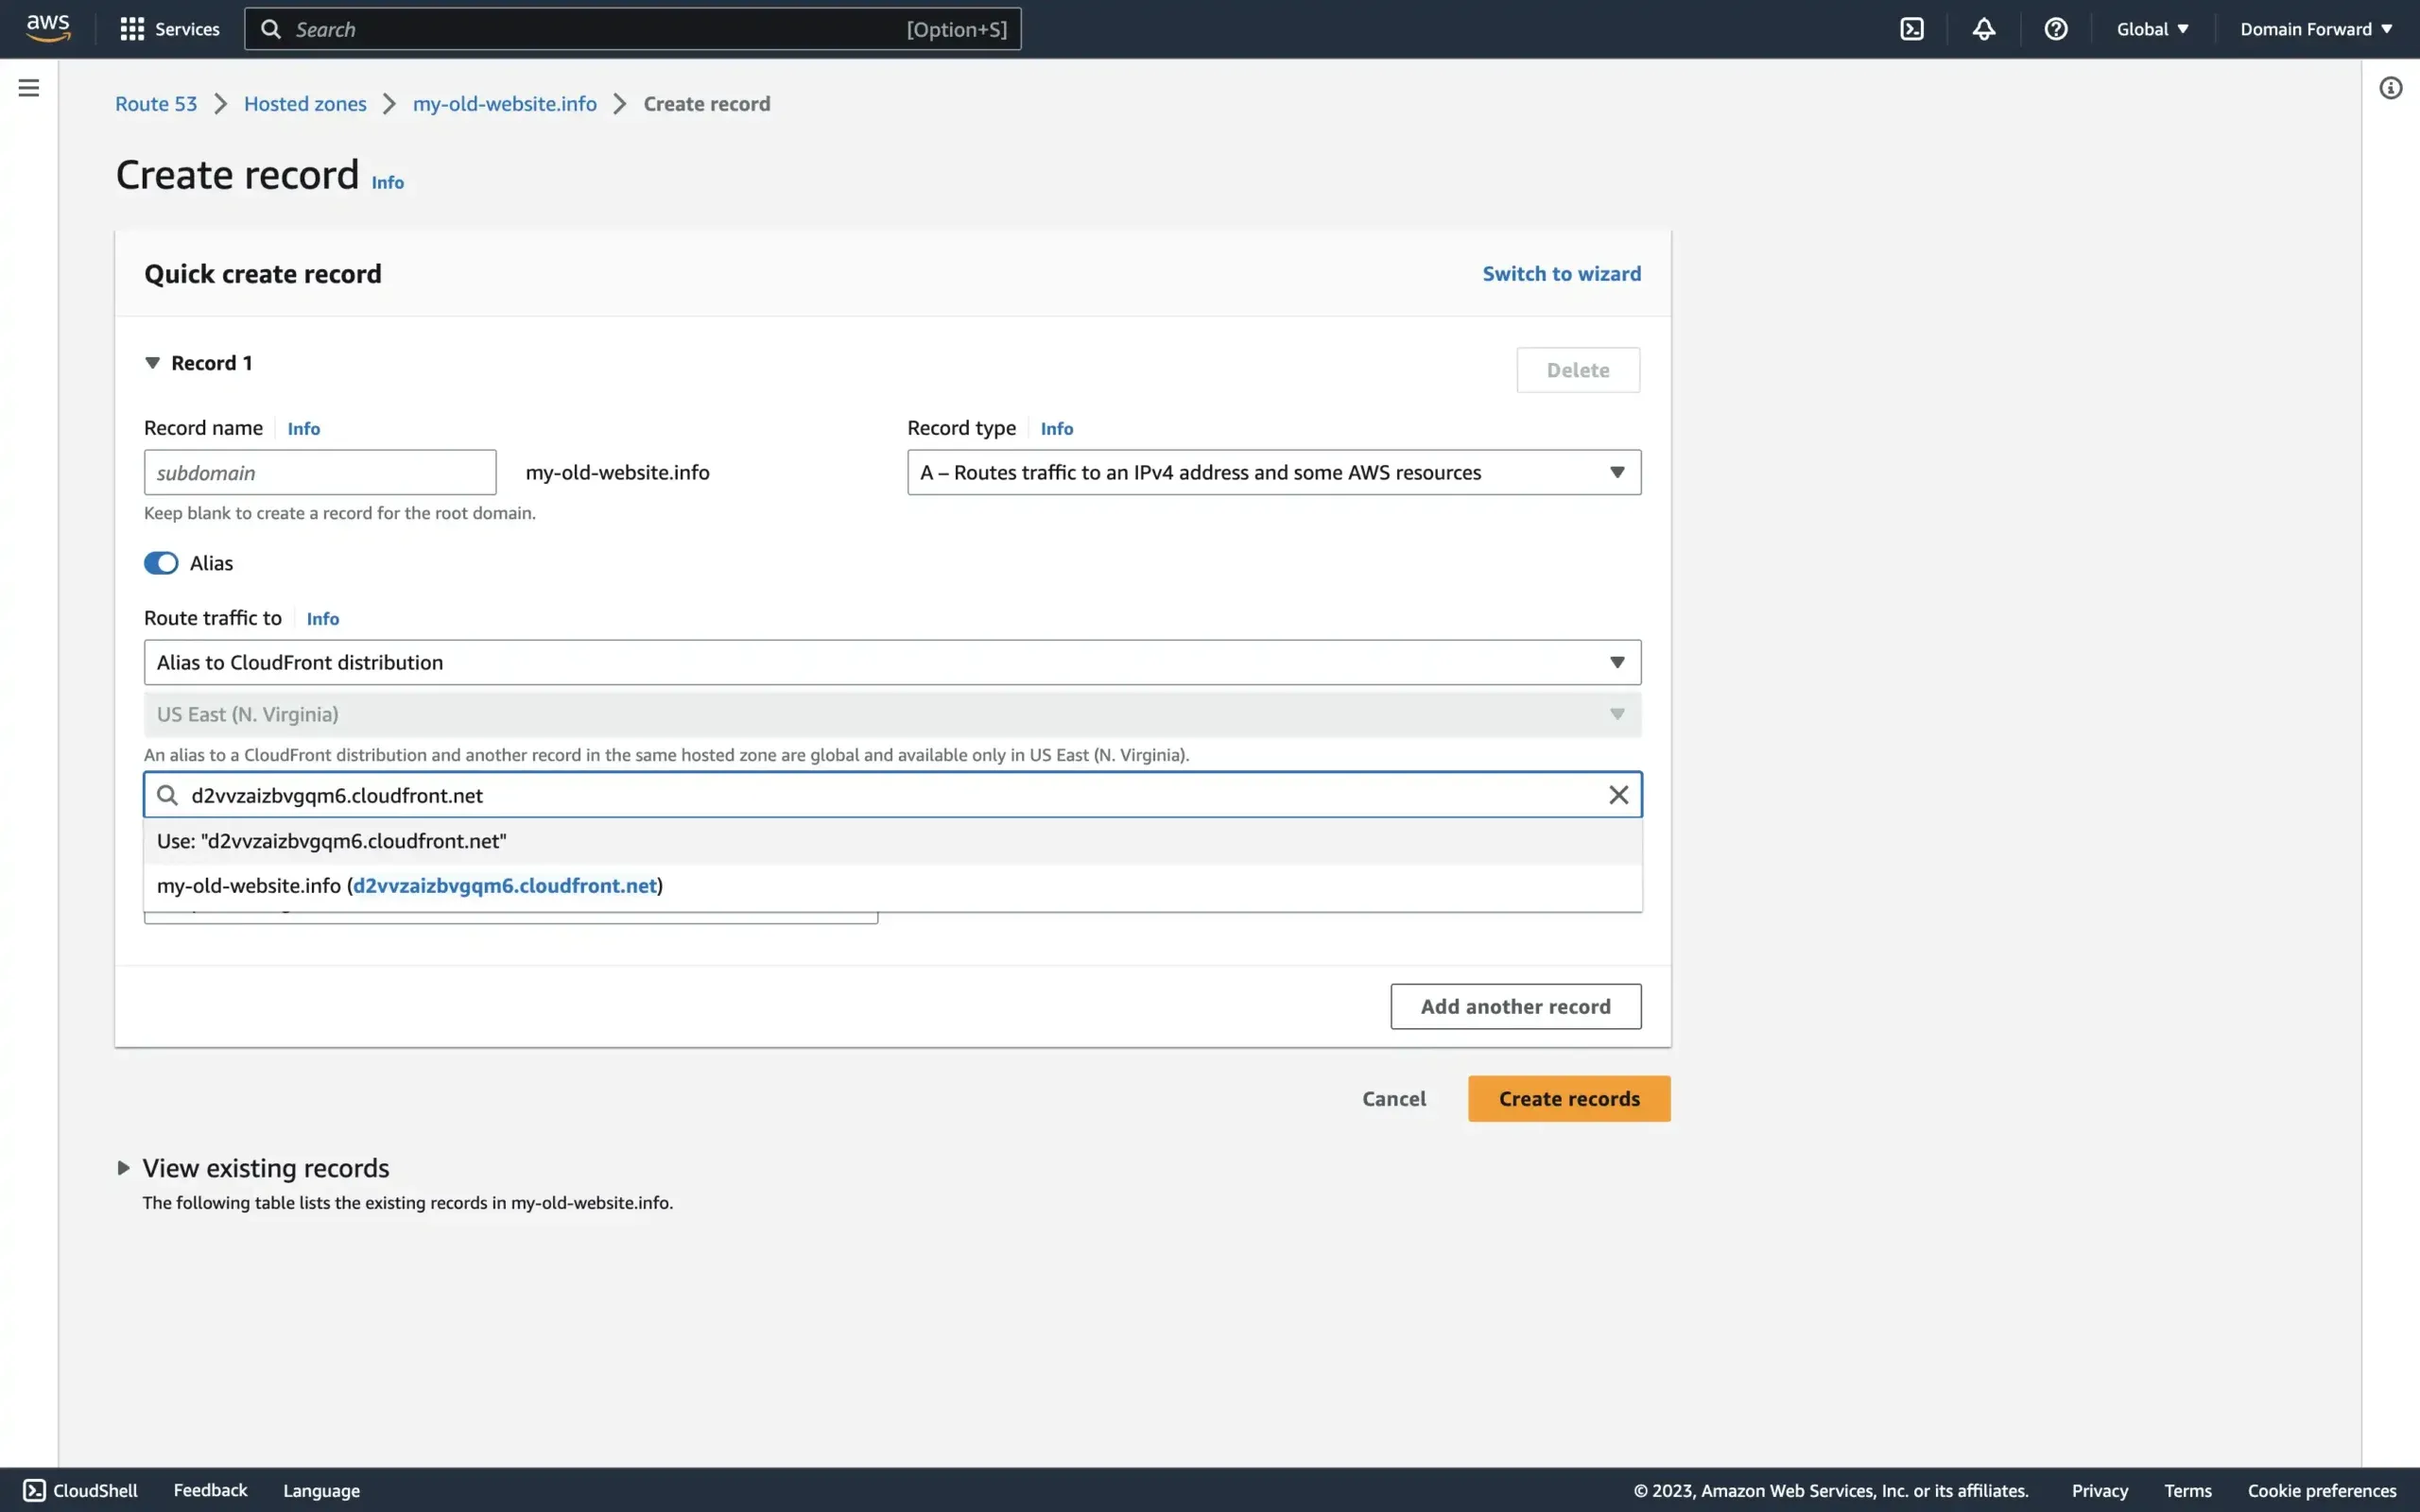
Next, choose Create Record and in the Quick Create record dialog box, specify the following values:
- For Record name, type the domain you are redirecting from.
- For Record type, choose A – Routes traffic to an IPv4 address and some AWS resources.
- For Alias, choose Yes.
- For Alias target, choose the CloudFront distribution that you created in step 1.
And then choose Create records.
Your Route53 and CloudFront are now connected. DNS propagation can take up to 24 hours.
Next, configure the actual redirect logic.
Step 3: Configure a CloudFront Function
CloudFront Functions run JavaScript at CloudFront’s 225+ edge locations. You’ll use one to perform the actual 301 redirect.

From the dashboard, select Create function.
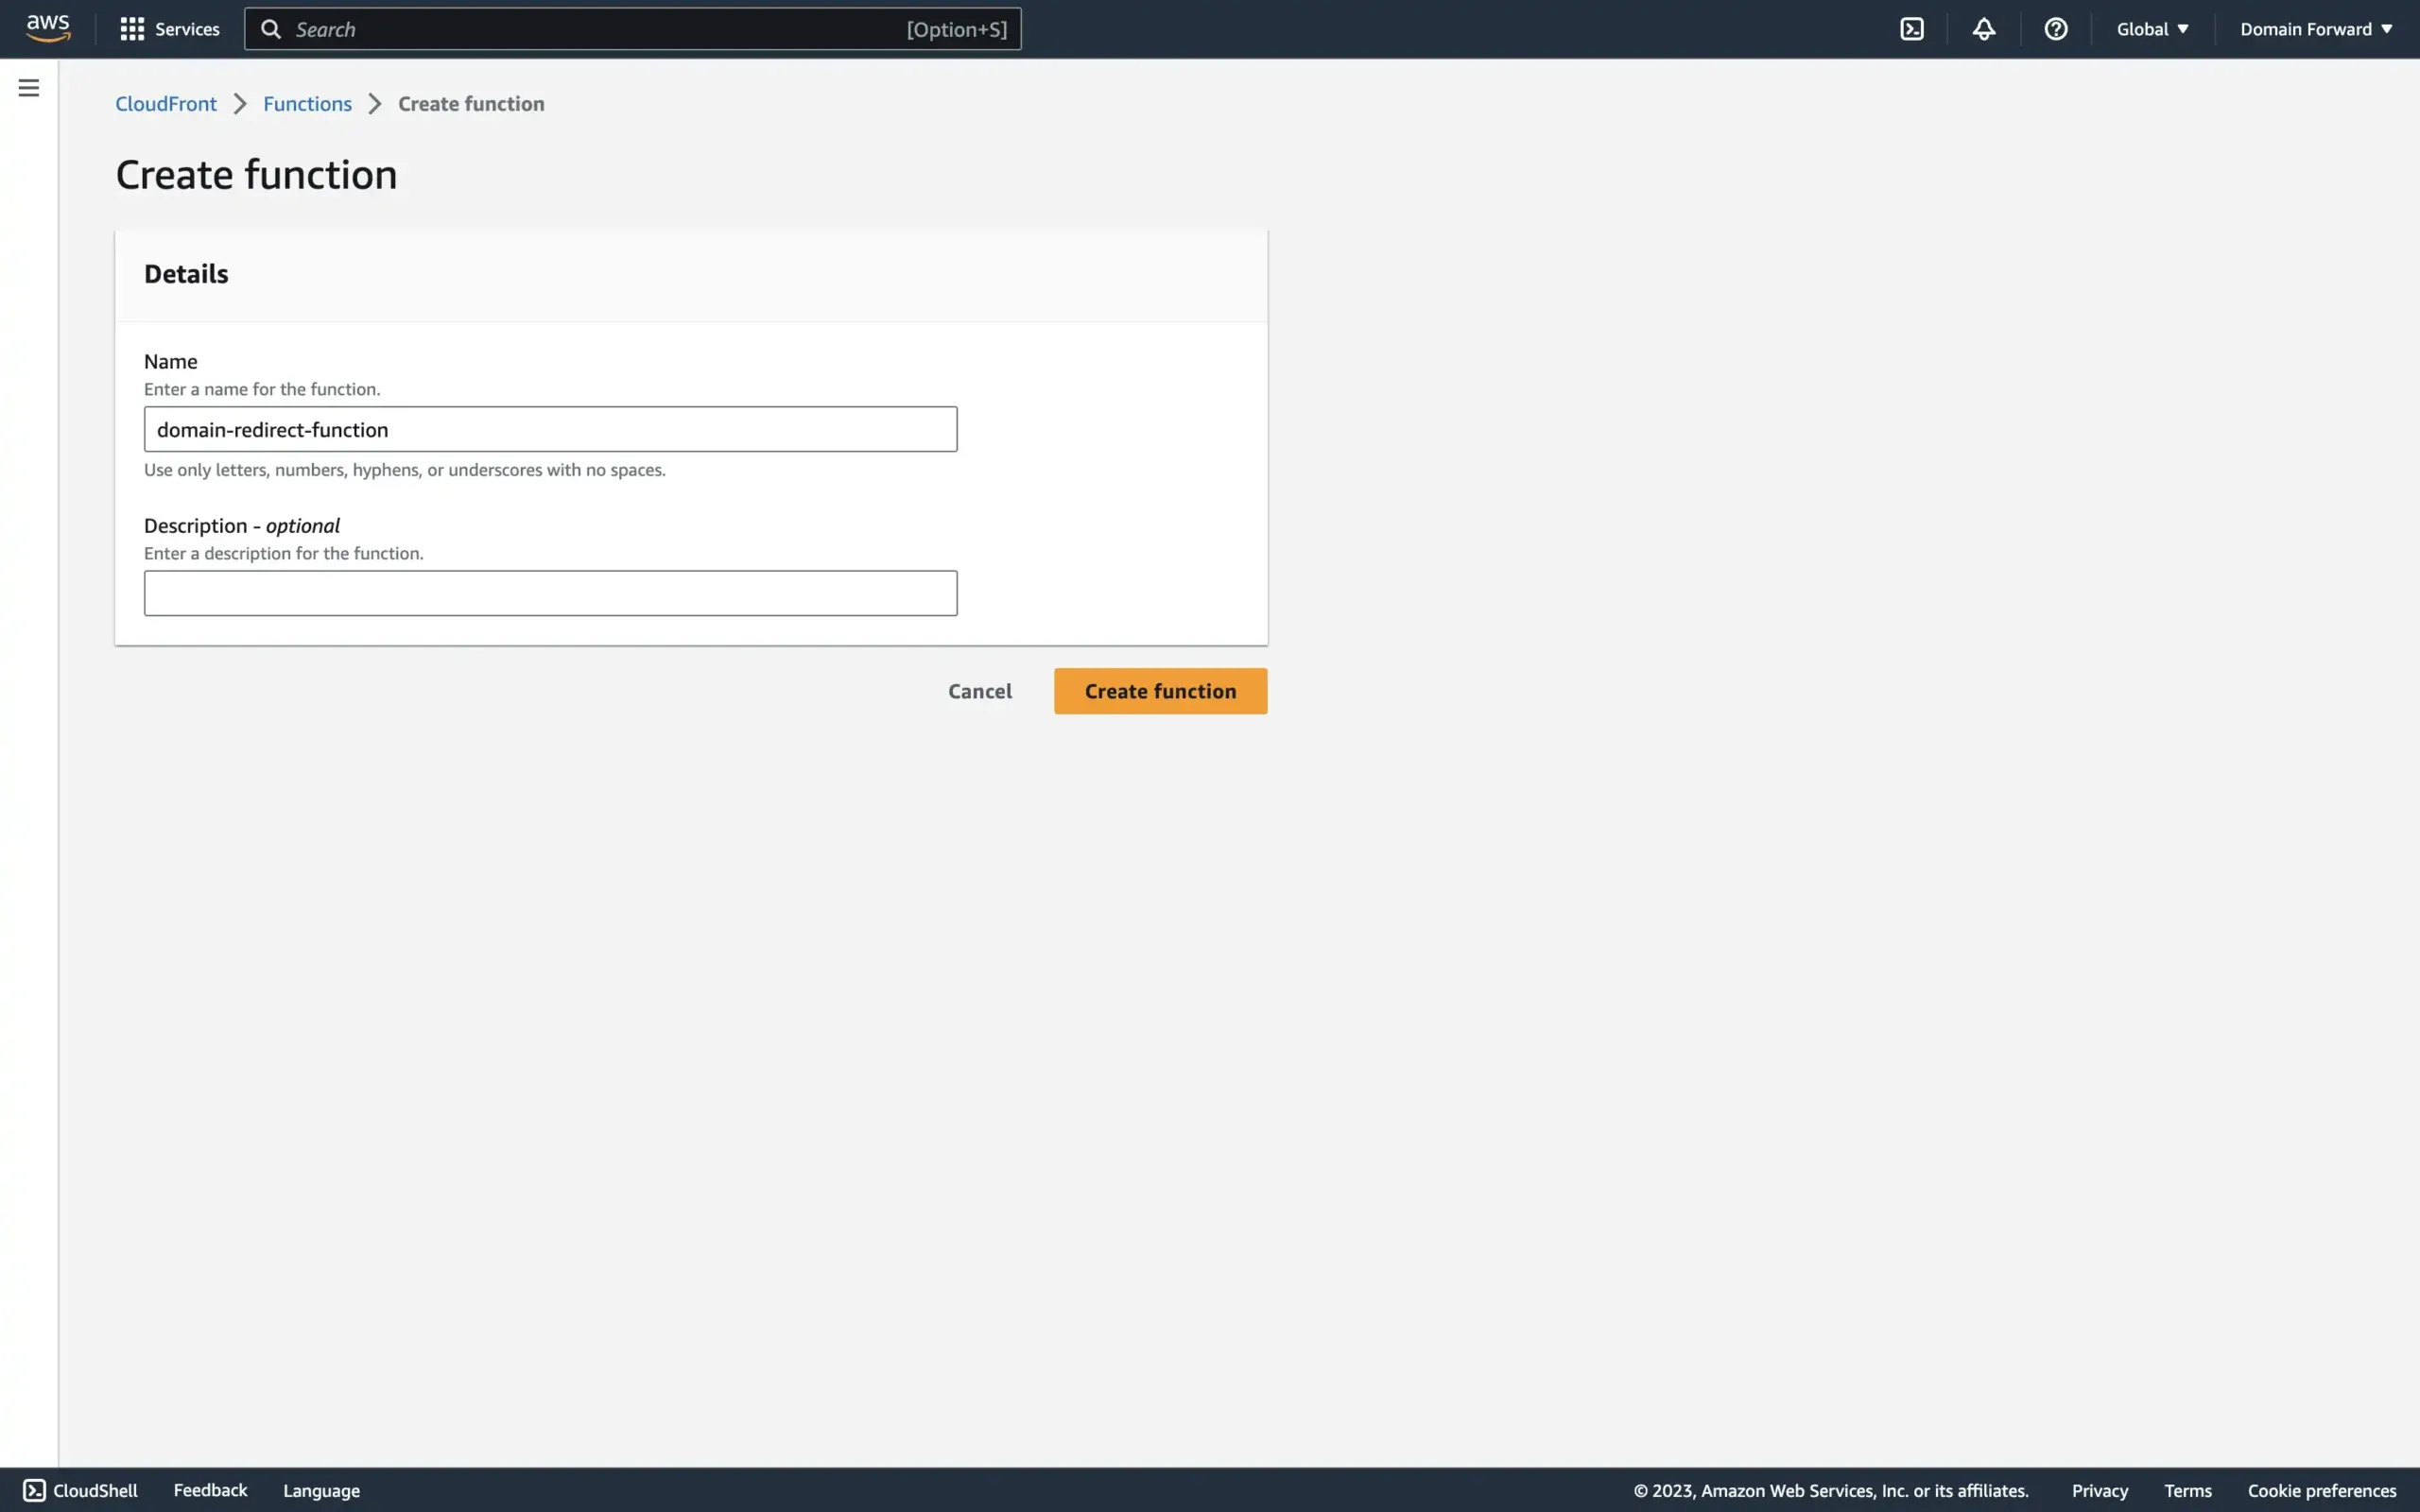
In the Create function screen, provide a descriptive name and click Create function.
Here’s the CloudFront function code. It redirects requests to a new domain while preserving the original path and query parameters.
/**
 * Patches lack of
 * https://developer.mozilla.org/en-US/docs/Web/API/Location/search in event.
 * Inspired by
 * https://github.com/aws-samples/amazon-cloudfront-functions/issues/11.
 * @param {import("aws-lambda"). CloudFrontFunctionsQuerystring} querystring The weird format exposed by CloudFront
 * https://docs.aws.amazon.com/AmazonCloudFront/latest/DeveloperGuide/functions-event-structure.html#functions-event-structure-query-header-cookie
 * @returns {string} Tries to return the same as
 * https://developer.mozilla.org/en-US/docs/Web/API/URLSearchParams/toString
 */
function getURLSearchParamsString(querystring) {
    var str = [];

    for (var param in querystring) {
        var query = querystring[param];
        var multiValue = query.multiValue;

        if (multiValue) {
            str.push(multiValue.map((item) => param + '=' + item.value).join('&'));
        } else if (query.value === '') {
            str.push(param);
        } else {
            str.push(param + '=' + query.value);
        }
    }

    return str.join('&');
}

function handler(event) {
    var request = event.request;
    var newHost = "www.google.com";

    var query = request.querystring && getURLSearchParamsString(request.querystring) ? getURLSearchParamsString(request.querystring) : '';

    var response = {
        statusCode: 301,
        statusDescription: 'Permanent',
        headers: {
            "location": {
                "value": "https://" + newHost + request.uri + (query == "" ? "" : "?" + query)
            }
        }
    };

    return response;
}
Replace the newHost variable value with your destination domain.
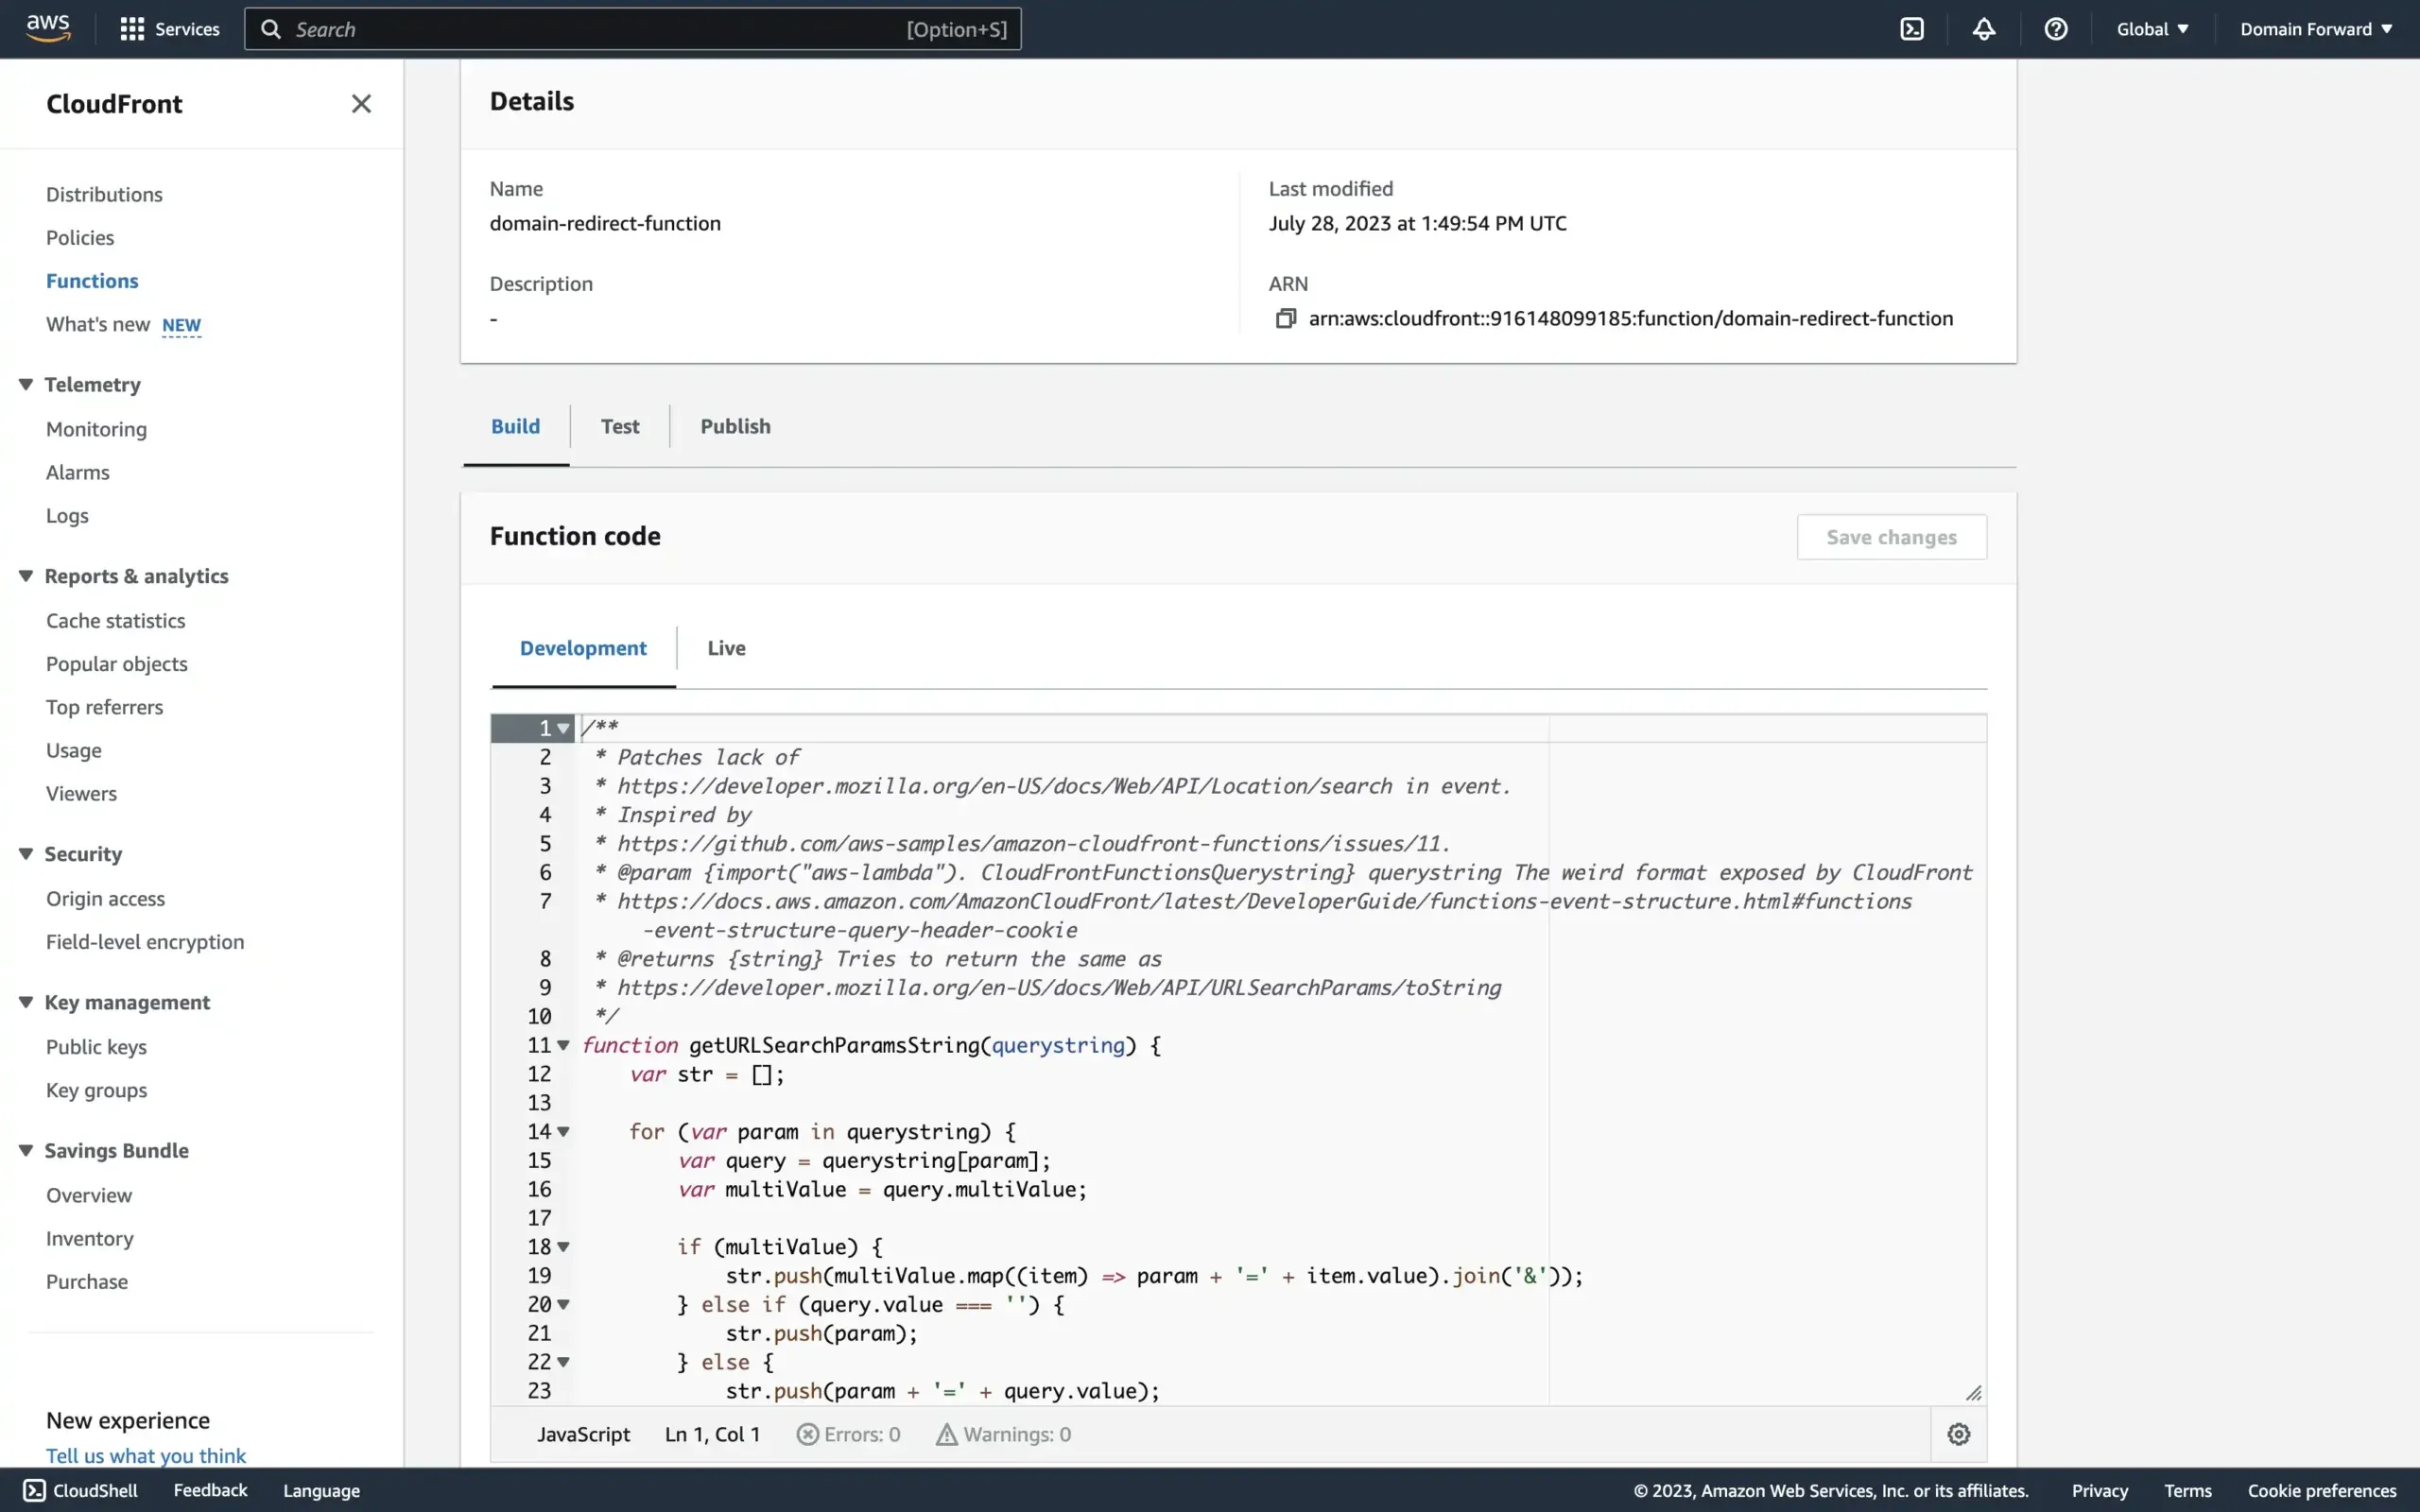
Paste the code into the Function code section and click Save changes.
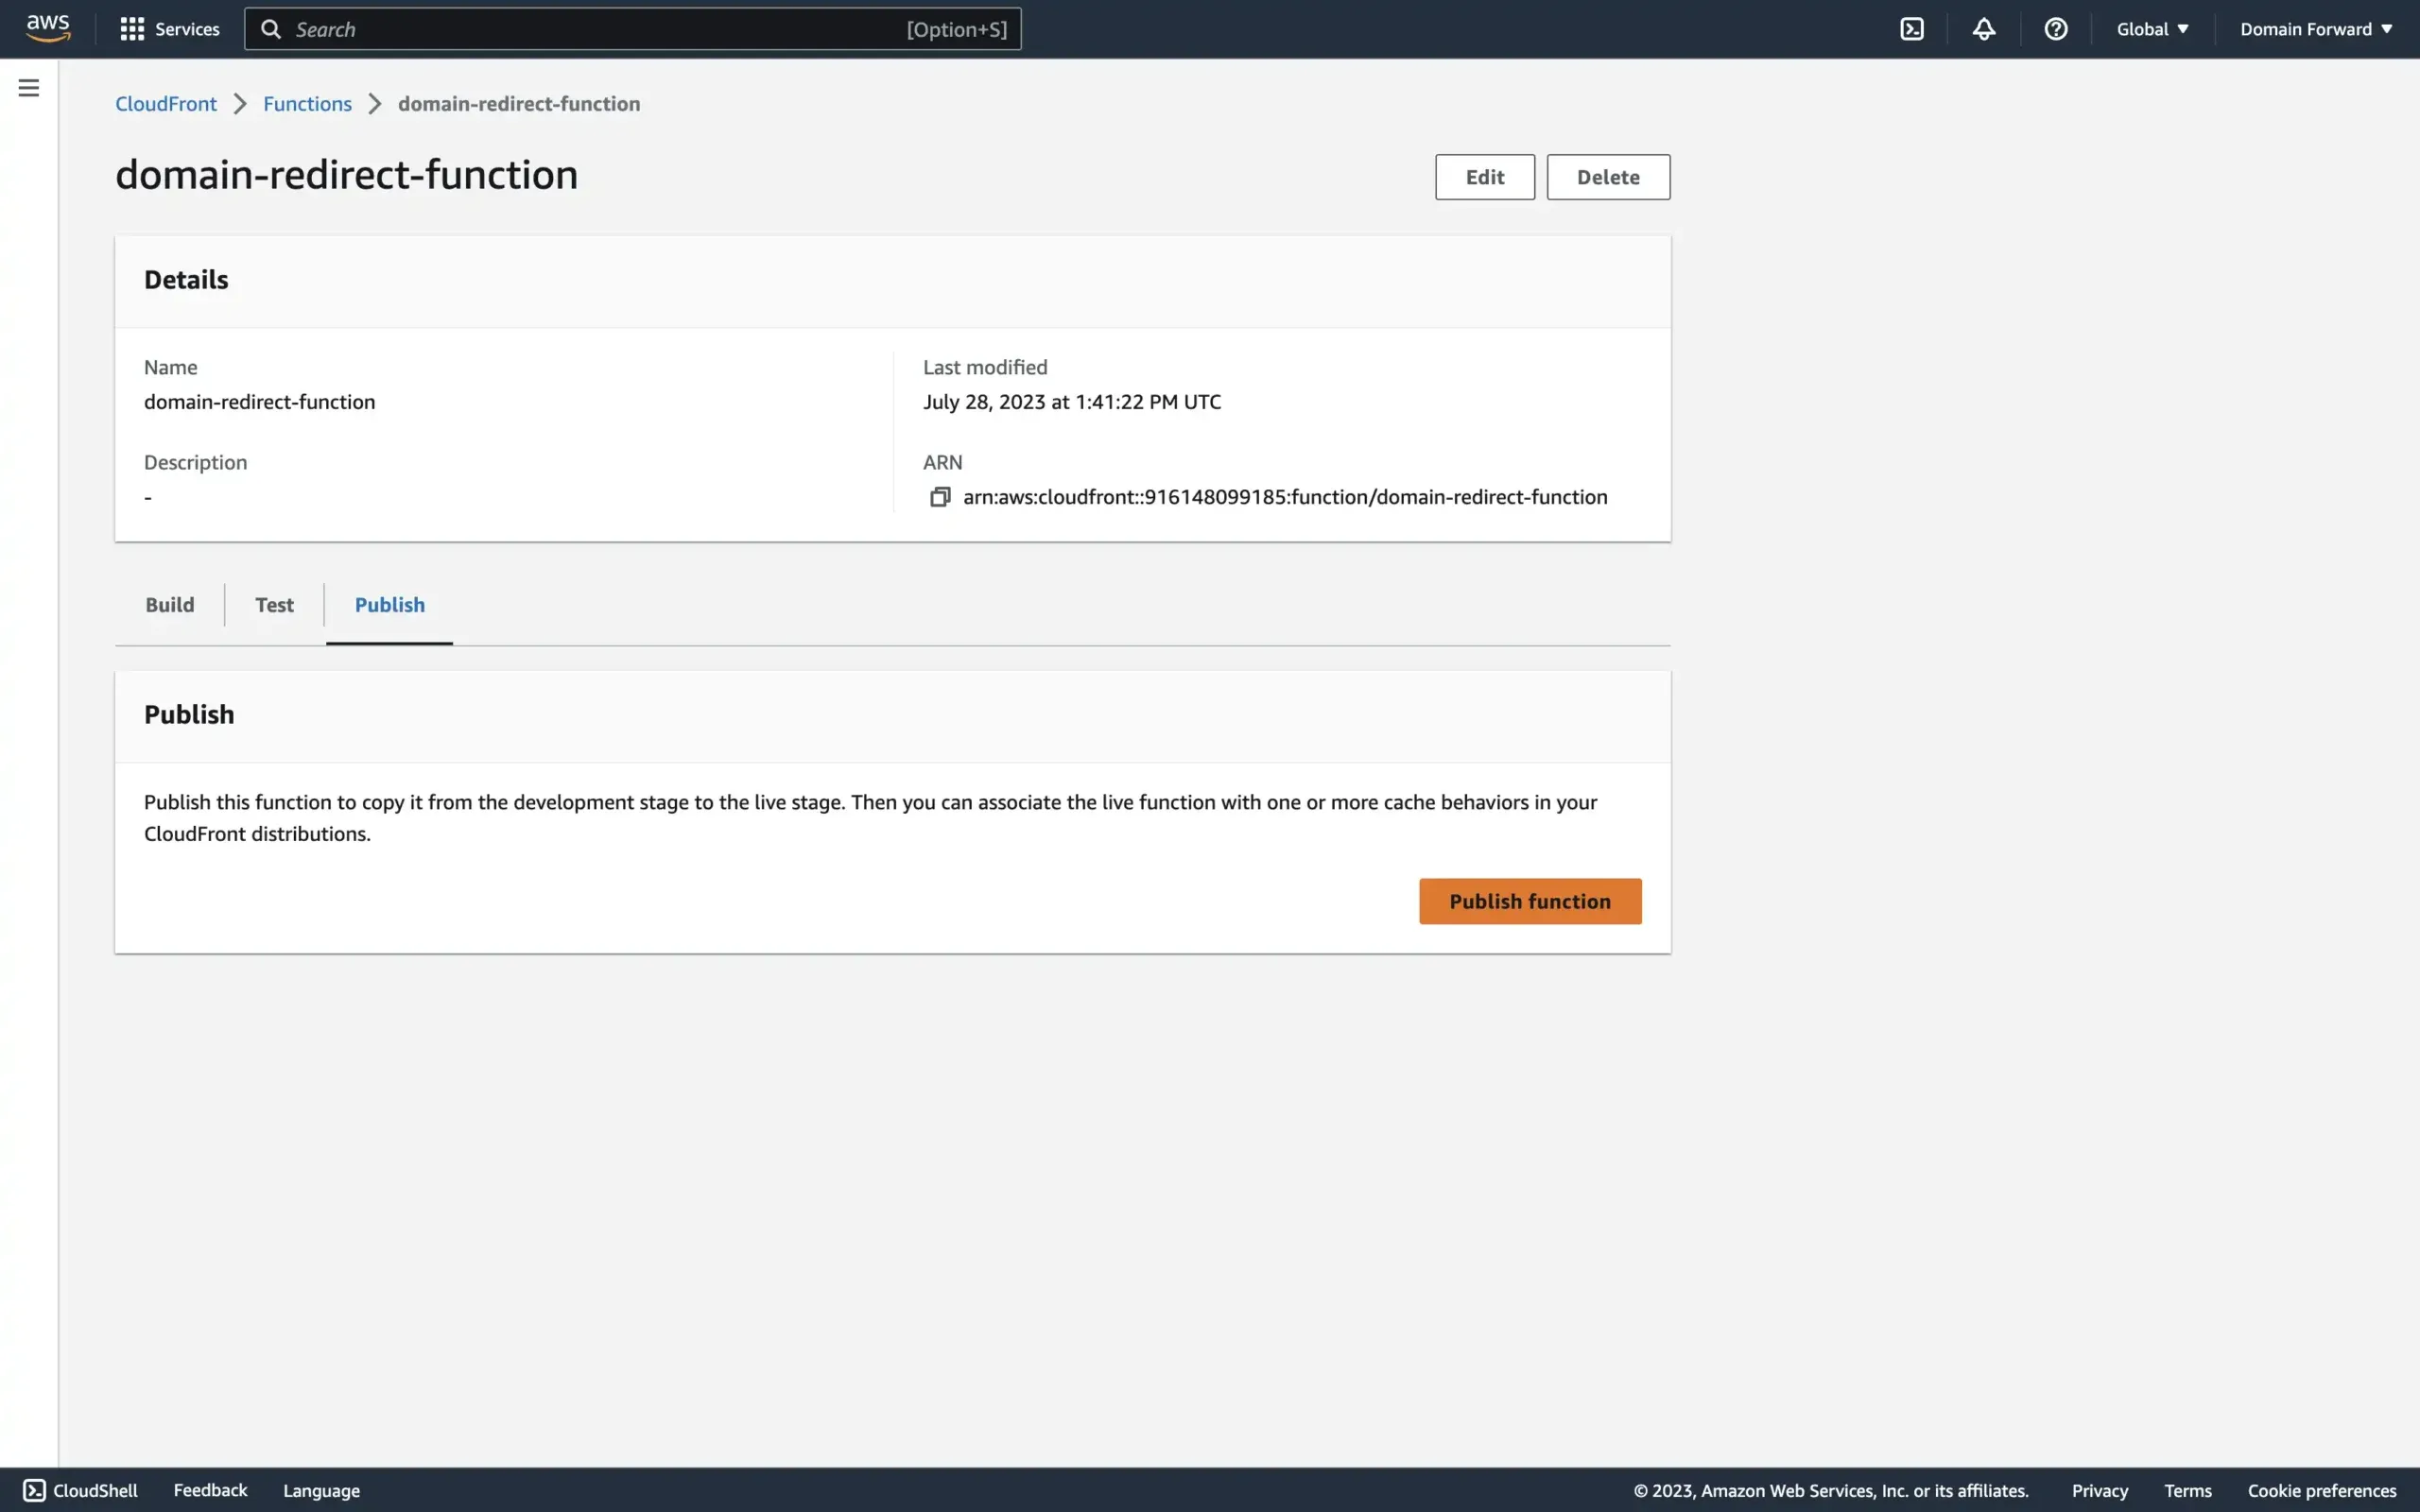
Publish the function by clicking Publish, then Publish function.
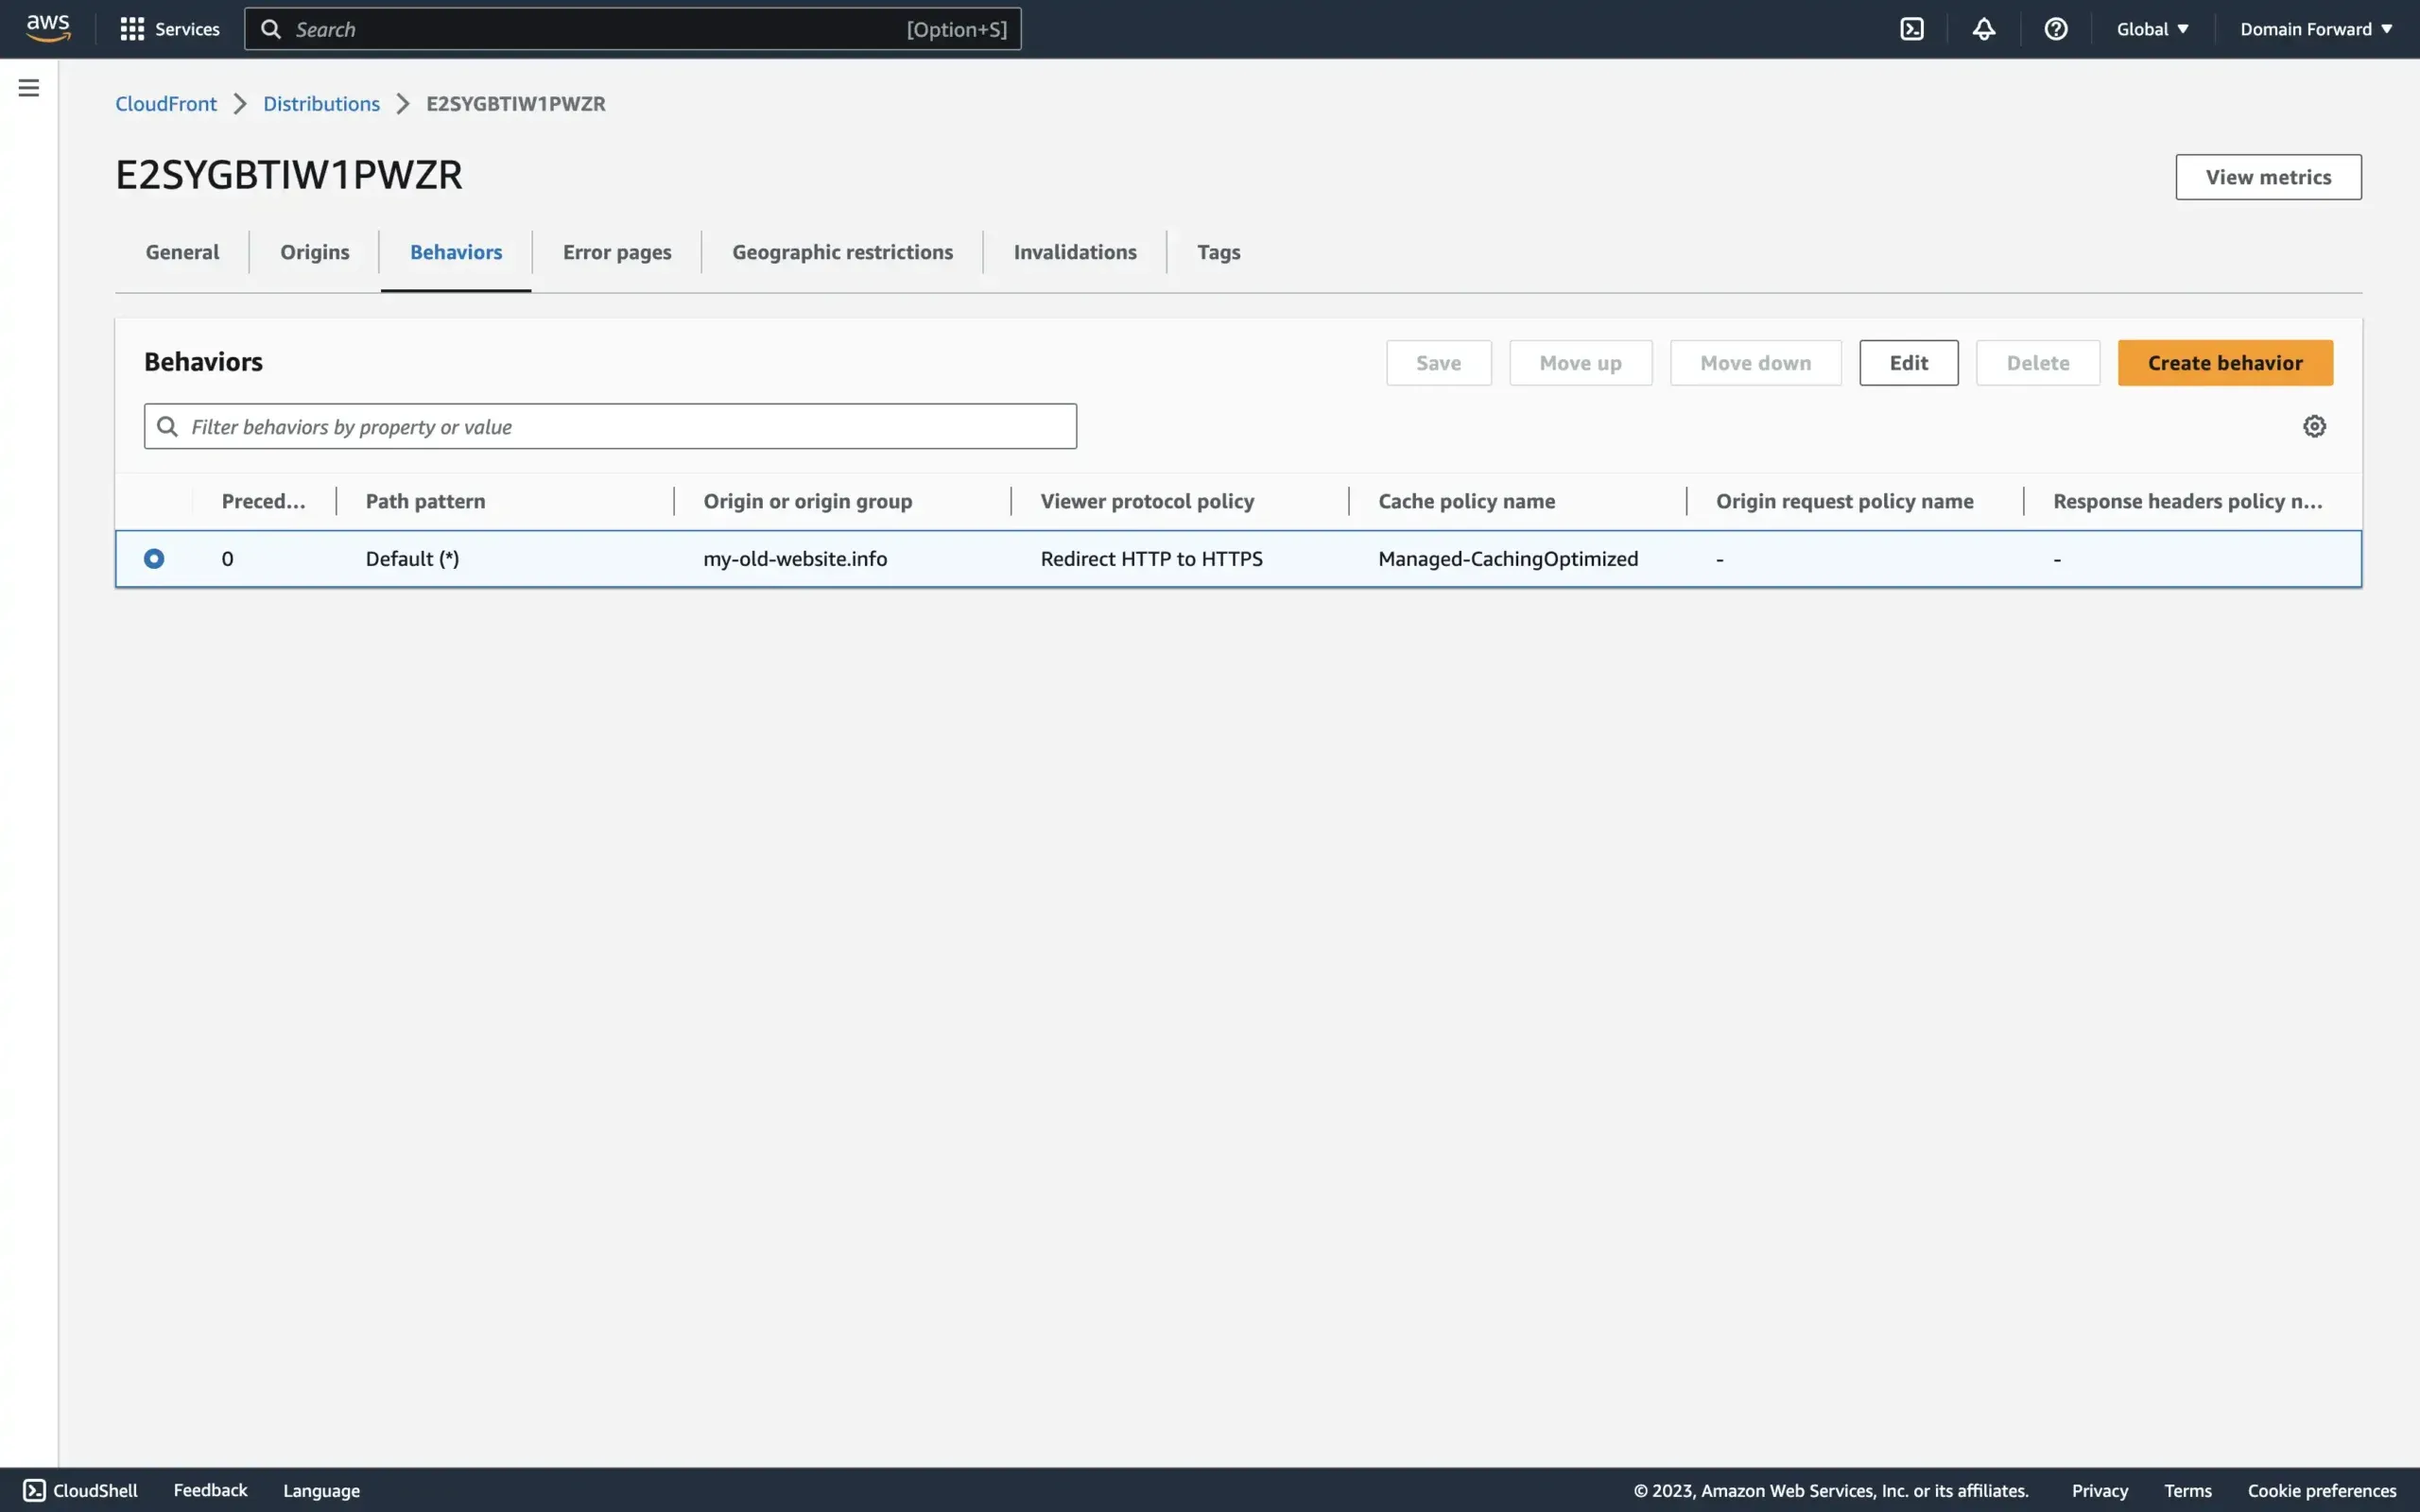
Now connect the function to your CloudFront distribution. Go back to the distribution, open the Behaviors tab, select the row, and click Edit.
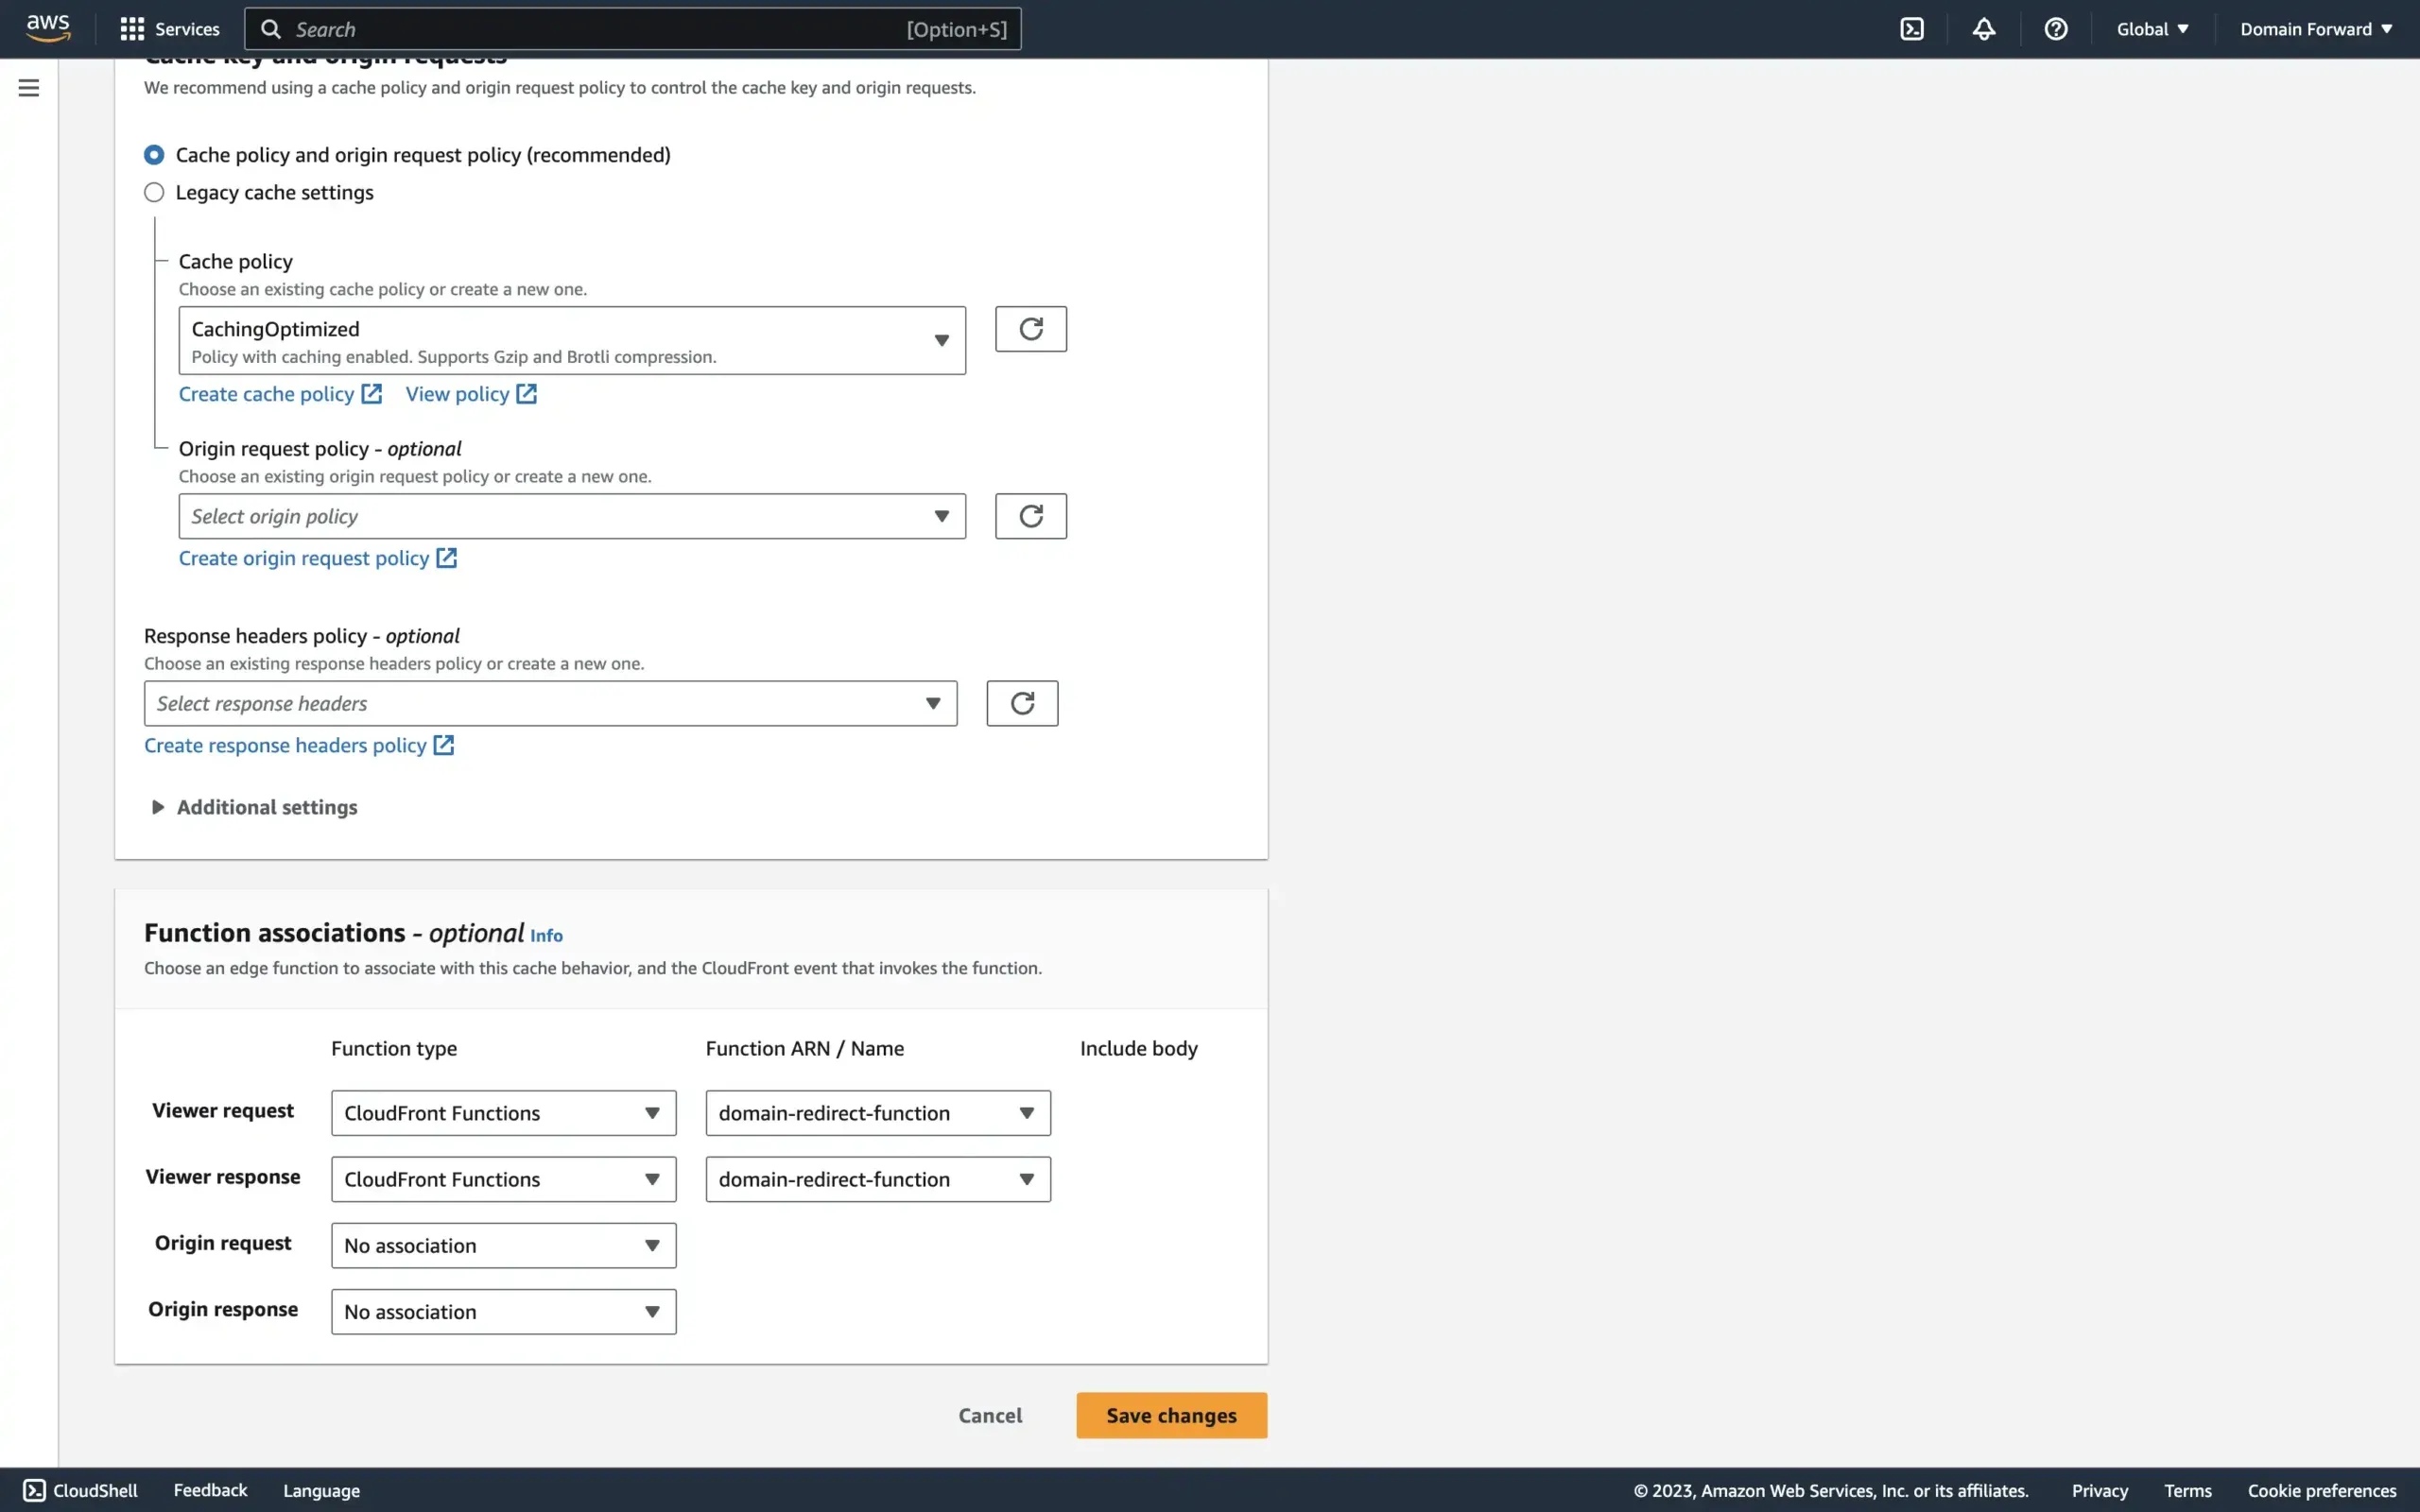
Scroll to the bottom and configure Viewer request and Viewer response as shown above. Select your function name from the dropdown.
If you skip this step, the function won’t run and visitors will see a 404 error.
Step 4: Test the Setup
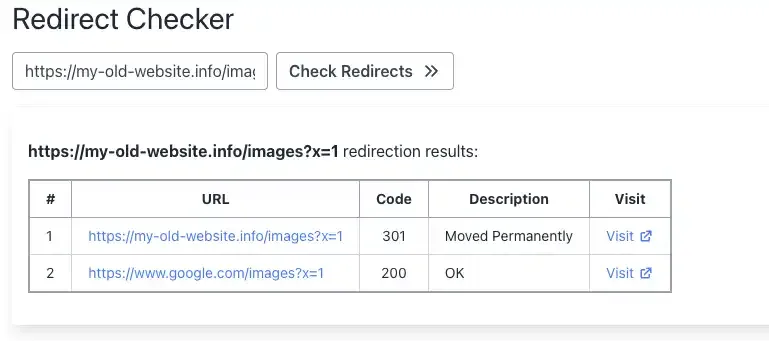
Open the redirected domain in your browser to confirm it works. The screenshot below shows the redirect working with HTTPS, path preservation (/images), and query parameter forwarding (?x=1).
Conclusion
That’s it for today’s tutorial. If you’re using a different stack, check out our other guides: Google Cloud Functions, Google Cloud Run, or for a no-code approach, Domain-Forward.com.
You can verify your redirect is working correctly with our redirect tester tool.
Please note: AWS occasionally updates its interface, so the exact steps and descriptions may vary slightly. Always refer to the official AWS documentation for the most accurate information.