TL;DR: Hostinger domain forwarding works for HTTP traffic, but doesn’t include SSL — HTTPS visitors see “Not Secure” warnings and leave. Since most browsers default to HTTPS, your redirect is broken for most visitors. Fix it in 5 minutes with Domain-Forward.com (free plan) — automatic SSL, 301 redirects, and analytics included.
You set up domain forwarding on Hostinger. You test the HTTP version — it works. Then you test HTTPS and get a security warning. Your SSL checker shows no certificate installed. Your visitors see “Not Secure” in their browser bar.
Hostinger’s domain forwarding does not include an SSL certificate. The redirect works perfectly over HTTP, but since nearly every modern browser defaults to HTTPS, the majority of your visitors will never complete the redirect.
This guide shows you how Hostinger’s forwarding works, exactly where it breaks, and how to fix it in 5 minutes with a free tool.
Why You Need HTTPS for Domain Redirects in 2026
Domain forwarding sends visitors from one domain to another. Simple enough. But in 2025, a redirect without HTTPS is essentially broken:
- Chrome, Safari, and Firefox default to HTTPS — your HTTP-only redirect never fires for most visitors
- “Not Secure” warnings destroy trust — visitors see a scary warning instead of reaching your destination site
- Google penalizes insecure redirects — SEO value doesn’t transfer properly through non-HTTPS redirect chains
- HSTS preload lists block HTTP entirely — some domains literally cannot be accessed over HTTP anymore
Hostinger’s forwarding works fine for the HTTP use case. The problem is that HTTP is no longer how most browsers access websites.
How to Set Up Hostinger Domain Forwarding (HTTP Only)
Hostinger’s built-in forwarding is straightforward to configure. Just know that it only works over HTTP — we’ll cover the HTTPS fix after.
Step 1: Log in to your Hostinger account
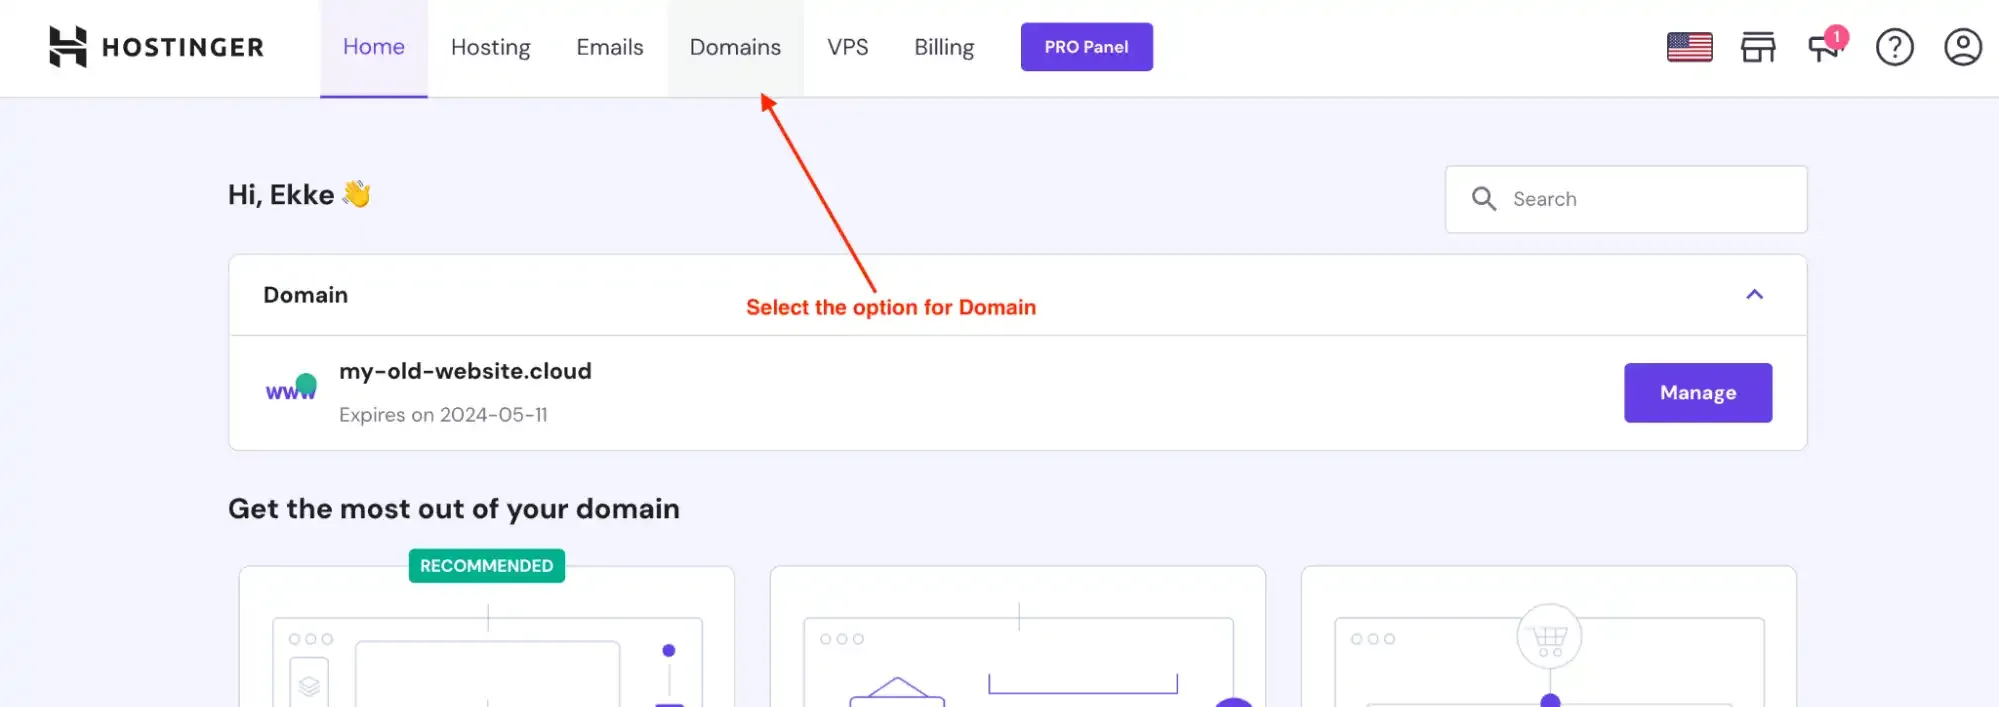
To begin, log in to your Hostinger account. Once you have successfully logged in to your account, click on the menu item “Domains”.
Step 2: Manage domains
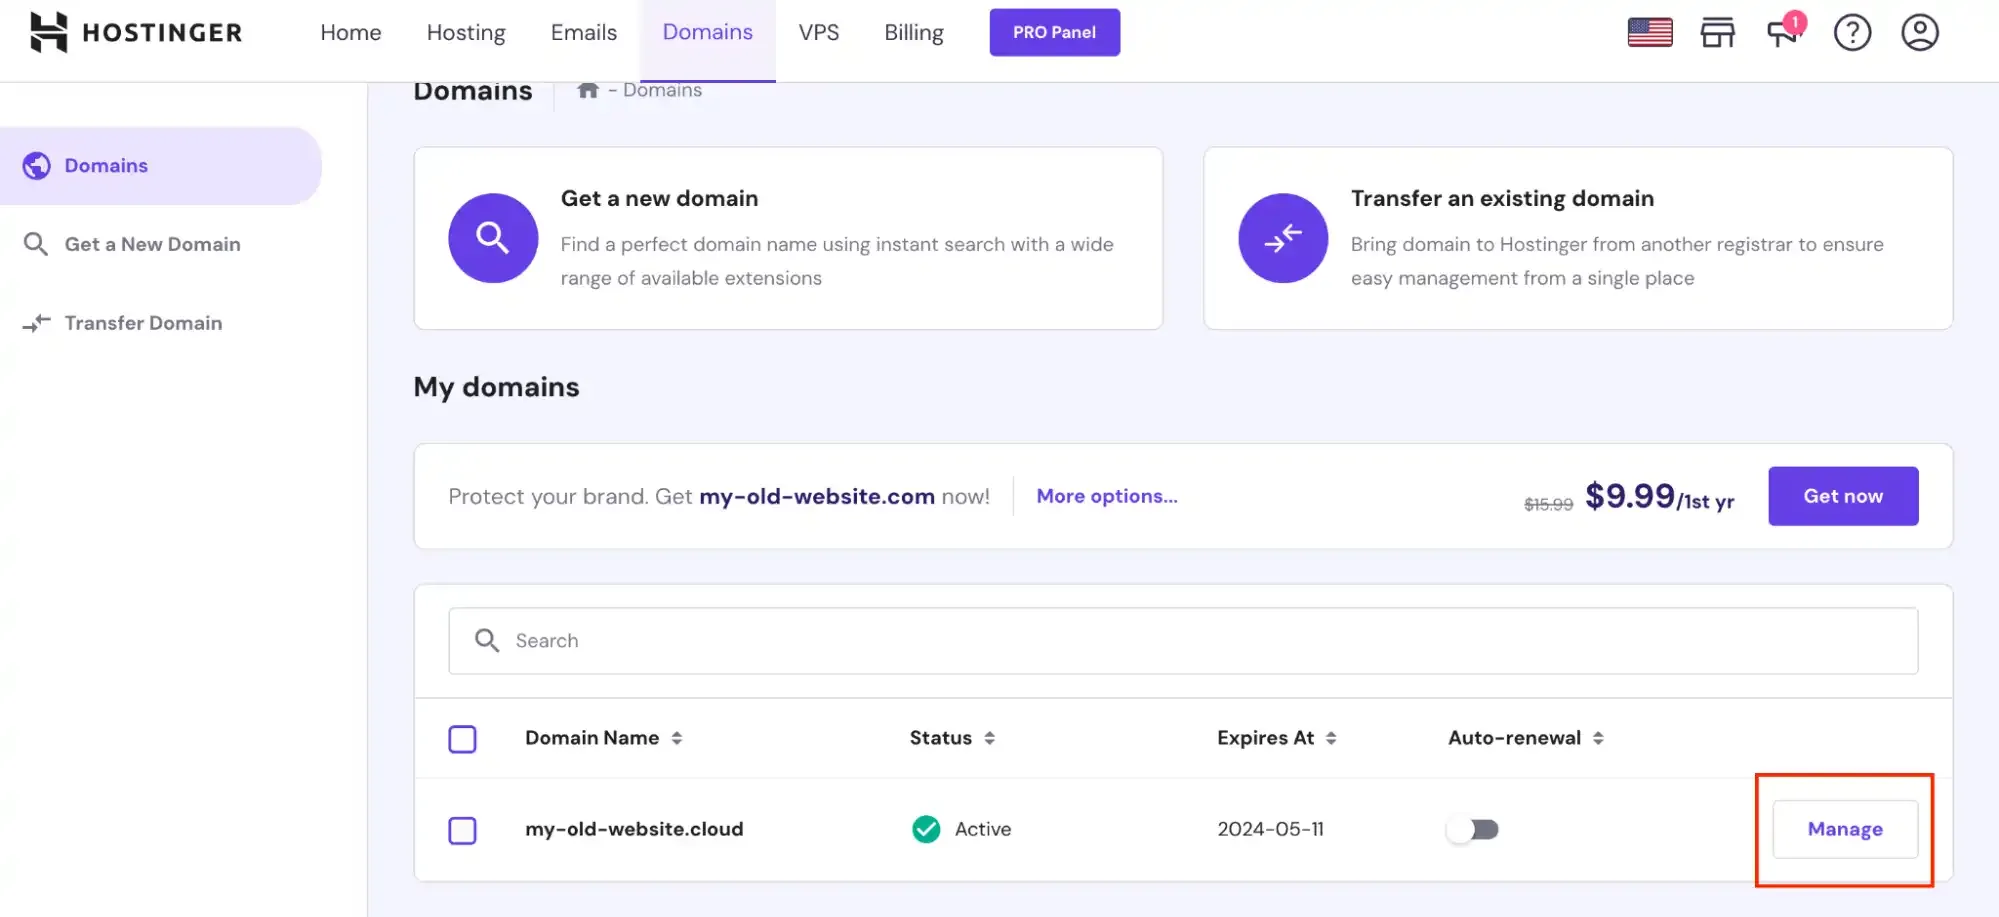
On the next page, you’ll see a list of domains you have access to. Navigate all the way down, and select the option for Manage domains for the domain you want to change.
Step 3: Forward domain
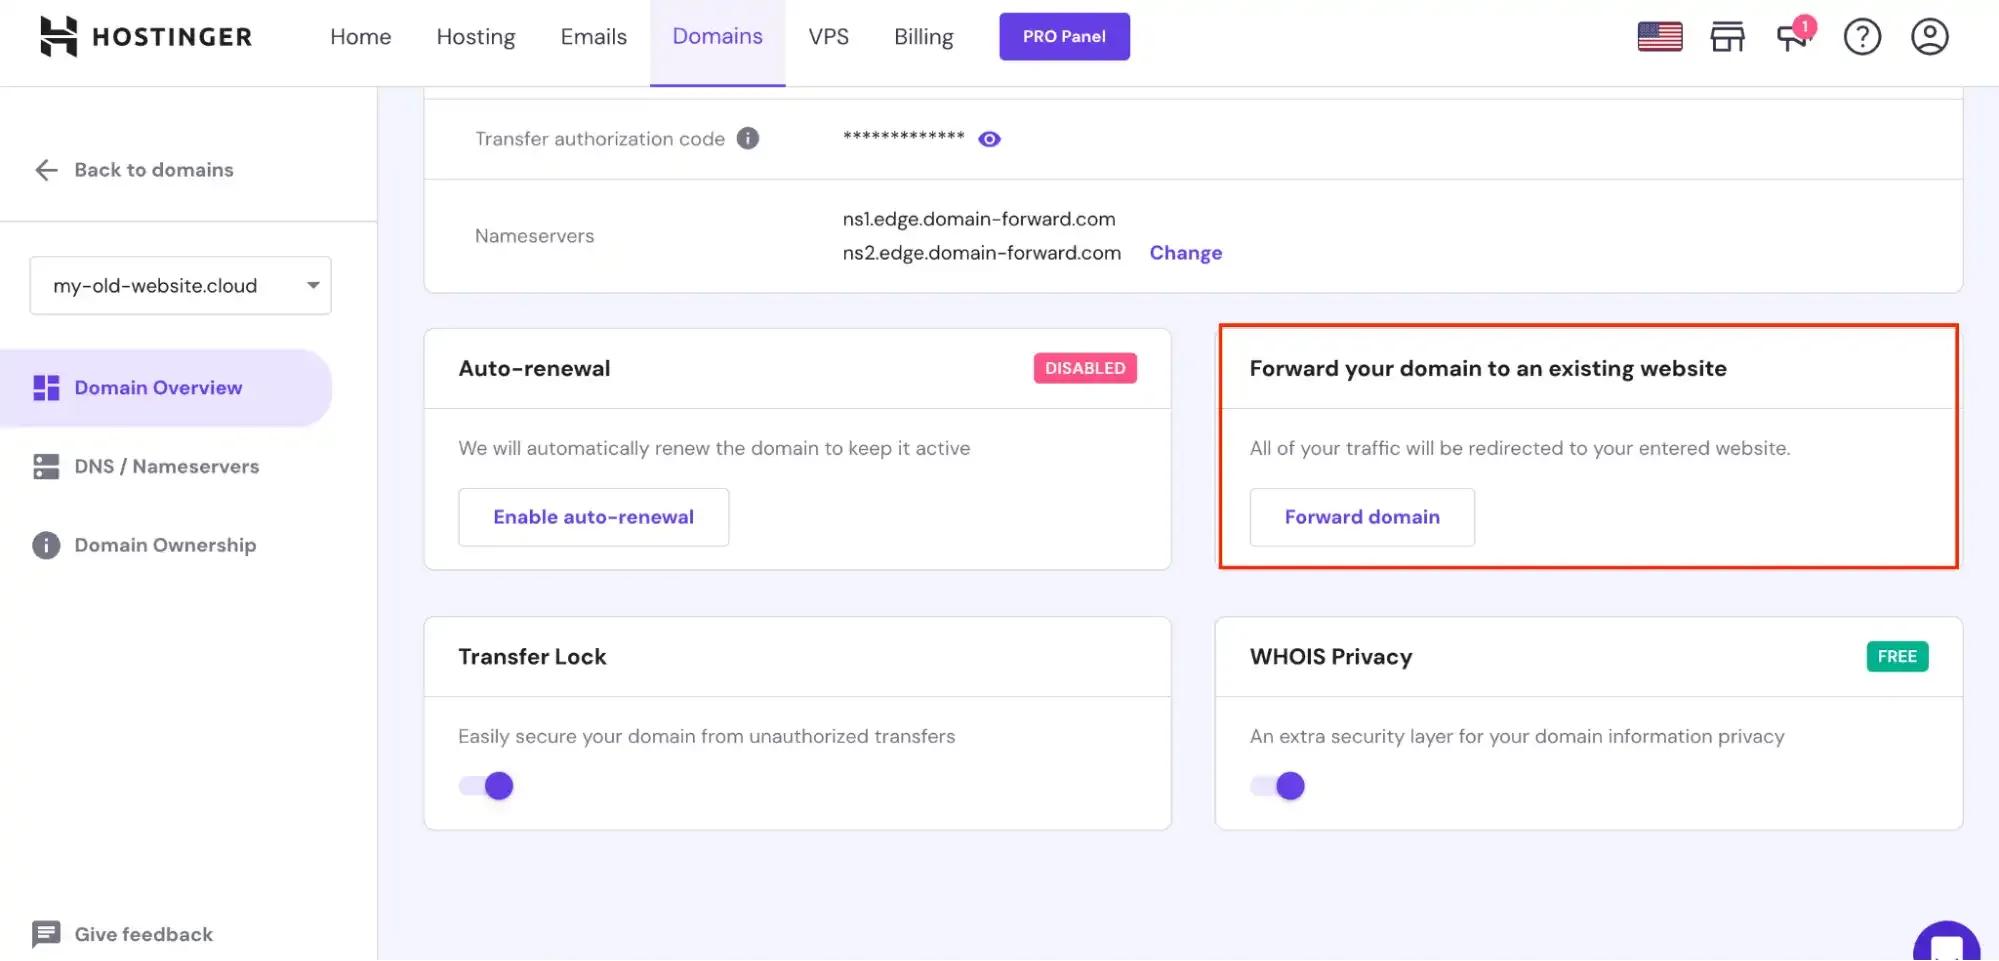
Now that you have selected the option to Manage the domain, a new page should launch. Simply navigate all the way down and select the option for “Forward domain to an existing website.”
Step 4: Enter domain redirect information
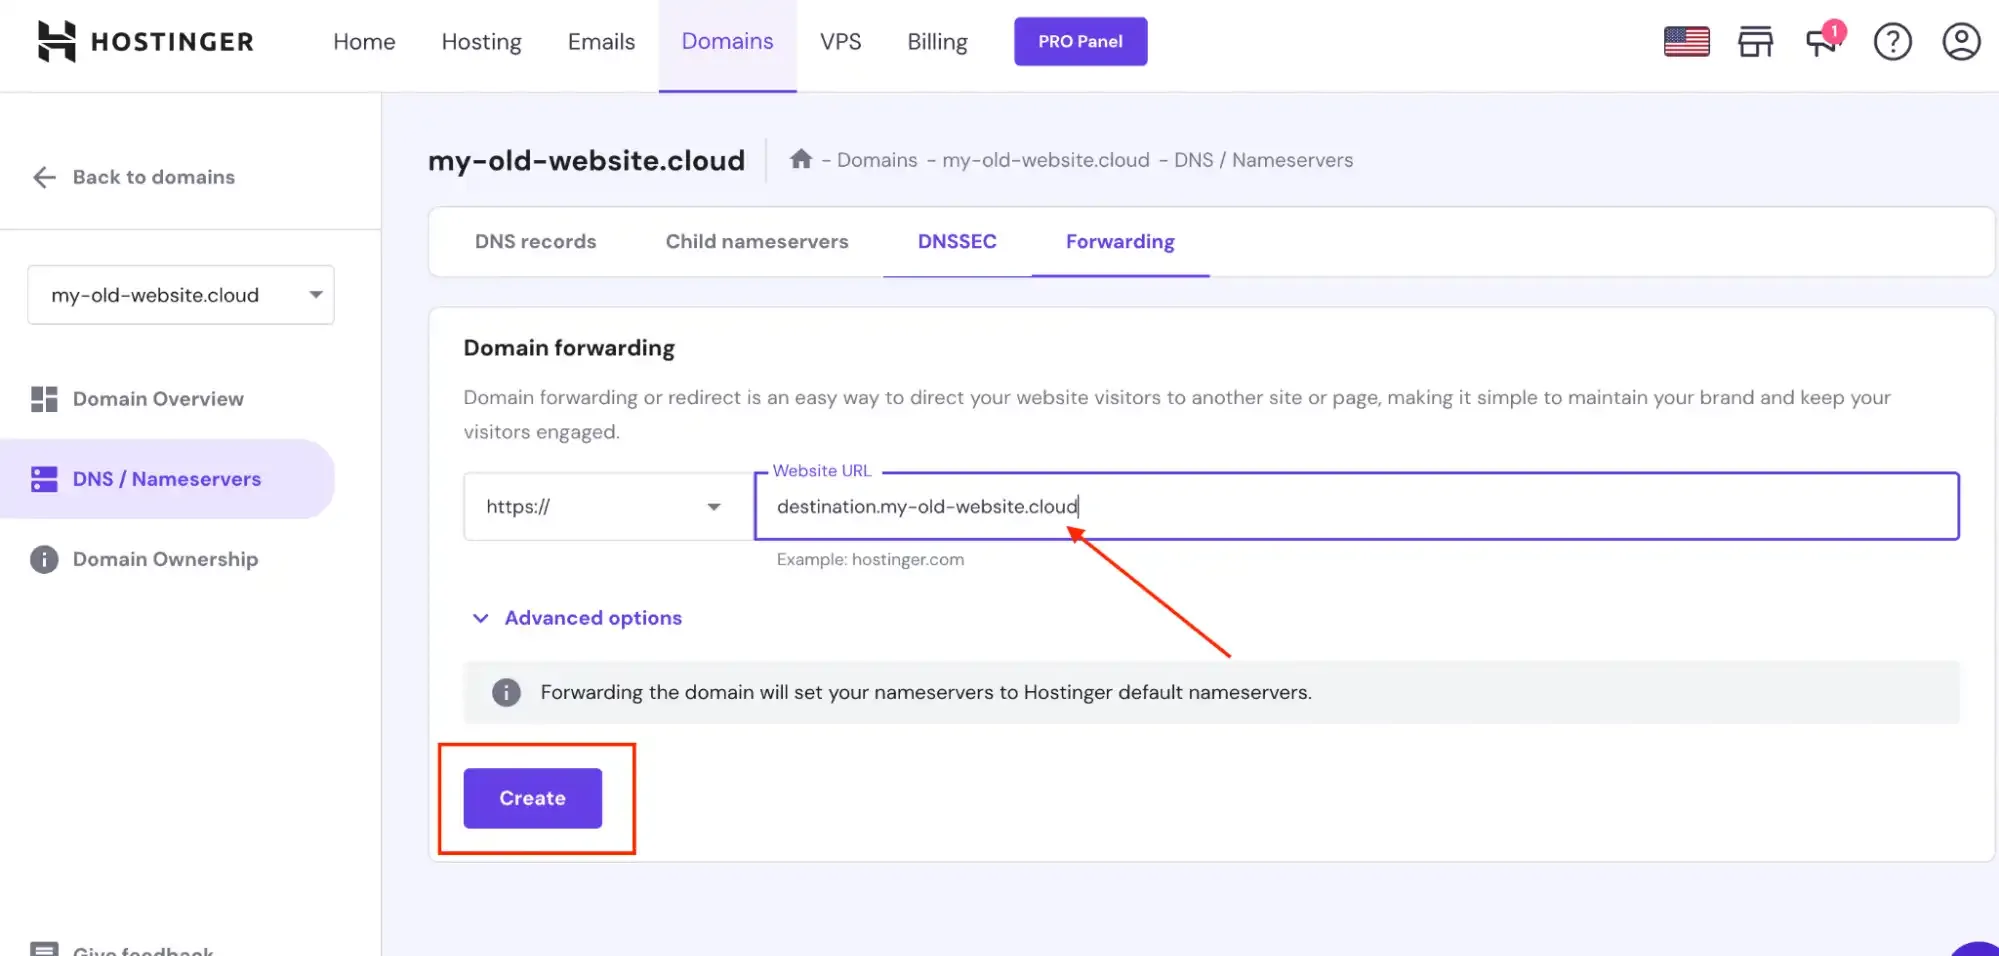
With the option to “Forward domain to an existing website” selected, you only need to type in the domain URL you’d like to redirect to. For this example, we will use destination.my-old-website.cloud as the URL to which we would like to redirect our original domain.
After entering your domain information, simply hit the Create button, and you’re all set.
If you followed the steps as we showed you, you should have something like this shown on the “Domain forwarding” page:

The screenshot above shows that we have successfully configured our original domain address to redirect to a new one (https://destination.my-old-website.cloud). Next, let’s test if the redirect actually works as expected.
Step 5: Testing the redirect using HTTP
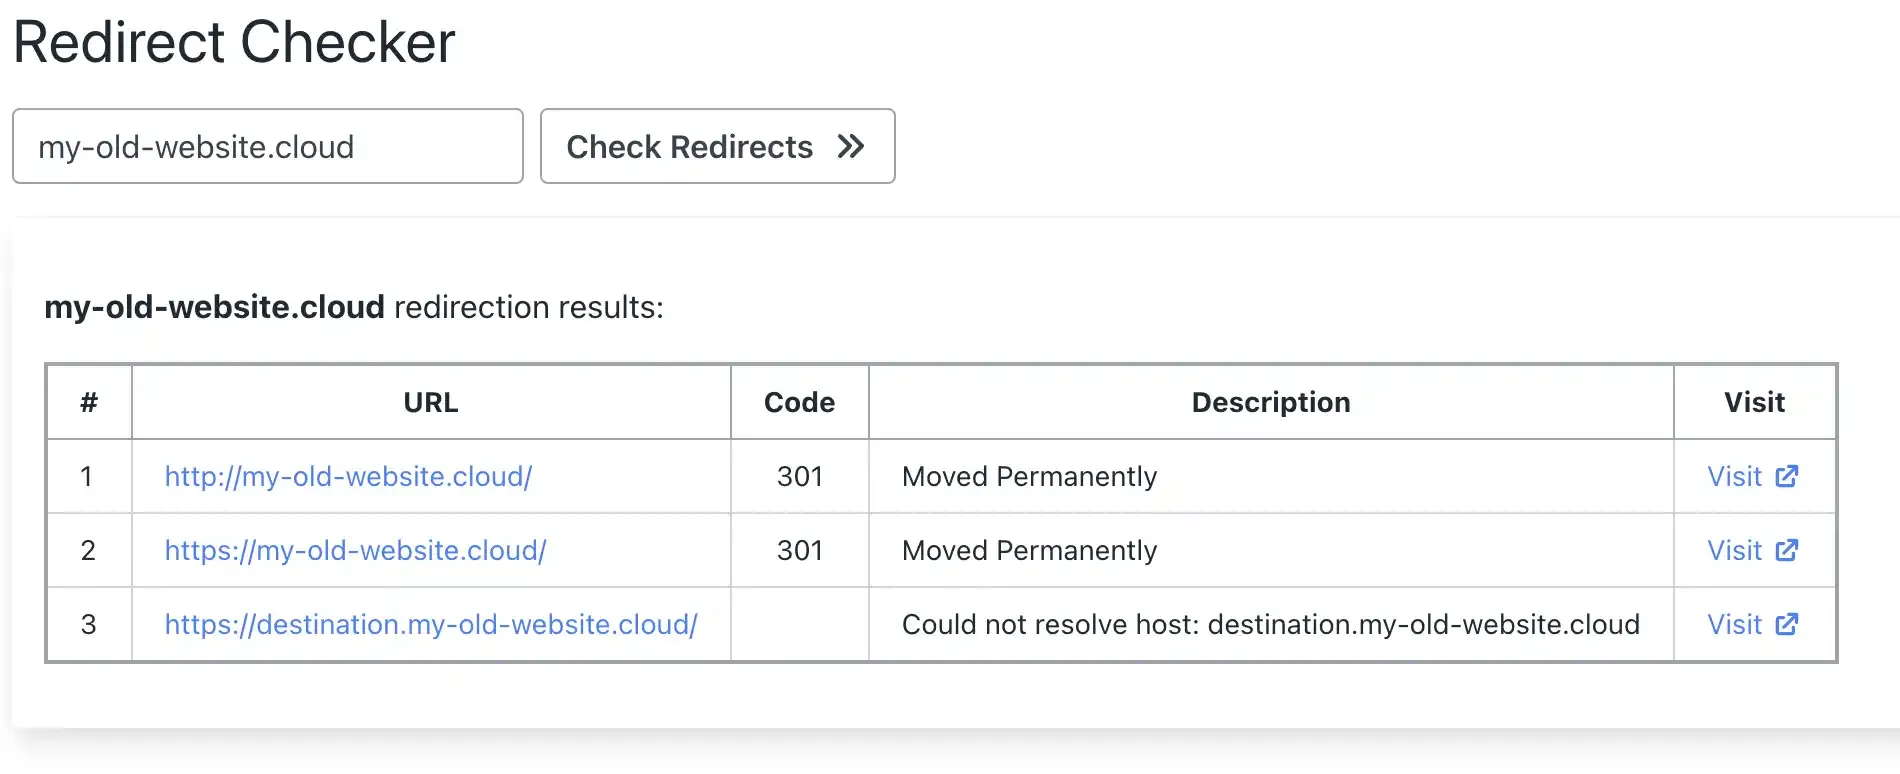
Now we want to check if the redirect works properly. After giving it some time for the DNS records to propagate, we can use a “redirect checker tool”. Using a tool like this we can see how the redirects are currently working for actual users visiting the original URL.
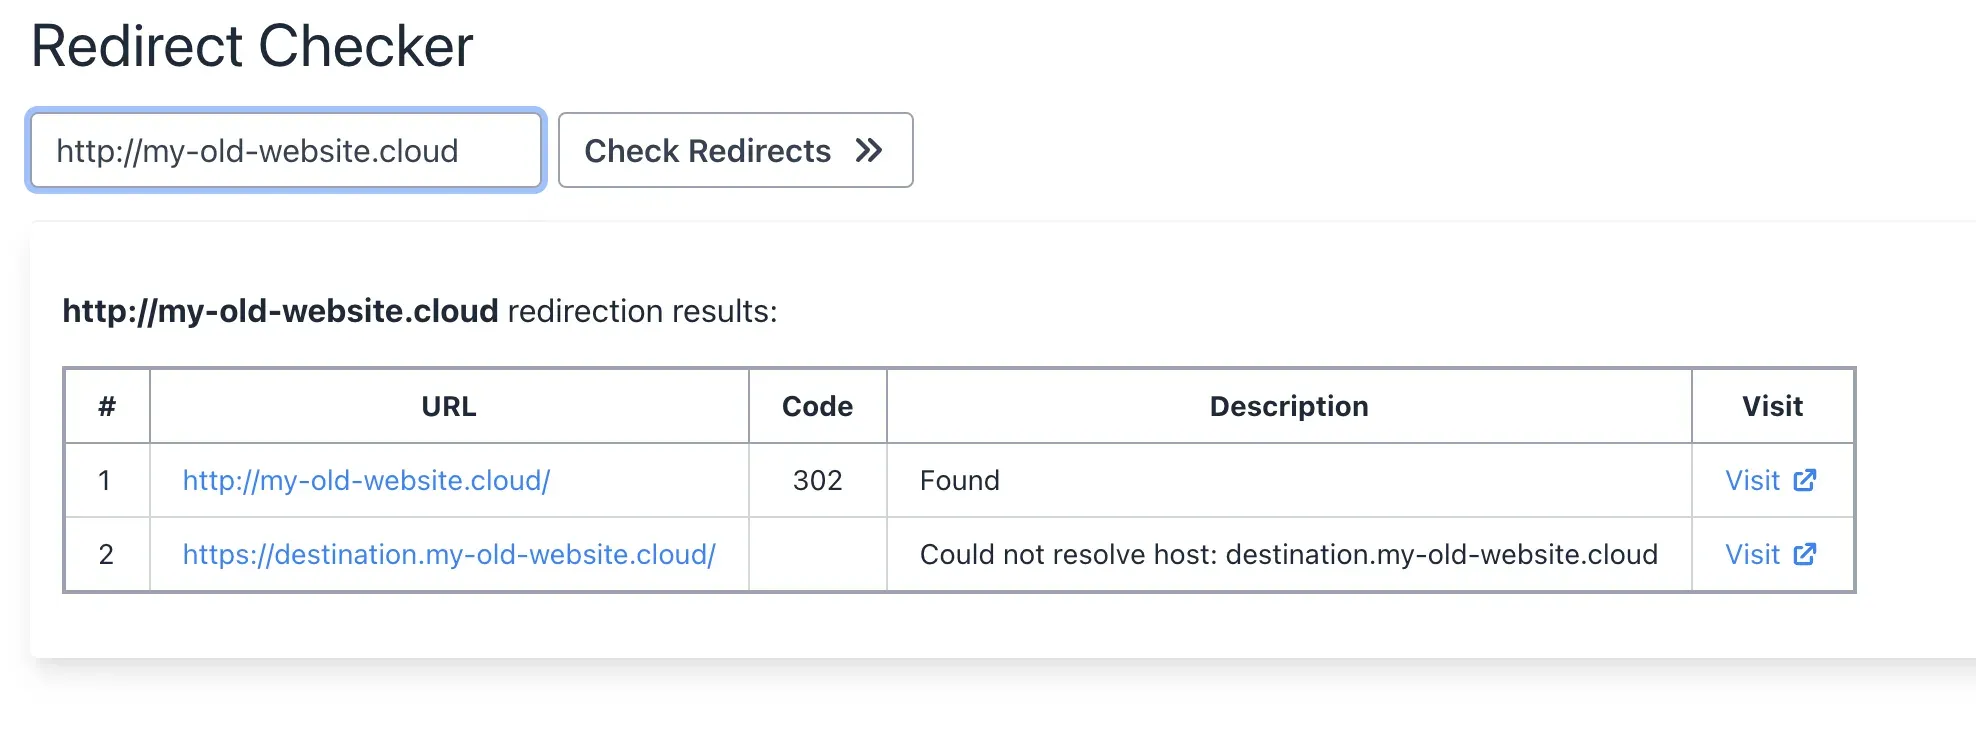
Looks like the HTTP redirects are working correctly. You can ignore the destination.my-old-website.cloud error. We haven’t set up an actual site on that address and that’s why the error “could not resolve host” is being shown.
Step 6: The problem — HTTPS doesn’t work
When you test with HTTPS, the redirect fails with an SSL error:
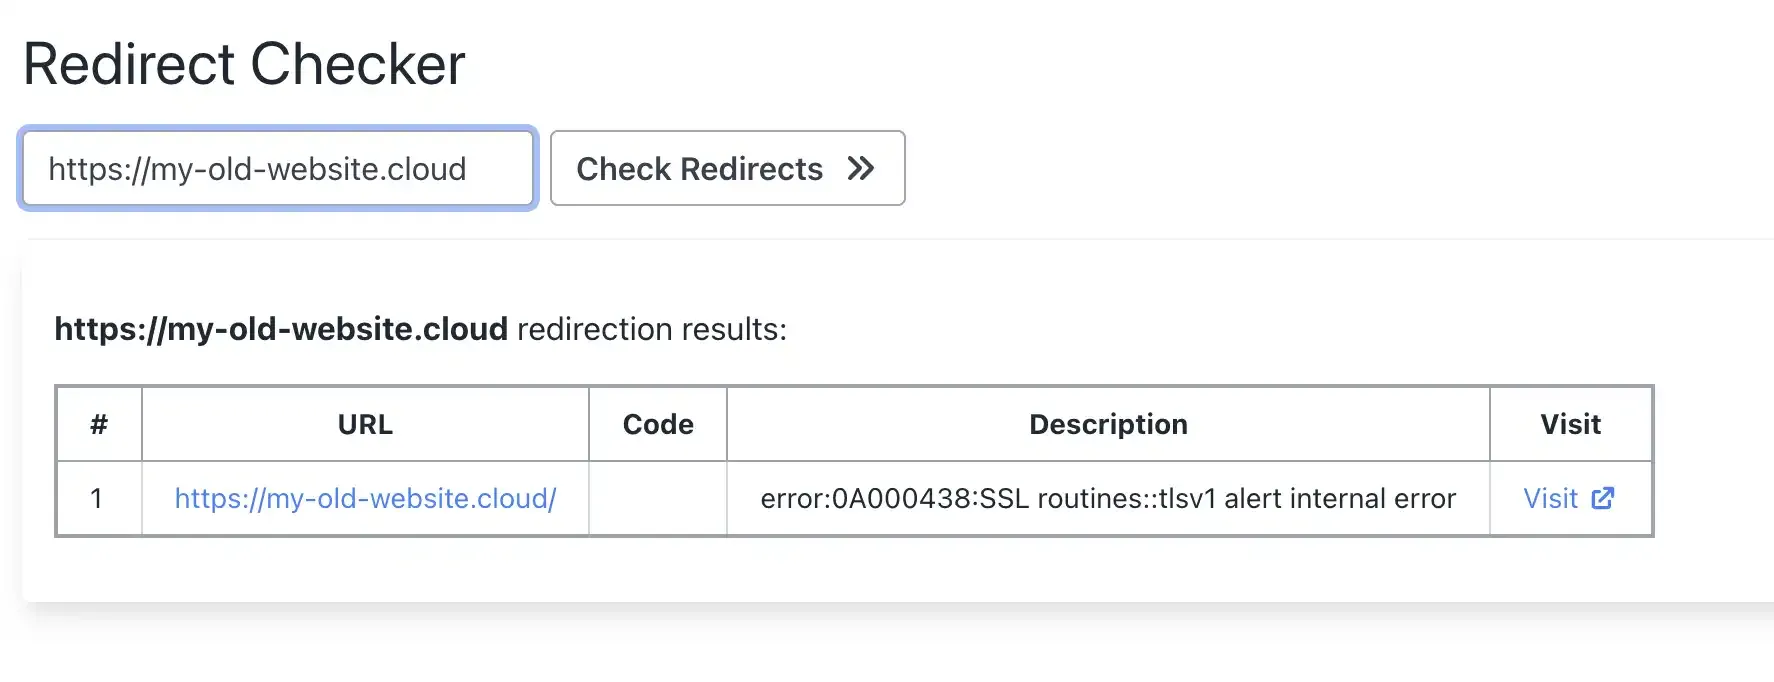
Hostinger does not install an SSL certificate for forwarded domains. The secure protocol (HTTPS) simply has no certificate to complete the connection. Visitors see a “Your connection is not private” warning.
The SSL checker confirms there’s no certificate installed:
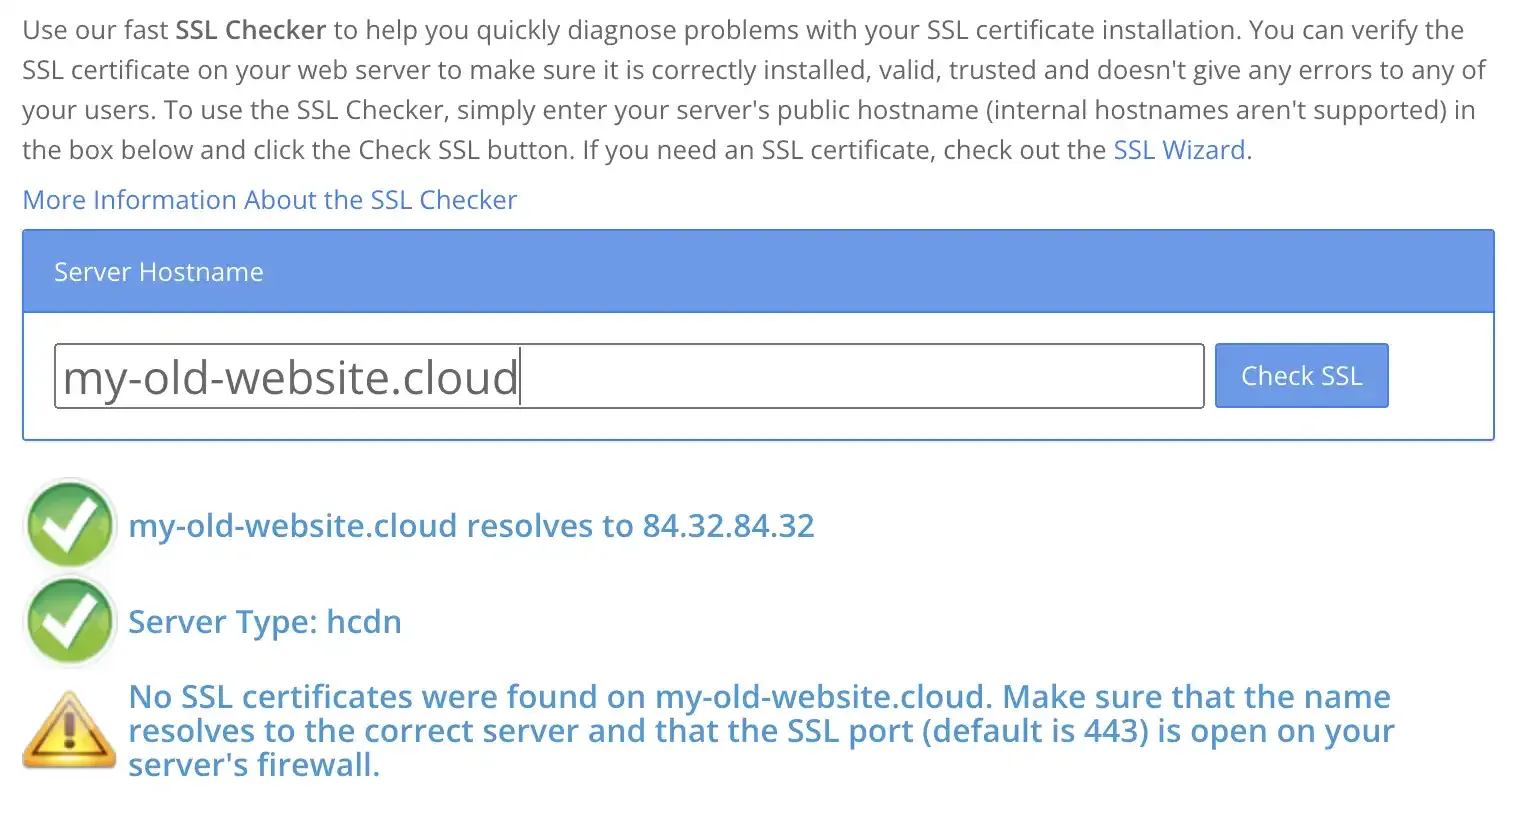
This is the fundamental limitation. You cannot fix this within Hostinger — they don’t provision SSL for forwarded domains.
The Fix: Domain-Forward.com — HTTPS Redirects That Work
Domain-Forward.com provides everything Hostinger’s forwarding is missing:
Step 1: Create an Account
First things first, you need to create an account, which is pretty straightforward.
Step 2: Add your domain to Domain-forward.com
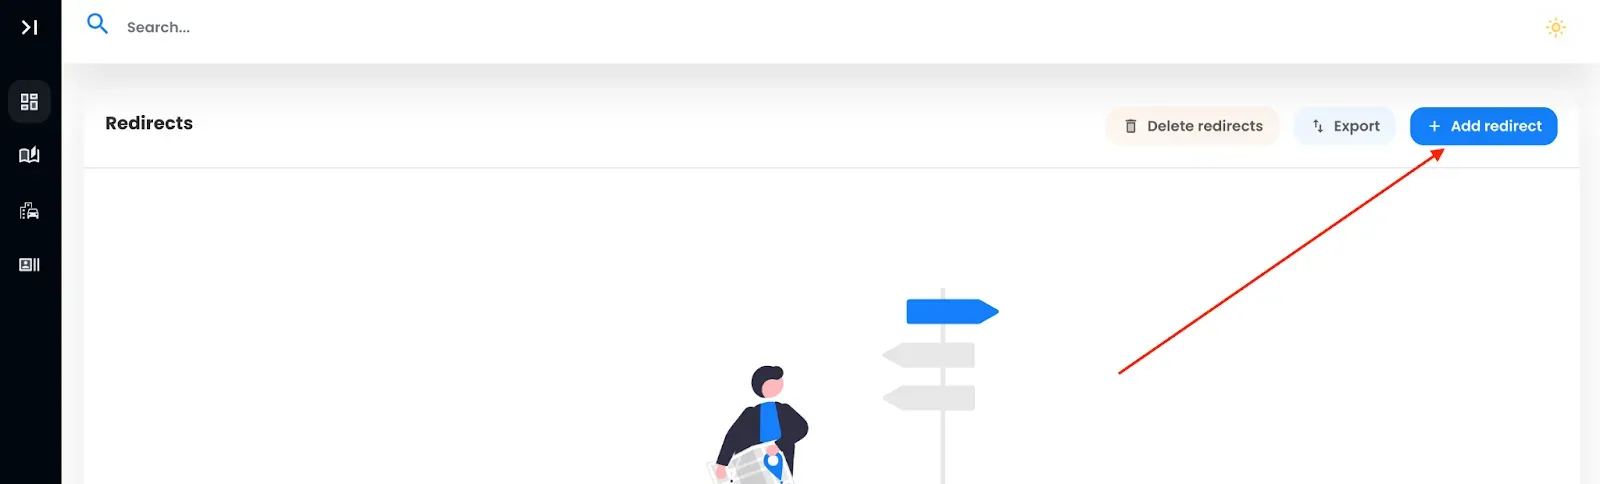
After successfully creating an account, it’s time to add the domain you’d like to redirect. To do that, click on the option to Add Redirect.
Since we already have a domain with Hostinger, “my-old-web.site,” we will add the domain to the Source URL field. For a hassle-free experience, we recommend adding www and the apex (non-www).
Also, we need to set the Destination URL, i.e., where we want to forward to.
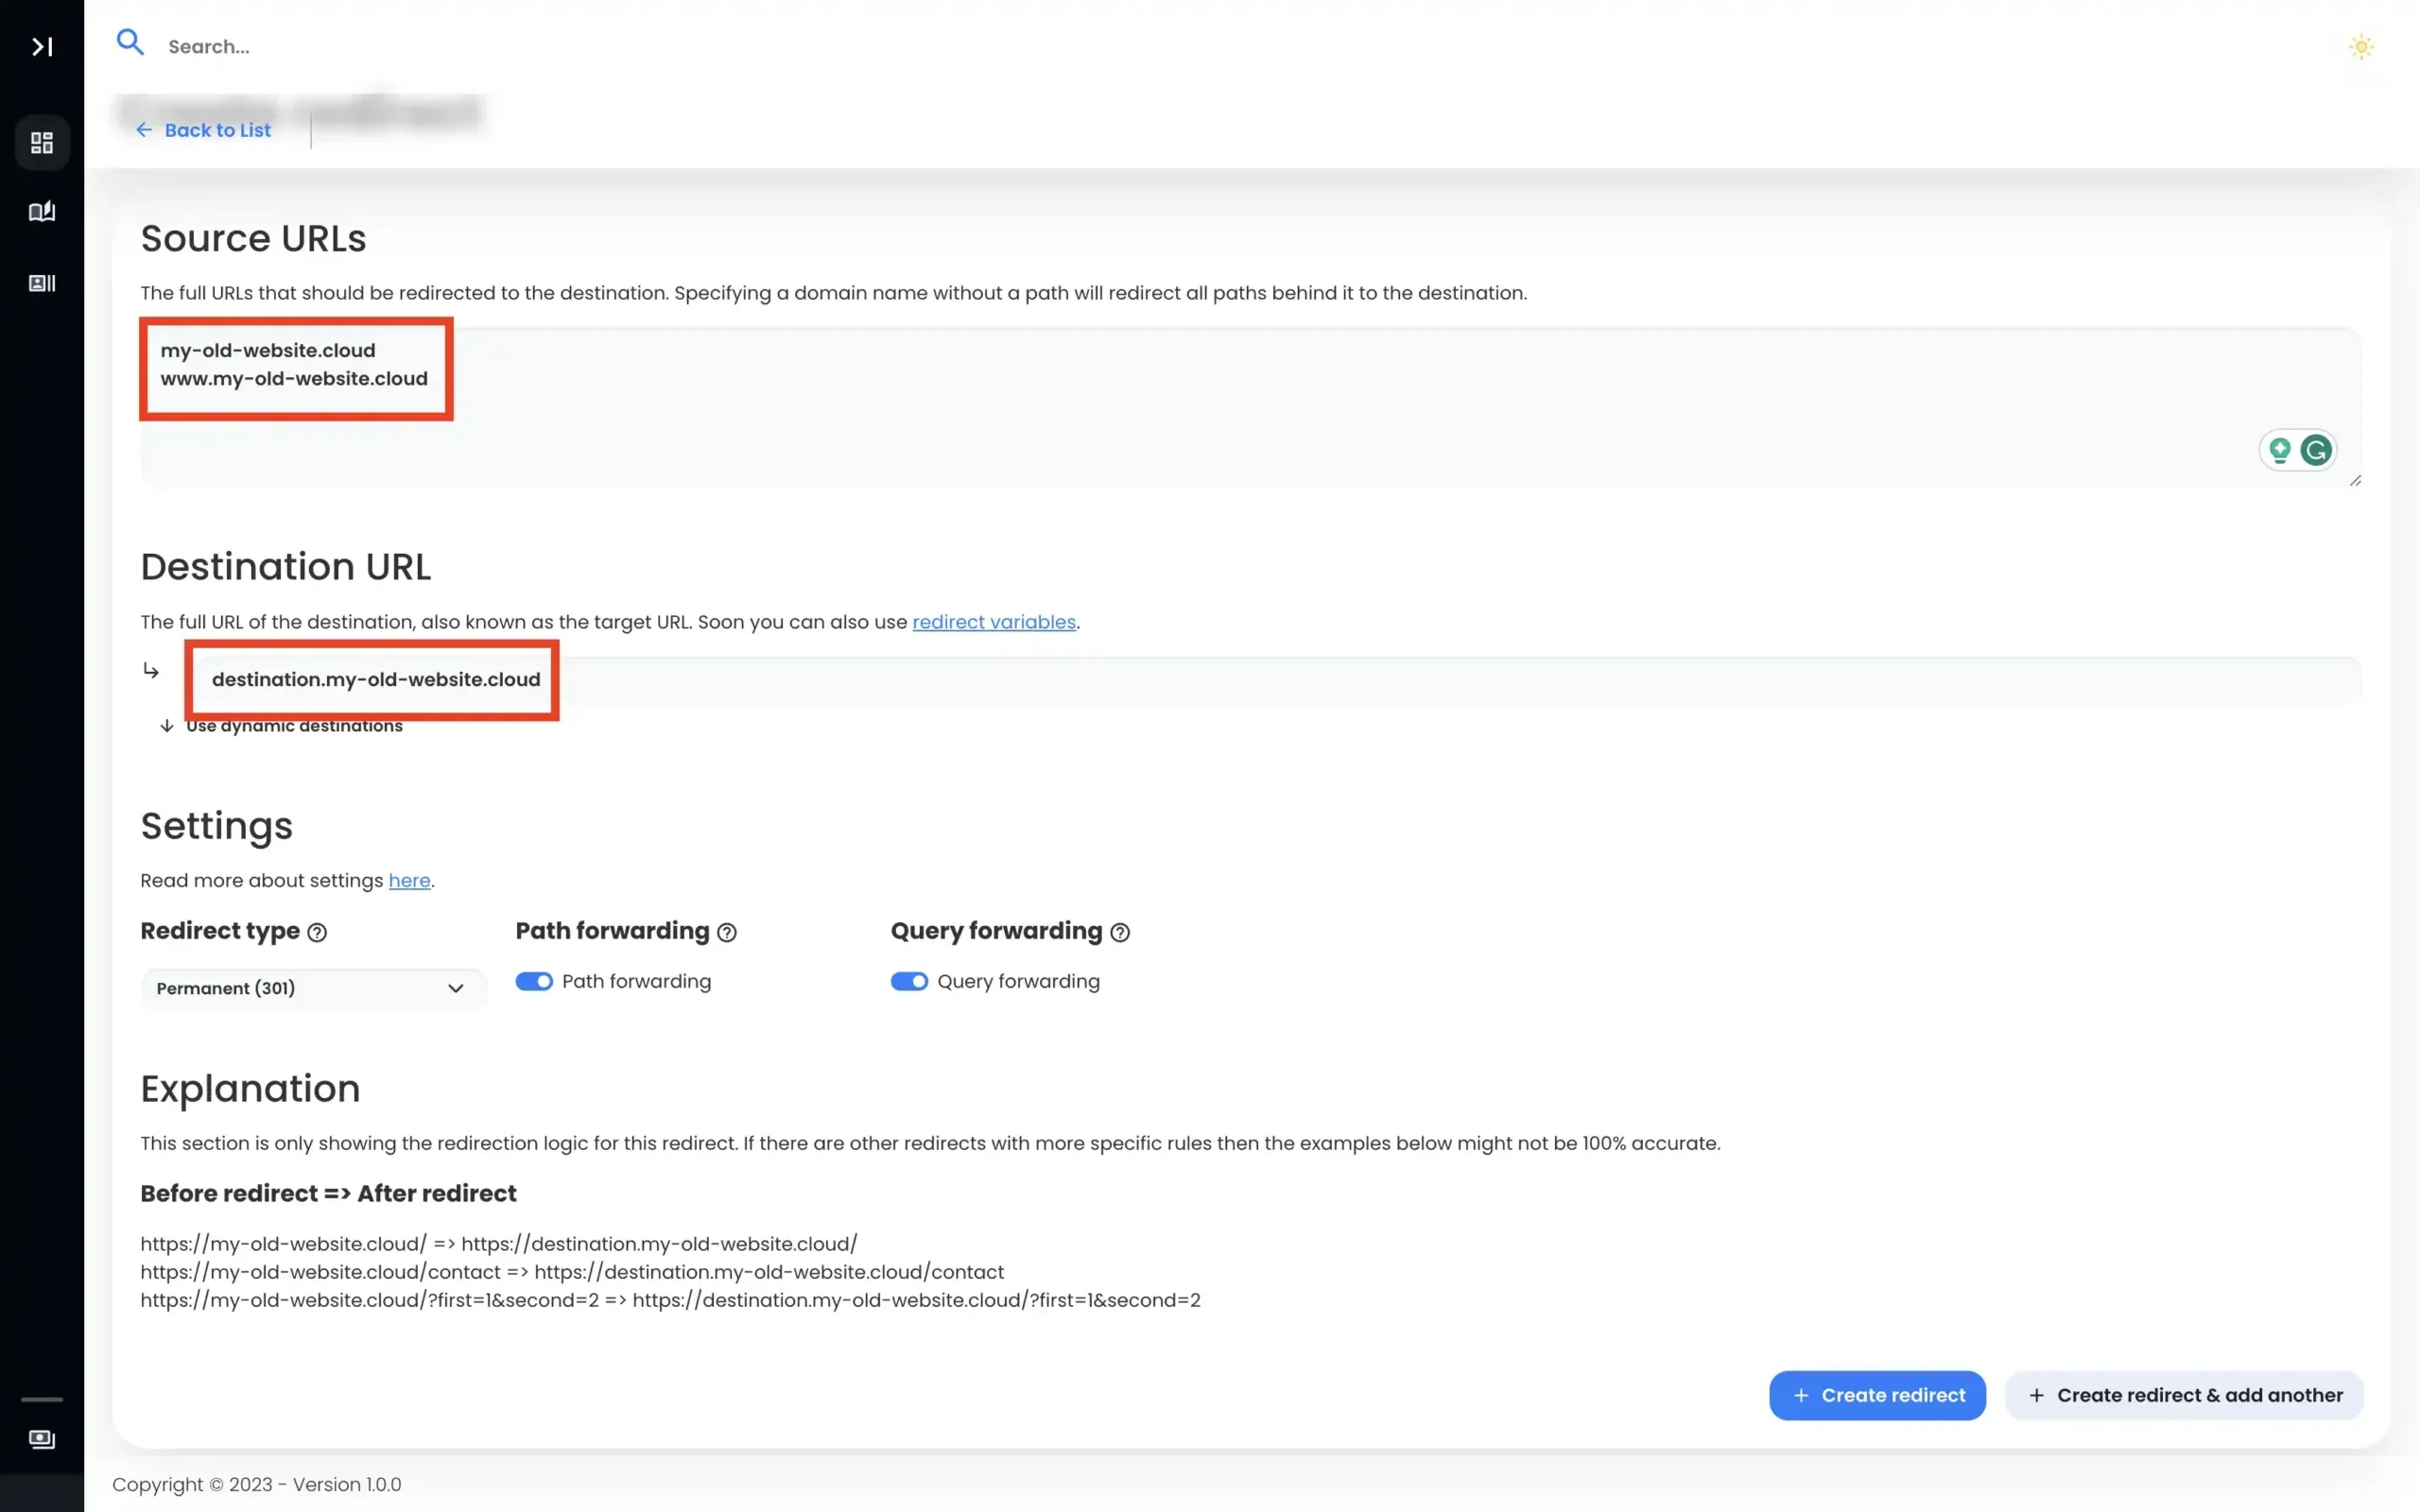
With all this information entered, we need to go ahead and create our redirect.
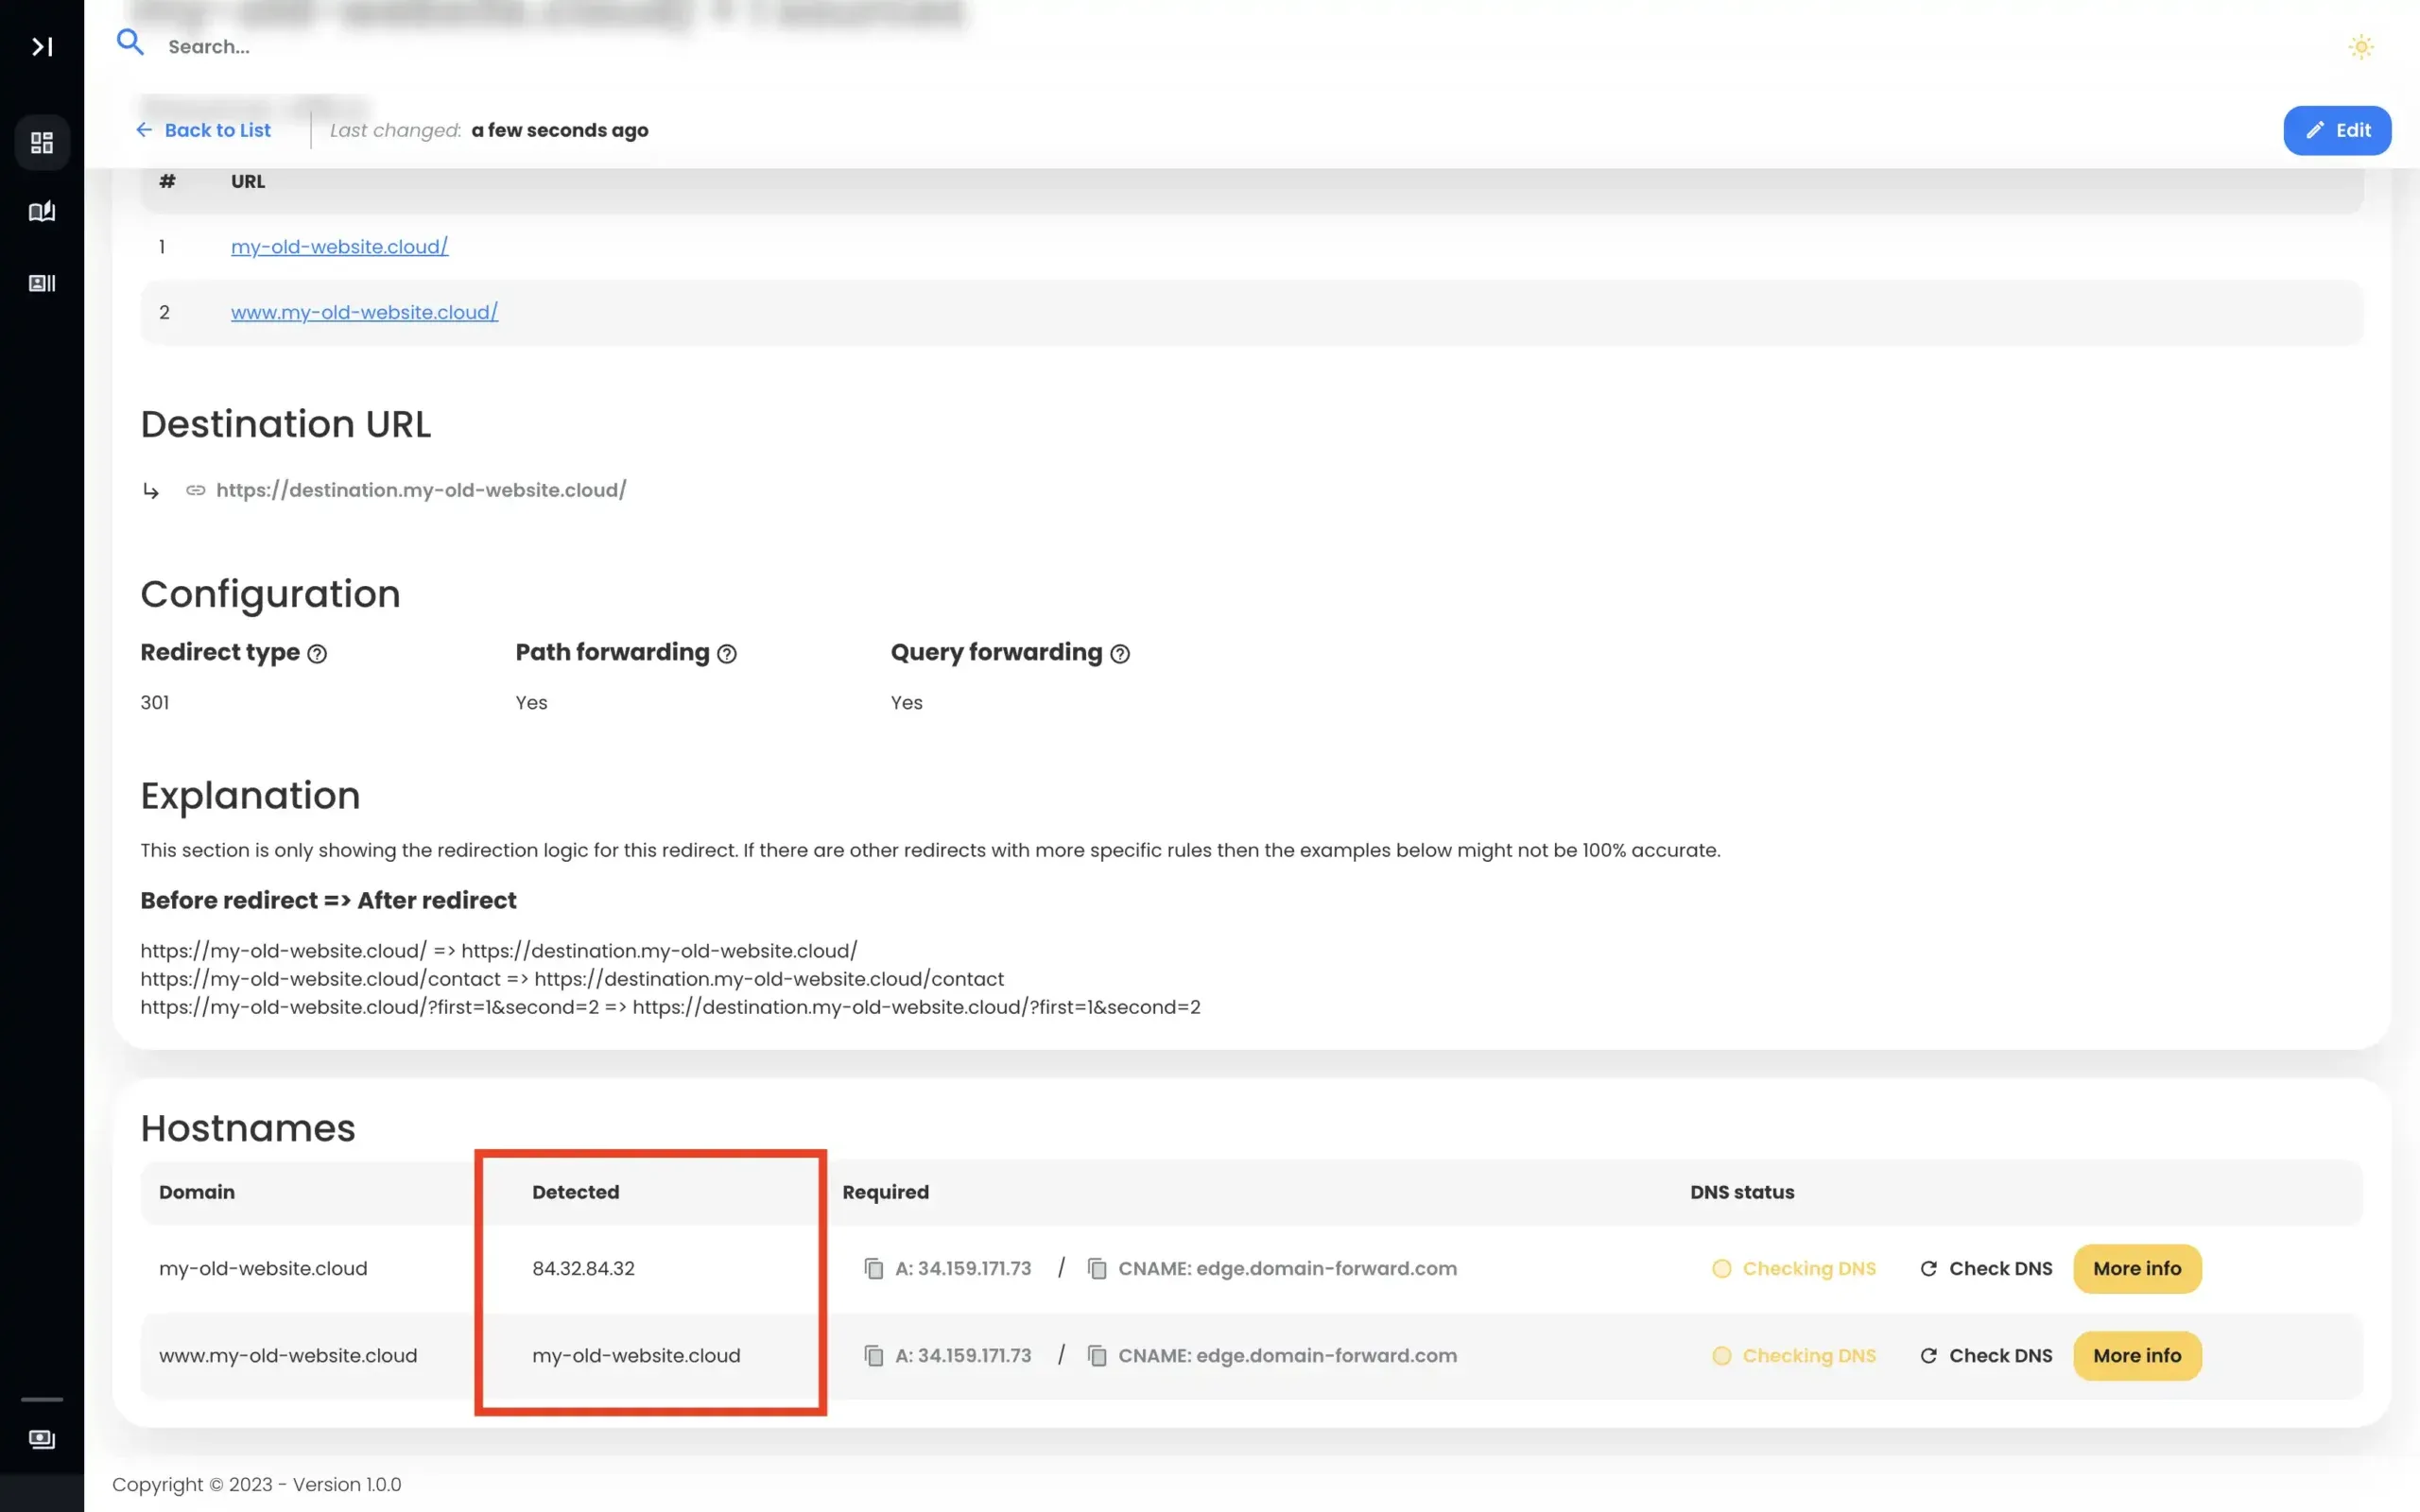
Note: After creating the redirect, you’ll notice the DNS entries are detected. Unfortunately, the required values are different. We need to fix that.
Step 3: Head over to Hostinger
To complete our domain redirect using Domain-Forward, we need to head to Hostinger to tweak the DNS changes.
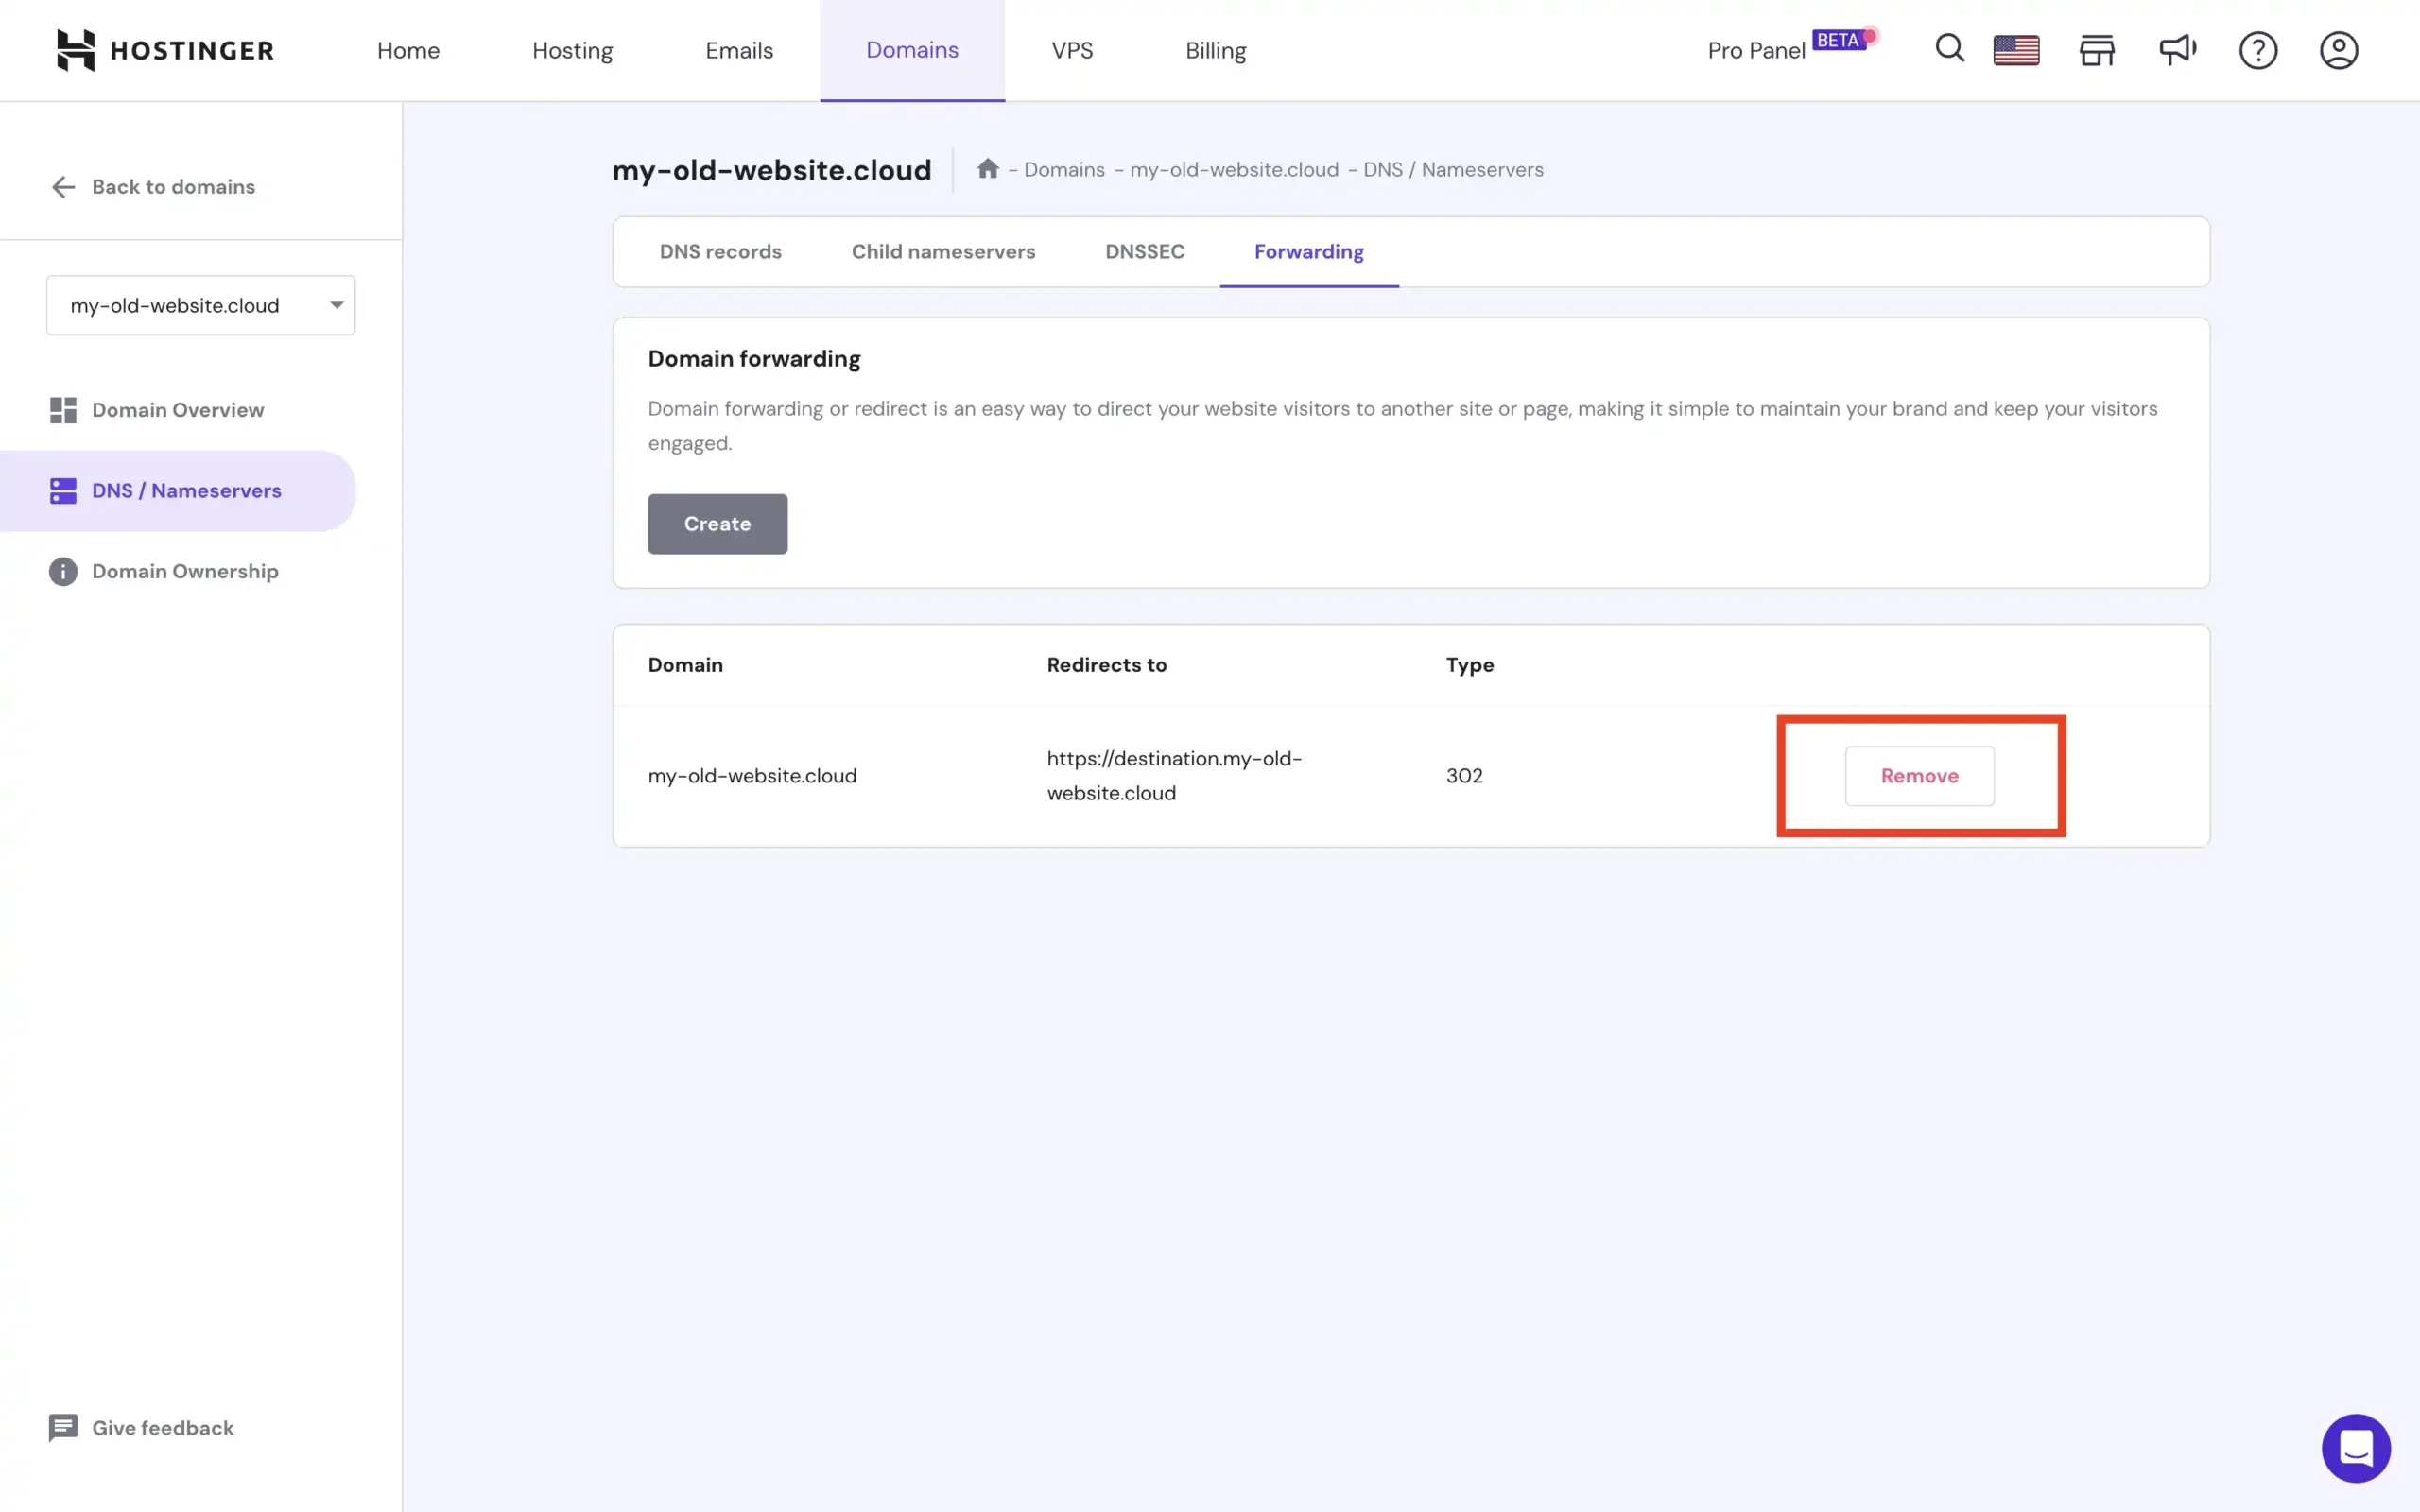
So log in to your Hostinger account, navigate to your Dashboard, and select the option for Manage for the domain you want to redirect. Under the domain forwarding settings, remove the old forwarding if it has been enabled.
Step 4: Change DNS settings
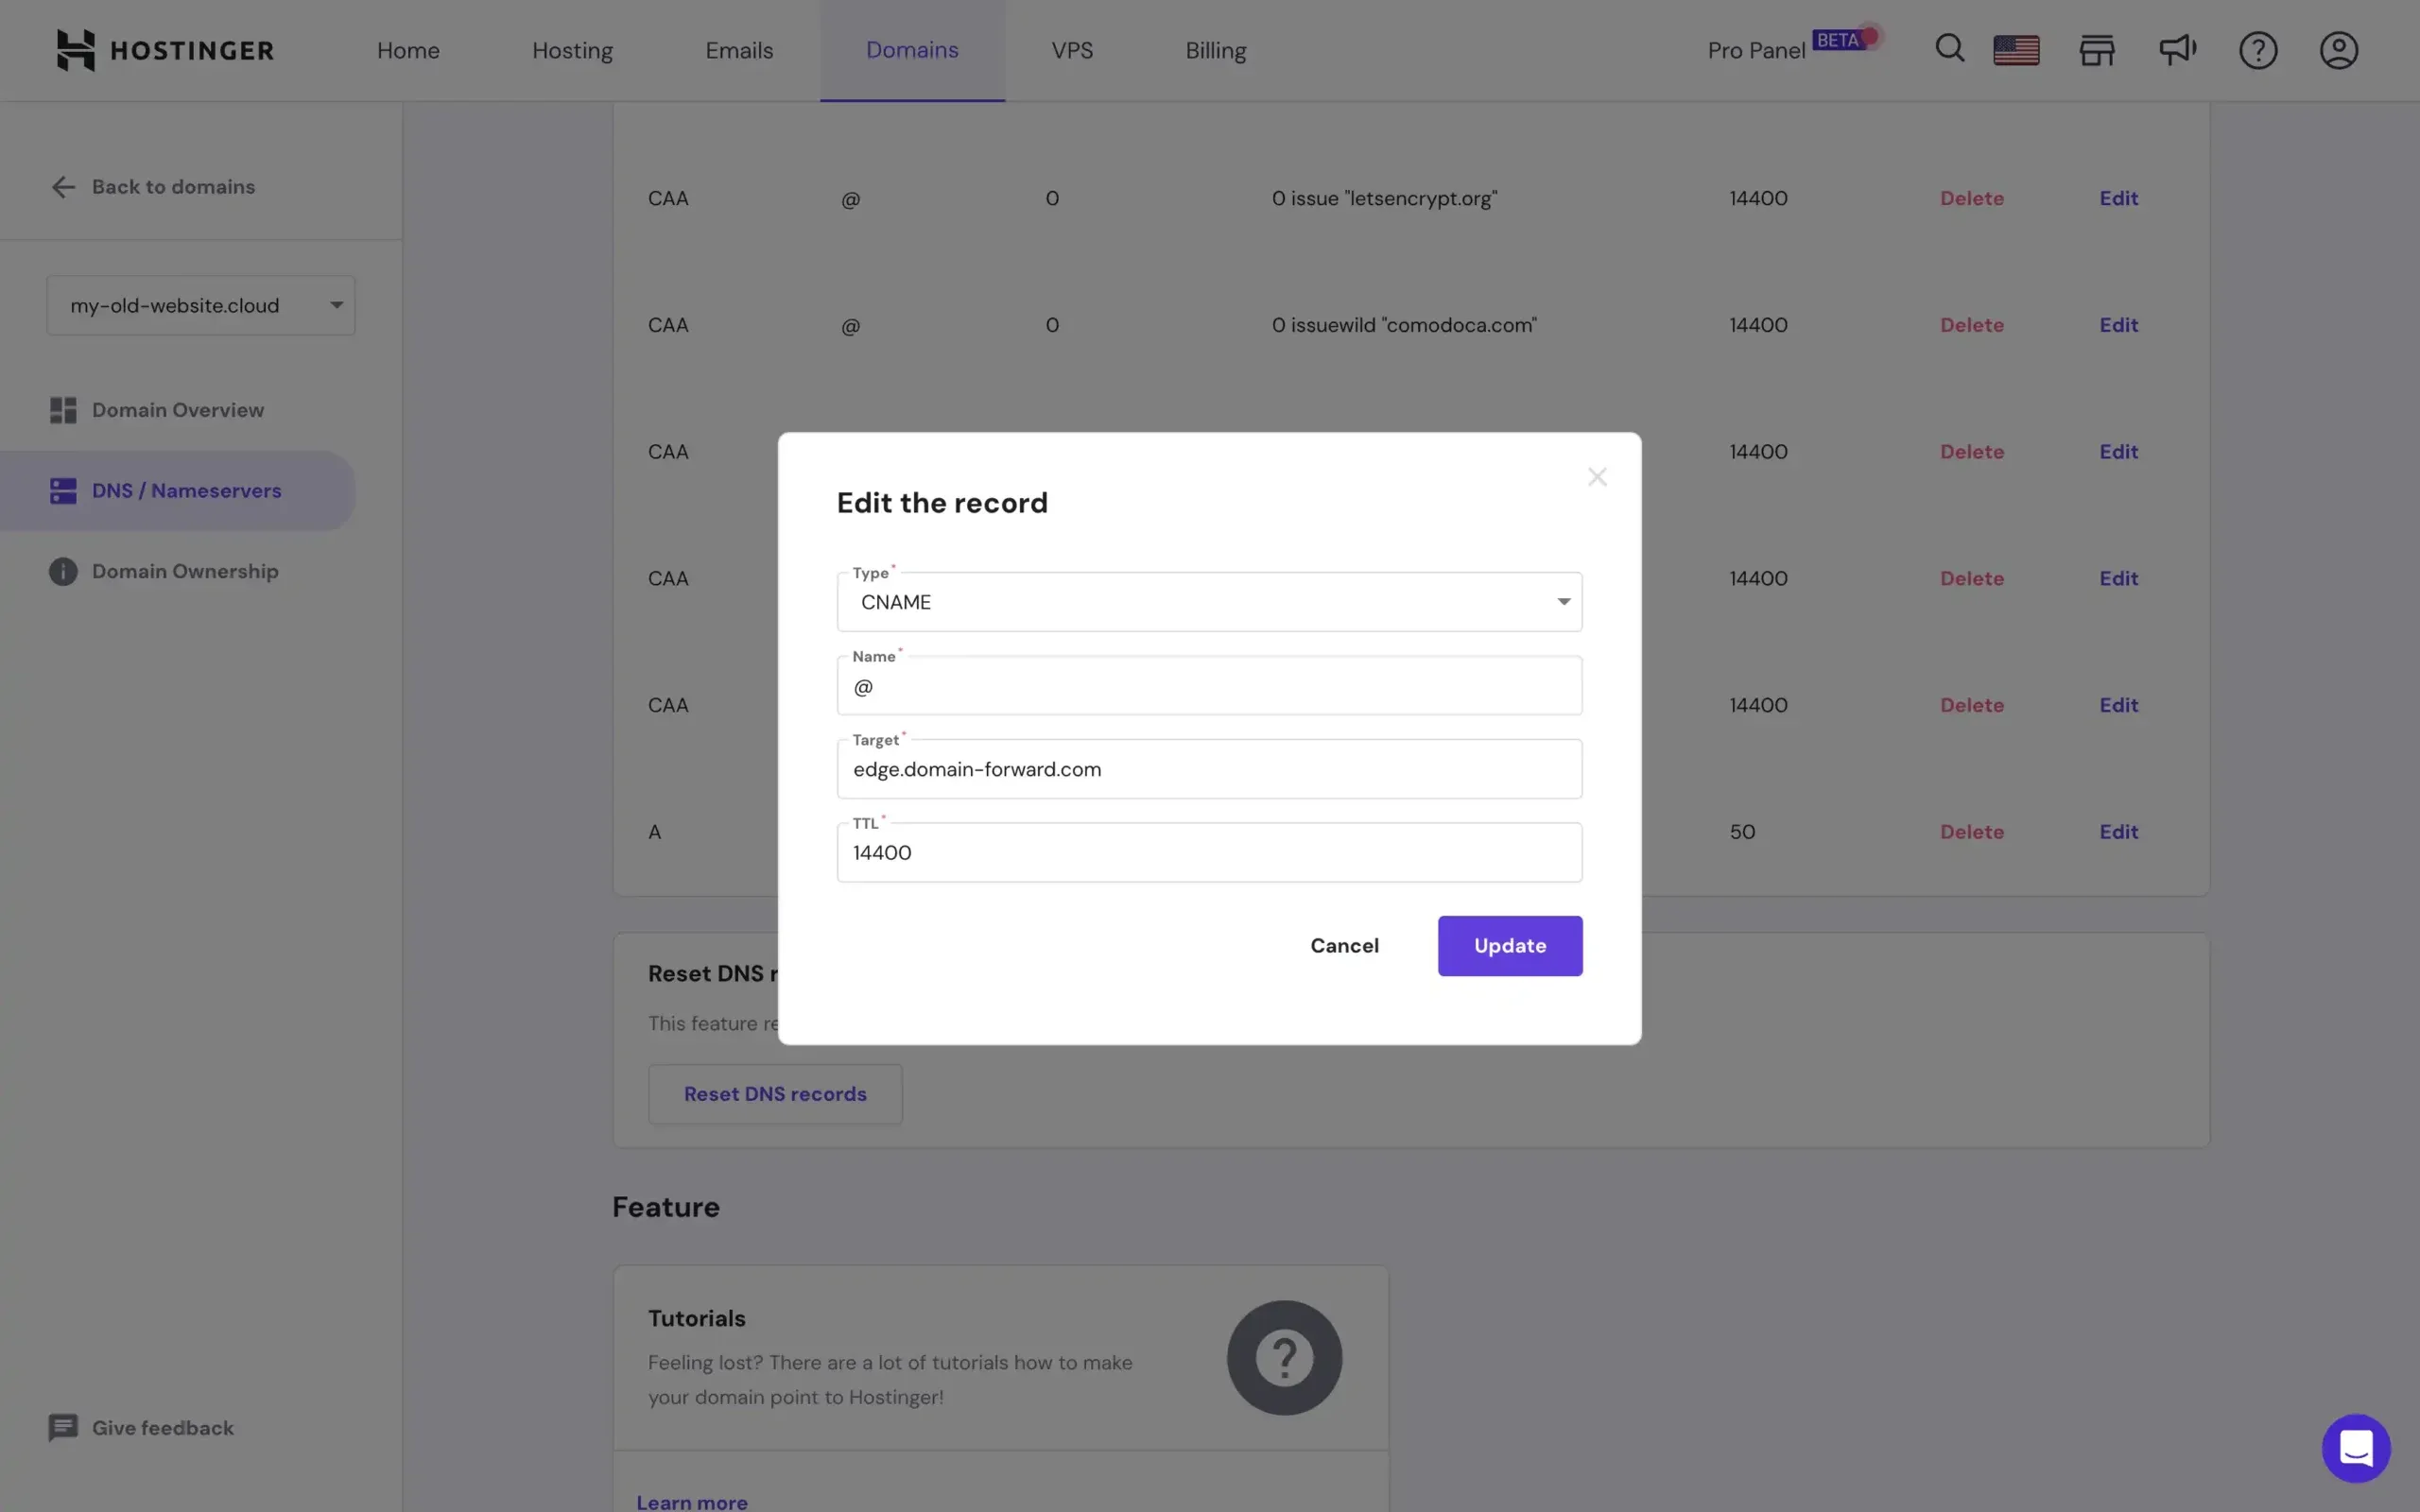
Now, it’s time to tweak our DNS settings. On the same page where you removed the domain forwarding, click on the “DNS records” menu item. In the list of records, you might have previously configured A or CNAME records that you will have to change. The image below shows the A record that we have to change. To do that, click on “Edit”.
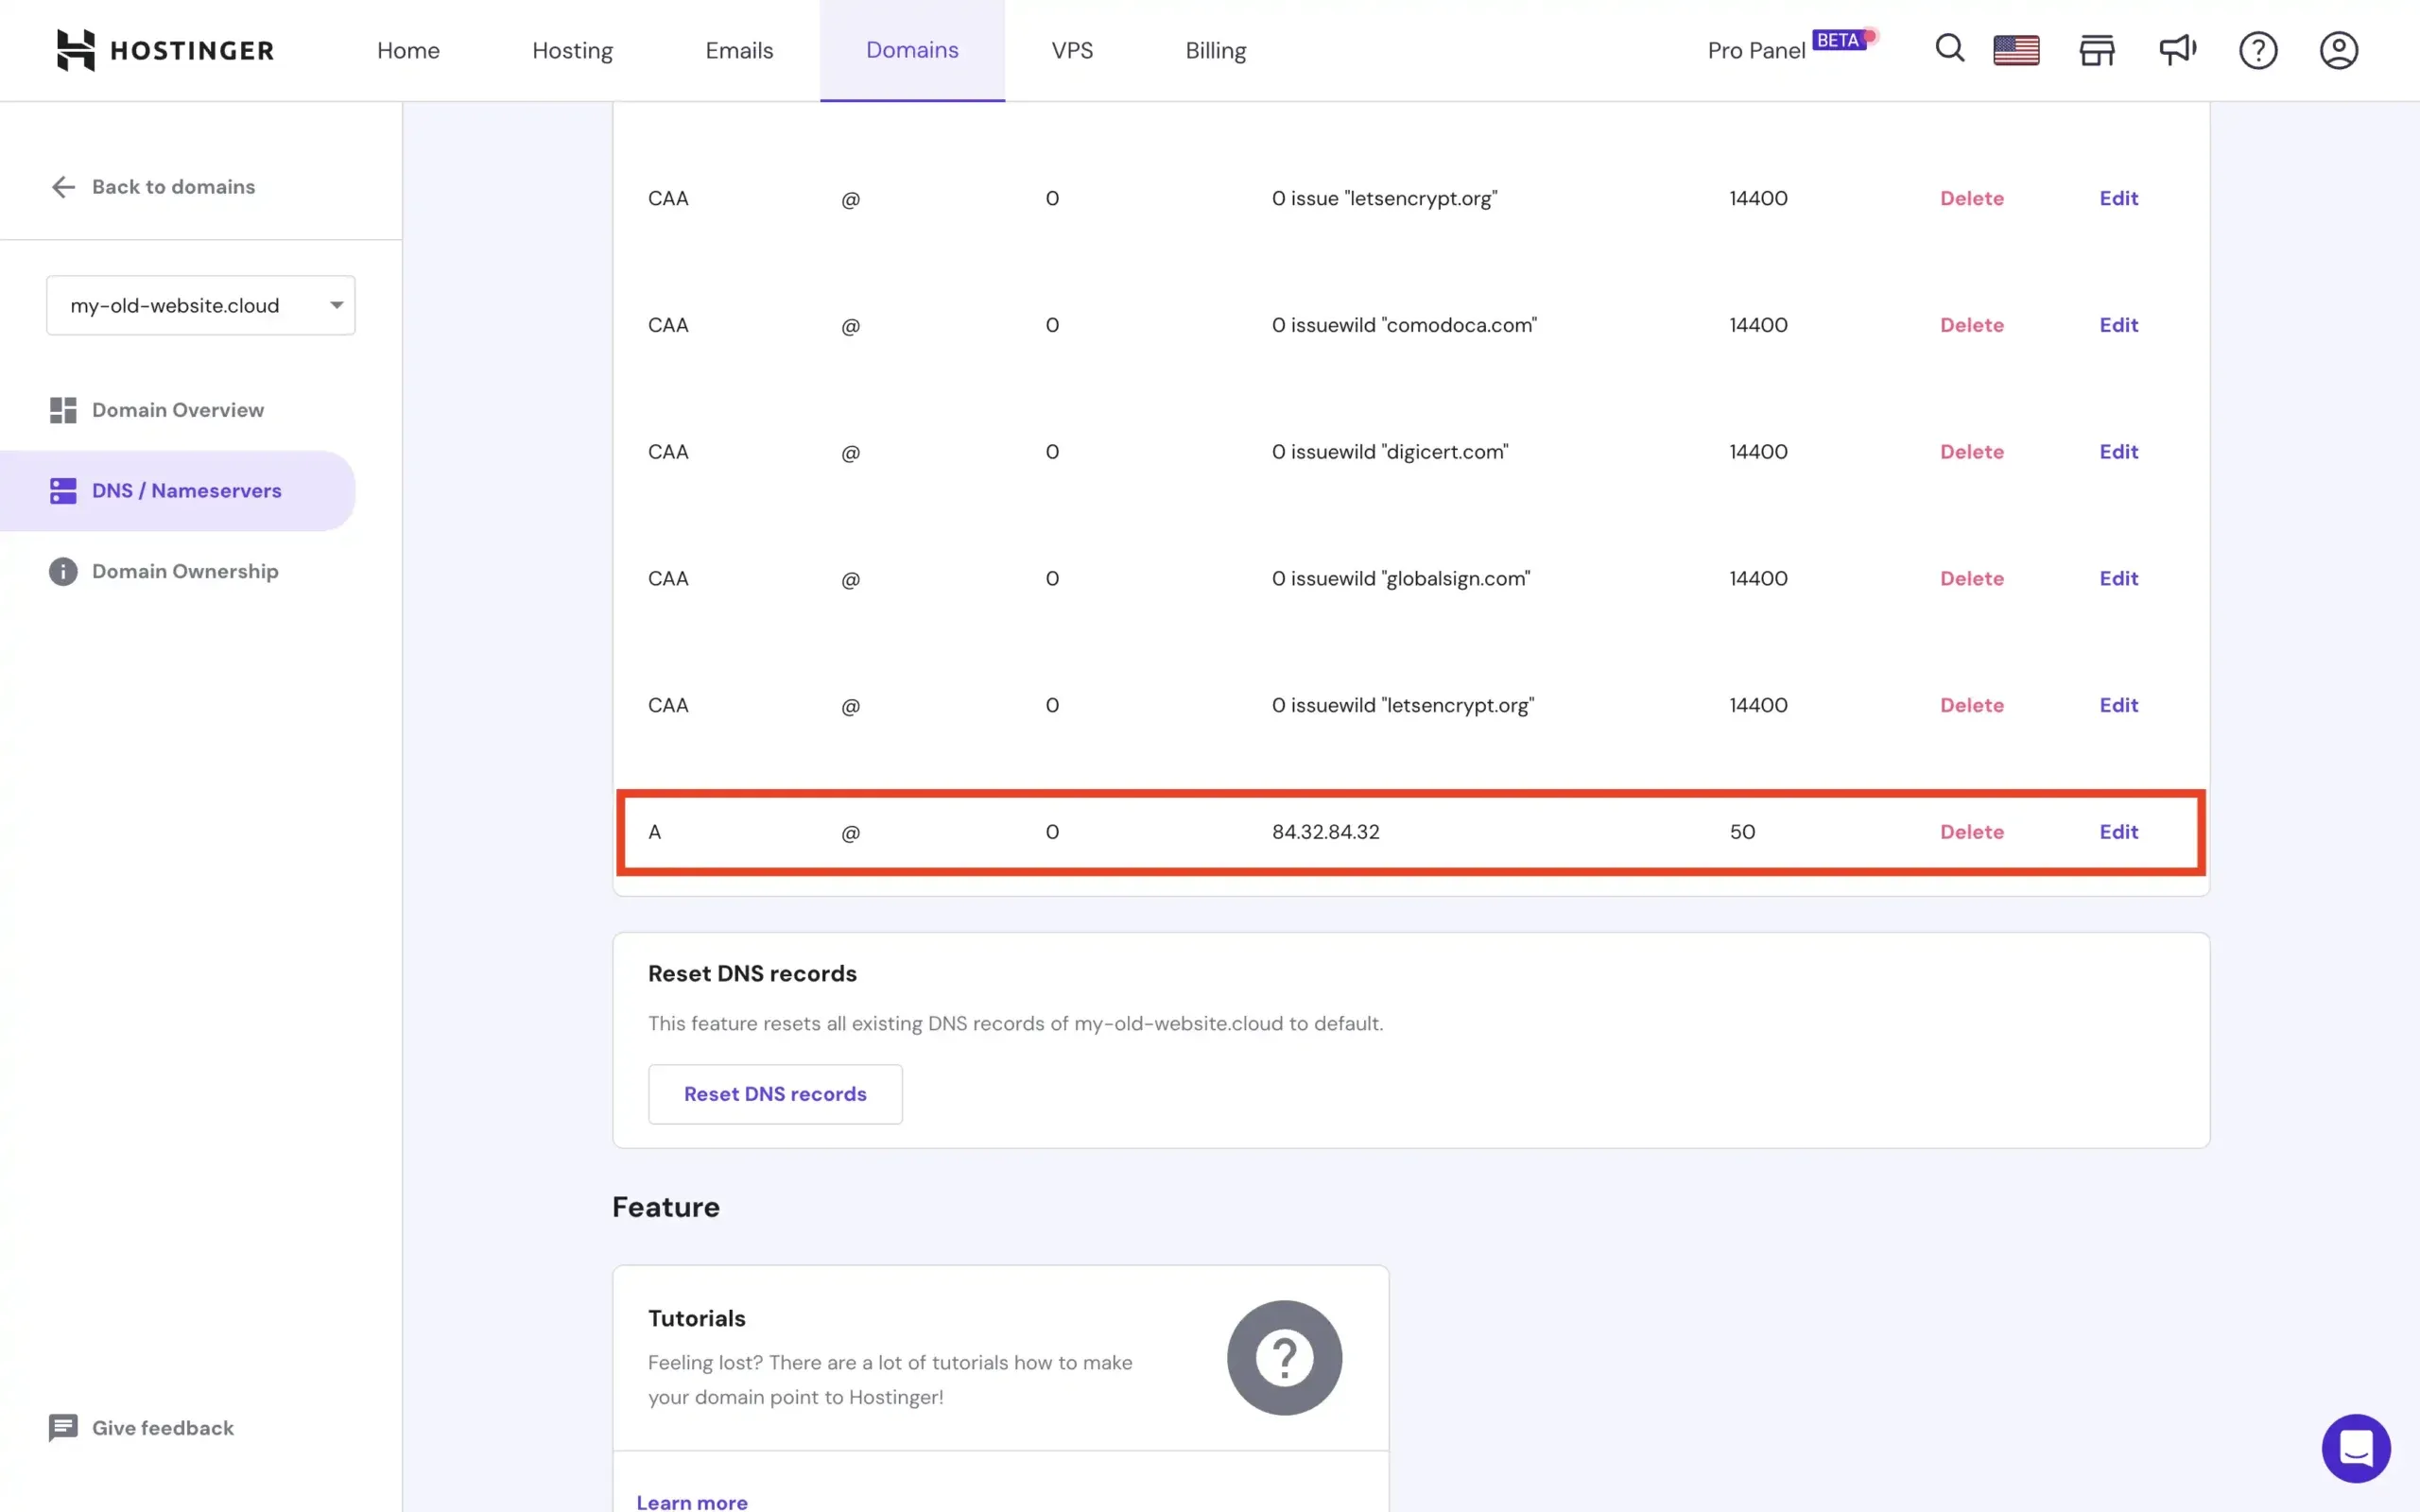
Select the Type CNAME Record and enter @ as Name with edge.domain-forward.com as target. Please check that this is the value that is also provided for you in the Domain Forward app before you configure it like that. ALIAS or A records work as well, but we have opted for CNAME in this case.
It is possible that Hostinger will change the CNAME to ALIAS after you click “Update”, but that doesn’t matter.
With that done, we need to repeat the process. For the second option, select the CNAME record again and enter www as Name with ‘edge.domain-forward.com’ as the target.

Step 5: Verify DNS At Domain-Forward.com
With our DNS changes now tweaked from the Hostinger backend, we only need to wait some time for the changes to be effected. Depending on the TTL set on those records, everything should be done in a few hours.
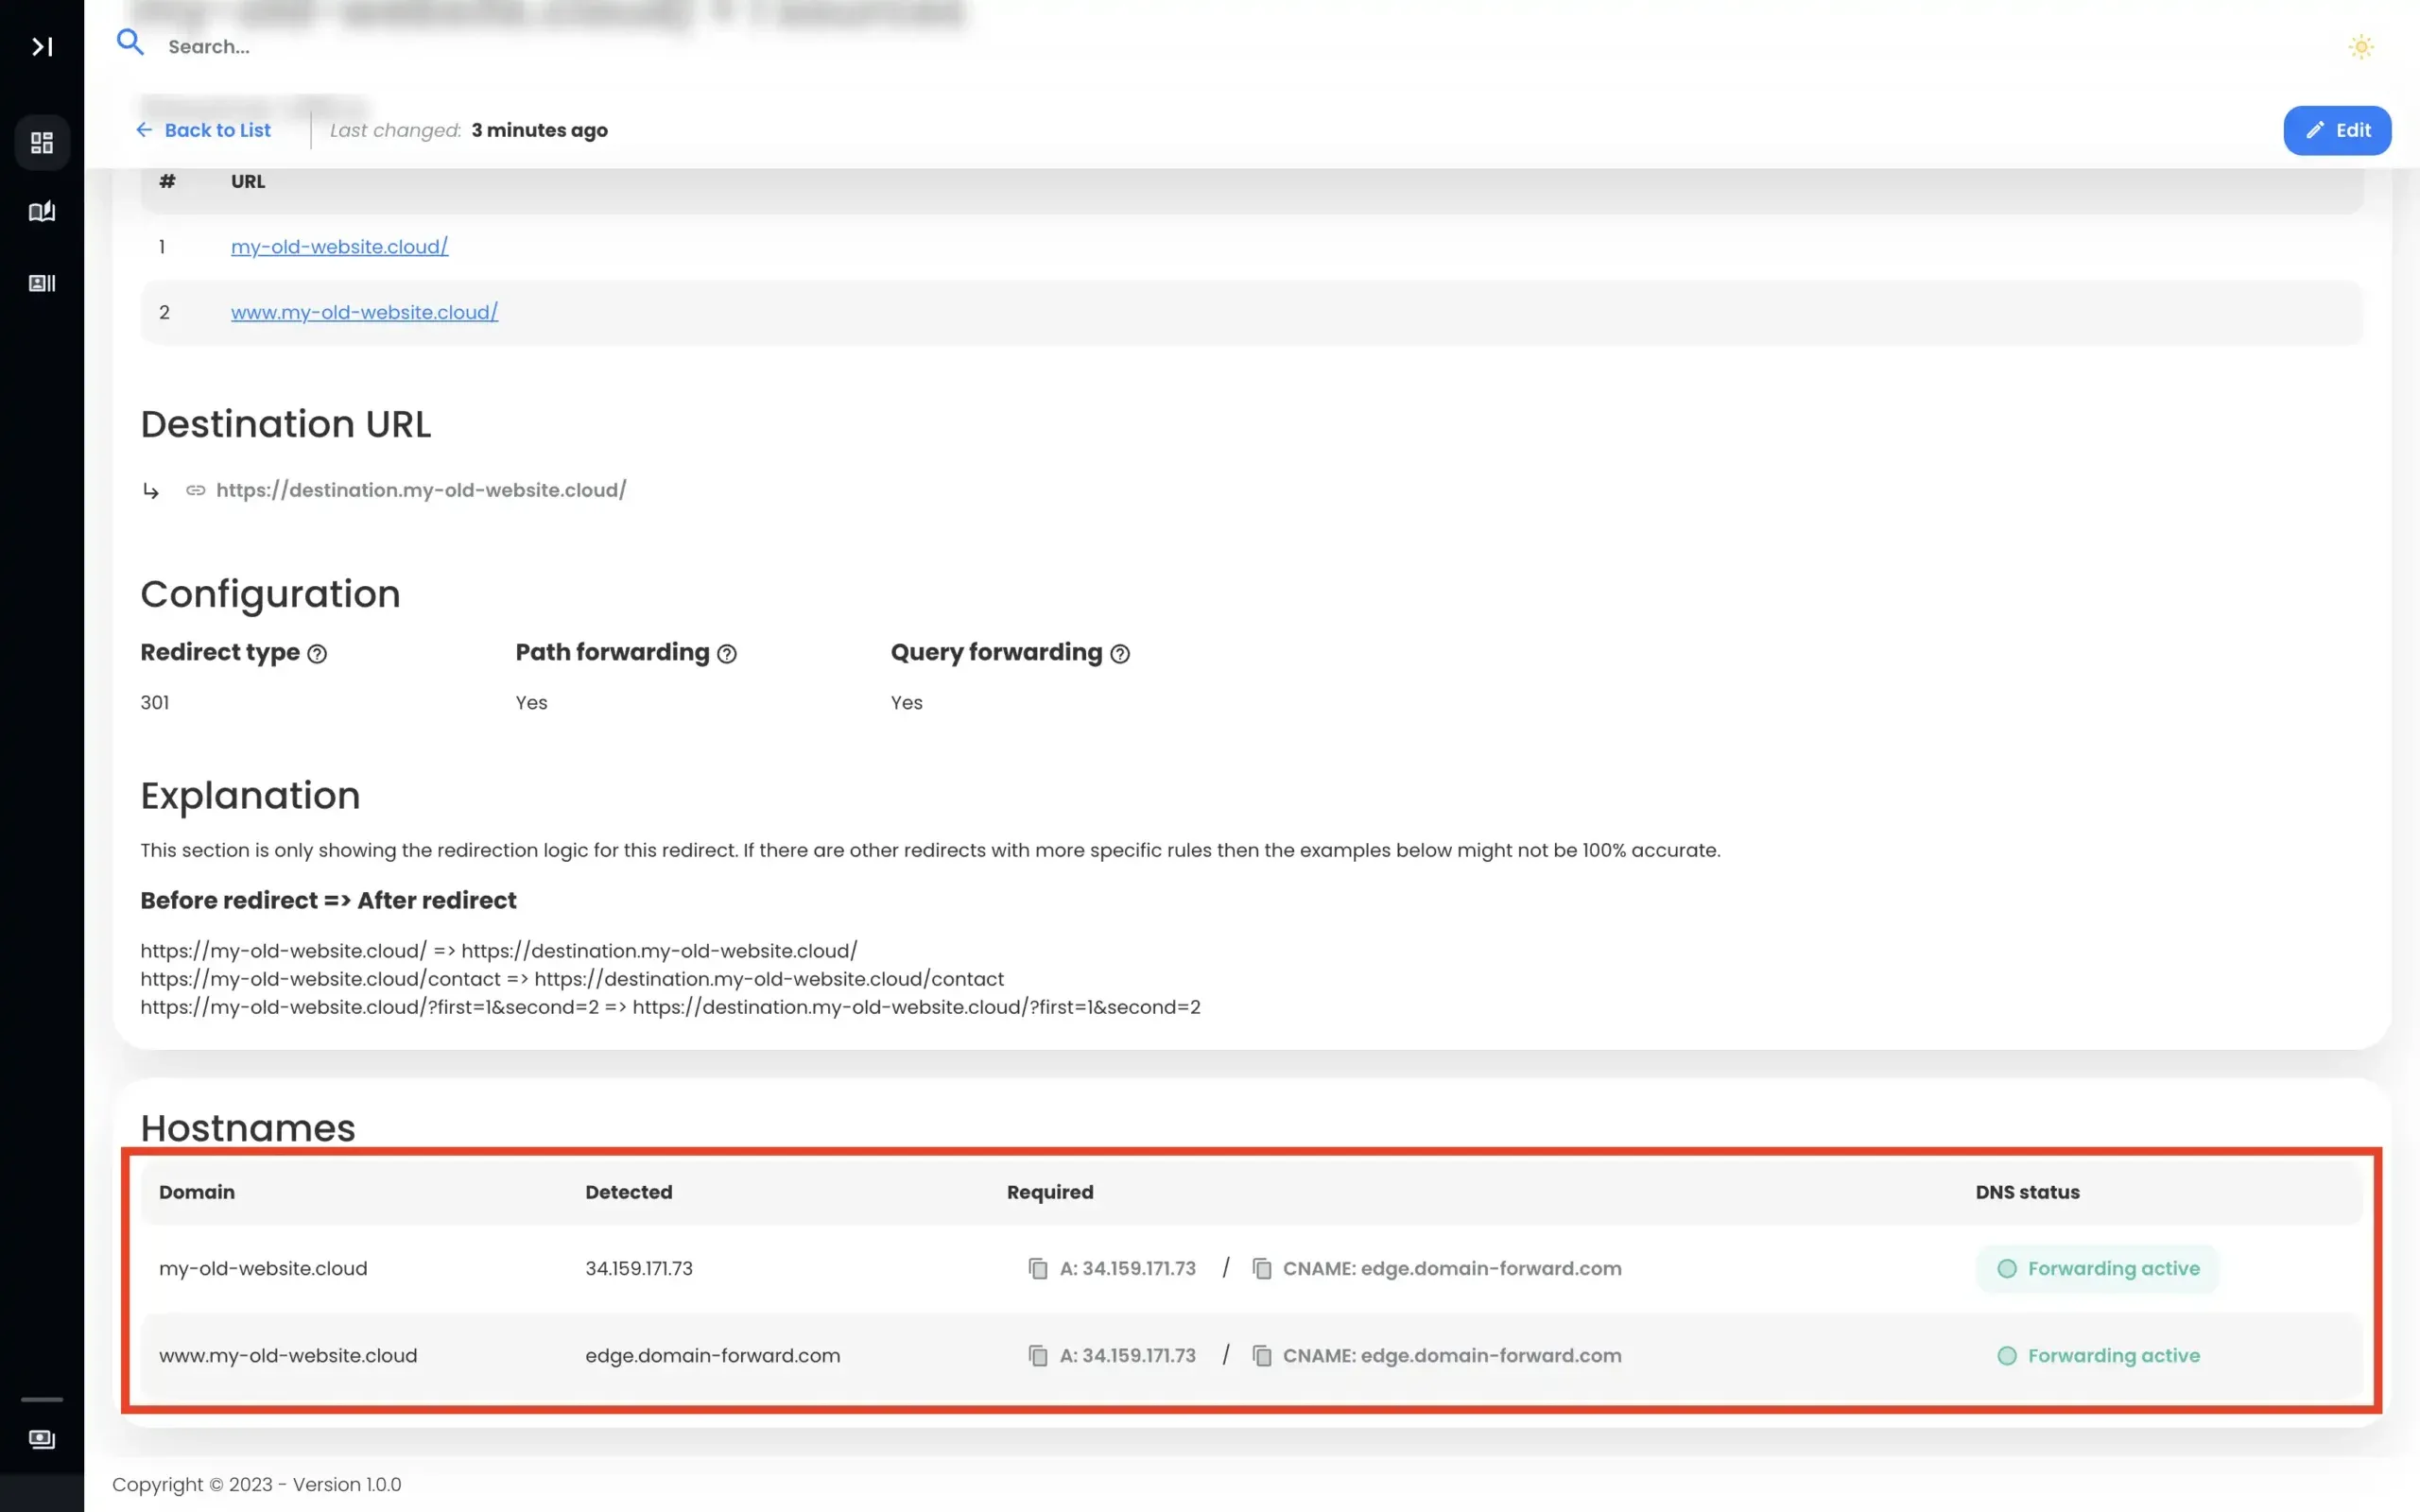
Here is what it should look like after the changes have been effected.
Step 6: Verify Redirect Using Online Tools
Now that we have configured the redirect in domain forward and the DNS entries as well, we can check if the redirection actually works. Below is an image that is taken from an online “redirect testing tool” and it does confirm that our redirection works correctly.
Hostinger Forwarding vs Domain-Forward.com
| Feature | Hostinger Forwarding | Domain-Forward.com |
|---|---|---|
| HTTP redirects | Yes | Yes |
| HTTPS/SSL | No | Yes (automatic) |
| 301 redirects | Yes | Yes |
| Analytics | No | Yes |
| www + non-www | Manual setup | Handled together |
| Price | Included with domain | Free plan (5 domains) |
Not sure what type of redirect you need? Check our guide to URL forwarding and redirect types. You can verify your setup works with our redirect tester tool.
If you’re using a different registrar, we have similar guides for GoDaddy, Namecheap, IONOS, Porkbun, Name.com, and Squarespace.
Stop Losing Visitors to Security Warnings
Hostinger’s forwarding works for HTTP but not HTTPS. Since browsers default to HTTPS, your redirect is broken for most visitors. The fix takes 5 minutes: Domain-Forward.com gives you automatic SSL, proper 301 redirects, and analytics. Your email stays working — only web traffic records change.