TL;DR: Namecheap domain redirects have two critical problems: they don’t work with HTTPS (visitors see security warnings) and they don’t work at all if you use custom nameservers. The fix: use Domain-Forward.com (free plan) — it works with any nameserver, provides automatic SSL certificates, and handles both www and non-www. Update two DNS records and you’re done.
You set up a domain redirect on Namecheap. It seems to work when you test with http://. Then a visitor types https:// — or their browser auto-upgrades to HTTPS — and they see a security warning. Or maybe you switched to a custom nameserver and your Namecheap redirect just… stopped working entirely.
You’re not alone. These are the two most common problems with Namecheap domain redirects, and they affect almost everyone who uses the feature.
This guide explains exactly what’s broken, why Namecheap can’t fix it, and how to get a working redirect in 5 minutes using a free alternative.
Why Namecheap Domain Redirects Break
Problem 1: No HTTPS support
Namecheap’s redirect does not provision an SSL certificate for your source domain. When someone visits https://your-domain.com:
- The browser tries to establish a secure connection
- There’s no SSL certificate
- The visitor sees “Your connection is not private” or “Not Secure”
- They leave — the redirect never fires
Since Chrome, Safari, and Firefox all prefer HTTPS by default, this affects the majority of your traffic.
Problem 2: Doesn’t work with custom nameservers
Namecheap’s redirect feature only works with BasicDNS, PremiumDNS, or FreeDNS nameservers. If you’re using:
- Cloudflare
- AWS Route 53
- Your hosting provider’s nameservers
- Any other third-party DNS
…then Namecheap redirects are completely unavailable to you. The feature simply won’t appear or won’t function.
Problem 3: Slow DNS propagation
Namecheap claims 30 minutes, but users regularly report waiting hours or days. This is particularly painful when you’re launching a new site and need the redirect working immediately.
How to Set Up Namecheap’s Built-In Redirect (HTTP Only)
If you only need HTTP forwarding and are using Namecheap’s own nameservers, here’s the native approach:
Step 1: Sign into Namecheap
Log into your Namecheap account dashboard.
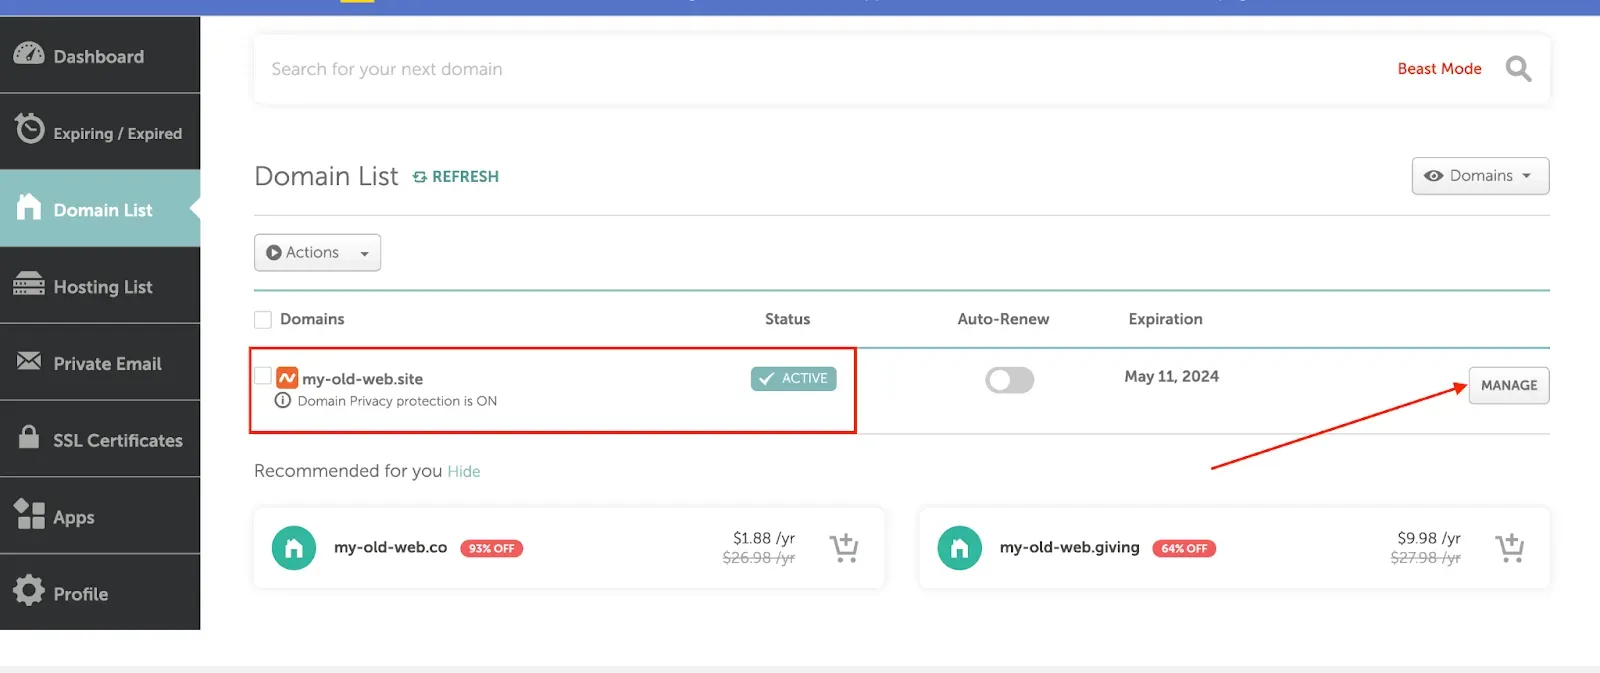
Step 2: Navigate to Domain List
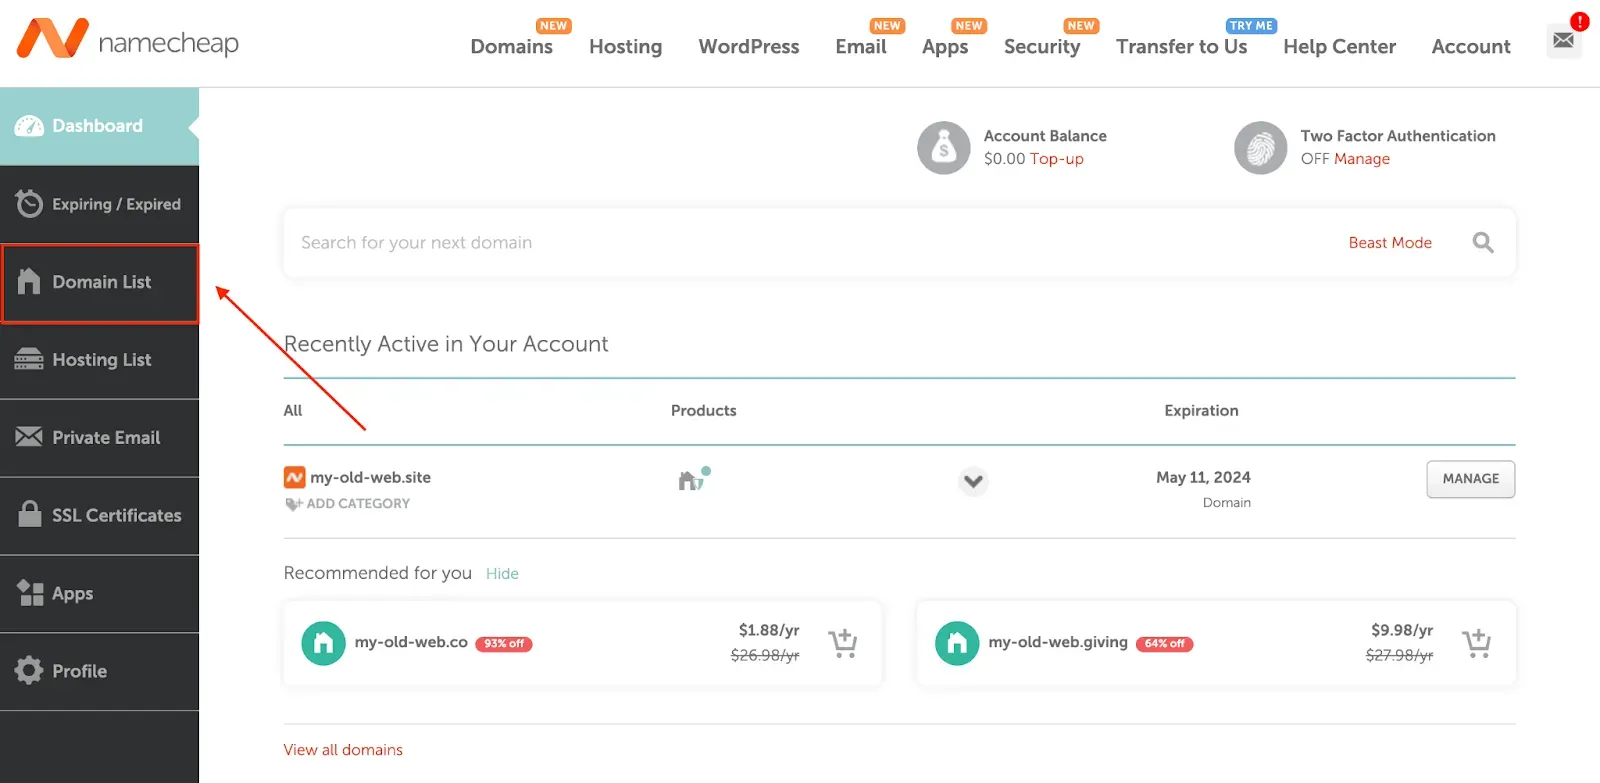
Step 3: Click Manage
Find the domain you want to redirect and click “Manage.”
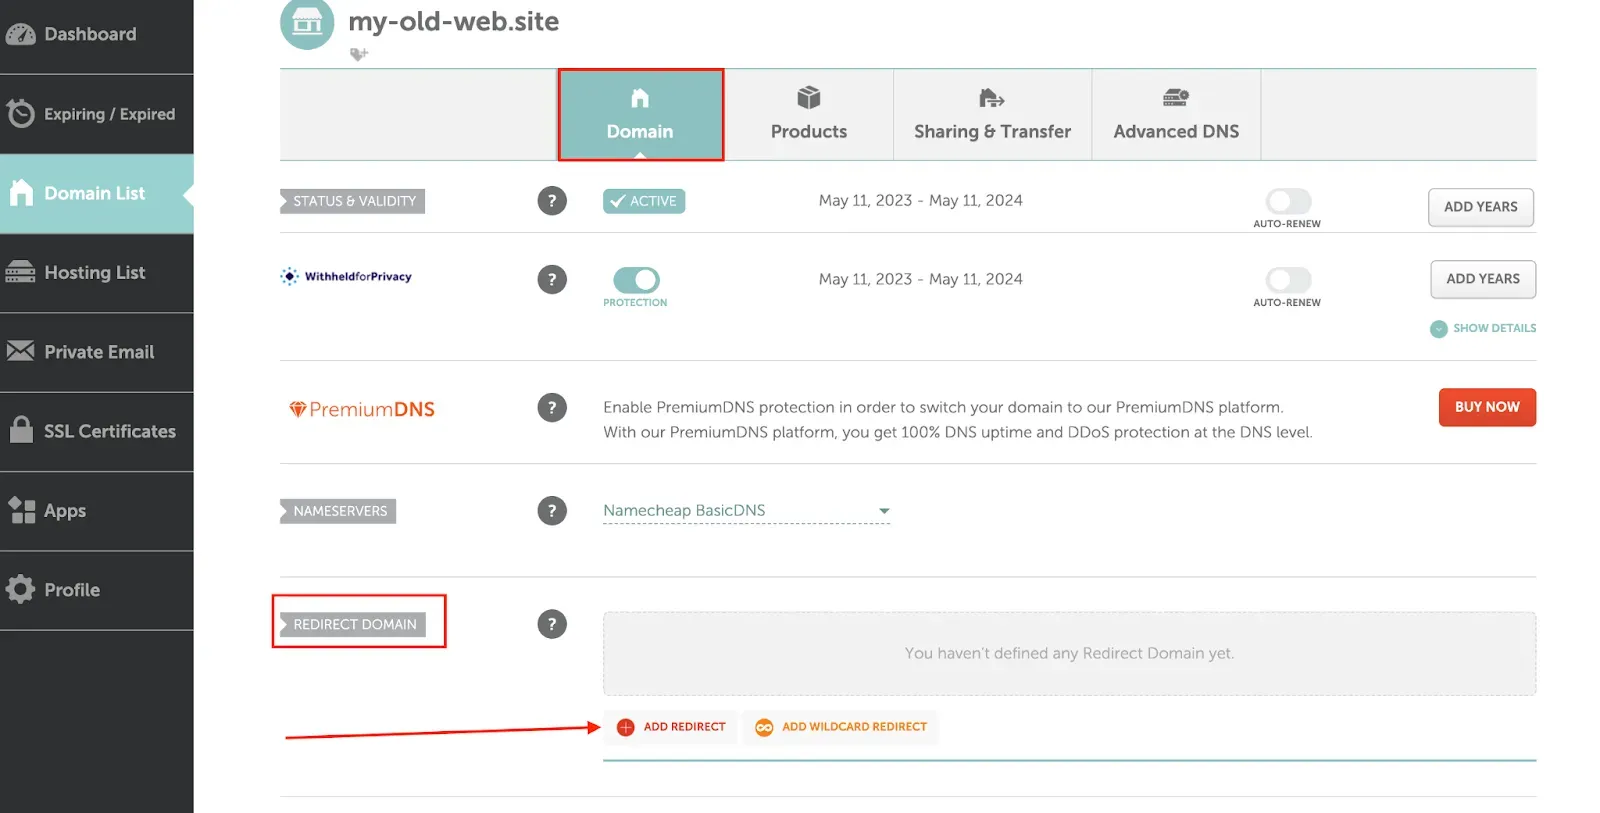
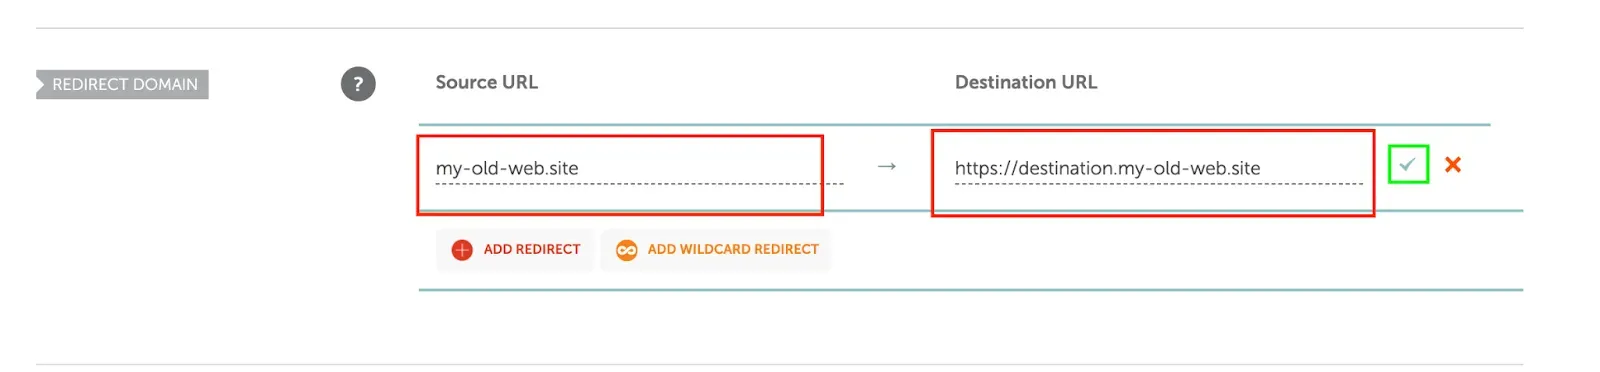
Step 4: Add a redirect
Scroll down to the “Redirect Domain” section and click “Add Redirect.”
Step 5: Configure source and destination
Enter your source URL and destination URL, then save.
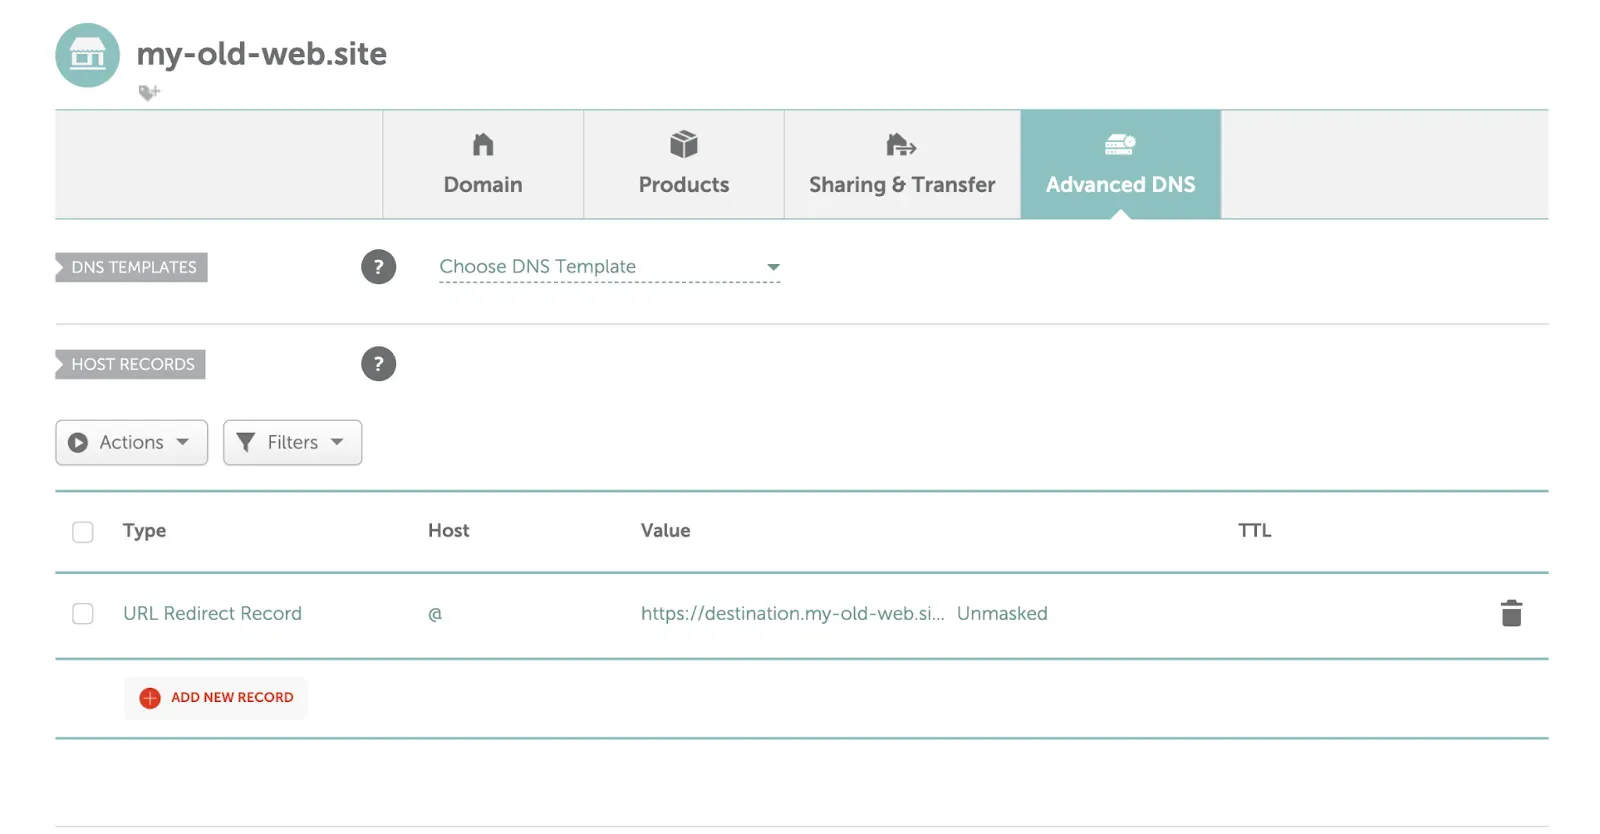
Step 6: Check Advanced DNS for conflicts
Navigate to the Advanced DNS tab and remove any conflicting CNAME or URL redirect records.
But remember: This redirect won’t work over HTTPS, and it requires Namecheap’s own nameservers.
The Fix: Domain-Forward.com — Works With Any Nameserver, Includes HTTPS
Domain-Forward.com solves both problems:
- Automatic HTTPS with SSL certificates that never expire
- Works with any nameserver — you just point DNS records, regardless of who manages them
- Handles www and non-www together
- 301 permanent redirects for proper SEO transfer
- Real-time analytics on redirect traffic
- Free plan for up to 5 domains
Step 1: Create a free account
Sign up at Domain-Forward.com — no credit card required.
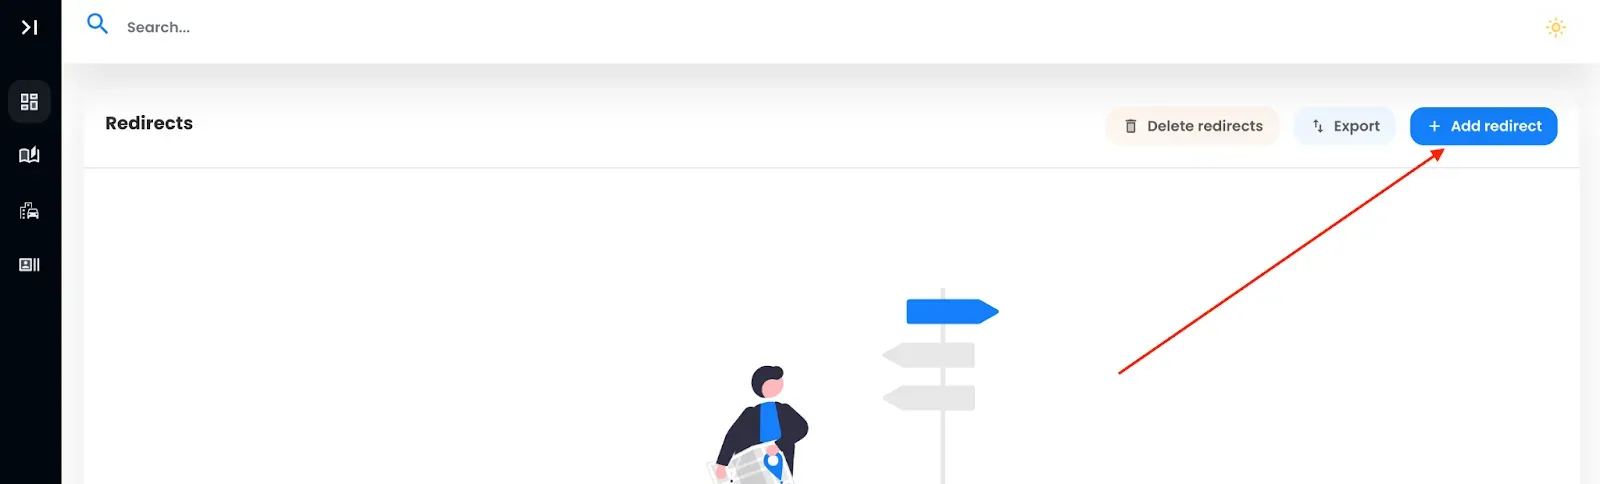
Step 2: Add your redirect
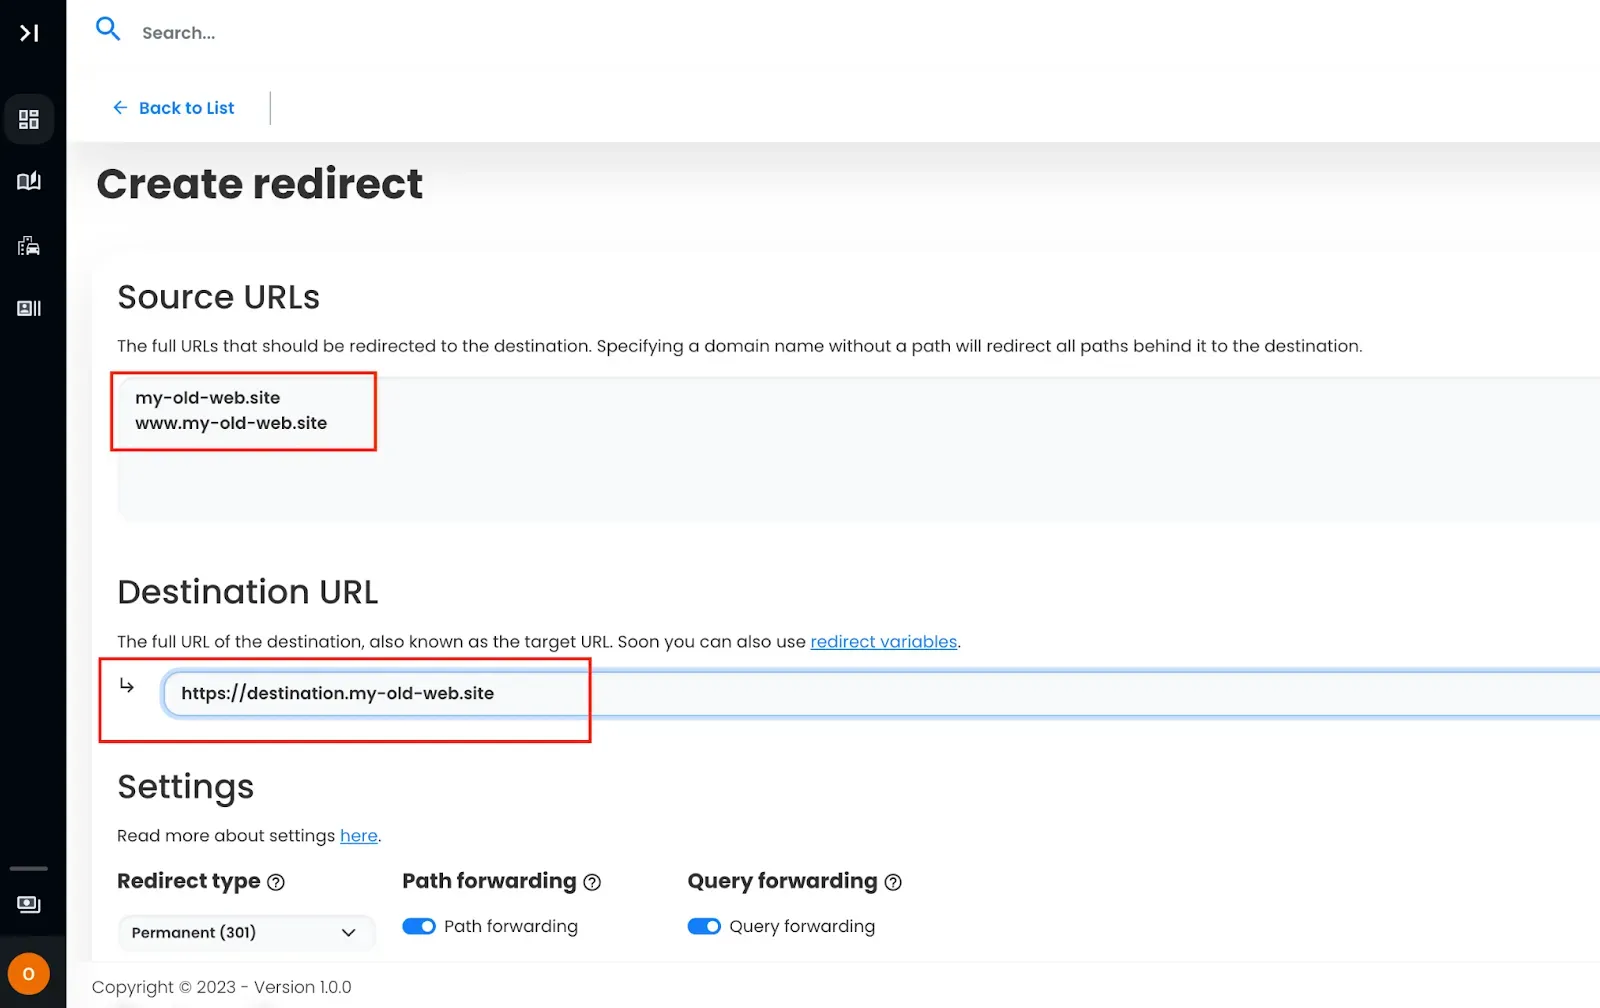
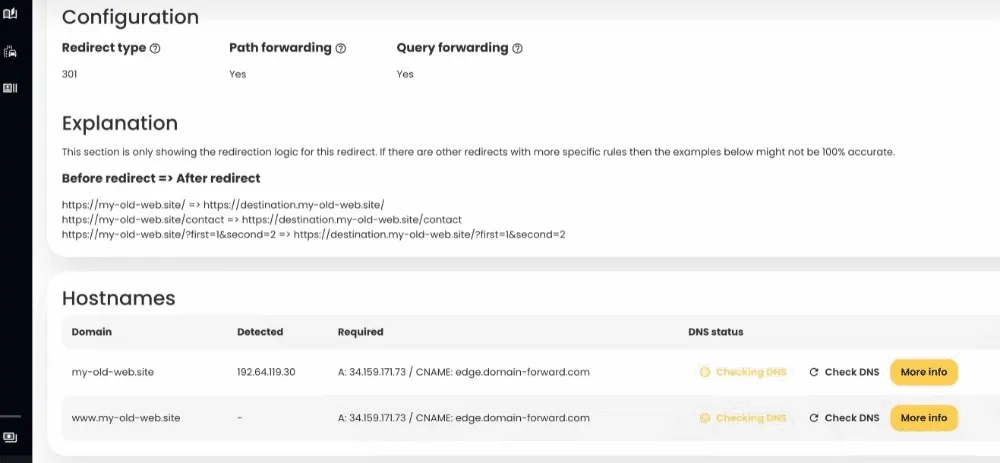
Click “Add Redirect.” Add both the www and non-www (apex) version of your domain as source URLs, and set your destination.
After creating the redirect, you’ll see the DNS status showing the current (incorrect) values detected:
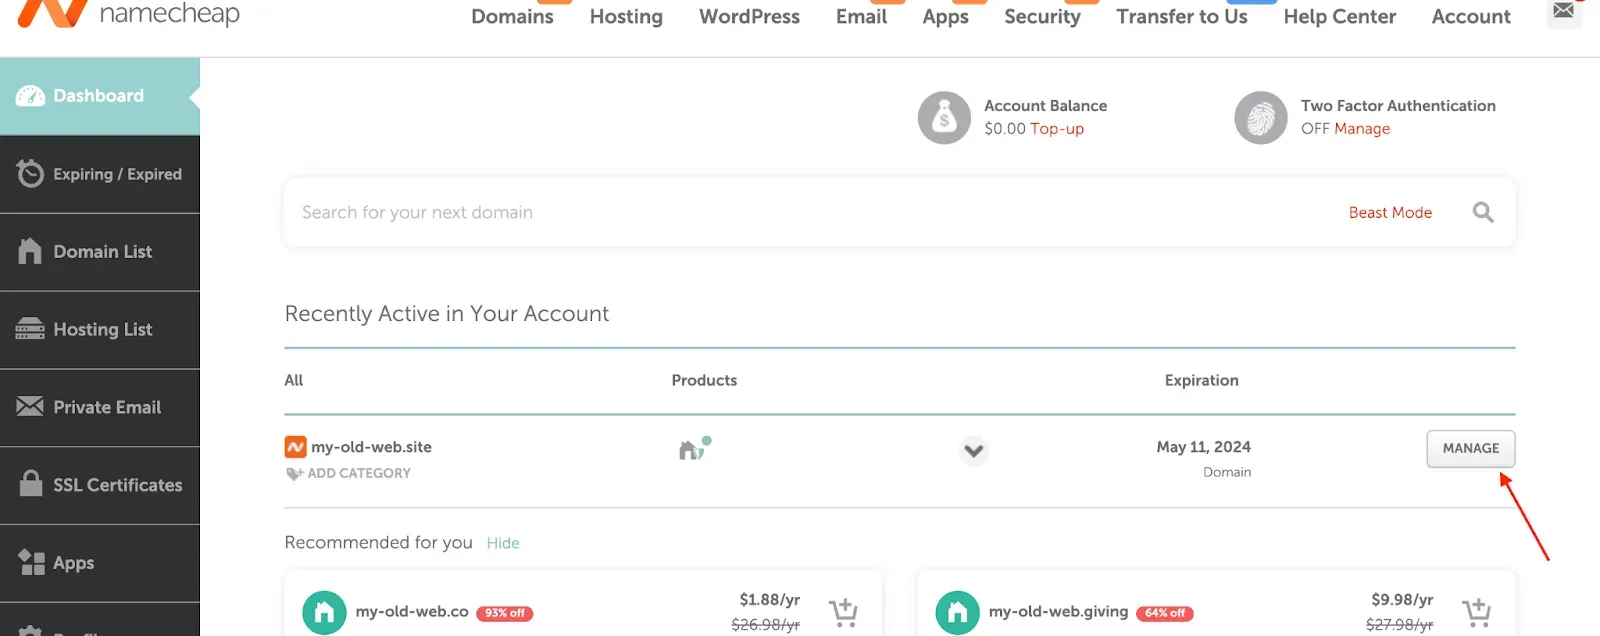
Step 3: Update DNS at Namecheap
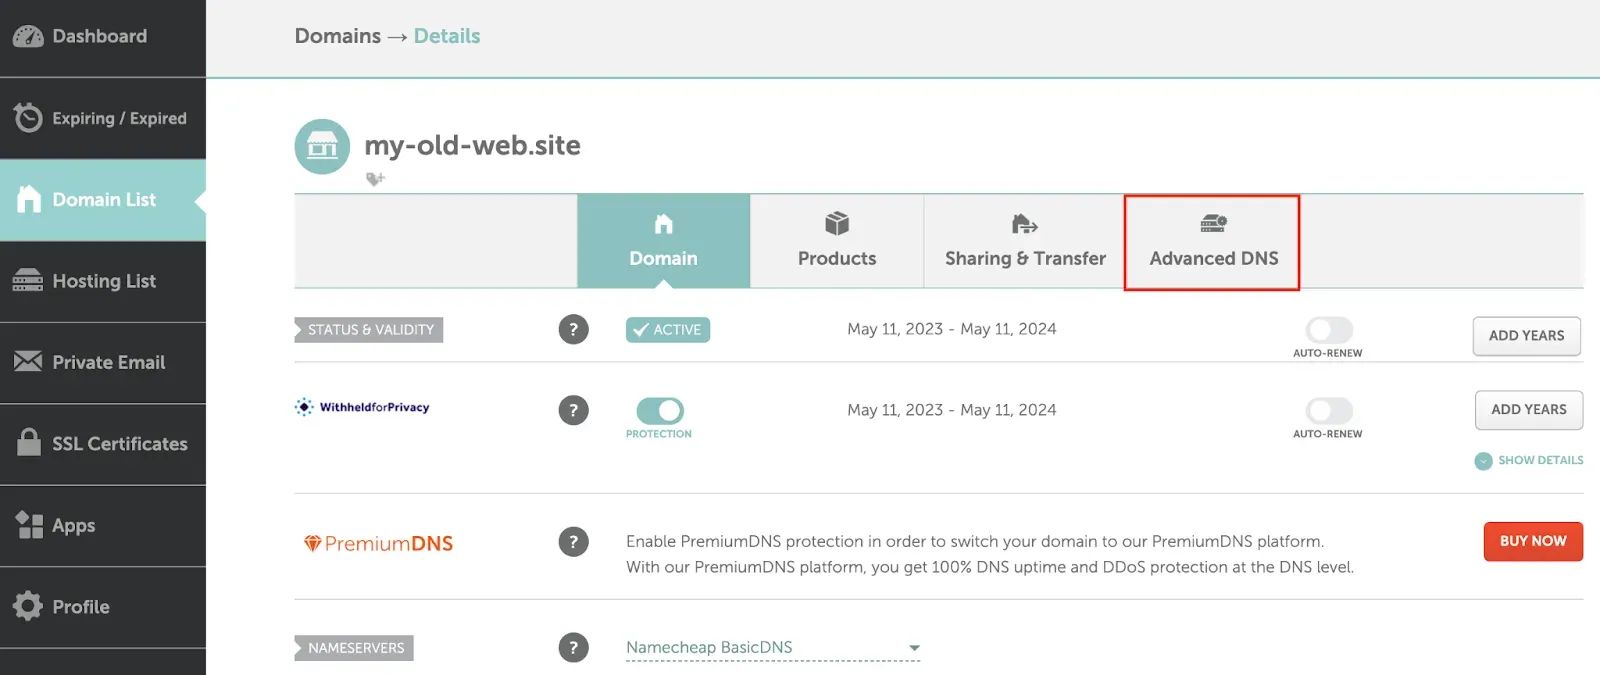
Log into Namecheap, go to your domain, and click “Manage.” Then select “Advanced DNS.”
Step 4: Remove old redirect records and add new ones
Delete any existing URL redirect records:
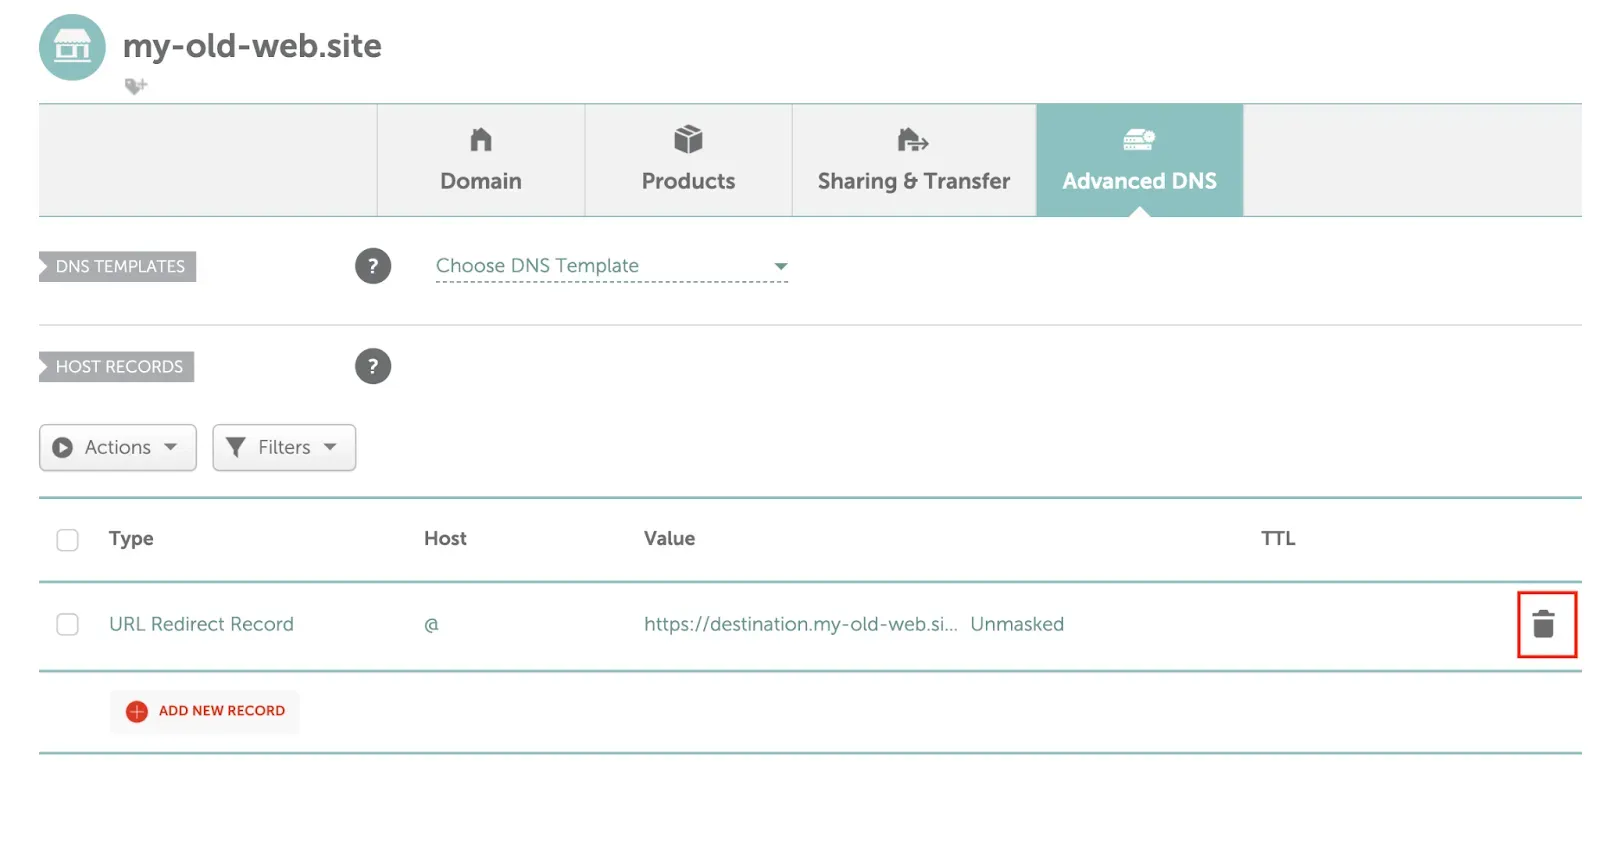
Click “ADD NEW RECORD” and add:
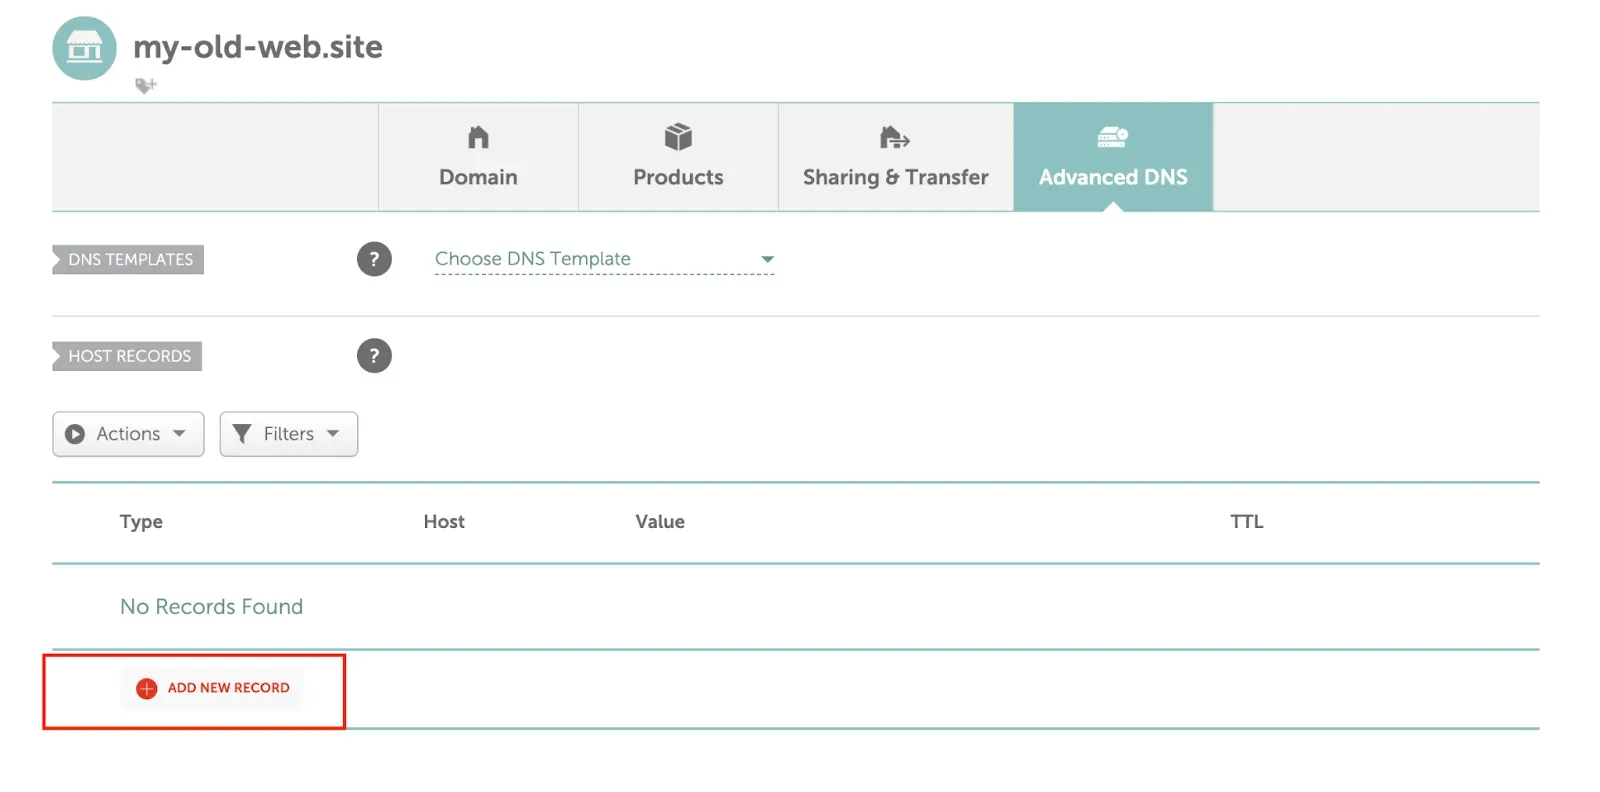
- ALIAS Record — Host:
@, Value:edge.domain-forward.com - ALIAS Record — Host:
www, Value:edge.domain-forward.com
Save all changes:
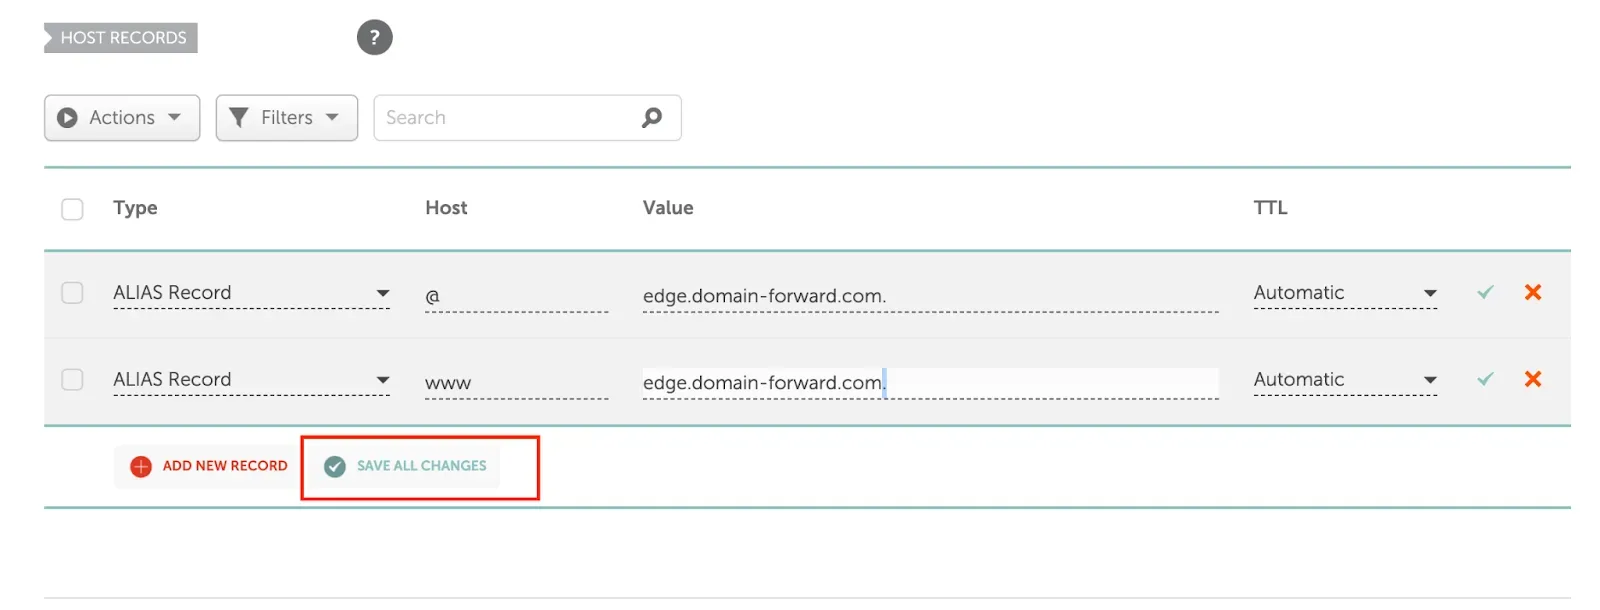
Your email keeps working. These changes only affect web traffic records. MX records for email are untouched.
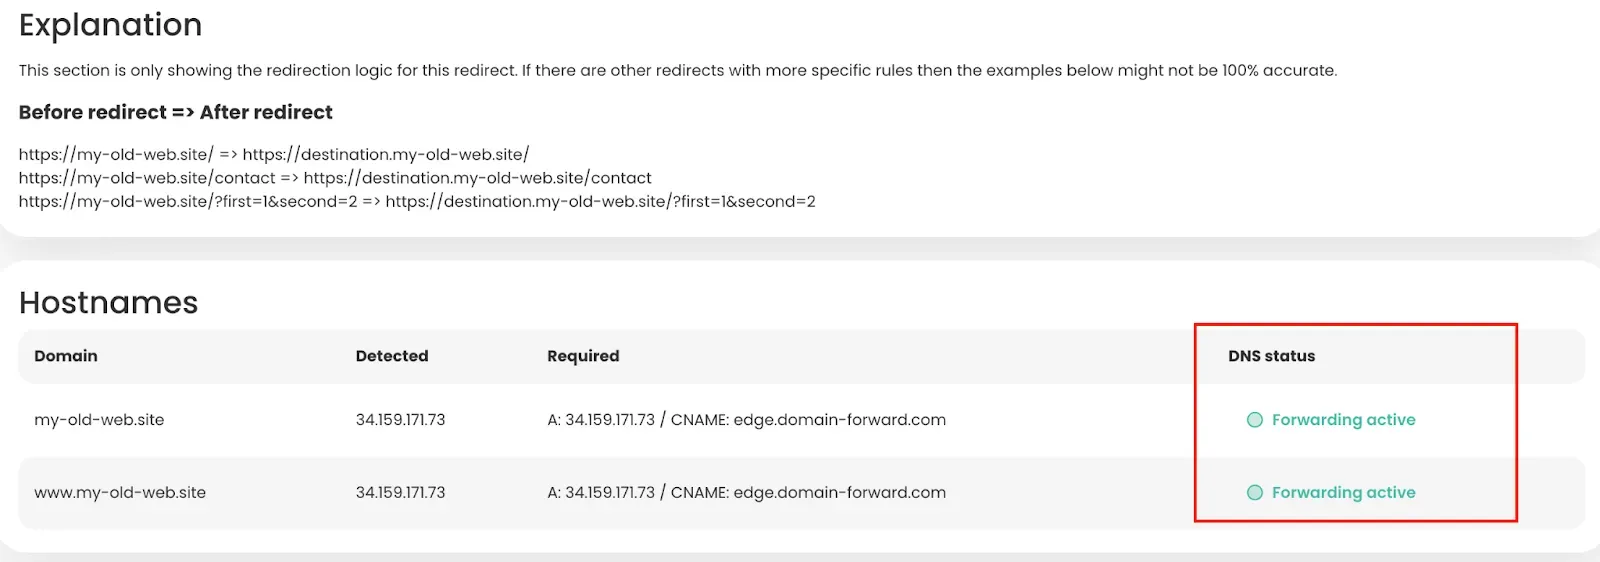
Step 5: Wait for DNS and verify
DNS propagation typically takes a few minutes to a few hours. Once complete, Domain-Forward.com will show your redirect as active:
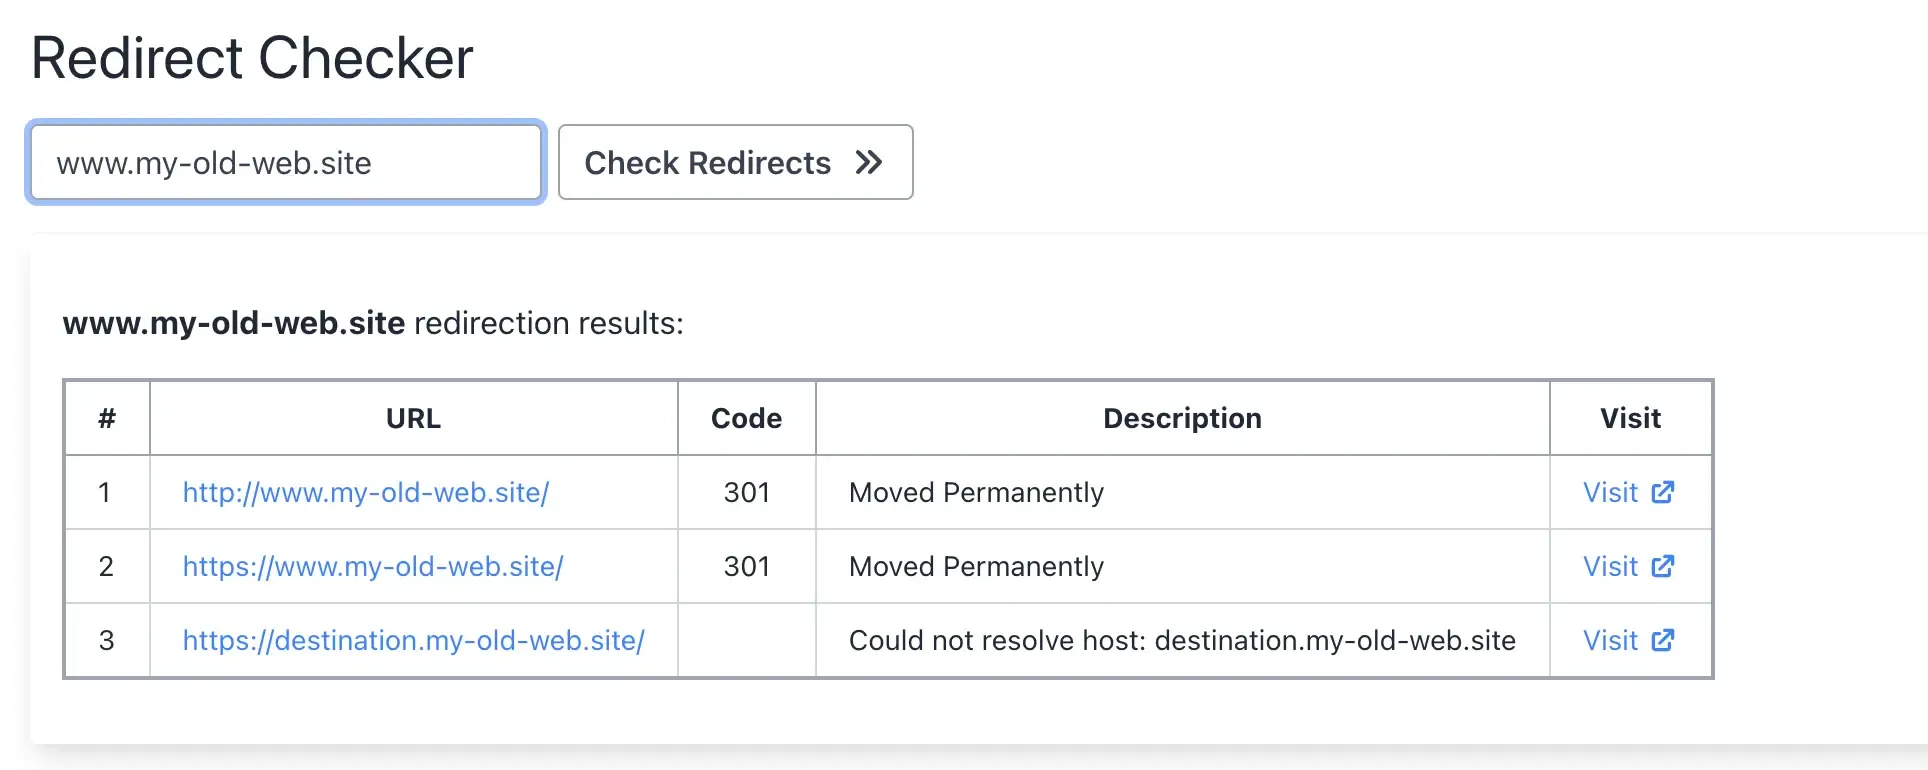
Step 6: Test your redirect
Use a redirect testing tool to confirm both HTTP and HTTPS redirect correctly:
Namecheap Redirects vs Domain-Forward.com
| Feature | Namecheap Redirect | Domain-Forward.com |
|---|---|---|
| HTTPS support | No | Yes (automatic SSL) |
| Custom nameserver support | No (BasicDNS only) | Yes (any DNS provider) |
| 301 permanent redirect | Sometimes 302 | Always 301 |
| Analytics | No | Yes |
| DNS propagation | Often slow | Standard |
| www + non-www | Manual setup | Handled together |
| Price | Free (with limitations) | Free plan (5 domains) |
Not sure what type of redirect you need? Check our guide to URL forwarding and redirect types. You can also verify your setup works with our redirect tester tool.
If you’re using a different registrar, we have similar guides for GoDaddy, Hostinger, Bluehost, Porkbun, Name.com, and Squarespace. You can also see how Namecheap compares in our Namecheap vs Domain Forward comparison.
Stop Losing Visitors to Broken Redirects
If you’re using Namecheap’s redirect and wondering why visitors aren’t reaching your destination site, it’s almost certainly the HTTPS problem or a nameserver incompatibility. Both are fundamental Namecheap limitations that can’t be configured away.
Domain-Forward.com takes 5 minutes to set up, works with any nameserver, and includes automatic HTTPS. Your visitors get redirected properly. Your SEO value transfers. Your email keeps working.